1/2 cup of mild olive oil. 3/4 cup brewed coffee. The juice of 3-4 blood oranges. I needed 4. 1/4 cup of oat milk or almond milk. Dry ingredients: 1 cup of coconut sugar. 1 cup regular sugar or coconut sugar. 2 cups flour 1 tsp of baking soda. 2 tsp of baking powder. 1 cup of cocoa powder. 1/2 tsp of pink salt. 2 tsp of orange zest. 1 tsp of vanilla.
Method.
1. Preheat the oven to 350 degrees F.
2. Combine all wet ingredients in one bowl.
3. Combine dry ingredients in one bowl.
4. Slowly add dry to wet and slowly mix to combine.
5. Place batter equally into two cake pans. Greased and lined with parchment paper.
6. Bake for 40-45 minutes or until center is cooked. Check with toothpick.
For frosting: One can of coconut cream. 1 ripe avocado. 1 cup of icing sugar. 3 oz of melted dark chocolate. 1 tsp of vanilla powder. 1/3 cup of cocoa powder. Mix together well and frost as desired
Glaze: 3 oz of dark chocolate, melted with 2 tsp of coconut oil. Use a double boiler to melt the two. And drizzle on top.
1. Lightly warm up tortilla for 20 seconds in the microwave (to soften for easier folding), then layer desired fillings in the middle.
2. Roll up tightly, and don’t forget to tuck in the sides.
3. Heat oil in a cast iron skillet, and place burrito seam side down into the pan. Use low heat (once the skillet is hot!) and rotate every 30-60 seconds until all sides are crispy and golden.
4. Top with crema, guacamole and/or salsa, and enjoy!
Notes:
*For the seasoned rice I cook 1 cup of white rice with 1/2 tsp each of paprika, smoked paprika, cumin, oregano, onion and garlic powder, and salt. *Cashew crema made with 1/2 cup soaked cashews, 1/4 cup plant based yogurt or sour cream, a splash of plant milk, lime juice, salt.
3 1/3 (+ 1/4 cup more if needed) cups bread flour 1-1/2 cups + 2 tbsp warm unsweetened almond milk 2 tablespoons sugar (I used cane sugar or coconut sugar) 1 package active dry yeast 2 tablespoons vegan butter, melted 1/2 tsp teaspoons salt Avocado oil or olive oil
Method.
1. Heat almond milk in microwave for 45 seconds or until warm. In the bowl combine warm almond milk and sugar, mix to combine then sprinkle yeast over the top of the almond milk. Allow to sit for about 5 minutes.
2. Add melted vegan butter and salt. Add flour a cup at a time until you’ve added 3-1/3 cups and mix until well combined. Dough will be really sticky but keep mixing / needing with your hands. If way too sticky add 1/4 cup more of flour. Keep kneading with your hands for about 4-5 minutes.
3. Transfer the dough to a bowl that has been coated with cooking spray or olive oil. Place a dish cloth over the bowl and allow bowl to sit on your counter for an hour or until doubled in size. Divide dough into 8 equal pieces. Using a rolling pin, roll dough into circles.
4. Heat a pan to medium heat. Brush the top of each dough circle with a small bit of avocado oil (or olive oil) and place the flat bread oil side down onto the grill. When the bottom side is browned, turn over the bread, and grill the other side until golden. Remove from heat, brush a bit more of oil on top and sprinkle with salt. Enjoy with hummus, as a wrap or how ever you wish! .
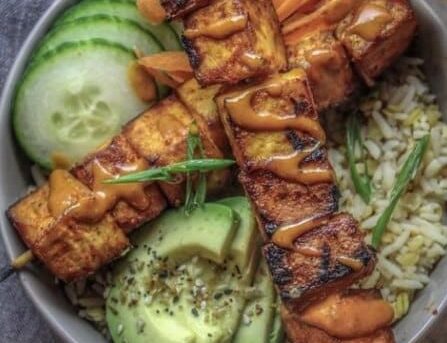
𝗧𝗛𝗘 𝗧𝗢𝗙𝗨 & 𝗠𝗔𝗥𝗜𝗡𝗔𝗗𝗘: 1 block extra firm tofu 2 cloves minced garlic 2 tbsp red curry paste 1/4 cup coconut milk, full fat 1 tsp smoked paprika 2 tbsp maple syrup 2 tbsp tamari skewers, pre-soaked in water
1. Combine all marinade ingredients in a bowl. Add in tofu cubes and ensure all are coated fully. Refrigerate 30+ minutes. Skewer tofu.
2. Preheat oven to 450 and bake for roughly 30 minutes. Rotate them 2-3 times. Broil for an additional few minutes, but really keep an eye on them as you do this.
𝗧𝗛𝗘 𝗣𝗘𝗔𝗡𝗨𝗧 𝗦𝗔𝗨𝗖𝗘 1 tbsp red curry paste 1/4 cup peanut butter 1 tbsp maple syrup 1 tsp red chili flakes 1/2 tsp sesame oil 1 tbsp tamari 1 tbsp lime juice 1/2 tsp rice vinegar 1 clove garlic, minced 1 tsp ginger, grated 2+ tbsp coconut milk
Combine all ingredients in a bowl. Thin as needed with more coconut milk or water—add 1 tbsp at a time.
𝗧𝗛𝗘 𝗢𝗧𝗛𝗘𝗥 𝗜𝗡𝗚𝗥𝗘𝗗𝗜𝗘𝗡𝗧𝗦: rice, buckwheat & split pea blend carrots cucumbers avocado, sliced sesame seeds green onions
Cook rice blend according to package instructions. Assemble bowl and enjoy!
There are dishes that demand your full attention and reward it completely. And then there are dishes like this Creamy Mushroom Vegan Risotto — the kind that asks you to stand at the stove for twenty minutes, ladle in hand, stirring with patience and intention, and that repays every moment of that attention with a bowl of such extraordinary silkiness, such profound depth of flavor, such genuine, restaurant-quality luxury that you understand immediately and completely why risotto has been the defining dish of Northern Italian cooking for centuries. This is that risotto. The one that makes people set down their spoons and simply look at the bowl for a moment before continuing. The one that is simultaneously the most elegant and the most deeply comforting thing you will eat all week. The one that proves beyond any possible doubt that dairy-free cooking is not a lesser version of anything — it is its own magnificent achievement.
This is a risotto of genuine classical pedigree — Arborio rice coaxed slowly into silkiness through the patient, continuous addition of warm vegetable broth, enriched with a generous pour of dry white wine that perfumes the entire dish with a winey, acidic brightness, deepened with golden pan-seared mushrooms that have been cooked to an intensity of flavor that borders on the miraculous, and finished with a generous swirl of vegan butter and nutritional yeast that creates the creamy, glossy, coating consistency that defines truly great risotto — all without a single gram of Parmesan or dairy cream.
What makes this risotto so genuinely outstanding is the technique — specifically the mantecatura, the final off-heat stirring of cold vegan butter into the finished rice that creates the extraordinary emulsified creaminess that distinguishes restaurant-quality risotto from home cooking. This technique requires no dairy whatsoever to achieve its effect — the starch released by the Arborio rice during cooking combines with the fat from the vegan butter in exactly the same way as in the dairy version, producing a sauce of identical silkiness and richness through entirely plant-based means.
This recipe is 100% vegan, naturally gluten-free, ready in just 40 minutes, and absolutely spectacular served in warmed wide bowls with a drizzle of truffle oil, a scattering of fresh herbs, and nothing else required because the risotto itself is complete and magnificent exactly as it is.
Recipe Information
Prep Time
Cook Time
Total Time
Servings
Calories
10 mins
30 mins
40 mins
4
~480 kcal
Ingredients
For the Risotto
400g (2 cups) Arborio rice or Carnaroli rice
1.5 litres (6 cups) good quality vegetable broth, kept warm in a separate pot
1 large white onion, very finely diced
5 cloves garlic, minced
1 cup (240ml) dry white wine (Pinot Grigio or Sauvignon Blanc)
3 tbsp olive oil
3 tbsp cold vegan butter (for mantecatura at the end)
4 tbsp nutritional yeast
1 tbsp white miso paste
Salt and white pepper to taste
Juice of half a lemon
For the Mushrooms
500g mixed mushrooms (cremini, shiitake, oyster, and porcini if available)
2 tbsp olive oil
2 tbsp vegan butter
4 cloves garlic, thinly sliced
3 tbsp fresh thyme leaves
2 tbsp fresh parsley, finely chopped
½ cup (120ml) dry white wine
Salt and black pepper to taste
For the Porcini Broth Boost (Optional but Extraordinary)
20g dried porcini mushrooms
2 cups (480ml) boiling water
(Soak porcini in boiling water for 20 minutes, strain and add the soaking liquid to the warm vegetable broth — this single addition transforms the depth of the finished risotto dramatically)
Optional Add-ins
1 cup (30g) fresh baby spinach (stir in with final butter)
½ cup (60g) frozen peas (add in final 5 minutes)
1 tbsp truffle oil (drizzled at the very end)
Vegan Parmesan or additional nutritional yeast to finish
Toasted pine nuts for texture
Fresh truffle shaved over the top for extraordinary occasions
To Serve
Drizzle of best quality extra virgin olive oil or truffle oil
Fresh parsley or chives, finely chopped
Freshly cracked black pepper — very generous
Additional nutritional yeast or vegan Parmesan
Lemon zest finely grated over the top
Crusty sourdough bread alongside
Instructions
Prepare the porcini boost and warm the broth. If using dried porcini place them in a bowl, cover with boiling water, and soak for 20 minutes until fully rehydrated. Strain the soaking liquid through a fine mesh sieve lined with kitchen paper to remove any grit and add the strained liquid to your vegetable broth. Pour the vegetable broth into a medium saucepan and heat over low heat until just below simmering — the broth must be warm when added to the rice or it will cool the rice and slow the cooking dramatically. Keep it warm on the adjacent burner throughout the entire cooking process.
Sear the mushrooms. Heat 2 tablespoons of olive oil and 2 tablespoons of vegan butter in a large skillet over the highest possible heat until almost smoking. Add the mushrooms in a single layer without stirring for 2–3 minutes until deeply golden and caramelized on the bottom. Flip and cook for 2 more minutes. Reduce heat to medium, add the sliced garlic and thyme, and cook for 60 seconds. Add the white wine and allow to bubble and reduce for 2 minutes. Season generously with salt and pepper and add the fresh parsley. Set aside — you will add these mushrooms to the risotto in two stages: half stirred in during cooking for flavor and half reserved for finishing on top.
Begin the risotto base. In a large, wide, heavy-bottomed pot or deep skillet heat 3 tablespoons of olive oil over medium heat. Add the finely diced onion and a pinch of salt and cook for 6–8 minutes, stirring regularly, until completely softened, translucent, and beginning to turn golden at the edges. Add the minced garlic and cook for 60 seconds until fragrant. The onion base must be completely soft before the rice is added — any residual crunch will remain throughout the cooking process.
Toast the rice. Add the dry Arborio rice to the softened onion and garlic and stir continuously for 2 minutes until every grain is coated in the oil and onion mixture and the edges of the grains become slightly translucent while the center remains opaque white. This toasting step is essential — it seals the surface of the grains slightly, controlling the rate at which they release starch and producing a risotto with more body and structure than untoasted rice provides.
Add the wine. Pour in the white wine all at once and stir continuously until it has been completely absorbed by the rice — this takes approximately 2 minutes. The wine will bubble vigorously as it hits the hot rice — keep stirring to prevent any sticking. The alcohol will cook off completely during this step leaving only the bright, acidic, complex wine flavor that is one of the defining characteristics of great risotto. The kitchen should smell absolutely extraordinary at this point.
Add the broth one ladle at a time. Add the warm broth one ladle (approximately 120ml) at a time, stirring continuously and waiting until each addition is almost completely absorbed before adding the next. This is the defining technique of risotto — the continuous stirring agitates the rice grains against each other, abrading their starchy outer layers and releasing amylopectin starch into the cooking liquid which is what creates the extraordinary creamy, glossy, coating sauce that surrounds the rice in great risotto. Each addition of broth should take approximately 2–3 minutes to absorb. Never rush this process and never add too much broth at once.
Add half the mushrooms. After approximately 15 minutes of adding broth — when the rice is halfway through its cooking — stir half the reserved seared mushrooms into the risotto. Continue adding broth one ladle at a time, stirring continuously. Add the white miso paste and nutritional yeast at this stage and stir to incorporate — these ingredients deepen the savory, umami character of the finished risotto dramatically.
Test for doneness. After approximately 20–22 minutes of broth addition taste a grain of rice — it should be tender throughout with just the faintest resistance at the very center, what Italians call al dente. The risotto at this stage should be quite loose and flowing — it will tighten as it rests. If the rice needs more time continue adding broth one ladle at a time. Season generously with salt and white pepper.
Mantecatura — the final creaminess. Remove the pot completely from the heat. Add the cold vegan butter cut into small cubes and the lemon juice all at once. Stir vigorously and continuously for 2 full minutes — this vigorous off-heat stirring emulsifies the cold butter fat into the starchy cooking liquid creating the extraordinary glossy, silky, cream-like consistency that defines great risotto and that cannot be achieved by any other method. The risotto should flow and ripple when the pot is shaken — what Italians call all’onda, meaning it moves like a wave.
Rest briefly and serve immediately. Allow the risotto to rest for 60 seconds then divide immediately between warmed wide bowls. Top each portion with the reserved seared mushrooms, a drizzle of excellent olive oil or truffle oil, a generous scattering of fresh parsley, a fine grating of lemon zest, additional nutritional yeast, and a very generous crack of fresh black pepper. Serve immediately — risotto waits for no one and loses its extraordinary flowing consistency within minutes of leaving the pot.
Pro Tips for the Most Extraordinary Vegan Risotto
Keep the broth warm throughout the entire cooking process. Adding cold broth to hot rice cools the cooking temperature and disrupts the continuous gentle cooking that creates great risotto texture. Keep the broth at a bare simmer on the adjacent burner and never add cold broth directly from the refrigerator.
Never stop stirring — but you do not need to stir every second. The continuous stirring required for risotto is one of its most mythologized aspects. In reality stirring every 30 seconds rather than continuously produces excellent results — what matters is regular, consistent stirring rather than frantic, uninterrupted motion. The stirring agitates the grains to release starch — occasional pauses of 20–30 seconds between stirs are completely acceptable.
Add the butter cold for mantecatura. The temperature differential between cold butter and the hot risotto is what drives the emulsification during mantecatura — cold butter melts slowly and evenly into the starchy liquid creating a stable emulsion. Room temperature or warm butter melts too quickly and produces a greasy rather than creamy result.
Use Carnaroli rice if you can find it. Arborio is the most widely available risotto rice and produces excellent results. Carnaroli — sometimes called the king of risotto rice — has a higher starch content and a firmer grain center that produces an even creamier, more luxurious finished risotto that is worth seeking out for special occasions.
Season in layers throughout cooking. Salt added only at the end of risotto cooking produces a one-dimensional, surface-level seasoning. Adding a pinch of salt with the onion, seasoning the mushrooms generously, and tasting and adjusting throughout the cooking process produces a deeply, uniformly seasoned risotto where the salt is integrated into every layer of flavor.
Use the porcini soaking liquid in the broth. This single addition — the deeply flavored, almost black soaking liquid from rehydrated dried porcini mushrooms — transforms the vegetable broth into something approaching a genuine mushroom stock, adding a depth and intensity of umami flavor that elevates the finished risotto from very good to genuinely extraordinary.
The Classical Art of Risotto
Risotto is one of the defining dishes of Northern Italian cuisine — a preparation so deeply embedded in the cooking culture of Piedmont, Lombardy, and the Veneto that it is considered not merely a dish but a technique, a philosophy, and in the hands of the greatest practitioners a genuine art form.
The secret to great risotto lies entirely in the starch chemistry of the Arborio rice grain. Each grain of Arborio rice contains two types of starch — amylose in the center of the grain, which remains firm and provides the characteristic al dente bite, and amylopectin on the outer surface of the grain, which dissolves readily into the cooking liquid during the continuous stirring process to create the extraordinary creamy, coating sauce that surrounds the grains in finished risotto.
This starch release is the entire mechanism of risotto — it requires no cream, no cheese, no dairy of any kind to achieve. The cream in risotto is not added from outside — it is coaxed from within the rice itself through patience, technique, and the correct ratio of rice to warm liquid added gradually over time. Understanding this fundamental truth about risotto makes the vegan version not a compromise but a revelation — because the creaminess was always plant-based. The Parmesan and butter of classical risotto add flavor and additional fat — they do not create the creaminess. The rice does that itself.
The mantecatura — the vigorous off-heat stirring of cold fat into the finished rice — is where the classical risotto adds its final layer of richness. In the dairy version this is done with cold butter and grated Parmesan. In this vegan version cold vegan butter and nutritional yeast perform exactly the same function — the butter fat emulsifies into the starchy cooking liquid in the same way, the nutritional yeast contributes the savory, umami depth that Parmesan contributes through its aged glutamates — and the finished result is a risotto of identical silkiness, richness, and depth achieved entirely through plants.
Flavor Variations
Truffle and Mushroom: Add a tablespoon of black truffle oil to the mantecatura alongside the vegan butter and finish each bowl with additional truffle oil and shaved vegan truffle cheese for the most extraordinarily luxurious risotto imaginable — a dish worthy of the finest restaurant occasion.
Asparagus and Lemon: Replace half the mushrooms with roasted asparagus spears and add the zest of two lemons to the finished risotto for a vibrant spring version with a bright, clean character that is particularly spectacular as the first asparagus of the season arrives.
Beetroot and Walnut: Stir 200ml of fresh beetroot juice into the broth for the most visually spectacular risotto imaginable — a deep, vivid magenta that is completely extraordinary on the plate — with toasted walnuts and vegan goat cheese stirred in at the end.
Roasted Butternut Squash: Add diced roasted butternut squash in the final 10 minutes of cooking for a sweet, earthy autumn version with a beautiful golden color and a flavor that pairs magnificently with the mushrooms and a generous addition of fresh sage.
Nutritional Highlights (Per Serving)
Calories
Protein
Carbs
Fiber
Fat
~480 kcal
14g
72g
5g
14g
At 480 calories per serving this risotto delivers a genuinely satisfying and nutritionally substantial meal — 14 grams of plant-based protein from the rice, mushrooms, nutritional yeast, and miso, and meaningful dietary fiber alongside an exceptional concentration of B vitamins from the nutritional yeast and mushrooms. The mushrooms contribute selenium, ergothioneine, and B vitamins including B2, B3, and B5 that support energy metabolism at the cellular level. The white miso paste contributes beneficial fermentation-derived compounds that support gut microbiome health alongside its extraordinary flavor contribution. The olive oil and vegan butter contribute heart-healthy unsaturated fats that provide satiety and support the absorption of fat-soluble vitamins throughout the dish.
Storage
Risotto does not store as well as most dishes — this is the honest truth about one of the world’s greatest preparations. The starch that creates the extraordinary creaminess when freshly made continues to absorb liquid during storage, causing the risotto to set firm and lose its flowing, silky consistency. For the finest result eat risotto within minutes of making it.
Refrigerator: Leftover risotto can be stored in an airtight container in the refrigerator for up to 3 days. It will set firm during refrigeration — reheat gently in a pan over medium-low heat with a generous splash of warm vegetable broth, stirring continuously until the risotto loosens and becomes creamy again. Add the broth gradually — the risotto will absorb it and return to a silky consistency.
Arancini: The finest use of leftover risotto is arancini — Italian stuffed rice balls. Shape cold leftover risotto into balls around a cube of vegan mozzarella, coat in breadcrumbs, and deep fry or air fry until golden and crispy on the outside and molten in the center. Leftover mushroom risotto arancini are one of the most extraordinary snacks imaginable.
Freezer: Risotto does not freeze well in its finished form — the starch structure breaks down during freezing and thawing producing a mushy, separated result. Freeze only if necessary and reheat very gently with generous additions of warm broth, stirring continuously, accepting that the texture will be different from freshly made.
Frequently Asked Questions
Can I make risotto without wine?
Yes — replace the white wine with an equal amount of additional vegetable broth and add an extra tablespoon of lemon juice and a teaspoon of white wine vinegar to approximate the acidity and complexity that the wine contributes. The finished risotto will be slightly less complex but still deeply delicious. Alternatively use a good quality alcohol-free white wine which performs identically to the regular version in cooking.
What is the best rice for risotto?
Arborio is the most widely available and produces excellent, creamy risotto. Carnaroli — considered the finest risotto rice by most Italian chefs — has a slightly firmer grain and higher starch content producing an even more luxurious result and is worth seeking out. Vialone Nano is a third option — smaller grained than Arborio with a particularly silky finished texture that is the preferred rice in the Veneto region. Never use long-grain, basmati, or jasmine rice for risotto — they do not contain the correct starch profile to create the characteristic creaminess.
Why is my risotto stodgy rather than silky?
Stodgy risotto is almost always caused by one of three things — adding too much broth at once, not stirring enough to release the starch, or overcooking the rice past al dente. Add the broth one ladle at a time, stir regularly, and stop cooking while the grains still have just a hint of bite at the center. The mantecatura — the vigorous off-heat stirring with cold butter — is also essential for achieving silkiness rather than stodginess.
Can I make risotto in advance for a dinner party?
Yes — with the par-cooking technique used by professional kitchens. Cook the risotto through approximately 75% of the broth addition — when the rice is almost but not quite cooked — then spread immediately on a cold baking sheet to stop the cooking process. Refrigerate until needed. When ready to serve return the par-cooked rice to a hot pan, add warm broth, and complete the cooking in under 10 minutes. This technique produces excellent results and allows the host to enjoy their own dinner party.
How do I know when the risotto is the correct consistency?
The correct consistency — all’onda or wave-like — is achieved when the risotto flows and ripples like a slow wave when the pot is shaken gently. It should not be stiff and set, and it should not be soupy and thin. It should flow generously but with body — coating the back of a spoon and falling from it in a slow, continuous ribbon. If it is too stiff add a splash of warm broth. If too thin continue stirring over gentle heat until it tightens slightly.
Is risotto suitable for meal prep?
Risotto is not ideally suited to meal prep in its traditional form — it is at its absolute peak the moment it leaves the pot and deteriorates more than most dishes during storage. For meal prep purposes consider making the mushroom component in advance and storing separately, then making the risotto fresh on the night — the actual active cooking time once the mise en place is complete is only 22–25 minutes, making it more practical for weeknight cooking than its reputation suggests.
Tried this recipe? Leave a comment below and let us know how it turned out! Tag us on Instagram and Facebook — we love seeing your plant-powered creations. Looking for more luxurious vegan dinner and Italian-inspired recipes? Browse all recipes on Easy Vegan Recipes — new recipes posted every single week!
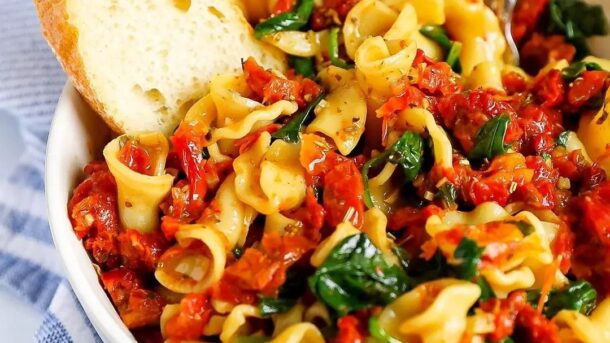
8 oz pasta 1 cup sun dried tomatoes 4 cloves garlic 2 tbsp olive oil ¼ cup white wine ½ cup vegetable broth ½ cup oat milk ¼ cup reserve pasta water 1 tablespoon Herbs de Provence 2 cups spinach 1 cup fresh basil ¼ teaspoon salt ¼ teaspoon pepper
Method.
1. Start by cooking the pasta according to package instructions. After cooking, save ¼ cup of the reserve pasta water before draining.
2. In a separate pan, sauté the garlic and sun-dried tomatoes in olive oil over medium-low heat for about 3 minutes.
3. Pour the white wine into the pan with the garlic and tomatoes and allow it to reduce for about 5 minutes.
4. Add the broth, oat milk, reserve pasta water, and spices into the pan. Stir and continue to cook for 5-10 minutes or until your sauce has started to thicken.
5. Remove from heat and stir in the cooked pasta, basil, and spinach. Stir and serve.
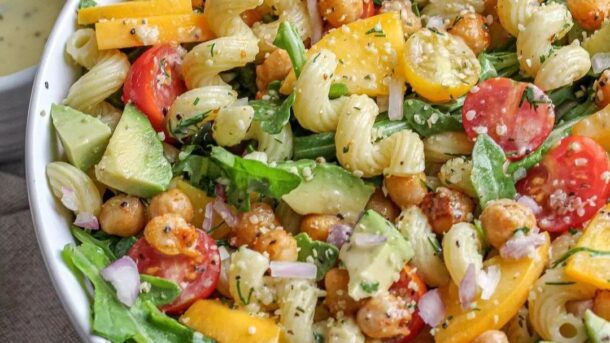
1/3 lb. cavatappi pasta 1 15 oz. can chickpeas drained and rinsed 1 tsp. avocado oil ¼ tsp. kosher salt ¼ tsp. pepper ¼ tsp garlic powder ½ tsp. sweet paprika 4 cups (lightly packed) arugula Juice of 1 lemon 1 ½ donut peaches pit removed and thinly sliced 3 tbsp. finely chopped shallot 2 tbsp. fresh dilled finely chopped 1 cup cherry or grape tomatoes halved 1 avocado diced 1 tbsp. hemp seed hearts
Creamy Agave-Mustard Dressing (makes extra) 2 tbsp. +1 tsp. agave nectar 3 tbsp. vegan mayo 1 tbsp. + 2 tsp. olive oil 2 tbsp. +1 tsp. white wine vinegar 1 ½ tsp. stone ground mustard 1 ½ tsp. Dijon mustard ¾ tsp. kosher salt ¾ tsp. pepper ¼ tsp. garlic powder
Method.
1. Cook the pasta in salted water until al dente, then drain and rinse. Set aside. Meanwhile, place a pan on medium heat. Add the 15 oz. chickpeas, 1 tsp. avocado oil, ¼ tsp. kosher salt, ¼ tsp. pepper, ¼ tsp. garlic powder, and ½ tsp. sweet paprika. Stir, cook for 3 to 4 min until heated, stirring occasionally.
2. Whisk together all Creamy Agave-Mustard Dressing ingredients in a bowl (2 tbsp. + 1 tsp. agave nectar, 3 tbsp. vegan mayo, 1 tbsp. + 2 tsp. olive oil, 2 tbsp. + 1 tsp. white wine vinegar, 1 ½ tsp. stone ground mustard, 1 ½ tsp. Dijon mustard, ¾ tsp. kosher salt, ¾ tsp. pepper, ¼ tsp. garlic powder).
3. Add the 4 cups arugula, cooked pasta, and juice of ½ the lemon to a large serving bowl or plate, and toss. Cut the remaining lemon into wedges for serving. Top the salad with the 1 ½ donut peaches, 3 tbsp. shallot, 2 tbsp. fresh dill, 1 cup cherry or grape tomatoes, 1 avocado, and 1 tbsp. hemp seed hearts, and about half of the dressing, and gently toss. Top with the chickpeas and serve with remaining dressing and lemon wedges on the side.
There are dinners you make because something quick and satisfying is needed. And then there are dinners like these Vegan Spicy Jalapeño Tofu Bowls — the kind that combine crispy golden tofu coated in a fiery, glossy jalapeño sauce with fluffy rice, crunchy fresh vegetables, and a cooling dollop of avocado or vegan crema, building one of the most genuinely exciting and balanced bowls you will make all week. This is that bowl. The one where every element pulls its own weight — heat, crunch, freshness, and richness all present simultaneously. The one that disappears the moment it is set on the table.
This recipe coats crispy pan-fried tofu in a vibrant sauce built on fresh jalapeño, garlic, lime, and a touch of honey-style maple syrup, served over rice with fresh vegetables and a cooling element to balance the heat. It is a build-your-own bowl that comes together in well under thirty minutes and delivers genuine restaurant-quality flavor.
What makes this dish so outstanding is the jalapeño sauce — blended fresh rather than cooked down, preserving the bright, grassy heat of the chili and the sharp freshness of lime in a way that a long-simmered sauce never achieves, producing a sauce that tastes alive and vibrant against the rich, crispy tofu.
This recipe is 100% vegan, naturally gluten-free when made with tamari, ready in just 30 minutes, and absolutely wonderful served over steamed rice or quinoa with extra lime wedges alongside.
Recipe Information
Prep Time
Cook Time
Total Time
Servings
Calories
15 mins
15 mins
30 mins
4
~420 kcal
Ingredients
For the Crispy Tofu
450g firm tofu, pressed and cubed
2 tbsp cornstarch
2 tbsp neutral oil
½ tsp salt
For the Jalapeño Sauce
3 jalapeños, roughly chopped (deseeded for less heat)
4 cloves garlic
¼ cup (15g) fresh cilantro
3 tbsp fresh lime juice
2 tbsp soy sauce or tamari
2 tbsp maple syrup
2 tbsp olive oil
2 tbsp water, to thin
For the Bowls
2 cups (370g) cooked rice
1 cup (175g) corn kernels, fresh or grilled
1 cup (175g) black beans, drained and rinsed
1 avocado, sliced
½ small red onion, thinly sliced
¼ cup (15g) fresh cilantro, chopped
1 lime, cut into wedges
Optional Add-ins
Vegan crema or vegan sour cream, drizzled over
Pickled jalapeños for extra heat
Shredded red cabbage for crunch
Crumbled vegan cotija or feta
To Serve
Extra lime wedges
Tortilla chips alongside
Hot sauce for those who want more heat
Instructions
Press and prepare the tofu. Press the tofu for at least 10 minutes to remove excess water. Cut into 2cm cubes and toss with the cornstarch and salt until evenly coated.
Crisp the tofu. Heat the oil in a large skillet over medium-high heat. Add the tofu in a single layer and cook for 3–4 minutes per side, turning occasionally, until golden and crispy on all sides. Remove and set aside.
Make the jalapeño sauce. Place the jalapeños, garlic, cilantro, lime juice, soy sauce, maple syrup, and olive oil in a blender. Blend until mostly smooth, adding water a tablespoon at a time to reach a thick but pourable consistency.
Coat the tofu. Toss the crispy tofu in the jalapeño sauce until evenly coated, reserving a small amount of sauce for drizzling over the finished bowls.
Assemble the bowls. Divide the rice between four bowls. Top each with the jalapeño-coated tofu, corn, black beans, sliced avocado, and red onion.
Finish and serve. Drizzle with the reserved jalapeño sauce, scatter fresh cilantro over the top, and serve with lime wedges alongside.
Pro Tips
Press the tofu thoroughly for the crispiest result — excess moisture prevents proper browning.
Deseed the jalapeños for a milder sauce, or leave the seeds and membranes in for significantly more heat.
Toss the tofu in the sauce just before serving to maintain maximum crispiness.
Taste the sauce before using and adjust the lime, maple syrup, or salt to balance the heat to your preference.
Why This Bowl Works So Well
This bowl balances heat, freshness, crunch, and richness in a single dish — the fiery jalapeño sauce is balanced by the cooling avocado, the crispy tofu is balanced by the soft rice and beans, and the bright lime cuts through the richness of everything else. This kind of deliberate balance across multiple sensory dimensions is what makes a bowl meal genuinely satisfying rather than simply a collection of ingredients in a dish.
Flavor Variations
Mango Jalapeño Bowls: Add diced fresh mango for a sweet contrast against the spicy tofu.
Cilantro Lime Rice Version: Toss the cooked rice with extra lime juice and chopped cilantro before assembling for a more vibrant base.
Extra Spicy Version: Leave the jalapeño seeds in and add a fresh serrano pepper to the sauce for serious heat.
Nutritional Highlights (Per Serving)
Calories
Protein
Carbs
Fiber
Fat
~420 kcal
18g
50g
11g
17g
Storage
Refrigerator: Store components separately for up to 4 days. The tofu is best reheated in a hot pan or air fryer to restore crispiness; assemble fresh with cold components like avocado added just before eating.
Sauce: The jalapeño sauce keeps in the refrigerator for up to 5 days and is excellent on tacos, grain bowls, or as a dip.
Freezer: The crispy tofu can be frozen for up to 1 month; reheat in an air fryer or oven before using.
Frequently Asked Questions
How spicy is this dish?
With seeds removed, the heat is moderate and approachable. Leaving seeds in or adding additional fresh chili significantly increases the heat for those who prefer it spicier.
Can I use a different protein instead of tofu?
Yes — tempeh or chickpeas work well with the same sauce and crisping technique.
Can I make this ahead for meal prep?
Yes — prepare all components and store separately, assembling fresh each day. The tofu reheats best in an air fryer to restore its crispy texture.
Tried this recipe? Leave a comment below and let us know how it turned out! Tag us on Instagram and Facebook — we love seeing your plant-powered creations. Looking for more vibrant vegan bowl and dinner recipes? Browse all recipes on Easy Vegan Recipes — new recipes posted every single week!
Crispy Air Fryer Falafel – This healthy, high-protein, plant-based recipe is the perfect easy vegan dinner or gluten-free meal prep option! Our recipe is made with fresh herbs, chickpeas, and bold Mediterranean flavors, this oil-free falafel is golden brown and crunchy on the outside while staying fluffy and tender inside. Cooked in the best air fryer, it’s a low-calorie, high-fiber snack that’s perfect for meal prepping, wraps, bowls, or salads. Skip the deep fryer and enjoy this quick, easy, and crispy falafel recipe in just minutes!
Ingredients:
2 cups (400 g) dried chickpeas (not canned or cooked chickpeas) 5 garlic cloves chopped 1 small onion chopped 1 cup parsley leaves chopped 1/2 cup cilantro leaves chopped 2 teaspoon ground coriander 2 teaspoon ground cumin 1 1/2 teaspoon sea salt 1 teaspoon black pepper Red pepper flakes or cayenne pepper to taste 1 teaspoon baking powder (optional, see notes) Cooking spray
Method:
1. The day before you start making the falafel, place the dried chickpeas in a large bowl. Fill it with plenty of water (the chickpeas should be covered by at least 3 inches/7 cm but add more water if needed) and soak for 18-24 hours. Drain the chickpeas completely and use a paper towel to lightly pat dry them (if they are too wet).
2. Transfer the chickpeas along with all other ingredients to a large food processor. If you have a small food processor, you will need to work in batches. Process everything for about 20 seconds, then scrape down the sides of the food processor and blend again. Do this a few times until the mixture is well combined, but not mushy.
3. Refrigerate the falafel mixture (in the food processor bowl) for about 45-60 minutes (or longer).
4. Use an ice cream scooper to scoop the falafel mixture and shape it with your hands to form a ball (or make a patty/disk if you wish). Do this with the remaining falafel mixture.
5. Use the cooking spray to lightly spray the falafel balls. Also, spray the basket of your air fryer to avoid sticking. Heat the air fryer to 375ºF (190ºC) and set the timer to 15 minutes. Cook the falafel balls in the air fryer, flip them after 10 minutes. They should be crispy and slightly brown on the outside. You might need to fry them in batches if necessary.
6. Serve hot on its own or assemble the falafels in pita bread with tahini, lettuce, tomato, and cucumbers. Enjoy!
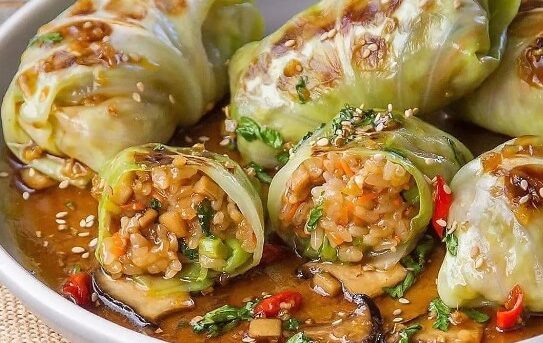
3 cups cooked rice (used glutinous rice or sub with other rice) about 15-20 cabbage leaves 3/4 cup kale stems, finely chopped (or use broccoli stem) 1/2 cup mushrooms, finely chopped – optional (used mini King Oyster mushrooms) 1 small carrot, finely chopped 1 tablespoon finely minced ginger oil for cooking, salt to taste Seasoning (see step): 1 tablespoon soy sauce/tamari, pepper, 2 teaspoons toasted sesame oil, salt & pepper to taste Sauce (optional, cabbage wraps can be served as is): Whisk together 1 1/2 tablespoons soy sauce/tamari,1 tablespoon maple syrup, 1 tablespoon mirin, 1 chopped Thai chilis (optional) salt & pepper in 1/2 cup water until well combined.
Method:
1. To make the filling, heat a non-stick pan with 1 teaspoon oil, sauté ginger until fragrant, add mushrooms, cook for 1-2mins. Add kale stems & continue to cook for about 30 secs, turn off the heat.
2. Transfer mixture to a bowl, then add carrots, cooked rice & mix well with seasoning ingredients. Taste test.
3. Bring a pot of water to boil, blanch cabbage leaves for about 45secs. Remove & quickly plunge them in icy water to stop the cooking. Place one cabbage leaf on a cleaned surface. Add a heaping spoon of filling in the middle, fold in the sides & wrap to seal. (Note: more filling for a larger leaf). Repeat with the remaining ingredients.
4. In a heated non-stick pan with 1 teaspoon oil, place as many cabbage wraps as will fit in one layer in the pan. Cook until both sides are nicely browned, flipping in halfway.
5. Sauce: Add the sauce ingredients to a pan, then bring it to simmer & cook until slightly thickened.
6. Drizzle sauce on the cabbage wraps & garnish with sesame seeds & chopped cilantro.
We use cookies on our website to give you the most relevant experience by remembering your preferences and repeat visits. By clicking “Accept”, you consent to the use of ALL the cookies.
This website uses cookies to improve your experience while you navigate through the website. Out of these, the cookies that are categorized as necessary are stored on your browser as they are essential for the working of basic functionalities of the website. We also use third-party cookies that help us analyze and understand how you use this website. These cookies will be stored in your browser only with your consent. You also have the option to opt-out of these cookies. But opting out of some of these cookies may affect your browsing experience.
Necessary cookies are absolutely essential for the website to function properly. These cookies ensure basic functionalities and security features of the website, anonymously.
Cookie
Duration
Description
cookielawinfo-checkbox-analytics
11 months
This cookie is set by GDPR Cookie Consent plugin. The cookie is used to store the user consent for the cookies in the category "Analytics".
cookielawinfo-checkbox-functional
11 months
The cookie is set by GDPR cookie consent to record the user consent for the cookies in the category "Functional".
cookielawinfo-checkbox-necessary
11 months
This cookie is set by GDPR Cookie Consent plugin. The cookies is used to store the user consent for the cookies in the category "Necessary".
cookielawinfo-checkbox-others
11 months
This cookie is set by GDPR Cookie Consent plugin. The cookie is used to store the user consent for the cookies in the category "Other.
cookielawinfo-checkbox-performance
11 months
This cookie is set by GDPR Cookie Consent plugin. The cookie is used to store the user consent for the cookies in the category "Performance".
viewed_cookie_policy
11 months
The cookie is set by the GDPR Cookie Consent plugin and is used to store whether or not user has consented to the use of cookies. It does not store any personal data.
Functional cookies help to perform certain functionalities like sharing the content of the website on social media platforms, collect feedbacks, and other third-party features.
Performance cookies are used to understand and analyze the key performance indexes of the website which helps in delivering a better user experience for the visitors.
Analytical cookies are used to understand how visitors interact with the website. These cookies help provide information on metrics the number of visitors, bounce rate, traffic source, etc.
Advertisement cookies are used to provide visitors with relevant ads and marketing campaigns. These cookies track visitors across websites and collect information to provide customized ads.