All Recipes

Browse our full collection of easy vegan recipes. From quick weeknight dinners to indulgent desserts, find your next favourite plant-based meal here.

Vegan Oreo Cream Chocolate Roll — The Most Impressive Most Indulgent Plant-Based Dessert You Can Roll Up and Slice for a Crowd

vegan oreo cream chocolate roll

There are desserts that you make and eat, and then there are desserts that you make and then stand back and look at for a moment before calling anyone in, because the finished thing is so visually striking — that spiral of dark chocolate sponge and brilliant white Oreo cream revealed in cross-section when the first slice is cut — that it deserves a beat of appreciation before the demolition begins. The Vegan Oreo Cream Chocolate Roll is firmly in the second category. It is a Swiss roll-style dessert: a thin, flexible sheet of intensely dark chocolate sponge, baked flat in a sheet pan and then rolled with precision while still warm so it holds its curved shape without cracking; filled with a thick, cloud-like Oreo cream made from whipped coconut cream and cream-scraped Oreo filling that is sweet and vanilla-forward with the unmistakable Oreo cookie fragrance running through every spoonful; and finished with a coat of dark chocolate ganache poured in a thin, glossy layer over the outside of the roll, studded with whole Oreos placed at intervals, and dusted with a snow of crushed Oreo crumbs that clings to the ganache as it sets. Served at the table and sliced crosswise to reveal the hypnotic spiral of chocolate and white cream, this is a dessert that produces a particular kind of delighted silence at the table — the kind that falls when something exceeds what was expected of it. It is, from a technical standpoint, more achievable than it looks: the sponge is mixed in one bowl, the filling requires no cooking, and the ganache is poured rather than spread. The most challenging step is the roll itself, and that step has a very reliable technique.

The secret is the hot-roll rest technique. Swiss rolls — sheet sponges designed to be rolled with a filling — crack during rolling for one reason: the gluten network in the sponge, having been baked flat and then allowed to cool rigid in that flat position, resists the sudden curvature that rolling requires and splits rather than bending. The hot-roll rest technique prevents this entirely by rolling the sponge before it has any chance to set in its flat shape. The moment the chocolate sponge comes out of the oven — while it is still hot, still flexible, still behaving more like a warm, pliable sheet than a rigid baked cake — it is turned out onto a clean sheet of parchment paper dusted with a mixture of powdered sugar and cocoa powder (to prevent sticking), the baking parchment peeled from the back, and the sponge rolled up immediately around the fresh parchment sheet in a tight, firm cylinder with no filling yet inside. The roll is left to rest in this position for 20–25 minutes as it cools. During this cooling period, the gluten network sets in the curved shape rather than flat — the sponge is trained into its rolled position while the proteins are still mobile enough to accommodate the curvature. When the cooled sponge is carefully unrolled 20–25 minutes later to receive the Oreo filling, it unrolls without cracking because it has already set in its pre-curved position; when it is rolled back up with the filling inside, it follows the path it already knows and curves cleanly around the cream without resistance. The hot-roll rest technique is the entire reason a Swiss roll can be rolled without cracking, and understanding why it works — gluten network set during cooling into a pre-curved shape — makes it reliable rather than anxious.

What makes this recipe extraordinary is the Oreo cream filling. Most Swiss roll fillings are simple whipped cream or buttercream. The Oreo cream in this recipe is built specifically to complement the dark chocolate sponge in the way a chocolate Oreo cookie complements its filling: the cream is made by whipping chilled full-fat coconut cream to stiff peaks, then folding in the scraped filling from an entire pack of Oreos (the white cream filling extracted from each cookie and collected — approximately 120g of pure Oreo filling from a standard 154g pack), plus a small amount of powdered sugar, vanilla extract, and very finely crushed Oreo cookie (the dark chocolate wafer portion, ground to a fine powder that gives the cream specks of dark cookie throughout and a faint bitter chocolate note that prevents the cream from being simply sweet). The result is a filling that tastes precisely, unmistakably, intensely of Oreo — not of cream with Oreos in it, but of the specific compound flavor of Oreo filling and Oreo chocolate cookie together, translated into a cloud-light, spreadable cream. It is a completely distinctive flavor that makes this roll immediately and precisely identifiable in a way that generic chocolate roll fillings never achieve.

This recipe is 100% vegan, dairy-free, and egg-free. Standard Oreos are vegan (they contain no dairy or egg ingredients, though they are produced in facilities that handle milk); verify with your regional supplier if required. It serves 10–12 from a standard 30×40cm (12×16 inch) sheet pan.


Recipe Information

Prep TimeCook TimeTotal TimeServingsCalories
25 mins12 mins37 mins (+ 25 min cooling)10–12 slices~445 kcal

Ingredients

For the Chocolate Sponge

  • 1 cup (120g) all-purpose flour
  • ½ cup (45g) Dutch-process cocoa powder (Dutch-process is strongly recommended — it produces a darker, more intensely chocolatey sponge; natural cocoa produces a lighter, redder, less deeply flavored result)
  • 1 tsp baking powder
  • ½ tsp baking soda
  • ¼ tsp fine salt
  • ¾ cup (150g) caster sugar or granulated sugar
  • ½ cup (120ml) strong brewed coffee or hot water (coffee amplifies the chocolate flavor significantly without making the sponge taste of coffee; hot water works but produces a slightly less deep chocolate note)
  • ½ cup (120ml) oat milk or soy milk, at room temperature
  • ¼ cup (60ml) neutral oil (refined coconut oil, sunflower oil, or vegetable oil — NOT olive oil)
  • 1 tsp vanilla extract
  • 1 tsp apple cider vinegar (reacts with the baking soda to produce lift in the absence of eggs; do not omit)

For the Roll Surface (Before Rolling)

  • 2 tbsp powdered sugar (icing sugar)
  • 1 tbsp Dutch-process cocoa powder
    (mixed together and dusted over the parchment paper the sponge rolls onto — prevents the sponge from sticking to the parchment and adds a faint sweet-cocoa coating to the outside of the roll’s interior spiral)

For the Oreo Cream Filling

  • 2 cans (2 × 400ml / 14oz) full-fat coconut cream, refrigerated overnight (both cans; use only the thick, solidified cream from the top of each can — leave the liquid behind; two cans provide enough volume to fill the roll generously without the filling squeezing out at the sides when rolled)
  • 1 standard pack (154g) Oreos — the filling scraped from each cookie (approximately 120g of white cream filling total; the dark chocolate wafer cookies are kept separately)
  • 3 tbsp powdered sugar (icing sugar), sifted
  • 1 tsp vanilla extract
  • 4–5 of the dark chocolate Oreo wafers (from above), finely crushed to a powder in a food processor or zip-lock bag — folded into the cream for flavor and visual speckling

For the Dark Chocolate Ganache

  • 150g (5oz) vegan dark chocolate (70%+ cocoa), finely chopped
  • 100ml (just under ½ cup) full-fat coconut cream (from the remaining liquid in the coconut cream cans used for the filling, or from a new can)
  • 1 tbsp maple syrup (optional — adds a very slight sweetness and gloss to the ganache; omit for a purely bitter dark ganache)

For Decoration

  • 6–8 whole Oreo cookies
  • 3–4 Oreo cookies, crushed to coarse crumbs (not fine powder — visible pieces of Oreo look best on the ganache surface)
  • Optional: a dusting of powdered sugar or extra cocoa powder

Instructions

  1. Prepare for baking. Preheat the oven to 180°C (355°F). Line a 30×40cm (12×16 inch) rimmed baking sheet (a Swiss roll tin or a standard half sheet pan) with parchment paper, pressing it firmly into the corners and up the sides. Lightly grease the parchment with coconut oil or cooking spray. Prepare the rolling parchment: lay a fresh sheet of parchment paper, larger than the baking sheet, on a clean work surface and dust it evenly with the combined powdered sugar and cocoa powder mixture. Set aside.
  2. Make the chocolate sponge. In a large bowl, whisk together the flour, cocoa powder, baking powder, baking soda, salt, and sugar until evenly combined. In a jug, combine the hot coffee or hot water, oat milk, neutral oil, and vanilla extract. Pour the wet mixture into the dry and whisk until smooth and lump-free — a few strokes is sufficient; do not over-mix. Add the apple cider vinegar and stir once to combine; the batter will begin to bubble slightly as the vinegar reacts with the baking soda. Pour the batter immediately into the prepared baking sheet and spread quickly and evenly to the corners with a palette knife or offset spatula — the batter is thin and should spread easily into a near-even layer approximately 5–6mm deep.
  3. Bake the sponge. Bake for 10–12 minutes until the sponge is set — it should spring back when pressed lightly in the center and a toothpick inserted in the middle comes out clean. Do not overbake; an overbaked sponge is dry and brittle and will crack when rolled regardless of the hot-roll technique. The sponge should be moist and slightly tacky on the surface.
  4. Hot-roll the sponge (immediately, while hot). Remove the sponge from the oven. Working quickly, run a knife around the very edge of the pan to loosen the sponge from the sides. Place the dusted parchment sheet (powdered sugar/cocoa side up) directly on top of the hot sponge. Place a clean cutting board or baking tray on top as a base. In one confident motion, flip the whole assembly so the sponge is now on the dusted parchment with its baked top side down. Carefully peel away the baking parchment that was lining the pan — it should come away cleanly. Working from the shortest edge nearest to you, roll the hot sponge up tightly and firmly with the dusted parchment paper inside (you are rolling the parchment with the sponge — this acts as a separator so the filling can go in later without the sponge sticking to itself). Roll it as tightly as you can without tearing. Set the rolled sponge seam-side down on a wire rack. Leave to cool at room temperature for 20–25 minutes — do not refrigerate, do not rush. The sponge is being trained into its curved shape as it cools.
  5. Make the Oreo cream filling. While the sponge cools, scrape the white cream filling from each Oreo cookie using a small knife or a teaspoon and collect it in a bowl — this requires patience but takes approximately 8–10 minutes for a full pack. Keep the dark chocolate wafer cookies separately. In a chilled bowl, beat the thick coconut cream from both refrigerated cans on high speed for 2–3 minutes until fluffy and holding stiff peaks. Add the collected Oreo filling, sifted powdered sugar, and vanilla extract and beat for 30 further seconds until incorporated. Finely crush 4–5 of the dark Oreo wafers to a powder (rolling pin in a bag, or food processor) and fold into the cream with a spatula. Refrigerate the cream until needed.
  6. Fill and re-roll the sponge. Once the sponge is cool, carefully unroll it — it should unroll smoothly without cracking, following the curve it set during the cooling period. Remove the parchment from inside. Spread the Oreo cream evenly across the interior of the sponge, leaving a 2cm (¾ inch) border at the far edge (the cream expands toward the edge as it is rolled and will reach it; no border means cream squeezing out). Roll the sponge back up tightly from the same short edge, this time without the parchment inside. Apply firm, even pressure as you roll. Place the finished roll seam-side down on a wire rack set over a baking sheet to catch the ganache. Refrigerate for 15 minutes to firm slightly while the ganache is made.
  7. Make the chocolate ganache. Place the finely chopped vegan dark chocolate in a heatproof bowl. Heat the coconut cream in a small saucepan until just simmering (small bubbles around the edge — do not boil). Pour the hot coconut cream over the chocolate and leave without stirring for 2 minutes, then stir from the center outward in small circles until completely smooth and glossy. Stir in the maple syrup if using. Allow to cool for 5 minutes until the ganache has thickened slightly but is still pourable — it should flow off a spoon in a thick, slow ribbon.
  8. Coat and decorate. Remove the roll from the refrigerator. Pour the ganache slowly and evenly over the length of the roll, letting it run down the sides and coat the exterior. Use a spatula to nudge the ganache toward any uncoated areas. Immediately place the whole Oreos at even intervals along the top of the roll, pressing them lightly into the still-wet ganache so they hold. Scatter the coarsely crushed Oreo crumbs over the ganache surface. Dust lightly with extra powdered sugar or cocoa powder if desired. Refrigerate for at least 30 minutes until the ganache is fully set.
  9. Slice and serve. Use a sharp knife, rinsed under hot water and wiped dry between each cut, to slice the roll crosswise into portions approximately 3cm (1¼ inch) thick. The spiral should be clearly visible in cross-section — dark chocolate sponge and brilliant white Oreo cream alternating in a tight, dramatic coil. Serve cold, straight from the refrigerator.

Pro Tips

  • Roll the sponge the moment it leaves the oven — do not wait even 5 minutes. The window for hot-rolling without cracking closes quickly as the sponge cools and the gluten network begins to set flat. Have the dusted parchment sheet prepared and on the work surface before the sponge goes into the oven, so the roll can happen immediately after the oven door opens.
  • Scrape every Oreo — the 120g of filling from a full pack is what gives the cream its intensely Oreo-specific flavor and sufficient body to hold its shape in the roll. A half-pack of filling produces a cream that tastes mildly of Oreo at best. The scraping is time-consuming but the flavor payoff is worth it; do it while the sponge bakes.
  • Do not over-whip the coconut cream — coconut cream whips beautifully but can become grainy and slightly buttery if over-beaten. Stop the moment the cream holds stiff peaks and looks glossy; beating beyond this point causes the fat to separate. If the cream becomes grainy, fold in 1–2 tablespoons of the coconut liquid from the can and beat briefly to re-emulsify.
  • Let the ganache cool before pouring — a ganache poured too hot is too thin and runs straight off the roll without coating. Allow it to cool for 5 minutes after mixing, stirring occasionally, until it coats the back of a spoon with a thick, slow drip. At this consistency it will flow over the roll and begin to set almost immediately on contact with the chilled sponge.

The Swiss Roll: A Victorian Invention with a Disputed Birthplace

The Swiss roll — a sheet of sponge cake rolled with a filling of cream or jam — is one of the most internationally recognized and most widely adapted dessert formats in the world, and almost nothing about it is straightforwardly Swiss. The earliest documented recipes for a rolled sponge cake do not appear in Swiss cookbooks but in American ones (the term “jelly roll” appears in American cookbooks from the 1850s and 1860s) and in Austro-Hungarian confectionery records from approximately the same period. The name “Swiss roll” appears in British English from the latter half of the nineteenth century but has no clear etymological connection to Switzerland — the most likely explanation is that “Swiss” was used as a general term of Continental European elegance in Victorian Britain, in the same way that “French” was attached to various foods and objects to imply sophistication rather than literal French origin. By the early twentieth century, the Swiss roll was a standard item in British bakeries and home kitchens, appearing in virtually every Victorian and Edwardian household cookbook; its simplicity — a thin sponge, a filling, a roll — made it both democratic and versatile, suited to everything from afternoon tea to children’s birthday parties. The format’s global spread followed British imperial and commercial influence: the Swiss roll (or its near-equivalents, known variously as brazo de reina in Spain and Latin America, bûche de Noël when dressed as a Yule log in France, and roll cake in Japan, where a particularly refined version with barely-sweetened cream became a bakery staple in the late twentieth century) now appears in pastry traditions across six continents, demonstrating that a fundamentally simple idea — sponge, filling, roll — is universal enough to transcend its uncertain origins and become something that every culture can genuinely call its own.


Flavor Variations

  • Vegan Matcha Oreo Roll: Replace the Dutch-process cocoa powder in the sponge with 2 tablespoons of high-quality culinary matcha powder (and increase the flour by 2 tablespoons to compensate for the reduced cocoa) for a vivid green sponge. Keep the Oreo cream filling exactly as written — the contrast of the grassy, slightly bitter matcha sponge against the sweet, vanilla Oreo cream is a striking and genuinely excellent combination, and the cross-section reveals green and white spirals rather than dark and white.
  • Vegan Cookies and Cream Roll (Double Oreo): Replace the chocolate ganache coating with a second batch of the Oreo cream (made from one additional can of coconut cream and the filling from half a pack of Oreos), spread thickly over the outside of the roll and studded with halved Oreos pressed into the surface. The result is a roll that is entirely white on the exterior — a completely different visual presentation — and has an Oreo-cream-to-sponge ratio that leans even more heavily toward the filling.
  • Vegan Peanut Butter Chocolate Roll: Replace the Oreo cream filling with a peanut butter cream — beat 200g of smooth natural peanut butter with the thick coconut cream from 1 chilled can, 3 tablespoons of powdered sugar, and ½ teaspoon of vanilla until smooth and spreadable. Coat the roll with the same dark chocolate ganache. The peanut butter and dark chocolate combination in a rolled sponge format is a version of the peanut butter cup flavor profile expressed as an elegant slice-and-reveal dessert.

Nutritional Highlights (Per Slice — Based on 12 Slices)

CaloriesProteinCarbsFiberFat
~445 kcal5g54g3g24g

Storage

  • Refrigerator: The finished roll keeps in the refrigerator for up to 4 days, covered loosely with plastic wrap or stored in an airtight container. The ganache may develop a slight bloom (whitish surface haze) after 48+ hours in the refrigerator — this is purely cosmetic (a result of fat crystals migrating to the surface as the chocolate temper shifts) and does not affect the flavor. A dusting of cocoa powder before serving restores the visual.
  • Serving from cold: The roll is best served cold — the Oreo cream filling is firmest and most defined in cross-section when chilled. Allow to sit at room temperature for 5 minutes before slicing if the ganache feels too firm to cut cleanly.
  • Freezer: The assembled, ganache-coated roll (without the whole Oreo garnishes, which become soggy) freezes well for up to 1 month. Freeze uncovered until the ganache is solid, then wrap tightly in two layers of plastic wrap. Thaw overnight in the refrigerator. The Oreo cookie garnishes and crumb dusting should be added after thawing.
  • Individual slices: Already-sliced portions can be refrigerated individually on a plate covered with plastic wrap for up to 3 days, making this an excellent make-ahead dessert for gatherings where individual portions are plated in advance.

Frequently Asked Questions

My sponge cracked when I rolled it — what went wrong?

The most common cause is waiting too long to roll — the hot-roll must happen the moment the sponge comes out of the oven. Even 5 minutes of cooling flat on the counter allows the sponge to begin setting in its flat position, and the subsequent roll encounters resistance. If the sponge did crack, press the cracks gently back together with your fingers (the sponge is forgiving), complete the roll and cooling, and fill as directed — the cracks will be invisible inside the roll, and the ganache exterior will cover any surface evidence. For future batches, have the dusted parchment ready before the oven timer goes off.

Can I use a different filling instead of the Oreo cream?

Yes — the sponge itself is excellent with any filling that is thick enough to stay in the roll without running. Good alternatives: vanilla cashew cream (blended soaked cashews with maple syrup and vanilla); vegan strawberry jam and whipped coconut cream in separate layers; or peanut butter thinned with a little maple syrup and coconut oil. If using a jam, spread it in a thin layer closest to the sponge and add the whipped cream on top — this prevents the jam from making the sponge soggy.

Do I need to remove the filling from every single Oreo?

For the most intensely Oreo-flavored cream, yes. The full-pack filling (approximately 120g) is what makes the cream taste unmistakably, specifically of Oreo rather than just of vanilla cream. If the scraping is impractical, a good shortcut is to buy one pack of Double Stuf Oreos (which have twice the filling) and scrape half the pack — approximately the same filling weight in half the time. Alternatively, 3 tablespoons of vegan cream cheese can supplement a smaller quantity of Oreo filling (half a pack) without significantly altering the flavor.

The ganache set before I finished pouring it — how do I fix it?

If the ganache becomes too thick to pour mid-application, place the bowl briefly over a saucepan of hot (not boiling) water and stir gently for 30–60 seconds until it loosens to a pourable consistency. Do not microwave ganache directly — the uneven heat can seize the chocolate. If the ganache has set completely on the roll in an uneven way, allow it to set fully and then use a knife dipped in hot water to smooth the surface, wiping the knife between passes.


Tried this recipe? Leave a comment below and let us know how it turned out! Tag us on Instagram and Facebook — we love seeing your plant-powered creations. Looking for more addictive vegan snack and appetizer recipes? Browse all recipes on Easy Vegan Recipes — new recipes posted every single week!
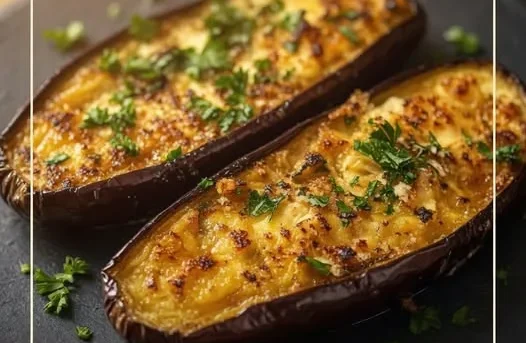
Vegan Garlic Eggplant — The Most Deeply Savory Most Glossy Most Intensely Flavored Plant-Based Side Dish You Will Put on the Table Tonight

vegan garlic eggplant

There is a version of eggplant that most people have eaten — the slightly bitter, slightly spongy, slightly underwhelming version that absorbs too much oil and gives too little back — and then there is this. Vegan Garlic Eggplant is an entirely different proposition: cubes of eggplant that have been properly prepared (and the preparation is everything, as this recipe will explain), cooked in a screaming-hot wok or wide skillet until their exteriors are seared to a deep, caramelized golden-brown while their interiors collapse into the silky, yielding, almost custardy softness that is the eggplant’s highest form. These seared eggplant cubes are then finished in a sauce of breathtaking simplicity and depth: a combination of garlic (an entire head of it, eight to ten cloves, minced and cooked at the edge of burning until it is golden and fragrant and has lost its raw sharpness in exchange for a sweet, nutty depth that is nothing like raw garlic and everything like the best version of it), soy sauce, a small amount of rice vinegar, a spoonful of maple syrup or sugar, sesame oil, and a small amount of cornstarch-thickened liquid that pulls the sauce into a glossy, coating consistency — a sauce that clings to every surface of every eggplant cube and makes the whole dish shine under the kitchen light in a way that makes it look, before you have even put it in your mouth, like something exceptional. Scattered with sliced spring onions, a pinch of sesame seeds, and served over plain steamed rice that absorbs the extra sauce from the pan, this is a 25-minute dinner that tastes like something you waited two hours for, and it is the kind of recipe that becomes a permanent part of a weekly rotation after the first time.

The secret is the dry-sear method. Eggplant is approximately 92% water and contains a network of air pockets in its cell structure that make it behave, when raw, like a sponge — it absorbs oil almost instantly on contact with a hot pan, which is why most eggplant recipes end up using far more oil than intended and produce a result that is greasy rather than caramelized. The dry-sear method circumvents this entirely by cooking the eggplant without any oil for the first phase of the cooking process, in a very hot, dry pan: the eggplant cubes go into a screaming-hot wok or cast-iron skillet with no oil at all, and the heat forces the air pockets in the eggplant’s cell structure to collapse and expel their moisture before the eggplant can absorb any fat. For the first 3–4 minutes, the eggplant sits in the dry pan and steam visibly rises from the cut surfaces as the internal water evaporates; the cell structure collapses; and the cut surfaces begin to make direct, intimate contact with the hot pan surface rather than sitting on a layer of trapped water vapor. After 3–4 minutes, the exteriors are beginning to color and the eggplant has lost enough moisture that its internal structure has become genuinely dense and slightly sticky on the cut surfaces — at this point, 2 tablespoons of oil are added to the pan, and the oil meets eggplant that is no longer a sponge. The oil coats the already-collapsing surfaces and immediately begins producing the Maillard browning that the pre-sear moisture was preventing, turning the eggplant golden-brown in another 2–3 minutes in a way that oil added at the beginning of cooking cannot achieve. The result is deeply caramelized eggplant that has used a fraction of the oil a conventional method requires, is not greasy, and has a genuinely firm, almost meaty exterior texture that holds its shape throughout the sauce coating.

What makes this recipe exceptional is the garlic bloom at the beginning of the sauce: once the eggplant is seared and temporarily removed from the pan, the garlic is added to the same pan with a small amount of fresh oil and cooked slowly — more slowly than garlic is usually cooked in a stir-fry — over medium rather than high heat, for 60–90 seconds, stirring constantly. This slower cook allows the garlic’s harsh, sulfurous raw compounds to cook off completely, transforming the garlic from sharp and pungent into something sweet, deeply savory, and nutty — the garlic equivalent of caramelized onion, achieved in 90 seconds rather than 40 minutes. The seared eggplant is then returned to the pan into this fragrant garlic base, the sauce is added, and the whole thing cooks together for 2–3 minutes until the sauce thickens and the eggplant absorbs the flavors. The garlic’s slow bloom is why this dish tastes so full and so deep despite having so few ingredients and so little cooking time.

This recipe is 100% vegan, dairy-free, and egg-free. It serves 2–3 as a main over rice, or 4 as a side dish.


Recipe Information

Prep TimeCook TimeTotal TimeServingsCalories
10 mins15 mins25 mins2–3 servings~290 kcal

Ingredients

For the Eggplant

  • 2 large eggplants (approximately 700–800g total), cut into 3cm (1¼ inch) cubes — uniform cubes cook more evenly than irregular chunks; do not cut them smaller than 3cm as they will shrink significantly during cooking and become too small to have a distinct interior texture
  • 1 tsp fine salt (for drawing out moisture before cooking — optional but recommended; see Pro Tips)
  • 2 tbsp neutral oil (avocado oil, refined coconut oil, or sunflower oil — added after the initial dry sear; do not use extra-virgin olive oil, whose low smoke point makes it unsuitable for the high heat of this recipe)

For the Garlic Sauce

  • 8–10 garlic cloves (a full head of garlic, approximately 40g once peeled and minced) — this is an intentionally large quantity; this is a garlic eggplant dish and the garlic is the defining flavor; reducing it to 3–4 cloves produces a dish that is pleasant but not the same thing
  • 1 tbsp neutral oil, for blooming the garlic
  • 3 tbsp soy sauce or tamari (tamari for a fully gluten-free version; light soy sauce gives a cleaner, brighter flavor; dark soy sauce adds color and a slightly sweeter, molasses-like depth — a combination of 2 tbsp light and 1 tbsp dark is the most complex result)
  • 1 tbsp rice vinegar (balances the soy sauce’s saltiness and adds brightness; do not substitute with balsamic or white wine vinegar, which have incompatible flavor profiles)
  • 1 tbsp maple syrup or caster sugar (balances the salt and vinegar; adjust to taste)
  • 1 tsp toasted sesame oil (added at the very end — toasted sesame oil’s volatile aromatics dissipate completely under high heat; it must be added off the heat or at the very last moment to preserve its distinctive fragrance)
  • ½ tsp cornstarch mixed with 3 tbsp water (the thickening slurry — produces the glossy, coating consistency that distinguishes a finished Chinese-style garlic sauce from a thin liquid; mix the cornstarch fully into the cold water before adding to the hot pan)
  • ¼ tsp white pepper or black pepper
  • ¼ tsp chilli flakes or 1 tsp chilli bean paste (doubanjiang) — optional for heat; doubanjiang adds both heat and a fermented, deeply savory complexity that takes the sauce in a slightly Sichuan direction
  • Optional: 1 tsp grated fresh ginger, added with the garlic for an additional aromatic layer

For Serving

  • Steamed jasmine rice or short-grain rice — 2 cups cooked rice per serving absorbs the extra sauce from the pan and is essential to the experience; noodles (soba or rice noodles) work as an equally good alternative
  • 3 spring onions (scallions), thinly sliced on the diagonal
  • 1 tbsp sesame seeds, toasted
  • Additional chilli flakes, to taste

Instructions

  1. Prepare the eggplant. Cut the eggplant into 3cm cubes. If time allows, place the cubes in a colander, sprinkle with 1 teaspoon of fine salt, toss to coat, and leave to stand for 15–20 minutes (this draws out surface moisture and significantly reduces the oil absorption during searing). After 15–20 minutes, pat the cubes dry with paper towels — they should feel noticeably less moist than when raw. If you are short on time, skip the salt-draw and proceed directly to the dry sear; the result will be slightly less caramelized but still excellent.
  2. Mix the sauce. In a small bowl or jug, combine the soy sauce, rice vinegar, maple syrup, white pepper, and chilli flakes (if using). Stir to dissolve. In a separate small bowl, mix the cornstarch with the 3 tablespoons of cold water until fully dissolved with no lumps. Keep both separate until Step 5 — they are added separately because the cornstarch slurry must go into the hot pan after the liquid to prevent uneven thickening.
  3. Dry-sear the eggplant. Heat a large wok or wide, heavy skillet (cast iron works exceptionally well for this step) over the highest heat available for 2 minutes until the pan is genuinely very hot — a drop of water should evaporate immediately on contact. Add the eggplant cubes with NO oil. Spread them in as close to a single layer as possible and cook without stirring for 3 minutes — the eggplant will begin to steam and then slowly color on the surfaces in contact with the pan. After 3 minutes, add the 2 tablespoons of neutral oil, toss to coat all the eggplant pieces, and continue cooking over high heat for a further 3–4 minutes, stirring every 60 seconds, until the eggplant cubes are deeply golden-brown on multiple surfaces and their interiors feel completely soft when pressed with a spatula. The eggplant should look collapsed and caramelized, not pale and spongy. Remove from the pan and set aside.
  4. Bloom the garlic. Reduce the heat to medium. Add the 1 tablespoon of oil to the same pan. Add the minced garlic (and ginger if using) and cook, stirring constantly, for 60–90 seconds over medium heat. Watch carefully: the garlic should turn from raw white to faintly golden and become intensely fragrant — it must not darken to brown, which happens quickly and makes it bitter. The slower medium heat allows the garlic to cook through and sweeten rather than scorching on the outside while remaining raw in the center. Add the doubanjiang or chilli bean paste here if using, and stir for 20 seconds.
  5. Finish the dish. Return the seared eggplant to the pan with the bloomed garlic. Raise the heat to high. Pour the soy sauce mixture over the eggplant and stir immediately to coat all the pieces. Cook for 60 seconds, stirring, until the sauce is bubbling vigorously. Give the cornstarch slurry a quick stir (it settles quickly) and pour it into the pan while stirring continuously. Cook for a further 60–90 seconds until the sauce thickens to a glossy, coating consistency that clings to every surface of the eggplant rather than pooling at the bottom of the pan. Remove from heat and stir in the toasted sesame oil.
  6. Serve immediately. Spoon over steamed rice. Scatter with spring onion slices and toasted sesame seeds. Add additional chilli flakes if desired. Serve at once — the gloss of the sauce is at its most beautiful immediately from the pan.

Pro Tips

  • Use the largest, widest pan available — eggplant needs space. Crowded eggplant steams instead of searing, producing a pale, soft result instead of a caramelized, meaty one. If you do not have a pan wide enough to accommodate the eggplant in a near-single layer, cook in two batches and combine at the sauce stage.
  • The dry-sear is the most important step — most garlic eggplant recipes fail because they add oil at the start and the eggplant absorbs it all before any browning can happen. The 3-minute oil-free pre-sear is the entire difference between a greasy, pale eggplant dish and a caramelized, intensely flavored one. Do not skip it or shorten it.
  • Do not burn the garlic — the garlic bloom at medium heat is deliberate. Garlic cooked at high heat in a stir-fry burns at the edge before the interior has cooked, producing raw-tasting pockets inside burnt-tasting shells. Medium heat for 90 seconds cooks the garlic through evenly and transforms its flavor from sharp and raw to sweet, nutty, and deep. Watch it constantly and be ready to move quickly.
  • Add the sesame oil off the heat — toasted sesame oil is a finishing oil, not a cooking oil. Its delicate, aromatic compounds (which are responsible for its distinctive fragrance) evaporate rapidly at cooking temperatures. Adding it to the pan after the heat is off preserves those aromatics and makes the finished dish noticeably more fragrant. A dish finished with sesame oil off the heat smells completely different from one where sesame oil was added early.

The Eggplant in Chinese Cooking: A Thousand-Year Relationship

The eggplant occupies a particularly important place in Chinese culinary history — more important, arguably, than in any other national cuisine. While European cooks spent centuries treating the eggplant with suspicion and Italian cooks embraced it primarily as an ingredient in sauces and casseroles, Chinese cooks developed a vast and sophisticated repertoire of eggplant preparations that exploit the vegetable’s extraordinary capacity for absorbing flavors and developing silky, yielding textures under heat. Eggplant arrived in China from India and Southeast Asia sometime before the Tang Dynasty (618–907 CE), and Tang dynasty records document it as a cultivated vegetable in multiple regions. By the Song Dynasty (960–1279 CE), eggplant was a staple of Chinese cooking across all social classes, appearing in imperial court records and in the food diaries of the scholar-official Su Dongpo, who wrote about the pleasures of simple eggplant preparations. The specific combination of eggplant and garlic that defines this recipe reflects a fundamental principle of Chinese flavor-building: the use of aromatics (garlic, ginger, spring onion, chilli) as the flavor foundation of a dish rather than as seasoning added on top of it. In Chinese cooking, the aromatics go in first (or at the structural center of the technique, as in this recipe’s garlic bloom), and the main ingredient — the eggplant — cooks in the flavor environment the aromatics have created, absorbing their character as it finishes. This is why garlic eggplant tastes so completely, so deeply of garlic: not because garlic is added as a condiment but because the eggplant has cooked in the garlic’s presence and absorbed its transformation.


Flavor Variations

  • Vegan Sichuan Garlic Eggplant (Yu Xiang Qiezi): Add 1 tablespoon of doubanjiang (fermented chilli bean paste) and 1 teaspoon of Sichuan peppercorn powder to the garlic bloom. Replace the plain rice vinegar with Chinkiang black vinegar for a deeper, more complex sour note. Add 1 tablespoon of hoisin sauce to the soy sauce mixture. The result is a version of the classic Sichuan Yu Xiang (fish-fragrant) flavor profile — simultaneously spicy, sour, sweet, and savory — one of the most celebrated flavor compositions in Chinese cooking, achieved entirely without any fish or animal products.
  • Vegan Ginger & Garlic Eggplant: Double the ginger (to 2 teaspoons, grated) and add it at the same time as the garlic bloom. Add 2 tablespoons of finely minced fresh chilli (red or green) for heat. The increased ginger gives the dish a sharper, more aromatic, more gingery character that shifts the flavor profile toward something closer to a Thai or Vietnamese garlic-ginger preparation than a Chinese one — equally delicious but distinctly different.
  • Vegan Miso Garlic Eggplant: Whisk 1 tablespoon of white miso paste into the soy sauce mixture before adding to the pan. The miso adds fermented, deeply savory umami that layers beneath the garlic’s sweetness and gives the finished sauce a complexity and depth that is difficult to place but impossible to miss. White miso produces a gentler, slightly sweeter result; red miso is more intense and assertive.

Nutritional Highlights (Per Serving — Based on 3 Servings, Without Rice)

CaloriesProteinCarbsFiberFat
~290 kcal5g28g9g17g

Storage

  • Refrigerator: Garlic eggplant keeps in the refrigerator for up to 4 days in a sealed container. The eggplant softens further overnight as it absorbs the sauce (which thickens in the refrigerator as well); the day-two version, reheated in a pan for 3–4 minutes or microwaved for 60 seconds, is arguably even more flavorful than fresh as the garlic and soy have fully permeated the eggplant.
  • Reheating: Best reheated in a hot pan for 3–4 minutes, adding a splash of water or soy sauce to loosen the sauce if it has become very thick in the refrigerator. Microwave reheating works but makes the eggplant very soft; pan reheating restores more of the original texture.
  • Freezer: Not recommended — cooked eggplant becomes very soft and watery when frozen and thawed, losing the texture that the dry-sear method worked to create.
  • Meal prep: This dish pairs perfectly with pre-cooked rice portioned for the week. Make a double batch of the eggplant, refrigerate in portions, and pair with reheated rice each day for a fast, complete lunch or dinner that requires no additional cooking.

Frequently Asked Questions

Why does my eggplant always turn out bitter?

Bitterness in eggplant is most common in large, old, or over-mature eggplants — the ones with many seeds and very thick skin. Younger, smaller, or more recently harvested eggplants are noticeably less bitter. To minimize bitterness in any eggplant, salt it before cooking (as this recipe recommends): the salt draws out some of the bitter compounds along with the moisture. For an eggplant that is particularly bitter, increase the salt-draw time to 30 minutes and press more firmly with paper towels before cooking. Salting and pressing is the most reliable way to address eggplant bitterness without changing the recipe.

Can I use Chinese or Japanese eggplant (the long, thin variety) instead of globe eggplant?

Yes — Chinese or Japanese eggplant (long, thin, purple) is actually preferred for this recipe by many Chinese cooks because it has thinner skin, fewer seeds, a slightly sweeter flavor, and less tendency to absorb oil than globe eggplant. Cut into 4–5cm (1½–2 inch) lengths or halved lengthwise and cut into similar lengths. The dry-sear technique is the same; the cooking time is slightly shorter (reduce the sear by about 1 minute per side) as the thinner flesh cooks through more quickly. The dish looks different — long, golden-seared pieces rather than cubes — but the flavor is excellent.

My sauce is too salty — how do I fix it?

If the sauce has become over-salty, add 1–2 teaspoons of extra maple syrup or sugar (sweetness counteracts the perception of saltiness) and a small squeeze of lime or lemon juice (acidity also modulates saltiness). A splash of extra water or unsalted vegetable stock, with an additional tiny pinch of cornstarch to re-thicken if needed, dilutes the sauce without thinning the texture. For future batches, use reduced-sodium soy sauce or tamari, or simply reduce the soy sauce quantity to 2 tablespoons and add a tablespoon of water to maintain the sauce volume.

Can I bake the eggplant instead of pan-frying it?

Yes — for a lower-oil version, arrange the salted and pressed eggplant cubes on a parchment-lined baking sheet, brush or spray lightly with oil, and roast at 220°C (430°F) for 22–25 minutes, flipping once at the halfway point, until deeply golden and collapsed. The roasted eggplant will not have the same seared-edge caramelization as the dry-sear pan method, but it is an excellent alternative that uses minimal oil and produces a tender, concentrated result. Add the roasted eggplant to the garlic sauce in Step 5 and proceed exactly as written.


Tried this recipe? Leave a comment below and let us know how it turned out! Tag us on Instagram and Facebook — we love seeing your plant-powered creations. Looking for more addictive vegan snack and appetizer recipes? Browse all recipes on Easy Vegan Recipes — new recipes posted every single week!

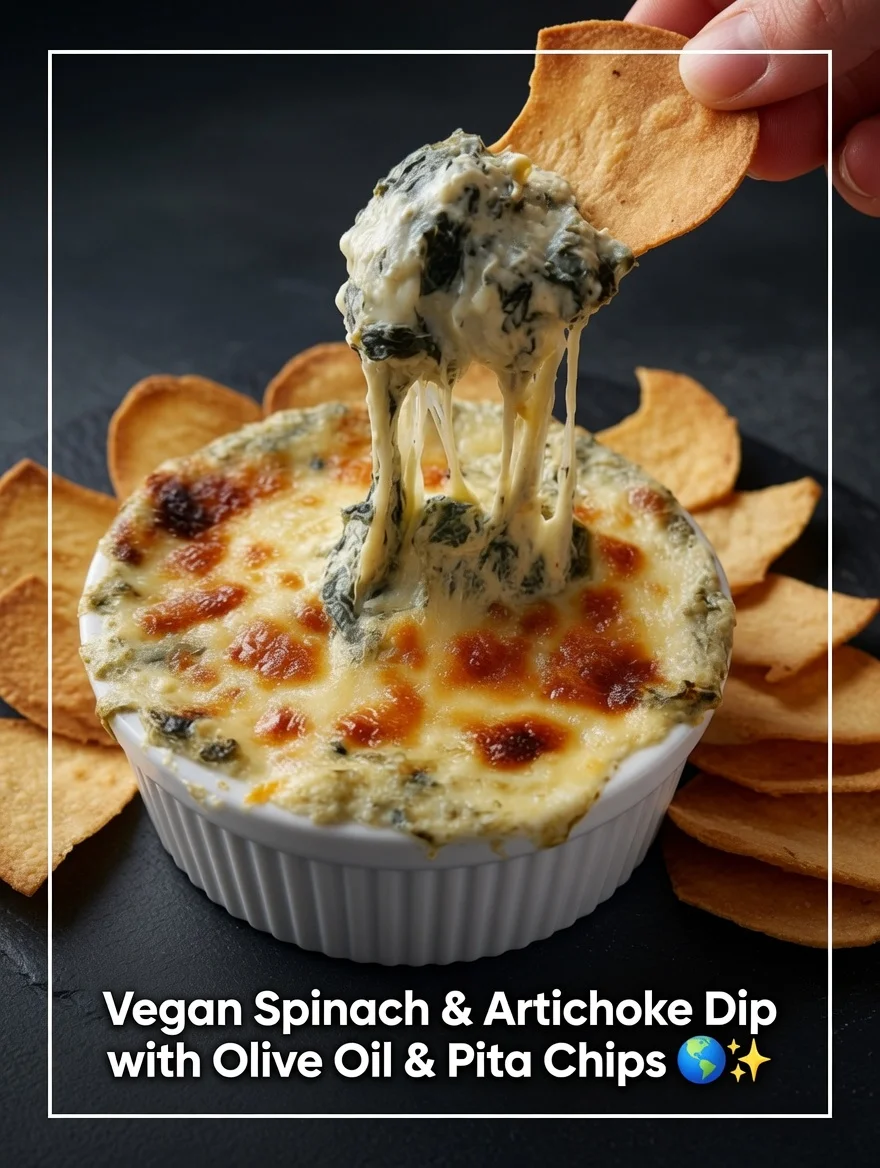
Vegan Spinach & Artichoke Dip with Olive Oil & Pita Chips — The Creamiest Most Deeply Flavored Plant-Based Party Dip You Have Ever Put on a Table

vegan spinach & artichoke dip with olive oil & pita chips

There is a category of food that exists almost entirely in the space between sitting down and the main course arriving — food that is not quite a meal and not quite a snack but occupies a social and culinary territory all of its own: the party dip, the sharing bowl, the thing that gets placed at the center of the table and around which a conversation forms and a gathering actually begins. Vegan Spinach & Artichoke Dip is one of the defining recipes in this category — a hot, bubbling, outrageously creamy bowl of wilted spinach, tender artichoke hearts, and a silky cashew-cream base that is seasoned with garlic and lemon and nutritional yeast and just enough white pepper to leave a gentle warmth at the back of the throat. It arrives at the table still bubbling from the oven, golden-spotted across the top where the cashew cream has browned under the grill, and it is surrounded by a pile of homemade pita chips that have been brushed with good olive oil, scattered with flaky salt and dried oregano, and toasted until they are shatteringly crisp — crisp enough to stand up to this dip without bending in half, and fragrant with the oregano and olive oil in a way that makes them worth eating on their own even before the dip appears. The combination of the hot, creamy dip and the crisp, herby pita chips is one of the best things you can put on a table for a group of people, and the fact that the entire recipe is completely plant-based and made without a single gram of dairy is something most guests discover only after they have already gone back for a third time.

The secret is the cashew cream base with the nutritional yeast bloom technique. Most vegan spinach and artichoke dips rely on a combination of store-bought vegan cream cheese, vegan sour cream, or canned coconut cream for their creamy base — all of which work adequately but produce a result that is either too tangy (cream cheese), too coconut-forward (coconut cream), or too thin and lacking the slightly grainy, genuinely dairy-like body of the original. The cashew cream base in this recipe produces none of these problems: raw cashews, soaked and blended smooth with lemon juice, garlic, water, and a small amount of apple cider vinegar (which provides the faint dairy-sour note that makes the cream taste like cream rather than blended nuts), become a base that is genuinely neutral in flavor, genuinely thick and silky in texture, and genuinely versatile enough to carry the flavors of the spinach and artichoke without either imposing a flavor of its own or disappearing entirely. The nutritional yeast bloom — which is what elevates this recipe beyond other cashew cream dips — involves stirring the nutritional yeast into 3 tablespoons of the hot, just-cooked spinach liquid before adding it to the blended cashew cream, rather than simply stirring nutritional yeast powder directly into the finished dip. The hot liquid hydrates and swells the nutritional yeast flakes, dissolving them into an even, fully integrated liquid rather than leaving them as partially dissolved particles in the finished dip; this produces a more uniform, deeper, more rounded umami flavor that reads as genuinely cheesy rather than as nutritional yeast, which has a distinctive flavor that can be identified as itself when it is incompletely dissolved. The nutritional yeast bloom step adds 90 seconds to the recipe and makes a perceptible difference to whether the finished dip tastes like a great cheesy dip or like a vegan dip that is trying to taste like a great cheesy dip.

What makes this recipe so outstanding is the double-layer artichoke approach. Marinated artichoke heart quarters (oil-packed from a jar, drained) are used in two different ways: two-thirds are roughly chopped and folded into the dip, where they provide tender, yielding pockets of artichoke flavor that are distributed through every spoonful; and one-third are left whole (or halved), arranged across the top of the dip before it goes into the oven, and pressed slightly into the surface so that they bake directly under the grill and develop a slightly caramelized, lightly charred exterior that adds a roasted note and a more concentrated flavor to the surface of the dip that the chopped pieces inside cannot achieve. The result is a dip with two textures of artichoke in every bowl — soft and integrated below, lightly caramelized and visually striking on top — and a depth of artichoke flavor that a single preparation method cannot produce.

This recipe is 100% vegan, dairy-free, egg-free, and naturally gluten-free (the pita chips are not gluten-free, but gluten-free flatbreads or vegetable crudités make excellent substitutes for those who need them). It serves 6–8 as a starter or party dip.


Recipe Information

Prep TimeCook TimeTotal TimeServingsCalories
15 mins20 mins35 mins (+ 1 hr cashew soak)6–8 servings~340 kcal

Ingredients

For the Cashew Cream Base

  • 200g (1⅓ cups) raw cashews, soaked in cold water for 1 hour minimum (or in boiling water for 20 minutes — for this recipe, the shorter boiling water soak is sufficient as the cashews are blended into a dip rather than a standalone cream and a small amount of remaining texture is masked by the other ingredients)
  • 120ml (½ cup) water (start with this quantity; add 1–2 tablespoons more if the blender needs loosening)
  • 2 tbsp lemon juice, freshly squeezed (approximately ½ a lemon)
  • 1 tbsp apple cider vinegar (provides the faint sour, dairy-like tang that makes the cashew cream read as cream rather than as blended nuts — white wine vinegar works as a substitute)
  • 2 garlic cloves, roughly chopped
  • ½ tsp fine salt
  • ¼ tsp white pepper (white pepper has a different heat profile from black pepper — more rounded, slightly floral, less sharp — and it does not create visible black specks in the cream; black pepper works but visually marks the white cream)

For the Dip

  • 300g (10oz) fresh baby spinach (or frozen spinach, fully thawed and squeezed as dry as absolutely possible — if using frozen, measure after thawing and squeezing; 300g fresh spinach cooks down to approximately 80–90g)
  • 2 jars (approximately 400g / 14oz drained weight total) marinated artichoke hearts in oil, drained thoroughly (oil-packed marinated artichoke hearts have a more complex, herby, slightly tangy flavor than water-packed artichokes; if only water-packed are available, add 1 tablespoon of olive oil and ½ teaspoon of dried thyme to compensate)
  • 4 tbsp nutritional yeast (the bloom technique below dissolves this fully into the dip — do not reduce this quantity; 4 tablespoons is what produces a genuinely cheesy, rounded flavor)
  • 3 tbsp olive oil, divided
  • 4 garlic cloves, finely minced
  • ½ medium onion, finely diced
  • 120g (½ cup) vegan cream cheese (Violife or Oatly — optional but adds additional body and a cream cheese tang to the dip; the recipe works without it if unavailable, producing a slightly lighter-textured result)
  • 1 tsp dried thyme
  • ½ tsp garlic powder (in addition to the fresh garlic — the dried garlic rounds out the fresh garlic’s sharpness with a deeper, more mellow background note)
  • Salt, black pepper, and chilli flakes, to taste

For the Homemade Pita Chips

  • 4 large pita breads (white or wholemeal — white pita produces crispier chips; wholemeal produces nuttier, slightly denser chips with more texture)
  • 4 tbsp good-quality extra-virgin olive oil
  • 1 tsp dried oregano
  • ½ tsp garlic powder
  • ½ tsp flaky sea salt
  • ¼ tsp black pepper

For Finishing the Dip

  • 2 tbsp extra-virgin olive oil, for drizzling over the top before baking
  • Chilli flakes, for scattering
  • Fresh parsley or basil, finely chopped, for serving
  • Lemon wedges, for serving

Instructions

  1. Soak the cashews. Cover the raw cashews with cold water and soak for a minimum of 1 hour (or pour boiling water over them and soak for 20 minutes). Drain and rinse thoroughly.
  2. Make the pita chips. Preheat the oven to 190°C (375°F). Split each pita bread horizontally into two thin rounds by running a knife along the seam (or simply cut without splitting for thicker, breadier chips). Cut each round into triangular wedges — 6–8 per round, depending on the size of the pita. In a large bowl, toss the pita wedges with the olive oil, dried oregano, garlic powder, flaky salt, and black pepper until every piece is evenly coated. Spread in a single layer across two baking sheets (do not crowd — overlapping chips steam rather than crisp). Bake for 12–15 minutes, turning once at the 8-minute mark, until golden, crisp, and fragrant. Watch carefully in the last 3 minutes as they go from golden to burnt quickly. Remove and allow to cool on the baking sheet — they crisp further as they cool. Set aside. (The pita chips can be made up to 24 hours in advance and stored in a sealed container at room temperature; they hold their crispness well.)
  3. Prepare the spinach. Heat 1 tablespoon of the olive oil in a large skillet or saucepan over medium-high heat. Add the fresh baby spinach in handfuls, tossing with tongs as each addition wilts to make room for more. Cook for 3–4 minutes total until all the spinach is completely wilted and most of the liquid has evaporated — the spinach should look glossy and reduced, not wet and pooling. Remove from the heat. Reserve 3 tablespoons of the hot spinach liquid from the pan (if there is any remaining liquid) — this is the liquid used to bloom the nutritional yeast. If using frozen spinach, skip this step; squeeze the thawed spinach in a clean kitchen towel until almost completely dry, then use 3 tablespoons of hot water for the bloom.
  4. Bloom the nutritional yeast. In a small bowl, stir the 4 tablespoons of nutritional yeast into the 3 tablespoons of hot spinach liquid (or hot water). Stir vigorously for 30–45 seconds until the nutritional yeast is fully dissolved into a smooth, thick, dark liquid with no visible flake particles remaining. Set aside.
  5. Cook the aromatics. In the same skillet used for the spinach, heat the remaining 2 tablespoons of olive oil over medium heat. Add the diced onion and cook for 5–6 minutes, stirring occasionally, until soft and translucent. Add the minced garlic and cook for 1 further minute, stirring constantly, until fragrant. Add the dried thyme and garlic powder and cook for 30 seconds. Remove from heat.
  6. Make the cashew cream. Drain and rinse the soaked cashews. Place them in a high-powered blender with the water, lemon juice, apple cider vinegar, garlic, salt, and white pepper. Blend on the highest speed for 2–3 minutes until completely smooth — run a small amount between your fingers; it should feel like thick cream with no grittiness. If the blender is struggling, add water 1 tablespoon at a time.
  7. Combine the dip. Preheat the oven to 200°C (390°F). In a large bowl, combine the cashew cream, bloomed nutritional yeast liquid, cooked aromatics, wilted spinach (roughly chopped if the leaves are large), and vegan cream cheese (if using). Stir until fully combined and evenly mixed. Roughly chop two-thirds of the drained artichoke hearts and fold them into the dip mixture. Season generously with salt, black pepper, and chilli flakes, tasting as you go — the dip should be well-seasoned and slightly more assertively flavored than seems correct at room temperature, as the flavor mellows slightly during baking.
  8. Bake the dip. Transfer the dip to a 20–23cm (8–9 inch) oven-safe skillet, cast-iron pan, or baking dish. Smooth the top with a spatula. Arrange the remaining whole or halved artichoke heart quarters across the surface of the dip, pressing them slightly into the surface so they are partially submerged and will roast directly on top. Drizzle the extra-virgin olive oil generously over the entire surface. Scatter with chilli flakes. Bake for 18–20 minutes until the dip is hot throughout and bubbling around the edges. Switch to grill (broiler) mode on high for 3–4 minutes until the surface is golden and spotted with dark patches and the artichoke hearts on top are lightly caramelized. Watch closely under the grill.
  9. Serve immediately. Remove from the oven and scatter with fresh parsley or basil. Serve in the skillet or baking dish, directly at the center of the table, with the pita chips arranged around it and lemon wedges on the side. The dip is best eaten hot; it can be re-baked at 180°C (355°F) for 10 minutes if it cools before everyone has finished.

Pro Tips

  • Blend the cashews until they are completely, perfectly smooth — any residual grittiness in the cashew cream will be noticeable in the finished dip. If your blender is not powerful enough to produce a completely smooth result, soak the cashews in boiling water for 30 minutes before blending and blend for an extra minute. A Vitamix or similar high-powered blender produces the best result; a standard blender needs longer blending time and may require additional water.
  • Squeeze frozen spinach aggressively — frozen spinach releases a large volume of water when thawed, and any water left in the spinach goes directly into the dip and makes it loose and watery rather than thick and creamy. Thaw completely, then wrap in a clean kitchen towel and squeeze over the sink as hard as you can, twisting the towel tighter and tighter, until no more water comes out. The spinach should feel almost dry to the touch.
  • Use oil-packed marinated artichoke hearts, not water-packed — the oil-packed version has already been seasoned with herbs and garlic during marination, giving the artichoke hearts a flavor complexity that water-packed artichokes (which taste of almost nothing) cannot match. Drain them thoroughly but do not rinse — the herby residue from the marinade adds to the dip.
  • Let the pita chips cool completely before serving — pita chips crisp as they cool, and chips served straight from the oven feel slightly leathery rather than shatteringly crisp. Make them 15–20 minutes before the dip goes in the oven, spread on the baking sheet to cool, and they will be at peak crispness when the dip is ready.

Spinach and Artichoke: Two Ancient Ingredients, One Modern Classic

The hot spinach and artichoke dip as a dish is a surprisingly recent invention — it appears in American restaurant menus primarily from the 1980s and 1990s, associated most closely with the Applebee’s chain (which popularized it nationally in the United States during the 1990s) and the broader casual dining boom of that decade, when sharing appetizers became a central feature of the restaurant experience in ways they had not been before. But its two central ingredients carry histories that stretch back thousands of years and across multiple continents. Spinach (Spinacia oleracea) originated in ancient Persia (modern Iran), where it was cultivated by at least 400 CE; Arab traders carried it westward along trade routes into the Mediterranean, where it arrived in Spain in the eleventh century under the Moorish occupation and spread through European cooking in the medieval period. Catherine de’ Medici, the Florentine noblewoman who married King Henry II of France in 1533, reportedly brought a team of Florentine cooks with her to the French court — cooks who specialized in Florentine spinach preparations — and dishes described as à la Florentine (with spinach) entered the French culinary lexicon as a direct result. The artichoke (Cynara scolymus) is a cultivated form of the wild cardoon, a thistle native to the Mediterranean basin and the Canary Islands, and was bred into its modern, edible form by Arab or Berber agriculturalists in North Africa or Sicily sometime in the medieval period — the first clear European references to the cultivated artichoke appear in Naples and Florence in the fifteenth century, and by the sixteenth century it had spread through European courts and gardens, arriving in Louisiana with French settlers in the eighteenth century and eventually becoming a signature crop of the California coast. The combination of these two ancient, widely traveled ingredients in a hot, creamy, shareable dip is a distinctly American creation — and the vegan version of it, made with cashew cream instead of dairy, may be the form in which both ingredients finally reach their fullest, most harmonious expression.


Flavor Variations

  • Vegan Jalapeño Spinach & Artichoke Dip: Add 2 finely minced pickled jalapeños (seeds removed for medium heat, seeds in for hot) to the aromatics when cooking the garlic. The jalapeño’s sharp, vinegary heat cuts through the richness of the cashew cream and adds a lively, punchy quality to the dip that is particularly good with plain tortilla chips alongside the pita.
  • Vegan White Bean Spinach & Artichoke Dip: Replace half the cashew cream (100g cashews) with one drained and rinsed can (400g) of white cannellini beans, blended smooth with the same seasonings. The cannellini beans add body, protein, and a slightly earthier flavor than cashews alone, and make the dip more substantial — better suited as a light meal than a party starter. White beans also produce a dip with a lower fat content than the all-cashew version.
  • Vegan Spinach, Artichoke & Sun-Dried Tomato Dip: Add 60g (¼ cup) of finely chopped oil-packed sun-dried tomatoes to the dip mixture before baking. The sun-dried tomatoes add an intensely concentrated, sweet-tart tomato note that runs through the creaminess of the cashew base and gives the finished dip a slightly Mediterranean character — particularly good when the pita chips are made with za’atar instead of oregano.

Nutritional Highlights (Per Serving — Based on 8 Servings, Including Pita Chips)

CaloriesProteinCarbsFiberFat
~340 kcal10g28g5g21g

Storage

  • Refrigerator: The baked dip keeps in the refrigerator for up to 4 days in a sealed container. The texture thickens as it cools; reheat in the oven at 180°C (355°F) for 12–15 minutes (or in the microwave in 60-second bursts, stirring between each), adding a splash of plant milk if needed to loosen. A final 2 minutes under the grill after reheating restores the golden, blistered surface.
  • Make-ahead (unbaked): The dip mixture (without the topping artichoke hearts) can be assembled up to 24 hours in advance and refrigerated, covered, in its baking dish. Remove from the refrigerator 20 minutes before baking to take the chill off, then top with the reserved artichoke hearts and bake as directed.
  • Freezer: The baked dip freezes well for up to 2 months. Freeze in a sealed container, thaw overnight in the refrigerator, and reheat as above. The texture may be slightly looser after freezing and thawing; stir vigorously after reheating to re-emulsify.
  • Pita chips: Store in a sealed container at room temperature for up to 3 days. They maintain their crispness well. Do not refrigerate (humidity from the refrigerator softens them).

Frequently Asked Questions

Can I make this without a high-powered blender?

Yes, but the cashew soaking time matters more. If using a standard blender, soak the cashews in boiling water for a full 30–40 minutes rather than 20, drain and rinse, and blend for 4–5 minutes, stopping to scrape down the sides every minute. Add water 1 tablespoon at a time if the blender is struggling. The result may have a very slightly less silky texture than a high-powered blender produces, but it will be smooth enough for a dip where other ingredients (spinach, artichoke) provide texture and mask any slight graininess.

Can I use store-bought vegan cream cheese instead of making cashew cream?

Yes — 300g (approximately 10oz) of store-bought vegan cream cheese (Violife, Oatly, or Kite Hill) can replace the cashew cream entirely for a simpler, faster version. Mix it with the nutritional yeast bloom, add the aromatics and vegetables, and bake as directed. The result is tangier and slightly firmer than the cashew version and has a very convincing cream cheese character. The cashew version is worth the extra step when you want something lighter and more neutral in flavor.

My dip came out watery — what went wrong?

The most common cause is insufficiently dried spinach — either fresh spinach that retained too much cooking liquid, or frozen spinach that was not squeezed thoroughly enough before use. A watery dip can usually be salvaged by returning it to the oven for an additional 10–15 minutes uncovered, which evaporates the excess liquid. For future batches, squeeze cooked or thawed spinach with maximum force using a clean kitchen towel, and drain the artichoke hearts on paper towels for 5 minutes before chopping.

What else can I serve this dip with besides pita chips?

The dip is excellent with: toasted sourdough baguette slices; corn tortilla chips (a natural gluten-free option); vegetable crudités (celery sticks, cucumber rounds, carrot batons, and radishes all work well — the cool, fresh crunch of raw vegetables against the hot, creamy dip is a particularly good contrast); roasted sweet potato rounds; or endive leaves, which are boat-shaped and function as natural scoops.


Tried this recipe? Leave a comment below and let us know how it turned out! Tag us on Instagram and Facebook — we love seeing your plant-powered creations. Looking for more addictive vegan snack and appetizer recipes? Browse all recipes on Easy Vegan Recipes — new recipes posted every single week!

Vegan Eggplant Pizzas — The Most Satisfying Most Flavor-Packed Low-Carb Plant-Based Pizza You Will Ever Make Without a Single Gram of Dough

vegan eggplant pizzas

There is a particular kind of cooking achievement that happens when you take an ingredient that most people think of as a supporting player — a background vegetable, the kind that disappears into sauces and stews and casseroles — and build an entire dish around it in a way that makes it undeniably, convincingly the star. This is what happens with Vegan Eggplant Pizzas. Each pizza begins as a thick round slice of eggplant, cut from the widest part of the bulb where the flesh is most substantial — a cross-section approximately 2cm (¾ inch) thick that, after roasting, becomes something almost miraculous: the exterior slightly caramelized and gently crisped, the interior collapsed into a dense, meaty, deeply savory flesh that has shed nearly all its water and concentrated into something with genuine substance, genuine chew, and a richness of flavor that makes it a more satisfying pizza base than many bread-based alternatives. On top of this roasted eggplant base goes a spoonful of quick-cooked tomato sauce that is spiked with garlic and dried oregano and basil and a small amount of red pepper flakes; then a generous layer of cashew mozzarella or store-bought vegan mozzarella that melts across the surface and bubbles at the edges; then whatever toppings you choose — olives, sun-dried tomatoes, roasted peppers, capers, fresh basil, marinated artichoke hearts, thinly sliced red onion — and then a final 5 minutes under the highest heat of the oven or a 2-minute pass under the grill to blister the cheese and char the tomato sauce at the edges into those slightly caramelized, slightly sweet, slightly smoky dark spots that are the signature of a genuinely good pizza. The whole thing is on the table in 35 minutes, is naturally gluten-free, is completely plant-based, is low in carbohydrates, and delivers every element of a great pizza experience — sauce, melted cheese, layered toppings, herb fragrance, the slight char of the oven — on a base that is more flavorful, more nutritious, and more interesting than most pizza doughs.

The secret is the pre-roast salt-draw technique. Eggplant is approximately 92% water by weight, which means that an eggplant slice cooked without preparation releases an enormous amount of liquid during cooking — liquid that steams the base from below rather than allowing it to crisp, leaving the finished eggplant soft, slightly waterlogged, and too yielding to hold its toppings without collapsing. The pre-roast salt-draw technique solves this by drawing out a significant portion of that moisture before the oven ever gets involved: the eggplant slices are laid on a wire rack, salted generously on both sides, and left to stand for 20–30 minutes. The salt creates an osmotic gradient across the cell walls of the eggplant, drawing water out of the cells and onto the surface of the slice — visible as beads of grey-tinged liquid that accumulate on the surface and drip from the edges. After 20–30 minutes, the slices are pressed firmly with paper towels or a clean kitchen cloth to remove the drawn-out liquid, rinsed very briefly under cold water to remove the excess salt, and pressed again until as dry as possible. The difference in the roasting outcome is dramatic: a salted-and-pressed eggplant slice roasts into a dense, substantially firmer base with caramelized edges and a concentrated meaty interior; an unsalted slice softens and steams and produces a pizza base that is pleasant but unstructured. The salt-draw step adds 20–30 minutes of passive time (during which the tomato sauce can be made and the toppings prepared) and is the single most important technique decision in the recipe.

What makes this recipe so outstanding is the double-heat finish. After the first roast (20–22 minutes at high heat to cook the eggplant through and establish the base), the toppings are added and the pizzas go back into the oven at its highest setting — typically 220–230°C (430–445°F) — for 8–10 minutes, then the grill (broiler) is turned on for the final 2 minutes. This two-stage topping cook achieves two separate goals: the oven heat melts and integrates the cheese into the tomato sauce so the two components become one unified layer rather than sitting separately on the base; and the grill at the end provides the direct, intense top heat that blisters the cheese surface and chars the edges of the tomato sauce into those dark, caramelized spots that no amount of oven heat alone can fully replicate. Without the grill finish, the cheese is melted but pale; with it, the surface has the visual and flavor character of a pizza that has been cooked in a hot stone oven. It is a 2-minute step that makes the finished dish look and taste dramatically more like a real pizza than without it.

This recipe is 100% vegan, dairy-free, egg-free, and naturally gluten-free. It serves 2 as a main course (3–4 eggplant pizza rounds per person) or 4 as a substantial starter.


Recipe Information

Prep TimeCook TimeTotal TimeServingsCalories
10 mins30 mins40 mins (+ 20 min salt-draw)2–4 servings~310 kcal

Ingredients

For the Eggplant Bases

  • 2 large eggplants (aubergines), approximately 700g–800g total weight — choose the fattest, most evenly cylindrical eggplants available; a wider diameter means more usable pizza-round slices from the widest section of each eggplant; thinner eggplants produce rounds too small to function as a pizza base
  • 1½ tsp fine salt, for the salt-draw
  • 3 tbsp olive oil (for brushing before roasting — use a brush or your hands to coat both sides of each slice generously; an under-oiled eggplant slice roasts dry and tough)
  • Black pepper, to taste
  • ½ tsp garlic powder (optional, brushed onto the slices with the olive oil before roasting — adds a subtle background savoriness to the base)

For the Quick Pizza Sauce

  • 2 tbsp olive oil
  • 3 garlic cloves, finely minced (or ½ tsp garlic powder if pressed for time — fresh garlic is significantly more aromatic but the sauce is quick enough that it doesn’t cook long enough to fully mellow)
  • 1 can (400g / 14oz) crushed tomatoes or passata
  • 1 tsp dried oregano
  • ½ tsp dried basil
  • ¼ tsp red pepper flakes (optional — adds warmth without making the sauce spicy)
  • 1 tsp sugar or maple syrup (balances the acidity of canned tomatoes; omit if using a good-quality sweet passata)
  • Salt and black pepper, to taste

For the Vegan Cheese Layer

  • 200g (7oz) store-bought vegan mozzarella (Violife, Sheese, Miyoko’s, or any brand that melts well — block-style vegan mozzarella, grated or sliced, melts more convincingly than pre-shredded; pre-shredded often contains anti-caking agents that inhibit melting); OR use the cashew mozzarella from this site’s Vegan Mozzarella recipe for a completely homemade version
  • Optional: 2 tbsp vegan parmesan (store-bought or nutritional yeast mixed with cashew powder and salt) for additional savory depth on top of the mozzarella

For the Toppings (Choose Any Combination)

  • A small handful of pitted black or green olives, halved
  • 6–8 sun-dried tomato halves (oil-packed, drained) — these caramelize further under the grill and add an intensely concentrated tomato note
  • ½ roasted red pepper (jarred is fine), sliced into thin strips
  • 1 tbsp capers, drained and rinsed
  • ¼ small red onion, very thinly sliced into rings
  • 4–6 marinated artichoke heart halves
  • A small handful of fresh baby spinach leaves (added for the last 3 minutes of oven time only — they wilt quickly)

For Finishing

  • A generous handful of fresh basil leaves, torn (added after the grill — heat destroys basil’s volatile aromatics; it must be added at the very last moment)
  • Chilli flakes, to taste
  • A drizzle of extra-virgin olive oil
  • Optional: a drizzle of balsamic glaze

Instructions

  1. Salt-draw the eggplant. Slice each eggplant crosswise into rounds approximately 2cm (¾ inch) thick, discarding the very top and bottom pieces (the cap end and the narrow tail, which are too small and too thin to function well as pizza bases). You should get approximately 6–8 usable rounds from two large eggplants — aim for the widest rounds from the center of each eggplant. Lay the rounds in a single layer on a wire rack set over a baking sheet (or directly on the baking sheet lined with paper towels). Sprinkle both sides generously with the fine salt — approximately ¼ teaspoon per side per slice. Leave to stand at room temperature for 20–30 minutes; you will see moisture bead on the surface and drip from the edges. After 20–30 minutes, press each slice firmly on both sides with paper towels or a clean kitchen cloth to absorb the drawn-out liquid, rinse very briefly under cold water to remove excess salt, and press again until as dry as possible.
  2. Make the pizza sauce. While the eggplant draws, heat 2 tablespoons of olive oil in a small saucepan over medium heat. Add the minced garlic and cook for 60 seconds, stirring constantly, until fragrant and just barely turning golden — do not allow it to brown. Add the crushed tomatoes, dried oregano, dried basil, red pepper flakes, sugar or maple syrup, salt, and black pepper. Stir to combine and cook at a gentle simmer for 10–12 minutes, stirring occasionally, until the sauce has thickened slightly and the flavors have melded. The sauce should be thick enough to spread onto the eggplant base without running immediately off the edges — if it is too thin, simmer for 2–3 further minutes uncovered. Remove from heat and set aside.
  3. Roast the eggplant bases. Preheat the oven to 220°C (430°F) fan, or 230°C (445°F) conventional. Line a large baking sheet with parchment paper. Arrange the dried eggplant rounds in a single layer on the baking sheet. Brush both sides of each round generously with olive oil (and garlic powder if using). Season with black pepper. Roast for 20–22 minutes, flipping once at the 12-minute mark, until the eggplant is completely cooked through, the cut surfaces are golden-caramelized, and the rounds feel dense and substantially firmer than raw eggplant — they should not be soft and waterlogged, but genuinely firm and concentrated. Remove from the oven.
  4. Top the eggplant pizzas. Spoon 1–2 tablespoons of pizza sauce onto each eggplant round and spread to within 5mm of the edge using the back of the spoon. Top each round with a generous layer of vegan mozzarella (grated or sliced). Add your chosen toppings, distributing them evenly but not overcrowding — too many toppings prevent the cheese from melting properly and make the base collapse under the weight.
  5. Double-heat finish. Return the topped eggplant pizzas to the oven at its highest setting (220–230°C / 430–445°F) and bake for 8–10 minutes until the cheese is melted and the sauce is bubbling around the edges. Then switch the oven to grill (broiler) mode and grill on high for 2–3 minutes, watching closely, until the cheese surface is blistered and spotted with golden-brown patches and the edges of the tomato sauce are dark and caramelized. Remove immediately — the grill finish happens quickly and the difference between perfectly charred and burnt is about 60 seconds.
  6. Serve. Transfer the eggplant pizzas to a serving board or plates using a wide spatula. Scatter torn fresh basil generously over all the rounds. Add a pinch of chilli flakes, a drizzle of good extra-virgin olive oil, and a drizzle of balsamic glaze if using. Serve immediately — eggplant pizzas are best eaten hot from the oven.

Pro Tips

  • Choose the fattest eggplants you can find — the diameter of the eggplant determines the size of your pizza base, and a wide, substantial round is significantly more satisfying and more structurally stable than a narrow one. Farmer’s market eggplants are often fatter and firmer than supermarket specimens; in season (summer and early autumn), they are also less bitter and require less salt-drawing time.
  • Don’t skip the flip during roasting — flipping the eggplant rounds at the 12-minute mark ensures both cut surfaces caramelize evenly, producing a base that is equally firm and flavorful on the top and the bottom rather than browned on one side and pale on the other.
  • Keep the sauce thick — a sauce that is too thin will make the eggplant base soggy during the topping cook. The sauce should be spreadable but thick, closer to a paste than a pourable liquid. Cooking it for the full 10–12 minutes rather than just 5 makes a meaningful difference.
  • The grill finish is not optional — it is what distinguishes these from baked eggplant with cheese on top and makes them convincingly pizza-like. Watch them under the grill with the oven door slightly ajar and remove at the first sign of significant golden spotting on the cheese surface. The line between perfectly blistered and overcooked is approximately 90 seconds at the end.

Eggplant: From Ancient Persia to the Vegan Pizzeria

Eggplant (Solanum melongena) has one of the longest and most geographically sweeping cultivation histories of any vegetable in the modern kitchen — a plant that originated in the wild in the Indian subcontinent (where it still grows wild in several forms), was first cultivated in India and China at least 1,500 years ago, traveled westward through Persia and into the Arab world during the medieval period, and arrived in Mediterranean Europe via Moorish Spain and Arab Sicily in the eighth and ninth centuries, where it was received with spectacular suspicion. Medieval European scholars were deeply distrustful of the eggplant: it was classified in European botanical literature as a member of the nightshade family (correct — it is, alongside tomatoes, peppers, and potatoes), associated with madness and melancholy (the Italian name melanzana was popularly derived from mela insana, “mad apple,” though the actual etymology traces to the Arabic al-badingan), and largely avoided as a food until the sixteenth century, when improved cultivars and changing culinary attitudes began to bring it into southern Italian cooking. Its rehabilitation was rapid and thorough: by the eighteenth century, eggplant was a staple of Sicilian cooking (caponata, pasta alla norma), of Greek cooking (moussaka, imam bayıldı), of Turkish and Levantine cooking (where it appears in dozens of forms — stuffed, smoked into baba ganoush, fried, braised), and of the French Provençal tradition (ratatouille). The particular affinity between eggplant and tomato — the pairing at the heart of every eggplant pizza — is a historically recent combination that required the tomato’s own tortuous journey from South America to European tables (the tomato arrived in Europe in the sixteenth century, was treated with equal suspicion as a nightshade relation, and was not accepted as a cooking ingredient in most of southern Italy until the eighteenth century). The eggplant pizza in this recipe is therefore the product of ingredients that crossed the world, spent centuries being feared, and eventually found each other in the most satisfying possible way.


Flavor Variations

  • Vegan Margherita Eggplant Pizzas: Keep it simple — pizza sauce, vegan mozzarella, and fresh basil only. No additional toppings. The restraint focuses the dish entirely on the quality of the roasted eggplant base, the sauce, and the cheese, which is an excellent composition when each element is made carefully. A drizzle of the best extra-virgin olive oil you have and a grind of black pepper are the only finishes needed.
  • Vegan Greek-Style Eggplant Pizzas: Top with pizza sauce, vegan feta (crumbled over the mozzarella base), Kalamata olives, sliced cherry tomatoes, thinly sliced red onion, and fresh oregano instead of basil. The combination of tangy vegan feta, briny olives, and sweet roasted tomatoes against the eggplant base is a Mediterranean composition that feels completely cohesive and deeply satisfying.
  • Vegan Pesto and Roasted Vegetable Eggplant Pizzas: Replace the tomato sauce entirely with a layer of vegan basil pesto (store-bought or homemade), then top with vegan mozzarella, roasted courgette ribbons, roasted cherry tomatoes, and pine nuts. The pesto base gives the finished pizza a bright, herby, more intensely aromatic character than the tomato version and is particularly good in summer when basil is at its peak.

Nutritional Highlights (Per Serving — Based on 4 Servings)

CaloriesProteinCarbsFiberFat
~310 kcal8g22g7g21g

Storage

  • Refrigerator: Leftover eggplant pizzas keep in the refrigerator for up to 3 days, covered or in a sealed container. The base softens slightly overnight but the flavor deepens and the toppings meld together in a way that makes day-two eggplant pizzas genuinely delicious in their own right.
  • Reheating: Reheat in a hot oven (200°C / 390°F) for 6–8 minutes rather than in the microwave, which makes the eggplant base soggy. A few minutes under the grill at the end of reheating restores the blistered cheese surface almost to fresh-baked quality.
  • Meal prep: The roasted eggplant bases and the pizza sauce can both be prepared up to 2 days in advance and refrigerated separately. On the day of serving, add the toppings and do the double-heat finish — total time from refrigerator to table is under 15 minutes when the components are pre-made.
  • Freezer: The roasted (unsauced, untopped) eggplant rounds freeze well for up to 1 month. Freeze in a single layer on a baking sheet, then transfer to a bag. Reheat directly from frozen at 200°C (390°F) for 10 minutes before topping and finishing.

Frequently Asked Questions

Do I really need to salt the eggplant for 20–30 minutes? Can I skip it?

Technically yes, you can skip it — but the result will be noticeably inferior. Unsalted eggplant releases its water content during roasting, which steams the rounds from within and prevents the exterior from caramelizing properly, leaving a softer, less structured base. The salt-draw step is passive (it requires no active work), and the 20–30 minutes of waiting time is the perfect window to make the pizza sauce and prepare the toppings. Skipping it to save time costs you the texture that makes the recipe work.

Which vegan mozzarella melts best for this recipe?

Block-style vegan mozzarella, grated at home, consistently outperforms pre-shredded bags because the grating exposes more surface area (faster, more even melting) without the anti-caking agents that prevent pre-shredded cheese from flowing and stretching when hot. Violife block mozzarella, Miyoko’s Fresh Vegan Mozzarella, and Sheese Mozzarella Style are all reliable melters. Under the grill, any of these will blister and spot convincingly.

My eggplant base is still too soft — what went wrong?

Three common causes: the eggplant was not salted and pressed thoroughly enough before roasting (the salt-draw step is the primary safeguard against a waterlogged base); the oven was not hot enough (this recipe requires a genuinely hot oven — 220°C / 430°F fan at minimum; if your oven runs cool, it may need 230°C or an additional 3–4 minutes); or the rounds were too thick (rounds thicker than 2.5cm / 1 inch take significantly longer to cook through and may remain undercooked in the center even when the surface looks done). For thicker rounds, add 4–5 minutes to the first roasting time.

Can I cook these on a barbecue instead of in the oven?

Yes — eggplant pizzas are excellent on the barbecue. Grill the salted-and-pressed eggplant rounds directly on an oiled, hot grill for 4–5 minutes per side until clearly marked and cooked through, then add the toppings, close the barbecue lid, and cook for a further 4–5 minutes until the cheese melts. The barbecue smoke adds an additional layer of flavor that is particularly good with the olive and sun-dried tomato topping combination.


Tried this recipe? Leave a comment below and let us know how it turned out! Tag us on Instagram and Facebook — we love seeing your plant-powered creations. Looking for more addictive vegan snack and appetizer recipes? Browse all recipes on Easy Vegan Recipes — new recipes posted every single week!

Vegan Black Forest Cheesecake Symphony — The Most Dramatic Most Deeply Flavored Plant-Based Dessert You Will Ever Assemble

vegan black forest cheesecake symphony

Some desserts are made to be eaten. And then there are desserts like this one — made to be looked at first, for a long, quiet moment, before the first slice is cut, because the visual composition is so precisely what a great dessert should look like that it deserves that moment of recognition. The Vegan Black Forest Cheesecake Symphony is a no-bake cheesecake of the highest order: a base of dark chocolate Oreo crumbs pressed into a firm, glossy crust; a filling of cream-white cashew cheesecake that is so silky, so creamy, and so perfectly set that it slices cleanly and holds its shape with the composed confidence of a professional patisserie product; a layer of intensely flavored dark cherry compote spooned across the surface in a deep, jewel-red pool that bleeds at the edges into the white cheesecake in the most beautiful possible way; a crown of coconut whipped cream piped in tall swirls around the perimeter; and a finish of dark chocolate shavings, fresh or maraschino cherries placed precisely on each cream swirl, and a final dusting of raw cacao powder that gives the whole composition a dark, dramatic quality that makes it look as though it came from a restaurant that takes dessert very seriously. It is, in the most honest possible sense, a showstopper — and it delivers on every visual promise in flavor, because every element is made with enough care and enough intention that the result is not merely beautiful but genuinely extraordinary to eat.

The secret is the freeze-set cashew technique. No-bake cheesecakes made from cashew cream are a staple of plant-based cooking, but most recipes produce a result that is either too soft (the cheesecake collapses when sliced) or too dense (the filling is more like a thick fudge than a creamy cheesecake). The freeze-set cashew technique solves both problems simultaneously by using a two-stage setting process: the cashew cheesecake filling — blended until completely smooth with coconut cream, lemon juice, coconut oil, maple syrup, and vanilla — is poured into the prepared crust and placed in the freezer for 2 hours, not the refrigerator. The freezer sets the cheesecake far more rapidly and far more firmly than the refrigerator, allowing the coconut oil (which is solid below approximately 24°C / 76°F and becomes more firmly set as the temperature drops) to create a stable matrix through the cashew cream that holds a clean slice even at serving temperature. After 2 hours in the freezer, the cheesecake is transferred to the refrigerator for at least 4 hours (or overnight) before serving — this second stage allows the cheesecake to soften from the fully frozen state back to a serving temperature that is cold but not icy, with a texture that is simultaneously firm enough to slice cleanly and soft enough to feel luxurious and creamy on the palate rather than dense and cold. The freeze-set is the difference between a no-bake cheesecake that slides onto a plate in a clean, knife-sharp slice and one that collapses and spreads and requires a fork and a forgiving attitude. It is the single most important technique decision in the entire recipe.

What makes this recipe so outstanding is the dark cherry kirsch compote — a quick-cooked compote of pitted dark cherries (fresh, frozen, or jarred in juice, not in syrup) cooked with a small amount of sugar, cornstarch, vanilla, and — the defining detail — a tablespoon of kirsch (the clear cherry brandy that is the defining spirit of the Black Forest tradition, and that is naturally vegan). The kirsch’s volatile aromatic compounds include many of the same flavor molecules found in fresh cherries (specifically benzaldehyde, the compound responsible for the almond-like, intensely floral note in ripe dark cherries) but at a higher concentration and with an additional complexity from the fermentation and distillation process, so a single tablespoon added to the compote at the end of cooking amplifies and extends the cherry flavor in a way that no additional cherry itself could achieve. The compote is thickened with a small amount of cornstarch to a consistency that is glossy and just barely flowing — thick enough to sit on top of the cheesecake without running down the sides, but fluid enough to pool beautifully across the white surface and create the visual contrast that is central to the Black Forest aesthetic. If kirsch is not available or not desired (this recipe works without it), substitute 1 tablespoon of cherry juice from the jar plus ½ teaspoon of almond extract, which approximates the flavor profile closely.

This recipe is 100% vegan, dairy-free, egg-free, and naturally gluten-free (verify that the Oreos used are certified gluten-free if required, as standard Oreos contain wheat). It serves 10–12 from a standard 23cm (9 inch) springform pan and is best made the day before serving, making it the ideal dinner party centerpiece.


Recipe Information

Prep TimeCook TimeTotal TimeServingsCalories
30 mins10 mins40 mins (+ 6 hrs setting)10–12 slices~510 kcal

Ingredients

For the Dark Chocolate Oreo Crust

  • 300g (10oz / approximately 25 cookies) Oreo cookies or chocolate sandwich cookies (the filling can stay in — it adds binding and a subtle vanilla note to the crust; removing it produces a crunchier, more purely chocolate result)
  • 80g (⅓ cup) vegan butter or refined coconut oil, melted
  • Pinch of fine salt

For the Cashew Cheesecake Filling

  • 300g (2 cups) raw cashews, soaked in cold water for 6–8 hours (or in boiling water for 1 hour), then drained and rinsed thoroughly (thorough soaking is essential — under-soaked cashews produce a slightly grainy filling rather than the perfectly smooth, silky texture the recipe requires; if using a high-powered blender, 1 hour in boiling water is sufficient)
  • 1 can (400ml / 14oz) full-fat coconut cream, refrigerated overnight (use only the thick cream from the top of the chilled can, leaving the liquid behind — the fat content of the thick cream is what gives the filling its richness and its ability to set firmly)
  • ½ cup (120ml) refined coconut oil, melted (solid below 24°C / 76°F — this is the primary setting agent in the cheesecake; do not substitute with olive oil or any other liquid oil that will not solidify on chilling)
  • ½ cup (120ml) pure maple syrup (adjust by 1–2 tablespoons to taste — the filling should be pleasantly sweet but not cloying, and should allow the lemon’s tartness to be the defining flavor note alongside the cashew’s creaminess)
  • Juice of 2 lemons (approximately 80ml / ⅓ cup) — the acidity is what gives cashew cheesecake its characteristic tang; without enough lemon, the filling tastes simply of blended cashews rather than of cheesecake
  • 1 tsp vanilla extract
  • ¼ tsp fine salt
  • 1 tsp lemon zest (optional but adds a brighter, more aromatic citrus note to the filling)

For the Dark Cherry Kirsch Compote

  • 400g (14oz) pitted dark cherries — fresh and pitted (in season), or frozen (thawed and drained of excess liquid), or jarred in juice (drained, not in syrup which is too sweet)
  • 3 tbsp caster sugar or coconut sugar
  • 1 tbsp cornstarch mixed with 2 tbsp cold water (the slurry — must be mixed cold to prevent lumping; add to the hot compote while stirring)
  • 1 tbsp kirsch (clear cherry brandy — the Black Forest’s defining spirit; substitute 1 tbsp cherry juice + ½ tsp almond extract if preferred or unavailable)
  • ½ tsp vanilla extract
  • Pinch of fine salt

For the Coconut Whipped Cream

  • 2 cans (2 × 400ml / 14oz) full-fat coconut cream, refrigerated overnight (two cans for a generous crown of piped cream — one can produces enough for a thin border only)
  • 2 tbsp powdered sugar (icing sugar), sifted
  • ½ tsp vanilla extract

For the Black Forest Finish

  • 80g (3oz) vegan dark chocolate (70%+ cocoa), shaved or grated using a vegetable peeler or the large holes of a box grater — large, curling shavings look infinitely more dramatic than finely grated chocolate
  • 10–12 fresh dark cherries with stems (for placing on the cream swirls — one per slice), or maraschino cherries
  • 1 tbsp raw cacao powder or cocoa powder, for dusting through a fine sieve
  • Optional: a few edible gold leaf flakes or edible rose petals for additional visual drama

Instructions

  1. Make the crust. Line the base of a 23cm (9 inch) springform pan with parchment paper and lightly grease the sides. Place the Oreo cookies in a food processor and process until they are fine crumbs with no visible cookie pieces (approximately 30–40 seconds); alternatively, place them in a sealed zip-lock bag and crush thoroughly with a rolling pin. Transfer the crumbs to a bowl, add the melted vegan butter and salt, and mix until every crumb is evenly moistened and the mixture holds together when pressed between two fingers. Tip the crumb mixture into the prepared pan and press it firmly and evenly across the base and approximately 2–3cm up the sides using the bottom of a flat glass or measuring cup — the more firmly it is pressed, the cleaner and more structural the crust will be. Freeze the crust for 15 minutes while preparing the filling.
  2. Make the cashew cheesecake filling. Drain and rinse the soaked cashews thoroughly. Place them in a high-powered blender with the thick coconut cream, melted coconut oil, maple syrup, lemon juice, vanilla extract, salt, and lemon zest (if using). Blend on the highest speed for 3–4 minutes, stopping to scrape down the sides twice, until the filling is completely smooth and silky with no visible cashew granules — run a small amount between your fingers; it should feel like thick cream, not gritty at all. If any grittiness remains, blend for a further 2 minutes. Taste and adjust: more lemon juice for tang, more maple syrup for sweetness. Pour the filling over the frozen crust, smooth the top with a palette knife or the back of a spoon, and tap the pan gently on the counter a few times to release any air bubbles.
  3. Freeze-set the cheesecake. Place the pan in the freezer for a minimum of 2 hours, or until the surface of the cheesecake is firm to the touch and does not dent when pressed lightly. Transfer to the refrigerator and leave for at least 4 further hours — overnight is ideal. Do not attempt to add the compote or cream until the cheesecake has completed both the freeze stage and the refrigerator stage; adding toppings to a partially set cheesecake causes them to sink into the surface.
  4. Make the dark cherry kirsch compote. Combine the pitted cherries and sugar in a small saucepan over medium heat. Cook, stirring occasionally, for 5–6 minutes until the cherries have released their juices and the sugar has dissolved — if using frozen cherries that have released a lot of liquid, cook for 2–3 additional minutes to reduce the liquid slightly before adding the cornstarch slurry. Stir the cornstarch slurry (mixed in cold water) into the hot cherry mixture while stirring constantly; the compote will thicken within 30–60 seconds of adding the slurry. Remove from heat and stir in the kirsch, vanilla, and salt. Cool completely before using — a warm compote will soften the surface of the cheesecake.
  5. Make the coconut whipped cream. Scoop the thick coconut cream from the tops of both chilled cans into a large, chilled bowl. Beat on high speed for 2–3 minutes until fluffy and holding peaks. Add the powdered sugar and vanilla and beat for 30 further seconds. Transfer to a piping bag fitted with a large star tip (1M or 2D) and refrigerate until needed.
  6. Assemble the cheesecake. Remove the set cheesecake from the refrigerator. Carefully unclip and remove the springform ring, running a thin palette knife or offset spatula around the inside edge of the pan first if the cheesecake is sticking slightly. Place on a serving board or plate. Spoon the cooled cherry compote across the center of the cheesecake, allowing it to pool in the center and approach (but not overflow) the edge — leave approximately 2cm of white cheesecake visible as a border. Pipe the coconut whipped cream in large, tall swirls around the perimeter of the cheesecake, with the swirls sitting on the white cheesecake border rather than on the cherry compote.
  7. Apply the Black Forest finish. Scatter the dark chocolate shavings generously across the cherry compote in the center of the cheesecake and over the cream swirls. Place one fresh cherry with stem (or one maraschino cherry) on top of each cream swirl. Dust the entire surface lightly with cacao powder through a fine sieve. Add gold leaf or rose petals if using. Refrigerate until serving (the assembled cheesecake holds beautifully in the refrigerator for up to 3 hours after final decoration).
  8. Serve. Use a sharp knife, rinsed under hot water and wiped dry between each cut, to slice cleanly. Serve each slice on a chilled plate.

Pro Tips

  • Soak the cashews long enough — 6–8 hours in cold water (or 1 hour in boiling water) is the minimum for a completely smooth filling. Cashews soaked for less than 4 hours in cold water retain a grainy texture that even the most powerful blender will not fully eliminate. If you forgot to soak, cover with boiling water and leave for 90 minutes, then blend for an extra minute.
  • Use only the thick coconut cream from a chilled can — the watery liquid at the bottom of the can does not set or whip and will make the filling too loose. Always refrigerate the can overnight and use only the solidified cream from the top. If the can has not separated (some brands homogenize so well they do not separate), freeze the can for 1 hour before opening.
  • The kirsch is worth using — even a single tablespoon makes a profound difference to the cherry compote’s flavor depth and complexity. Most supermarkets stock it in the spirits section; a small bottle (200ml) lasts for many batches and is an invaluable pantry item for desserts in the Black Forest tradition.
  • Shave the chocolate rather than chop it — large, curling chocolate shavings produced by dragging a vegetable peeler across the flat surface of a slightly warmed chocolate bar (warm it in your hands for 30 seconds until the surface is very slightly tacky) look dramatic and professional; chopped chocolate chunks look rustic; finely grated chocolate disappears visually. The shavings are the easiest of the three to apply and produce the most striking result.

The Black Forest Cake: A German Tradition, a French Name, and a Disputed Origin

Schwarzwälder Kirschtorte — the original German dessert from which this cheesecake draws its flavors, its palette, and its name — is one of the most internationally recognized cakes in the world, and it carries within it a centuries-deep argument about who invented it and why it is called what it is called. The “Black Forest” in the name does not straightforwardly refer to the Schwarzwald — the heavily forested mountain range in Baden-Württemberg in southwestern Germany — though the region is indeed famous for its sour cherries (Morello cherries, which grow in the foothills of the Schwarzwald and are the traditional fruit used in the cake) and for kirsch production (the Schwarzwald produces some of Germany’s finest cherry brandy). The more compelling etymology traces the name not to the geography but to the traditional costume of the Schwarzwald region: the Bollenhut, the elaborate hat worn by unmarried women in certain Schwarzwald villages, is decorated with large, bright red pom-poms that directly evoke the cherries placed on each slice of the cake. The cake’s documented history begins in the early twentieth century: the first written recipe for Schwarzwälder Kirschtorte appears in a German cookbook in 1934, though Josef Keller, a confectioner working in Bad Godesberg, claimed to have created it in 1915. What is certain is that by the 1930s the cake was established enough to be considered a regional classic, and by the post-war decades it had traveled with German emigrants and German restaurant culture to every continent, becoming in the process one of the few German desserts with genuine global name recognition. This cheesecake translation keeps the defining flavor elements — dark chocolate, black cherry, kirsch, and cream — while replacing the sponge layers with a set cashew filling that delivers the same composition in a completely different and completely contemporary form.


Flavor Variations

  • Vegan White Chocolate Black Forest Cheesecake: Replace 100g of the cashews in the filling with 100g of melted vegan white chocolate for a filling that is slightly sweeter, more vanilla-forward, and ivory-colored rather than pure white — creating a striking color contrast with the dark cherry compote and the dark chocolate shavings that is even more dramatic than the standard version.
  • Vegan Black Forest Cheesecake Jars (Individual Portions): Layer the crumbled Oreo crust, cashew cheesecake filling, and cherry compote in individual serving jars (250ml mason jars are perfect) and refrigerate overnight. Top with coconut whipped cream, chocolate shavings, and a single cherry just before serving. Individual jars are ideal for dinner parties where pre-portioned desserts simplify service, and they present beautifully with the distinct layers visible through the glass.
  • Vegan Raspberry Black Forest Cheesecake: Replace the dark cherry compote with a raspberry compote made the same way (400g raspberries, 3 tbsp sugar, cornstarch slurry, lemon juice instead of kirsch) for a version with a brighter, sharper, more modern fruity character than the traditional sour cherry — still visually striking in the same deep red and white composition.

Nutritional Highlights (Per Slice — Based on 12 Slices)

CaloriesProteinCarbsFiberFat
~510 kcal9g46g3g33g

Storage

  • Refrigerator: The assembled cheesecake (without fresh cherry garnishes, which should be added at serving) keeps in the refrigerator for up to 4 days, covered loosely with plastic wrap or a cake dome. The filling and crust hold their texture very well; the cherry compote may weep very slightly after 48 hours but remains flavorful and visually acceptable.
  • Freezer (whole cheesecake): The set cheesecake can be frozen before the cherry compote and cream toppings are added (freeze until solid on a flat surface, then wrap tightly in two layers of plastic wrap and one layer of foil) for up to 1 month. Thaw overnight in the refrigerator and decorate on the day of serving.
  • Freezer (individual slices): Freeze individual slices on a parchment-lined tray until solid, then transfer to a freezer bag or sealed container for up to 1 month. The texture is excellent straight from the freezer (eaten very cold, like a frozen cheesecake bar) or after 30 minutes of thawing at room temperature.
  • Cherry compote: Keeps in a sealed jar in the refrigerator for up to 1 week. Also excellent spooned over vegan ice cream, stirred into oat porridge, or spread on toast.

Frequently Asked Questions

Why is my cheesecake filling not setting firmly?

The two most common causes are: the coconut oil was not in sufficient quantity or was substituted with a non-solidifying oil (the coconut oil is the primary setting agent — do not reduce the quantity or substitute it), or the cheesecake did not spend sufficient time in the freezer before being transferred to the refrigerator. The freeze stage is the critical first setting step; skipping it or shortening it significantly reduces the firmness of the final slice. If the cheesecake has been in the refrigerator for 6+ hours and is still too soft to slice cleanly, return it to the freezer for 1 hour before serving.

Can I use store-bought vegan cream cheese instead of cashews?

Yes — 500g of vegan cream cheese (Violife, Kite Hill, or Oatly brands all work well) can replace the soaked cashews. Use the same quantities of coconut oil, maple syrup, lemon juice, and vanilla, but reduce the coconut cream to ½ cup (as the cream cheese provides more body than raw cashews). Blend until smooth and proceed as described. The result has a tangier, more assertive cream cheese flavor and a slightly denser texture than the cashew version, but sets equally well and is a very good shortcut when soaking time is not available.

My Oreo crust is crumbling when I try to slice — what went wrong?

Crumbling crust is almost always caused by insufficient butter (the crumbs were too dry to bind) or insufficient pressing (the crust was not compacted firmly enough against the base of the pan). When pressed correctly, the crumb mixture should hold its shape when a small piece is pinched — if it crumbles between the fingers, add 1–2 more tablespoons of melted butter and mix again. Press the crust with the firmest possible pressure using the bottom of a flat glass, paying particular attention to the edges where crust meets sides.

Does this taste like a traditional Black Forest cake?

The flavor profile is unmistakably Black Forest: the combination of dark chocolate, sour cherries, kirsch, and cream is the same flavor composition as the original Schwarzwälder Kirschtorte, and all four elements are present and prominent in this cheesecake. The format is completely different — no layers of sponge cake soaked in kirsch syrup, no cream between the layers — but the experience of eating it delivers the same flavor memory as the original, and for many people the cashew cheesecake’s richer, creamier filling is an improvement on the sponge. What is unmistakably different is the lightness of texture: a traditional Black Forest cake is quite light and airy from the sponge; this cheesecake is denser and more decadent.


Tried this recipe? Leave a comment below and let us know how it turned out! Tag us on Instagram and Facebook — we love seeing your plant-powered creations. Looking for more addictive vegan snack and appetizer recipes? Browse all recipes on Easy Vegan Recipes — new recipes posted every single week!

Vegan Peanut Butter Cup Dump Cake — The Richest Most Indulgent Plant-Based Chocolate Dessert You Can Make in One Pan with Almost Zero Effort

vegan peanut butter cup dump cake

There is a category of baking that requires precision and patience and a clean kitchen and a certain kind of quiet focus — and it produces beautiful, technically impressive things. And then there is this Vegan Peanut Butter Cup Dump Cake, which requires almost none of those things and produces something that might be the most satisfying chocolate dessert in this entire recipe collection. A dump cake is exactly what the name suggests: you dump ingredients into a pan, in layers, without mixing, without creaming, without a stand mixer running, and without the particular anxiety that attends more demanding bakes — and what comes out of the oven is a self-assembling, molten-centered, deeply fudgy chocolate dessert with a caramelized, slightly crispy top, a gooey, brownie-like middle, and a bottom layer of warm, barely-set peanut butter that pools under the cake like the filling of a Reese’s cup and makes every spoonful a combination of intensely dark chocolate and salty, roasty peanut butter in the precise proportion that has made that flavor combination one of the most beloved in the history of confectionery. It is a dessert that takes 8 minutes to assemble and 35 minutes to bake, serves 8 people generously from a single 9×13 inch pan, and produces a result that people consistently describe as the best thing they have eaten in recent memory — which says something about what great flavor combinations can do even in the most technically undemanding format.

The secret is the reverse-layer dump method. Traditional dump cakes are assembled by layering ingredients in a specific order so that they self-assemble during baking without stirring: the liquid components sink, the dry components form a crust, and the fat melts and distributes through the layers as the whole thing bakes. The reverse-layer dump method used here takes this principle and applies it specifically to the peanut butter cup flavor pairing: the peanut butter layer goes in first (at the bottom of the pan, thinned with a small amount of coconut oil to make it pourable), then the dry chocolate cake mix layer is dumped directly over it without stirring, then the wet components (coconut milk and maple syrup) are poured evenly over the dry layer without mixing, and finally the vegan butter is distributed across the top in thin slices. During baking, the butter melts and absorbs into the dry cake layer from above while the coconut milk soaks up from below, and as the cake bakes, the peanut butter at the bottom heats and loosens and begins to rise through the cake in pockets and swirls, so that when the finished cake is spooned into bowls (this is a spoon-it-out dessert, not a slice-it-clean one), every portion has pockets of melted peanut butter dispersed through the fudgy chocolate cake rather than a uniform bottom layer. The peanut butter doesn’t fully incorporate — it remains distinct, in soft, warm pools — but it is present throughout the cake rather than just at the base, making each spoonful a genuine combination of both flavors rather than a bite of cake followed by a spoonful of peanut butter. This is the single technique decision that makes this dump cake taste like a peanut butter cup rather than simply a chocolate cake with peanut butter underneath it.

What makes this recipe so outstanding is the topping — a scatter of roughly chopped vegan dark chocolate (not chips, which are formulated to hold their shape and do not melt as freely, but a chopped bar of good-quality vegan dark chocolate, 70%+, which melts into irregular, intensely chocolatey pools across the surface of the cake as it bakes) and a drizzle of extra peanut butter that is added in the last 5 minutes of baking so that it softens and becomes glossy and slightly caramelized rather than raw. Served warm from the pan with a large scoop of vegan vanilla ice cream that melts immediately into the gooey cake and mingles with the peanut butter and chocolate, this is a dessert that is entirely greater than the sum of its parts and that consistently produces the particular silence that falls over a table when something is genuinely, unexpectedly excellent.

This recipe is 100% vegan, dairy-free, and egg-free. It is also, in the best possible way, almost entirely foolproof.


Recipe Information

Prep TimeCook TimeTotal TimeServingsCalories
8 mins35 mins43 mins8–10 servings~490 kcal

Ingredients

For the Peanut Butter Base Layer

  • ¾ cup (195g) natural peanut butter, smooth and well-stirred (natural, unsweetened — the oil content of natural peanut butter makes it looser and more pourable when warmed than commercial peanut butter; commercial peanut butter with palm oil and stabilizers works but produces a denser, less fluid base layer)
  • 2 tbsp refined coconut oil, melted (thins the peanut butter to a pourable consistency without adding flavor; refined coconut oil has no coconut taste, unlike virgin coconut oil)
  • 2 tbsp maple syrup
  • ¼ tsp fine salt

For the Dry Chocolate Cake Layer

  • 1½ cups (190g) all-purpose flour
  • 1 cup (200g) granulated sugar or coconut sugar (coconut sugar gives a slightly deeper, more caramel-like sweetness and a darker cake; granulated sugar gives a cleaner, brighter chocolate flavor)
  • ½ cup (45g) Dutch-process cocoa powder (Dutch-process cocoa is darker, less acidic, and more intensely chocolatey than natural cocoa and gives the cake its deep, dark color; natural cocoa works but produces a slightly lighter, more acidic result)
  • 1½ tsp baking powder
  • ½ tsp baking soda
  • ½ tsp fine salt
  • 1 tsp espresso powder (optional but highly recommended — a small amount of espresso powder amplifies the chocolate flavor without making the cake taste of coffee; it is the same trick used in professional chocolate cakes and it makes a noticeable difference)

For the Wet Layer (Poured Over, Not Mixed)

  • 1 can (400ml / 14oz) full-fat coconut milk, well-shaken
  • ¼ cup (60ml) pure maple syrup
  • 1 tsp vanilla extract

For the Fat Layer (Placed on Top)

  • ½ cup (115g) vegan butter, cold, cut into thin slices (cold butter distributes more evenly across the surface of the dry layer than melted butter, which pools rather than distributing)

For the Topping

  • 150g (5oz) vegan dark chocolate (70%+ cocoa), roughly chopped into uneven chunks (not chocolate chips — chopped bar chocolate melts into more irregular, more visually appealing pools and has a purer chocolate flavor)
  • 3 tbsp natural peanut butter, for drizzling in the last 5 minutes of baking
  • Flaky sea salt, for finishing

For Serving

  • Vegan vanilla ice cream (essential — the contrast of cold ice cream against the warm, fudgy cake is a significant part of the eating experience; coconut-based ice cream works especially well alongside the peanut butter and chocolate)

Instructions

  1. Preheat and prepare the pan. Preheat the oven to 180°C (350°F). Lightly grease a 9×13 inch (23×33cm) baking dish with vegan butter or coconut oil — a glass or ceramic baking dish gives a slightly more evenly baked result than a metal pan, as glass heats more slowly and reduces the risk of the bottom burning before the center sets.
  2. Make the peanut butter base layer. In a small bowl or jug, stir together the natural peanut butter, melted coconut oil, maple syrup, and salt until smooth and pourable — the mixture should flow easily from a spoon. If the peanut butter is stiff, microwave for 20 seconds first. Pour the peanut butter mixture into the prepared baking dish and tilt the dish gently to spread it into an even layer across the base. Do not try to spread it perfectly — a near-even layer is sufficient, and the peanut butter will move during baking regardless.
  3. Add the dry chocolate layer. In a large bowl, whisk together the flour, sugar, cocoa powder, baking powder, baking soda, salt, and espresso powder until evenly combined. Dump this dry mixture directly and evenly over the peanut butter layer — do not stir, do not press, do not try to integrate the two layers. The dry layer should sit on top of the peanut butter as a loose, even blanket approximately 2–3cm (1 inch) deep across the full surface of the pan. Use a fork to lightly rake the surface of the dry layer even if it has mounded in the center during pouring.
  4. Add the wet layer. In a jug, stir together the coconut milk, maple syrup, and vanilla extract until combined. Pour this liquid mixture slowly and evenly over the entire surface of the dry layer — move the jug across the pan in a steady stream so the liquid is distributed as evenly as possible rather than poured in one spot. Do not stir. Some of the cocoa powder on the surface will look wet and dark immediately; this is correct. The liquid will sink through the dry layer during baking.
  5. Add the fat layer and chocolate. Distribute the cold vegan butter slices evenly across the surface of the wet layer — place them in a grid pattern so that every portion of the cake surface is within a few centimeters of a butter slice. Scatter the roughly chopped dark chocolate evenly over the top.
  6. Bake. Place in the preheated oven and bake for 30 minutes without opening the door. At 30 minutes, the edges should be set and pulling away from the sides of the pan, the chocolate chunks on top should be melted and glossy, and the center should still have a slight jiggle when the pan is moved — this is correct and intentional. Remove from the oven briefly, drizzle the 3 tablespoons of peanut butter over the surface in thin, irregular ribbons, and return to the oven for a further 5 minutes. Total bake time: 35 minutes.
  7. Rest and serve. Remove from the oven and scatter immediately with flaky sea salt. Allow to rest for 5–10 minutes before serving — the cake continues to set slightly during this rest and the peanut butter pools become more defined. Spoon generously into deep bowls (this is not a slice-and-lift dessert; it is a spoon-from-the-pan dessert and should be served warm and barely structured). Top each portion with a scoop of vegan vanilla ice cream and serve immediately.

Pro Tips

  • Do not overbake — the most common mistake with dump cakes is baking until the center appears fully set, which by that point means the edges are dry and overdone. The center should still have a slight jiggle at the 35-minute mark; it will continue to firm as it cools during the 5–10 minute rest. A slightly underbaked dump cake is a warm, molten-centered triumph; a slightly overbaked one is just a very dense, dry cake.
  • Use Dutch-process cocoa, not natural — Dutch-process cocoa is treated with an alkalizing agent that neutralizes its natural acidity, producing a darker, more intensely chocolatey powder that blooms more fully in the coconut milk and gives the cake its deep, dark, almost fudge-like color. Natural cocoa produces a lighter, redder, slightly more acidic cake. Both work, but Dutch-process is visually and flavor-wise the better choice here.
  • Chop the chocolate rather than using chips — chocolate chips are formulated with stabilizers that prevent them from fully melting at oven temperatures (so they hold their shape in cookies); a good-quality vegan dark chocolate bar, roughly chopped, melts completely and flows into irregular glossy pools across the cake surface that look dramatically better and taste dramatically more intense than chips that have merely softened slightly.
  • Serve warm — this cake is designed to be eaten warm, within 30 minutes of coming out of the oven, when the peanut butter is still fluid, the chocolate pools are still glossy, and the center is still gooey. Reheated the next day it is still very good; room-temperature it is good; cold from the refrigerator it is dense and heavy. Warm from the pan with ice cream melting over it is the definitive version.

The Peanut Butter Cup: How a Pennsylvania Candy Maker Invented One of the World’s Most Beloved Flavor Combinations

The peanut butter cup — that particular combination of sweet milk chocolate shell and salty, dense peanut butter filling that has become one of the most recognized confectionery forms in the world — was invented in 1928 by H.B. Reese, a former dairy farmer and candy maker working in Hershey, Pennsylvania, who had previously worked for Milton Hershey himself and who founded his own candy company in the basement of his house using Hershey’s chocolate for coating. Reese’s insight was not the individual ingredients — peanut butter had been commercially available since the 1890s (first introduced at the 1893 Chicago World’s Fair) and chocolate confectionery was already a mature industry — but the specific ratio and the specific contrast: the filling in a peanut butter cup is not simply peanut butter but a dense, sweetened, slightly salty paste in which the peanut flavor is more concentrated and more assertive than in table peanut butter, and the chocolate shell is thin enough that the filling dominates rather than the chocolate enclosing it, producing a confection where both components are present in nearly equal proportion in every bite. The flavor logic of peanut butter and chocolate is now well understood by food scientists: the roasted, savory, slightly bitter flavor compounds in peanuts (pyrazines, produced by the Maillard reaction during roasting) complement and amplify the similar pyrazine compounds in roasted cocoa; the fat in both peanut butter and chocolate coats the palate and extends the flavor; and the salt in peanut butter sharpens and brightens the chocolate’s sweetness in the same way salt generally enhances sweet flavors. The dump cake in this recipe takes the same flavor logic and applies it to a warm, baked, barely-structured dessert format where the two components are distributed through each other rather than layered — a more intimate combination than the original cup, and in its own way just as satisfying.


Flavor Variations

  • Vegan Almond Butter and White Chocolate Dump Cake: Replace the peanut butter with almond butter and the dark chocolate with roughly chopped vegan white chocolate for a paler, sweeter, more delicate version where the almond’s gentle nuttiness and the white chocolate’s vanilla-cream sweetness create a completely different but equally compelling flavor profile. Add a scatter of toasted almond flakes over the top before baking.
  • Vegan Mexican Chocolate Dump Cake: Add 1 teaspoon of ground cinnamon and ¼ teaspoon of cayenne pepper to the dry chocolate layer, and scatter the top with 100g of chopped vegan dark chocolate and 50g of roughly chopped pecans before baking. The cinnamon and cayenne add warmth and complexity inspired by Mexican chocolate (champurrado, mole, and the chocolate drinks of Oaxaca) that transforms the simple dump cake into something deeply spiced and surprisingly sophisticated.
  • Vegan Triple Chocolate Dump Cake: Use ½ cup Dutch-process cocoa in the dry layer, scatter 100g of chopped vegan dark chocolate AND 50g of vegan milk chocolate chips over the top, and replace the peanut butter base entirely with 100g of melted vegan dark chocolate thinned with 2 tablespoons of coconut oil. The result is a pure, uncompromising chocolate dessert for those for whom more chocolate is always the answer.

Nutritional Highlights (Per Serving — Based on 8 Servings)

CaloriesProteinCarbsFiberFat
~490 kcal10g52g5g27g

Storage

  • Room temperature: Cover the pan with foil and store at room temperature for up to 2 days. The cake firms as it cools and is denser and more brownie-like at room temperature than when warm. Reheat individual portions in the microwave for 30–40 seconds to restore the warm, gooey texture.
  • Refrigerator: Covered, for up to 4 days. The cold peanut butter layer firms considerably in the refrigerator; bring to room temperature for 20 minutes or microwave for 45 seconds before eating.
  • Freezer: Portion the cooled cake into individual servings, wrap in plastic wrap, and freeze for up to 2 months. Thaw at room temperature for 1 hour or microwave from frozen for 60–90 seconds until warm throughout.
  • Reheating: The microwave is the best reheating method for this cake — 30–40 seconds per portion at full power returns it to approximately 80% of its fresh-from-the-oven quality. The oven (covered with foil at 160°C / 325°F for 10–12 minutes) restores it more completely but takes longer.

Frequently Asked Questions

Why is my dump cake dry in the center or on top?

The most likely cause is overbaking or insufficient liquid. Ovens vary significantly in actual temperature versus dial temperature — if your oven runs hot, the cake may be done at 28–30 minutes rather than 35. Test at 30 minutes: the edges should be set, the chocolate should be melted, and the center should jiggle slightly but not be liquid. If the dry layer on top has areas that are still floury and unabsorbed even after baking, the coconut milk was not distributed evenly enough when poured — pour in a slow, deliberate stream that covers the entire surface of the dry layer rather than pouring from one spot and hoping for the best.

Can I make this in a smaller pan?

Yes — use an 8×8 inch (20×20cm) square pan for a deeper, fudgier cake that serves 6. Reduce the baking time to 28–30 minutes, as the cake will be thicker and the center will need less time to set. The deeper pan produces a more molten-centered result that is particularly excellent served very warm with ice cream. Do not use a pan smaller than 8×8 for this recipe, as the layers will be too deep and the center may never fully set.

My peanut butter sank completely to the bottom and there’s a layer of oil under the cake — what happened?

Natural peanut butter separates into peanut solids and oil, and if it has not been stirred thoroughly before use, the oil-heavy layer of separated peanut butter will not hold together during baking. Always stir natural peanut butter thoroughly (all the way to the bottom of the jar) before measuring and using it. If the separation has already occurred in the cake, it is still safe to eat — the oil layer underneath the cake will be absorbed into the cake as it cools — but the peanut butter flavor will be less evenly distributed than intended.

Can I use a box of vegan chocolate cake mix instead of the from-scratch dry layer?

Yes — a box of vegan chocolate cake mix (most standard chocolate cake mixes are accidentally vegan; check the label) can replace the from-scratch dry layer entirely. Use the full box (typically around 450–500g), dump it dry over the peanut butter base, and proceed with the coconut milk wet layer and the remaining steps exactly as written. This makes the recipe even simpler and produces a slightly different but completely delicious result — the boxed mix typically includes more leavening than this recipe and produces a slightly fluffier, more cake-like center than the denser, fudgier from-scratch version.


Tried this recipe? Leave a comment below and let us know how it turned out! Tag us on Instagram and Facebook — we love seeing your plant-powered creations. Looking for more addictive vegan snack and appetizer recipes? Browse all recipes on Easy Vegan Recipes — new recipes posted every single week!

Tomato Basil Flatbread with Vegan Mozzarella — The Crispiest Most Flavor-Packed Plant-Based Flatbread You Will Make All Summer

tomato basil flatbread with vegan mozzarella

There is a version of this flatbread that is made with store-bought dough, jarred sauce, and a scatter of whatever is in the refrigerator — and it is fine. And then there is this version, which is something else entirely: a thin, cracker-crisp flatbread with a blistered, charred edge and a base so light and airy that it shatters slightly at the first bite; a tomato sauce that has been cooked down from whole crushed tomatoes into something so sweet, so bright, and so deeply savory that it is worth making in a double batch just to have extra in the refrigerator; a vegan mozzarella that stretches and melts and browns in a way that no bought vegan mozzarella does, because it is made from cashews and tapioca and a handful of pantry ingredients in under 5 minutes and then spread directly onto the flatbread before going under a very hot grill; and a finish of fresh basil torn directly over the hot flatbread the moment it comes out of the oven so that the heat of the crust wilts the leaves just slightly, releasing the basil’s volatile oils into every bite without destroying the brightness of the fresh herb. Together, these four elements — the cracker-crisp crust, the concentrated tomato sauce, the stretchy melting mozzarella, and the fresh basil — produce a flatbread that is the best possible version of one of the greatest flavor combinations in the history of cooking, and it is fully, uncompromisingly, deliciously vegan.

The secret is the cold-ferment stretch technique. The flatbread dough in this recipe is mixed the evening before and left in the refrigerator overnight — a minimum 8-hour cold ferment, and up to 48 hours for even more complex flavor. Cold fermentation is slower than room-temperature fermentation: the yeast is active at refrigerator temperatures but sluggish, and the slow, long fermentation that results produces a dough with a far more complex flavor than a quick-rise dough achieves in 1–2 hours at room temperature. The carbon dioxide produced during the long cold ferment creates a more open, more irregular gluten network, which translates to a flatbread with larger, more irregular air pockets and a crumb structure that is simultaneously crisp at the surface and slightly chewy just beneath it — the exact texture that makes a great flatbread so satisfying to eat. The technique also makes the dough significantly easier to stretch: cold, long-fermented dough is more relaxed and more extensible than fresh dough, which tends to spring back when stretched. When the cold-fermented dough is brought to room temperature for 30 minutes before stretching, it stretches thin and stays thin without snapping back, producing the flat, even base that is essential for a flatbread that bakes evenly and crisps uniformly rather than having thick edges and a dense center. Cold fermentation is also the most forgiving technique in bread baking — the dough can sit in the refrigerator for up to 48 hours without overproofing, giving complete flexibility about when the flatbreads are baked.

What makes this recipe so outstanding is the vegan mozzarella — a cashew and tapioca mozzarella that is made by blending soaked cashews with nutritional yeast, tapioca starch, lemon juice, apple cider vinegar, garlic, and salt into a completely smooth liquid, then cooking briefly in a saucepan until the tapioca starch activates and the mixture transforms from a thin, pourable liquid into a thick, stretchy, gooey mass that pulls like real mozzarella, browns like real mozzarella under a hot grill, and has a mild, creamy, slightly tangy flavor that is remarkably similar to fresh mozzarella’s gentle dairy note. The tapioca starch is the ingredient that makes this possible: tapioca produces a uniquely stretchy, stringy gel when heated that no other starch replicates in quite the same way — cornstarch gels firmly, arrowroot gels clear and slightly slippery, but tapioca gels stretchy, and it is that stretch that makes this mozzarella behave like the real thing on a hot flatbread rather than simply melting into an undifferentiated pool. The mozzarella is spooned onto the flatbread in large, irregular dollops — not spread into a uniform layer, because the irregular distribution means some bites are creamy and rich and dominated by the mozzarella, and others are dominated by the tomato, and the variation makes the eating experience significantly more interesting than a uniformly coated flatbread.

This recipe is 100% vegan, dairy-free, and egg-free. It produces four individual flatbreads (each approximately 25–30cm / 10–12 inches in diameter) that are best eaten immediately from the oven while the crust is at peak crispness and the mozzarella is still warm and stretchy.


Recipe Information

Prep TimeCook TimeTotal TimeServingsCalories
20 mins12 mins32 mins (+ overnight ferment)4 flatbreads~520 kcal

Ingredients

For the Cold-Ferment Flatbread Dough (Make the Night Before)

  • 2½ cups (315g) strong bread flour (the higher protein content of bread flour develops more gluten than all-purpose flour, giving the flatbread its chew; all-purpose flour works but produces a slightly less structured, less chewy result)
  • 1 tsp instant yeast (also called fast-action or rapid-rise yeast — it does not need to be dissolved in water first)
  • 1 tsp fine salt
  • 1 tsp granulated sugar (feeds the yeast during the long ferment)
  • 1 tbsp olive oil
  • ¾ cup (180ml) lukewarm water (approximately 38°C / 100°F — too hot kills the yeast; too cold slows the initial mixing phase; if in doubt, use tap water that feels warm but not hot against the inside of the wrist)
  • Plus: a little extra flour for shaping, and olive oil for the baking surface

For the Quick Tomato Sauce

  • 1 can (400g / 14oz) whole peeled tomatoes (whole peeled tomatoes have a better flavor than pre-chopped tinned tomatoes, which are often made from lower-grade fruit; crush them by hand into the pan)
  • 2 tbsp olive oil
  • 3 cloves garlic, finely minced
  • ½ tsp dried oregano
  • ½ tsp dried basil
  • ½ tsp caster sugar (balances the tomatoes’ acidity)
  • ¼ tsp fine salt
  • ¼ tsp ground black pepper
  • Pinch of red chilli flakes (optional, but adds a background warmth that makes the sauce more complex)

For the Cashew Tapioca Mozzarella

  • ¾ cup (105g) raw cashews, soaked in cold water for 4 hours or in boiling water for 30 minutes, then drained and rinsed (soaking softens the cashews for completely smooth blending — if using a high-powered blender such as a Vitamix or Blendtec, soaking can be reduced to 15 minutes in boiling water)
  • ½ cup (120ml) water
  • 3 tbsp tapioca starch (also called tapioca flour — do not substitute cornstarch or arrowroot, as neither produces the same stretchy, stringy texture)
  • 2 tbsp nutritional yeast
  • 1 tbsp fresh lemon juice
  • 1 tsp apple cider vinegar
  • ½ tsp fine salt
  • ¼ tsp garlic powder
  • 2 tbsp refined coconut oil or vegan butter (adds richness and helps the mozzarella brown under the grill)

For Finishing

  • Large handful fresh basil leaves, torn
  • Extra-virgin olive oil, for drizzling
  • Flaky sea salt, for finishing
  • Freshly ground black pepper
  • Optional: thin slices of ripe tomato or sundried tomatoes, placed on top of the mozzarella before grilling

Instructions

  1. Make the flatbread dough (the night before). In a large bowl, whisk together the flour, instant yeast, salt, and sugar. Make a well in the center and add the olive oil and lukewarm water. Mix with a wooden spoon or your hands until a shaggy dough forms, then turn out onto an unfloured surface and knead for 5–6 minutes until smooth, elastic, and slightly tacky but not sticky. Shape into a ball, place in a lightly oiled bowl, cover tightly with plastic wrap or a damp kitchen towel, and refrigerate overnight (minimum 8 hours, maximum 48 hours). The dough will rise slowly in the refrigerator.
  2. Make the tomato sauce. Heat the olive oil in a small saucepan over medium heat. Add the minced garlic and cook for 60 seconds until fragrant and just beginning to turn golden. Add the crushed whole peeled tomatoes (crush them by squeezing in your fist over the pan), dried oregano, dried basil, sugar, salt, pepper, and chilli flakes. Cook over medium heat, stirring occasionally, for 15–18 minutes until the sauce has reduced and thickened significantly — it should coat the back of a spoon heavily and not be watery. Taste and adjust. Cool before using (a hot sauce steams the dough base and prevents it crisping properly). The sauce keeps in the refrigerator for up to 5 days.
  3. Make the cashew tapioca mozzarella. Drain the soaked cashews and place in a blender with the water, tapioca starch, nutritional yeast, lemon juice, apple cider vinegar, salt, and garlic powder. Blend on high for 2–3 minutes until completely smooth — stop and scrape down the sides twice; any remaining cashew granules will produce an uneven mozzarella. Pour the smooth liquid into a small saucepan and add the coconut oil. Cook over medium heat, stirring constantly with a silicone spatula, for 4–5 minutes. The mixture will appear smooth and liquid for the first 2–3 minutes, then will suddenly begin to clump, pull away from the sides of the pan, and transform into a thick, stretchy, cohesive mass — this is the tapioca starch activating. Continue stirring vigorously for 1–2 further minutes until the mozzarella is smooth, shiny, and pulling away from the pan in stretchy strings. Remove from heat and set aside.
  4. Prepare to bake. Remove the dough from the refrigerator 30 minutes before baking to allow it to come to room temperature and relax. Preheat the oven to its maximum temperature (typically 240–250°C / 475°F) with a baking stone, inverted heavy baking sheet, or cast iron pan inside — the hot surface is essential for a crisp base. If using a grill/broiler for the final stage, preheat that too.
  5. Shape the flatbreads. Divide the dough into 4 equal portions. On a lightly floured surface, use your hands to gently stretch each portion into a thin oval or round approximately 25–30cm (10–12 inches) in diameter and 2–3mm thick. Do not use a rolling pin for the final shaping — the hands feel the resistance of the dough and adjust pressure accordingly, producing a more even, more irregularly beautiful flatbread than a pin. If the dough resists and springs back, cover it with a cloth and let it rest for 5 minutes before continuing.
  6. Top and bake. Carefully slide the stretched flatbread onto the preheated hot baking surface (use a pizza peel dusted with semolina, or slide it onto parchment paper and transfer using the parchment). Spread 3–4 tablespoons of tomato sauce thinly and evenly over the surface, leaving a 1cm border. Dollop the cashew mozzarella in large, irregular spoonfuls over the tomato sauce — approximately 6–8 spoonfuls per flatbread; resist the temptation to spread it into a uniform layer. Bake at maximum oven temperature for 8–10 minutes until the crust edges are deeply golden and charred in spots and the mozzarella is bubbling and browning.
  7. Finish and serve. Remove from the oven. Immediately tear fresh basil leaves directly over the hot flatbread. Drizzle with a thin thread of extra-virgin olive oil. Scatter with flaky sea salt and a few grinds of black pepper. Serve immediately — flatbread at peak crispness lasts approximately 5 minutes before the crust begins to soften from the toppings’ steam.

Pro Tips

  • The hotter the oven, the better — flatbread baked at 240°C (475°F) on a preheated surface crisps in 8 minutes; flatbread baked at 180°C (350°F) on a cold sheet takes 20 minutes and produces a pale, soft result that lacks the blistered, charred character of a proper flatbread. If your oven has a convection/fan setting, use it — the circulating air accelerates crisping at the surface and is the difference between a flatbread and a pizza.
  • Stretch the dough by hand, not with a rolling pin — a rolling pin compresses the gluten structure and pushes out the gas bubbles that the overnight ferment has developed, producing a denser, flatter result. Hand-stretching preserves those bubbles, which expand into the characteristic irregular air pockets and blisters during baking.
  • Add the fresh basil after the oven, not before — basil contains volatile aromatic compounds that evaporate rapidly above 60°C (140°F); basil baked on a flatbread for 10 minutes at 240°C tastes of nothing. Added directly to the hot surface the moment the flatbread comes out, it wilts gently and releases its oils without losing them.
  • The mozzarella can be made up to 3 days ahead and refrigerated in a sealed container — it firms considerably when cold. Before using, microwave for 20–30 seconds and stir until soft and scoopable again, or bring to room temperature for 30 minutes.

Flatbread and Mozzarella: Two Ancient Foods That Found Each Other in Naples

The story of flatbread and mozzarella finding each other is the story of Naples in the late eighteenth century — but both of the ingredients that made that meeting possible have histories that run far deeper and further than the Neapolitan port city where they were first combined. Flatbread is among the oldest prepared foods in the archaeological record: unleavened flatbreads made from ground grain and water have been found at Neolithic sites across the Middle East, Europe, and Central Asia dating to at least 10,000 BCE, predating pottery (the breads were baked on flat stones beside open fires) and representing one of the earliest examples of grain processing for human consumption. The introduction of leavening — whether through wild yeast contamination, sourdough culture, or the addition of beer barm — followed considerably later, but the flatbread tradition has persisted everywhere that grain is grown, from the lavash of Armenia to the roti of South Asia to the injera of Ethiopia, each expressing the same fundamental idea (grain, water, heat) through the lens of local culture and available grain. Mozzarella’s history is more precisely located: it is a product of the Campania region of southern Italy, where water buffalo (Bubalus bubalis) were introduced (probably by the Normans or the Lombards, depending on which historian you consult) sometime in the medieval period, and where the technique of pasta filata — stretching and folding curd in hot whey until it reaches a smooth, elastic consistency — was developed to process buffalo milk into a fresh cheese that was mild, moist, and extraordinarily meltable. The first documented mention of mozzarella in Campania dates to the twelfth century; by the eighteenth century it was a common street food in Naples, sold fresh from the cheese-makers’ workshops. The flatbread that became pizza was also a Neapolitan street food — the poor man’s meal of the vicoli (the narrow alleyways of Naples’ old city) — and the combination of the two, with tomato (newly arrived from the Americas and initially regarded with deep suspicion by Europeans who believed it to be poisonous) added as a third element, produced the Margherita pizza that is now the most reproduced dish in the world.


Flavor Variations

  • Vegan Roasted Garlic and Mushroom Flatbread: Replace the tomato sauce with a white sauce (blend 100g soaked cashews with 120ml water, 2 cloves roasted garlic, 2 tbsp nutritional yeast, salt, and lemon juice until smooth; no cooking required) and top with 200g of thinly sliced cremini or portobello mushrooms sautéed until golden. Finish with fresh thyme and a drizzle of truffle oil.
  • Vegan Caramelized Onion and Olive Flatbread: Slowly caramelize 2 large onions in olive oil with a pinch of sugar and salt over low heat for 40 minutes until deeply sweet and golden. Spread over the tomato sauce in place of or alongside the mozzarella, and scatter with sliced Kalamata olives, capers, and fresh rosemary. Finish with flaky salt — a Provençal-style pissaladière variation.
  • Vegan Pesto and Sundried Tomato Flatbread: Replace the tomato sauce with a generous spread of vegan pesto (blend 60g fresh basil + 30g pine nuts or walnuts + 2 cloves garlic + 3 tbsp nutritional yeast + 4 tbsp extra-virgin olive oil + salt + lemon juice until smooth) and top with the cashew mozzarella and sliced sundried tomatoes packed in oil. The pesto’s herby brightness is a completely different register from the cooked tomato version.

Nutritional Highlights (Per Flatbread)

CaloriesProteinCarbsFiberFat
~520 kcal16g62g5g23g

Storage

  • Flatbread dough: After the overnight cold ferment, the dough keeps in the refrigerator for up to 48 hours total. It can also be portioned and frozen (after dividing into 4 balls, place on a parchment-lined tray to freeze solid, then transfer to a freezer bag) for up to 2 months. Thaw overnight in the refrigerator and bring to room temperature for 30 minutes before stretching.
  • Tomato sauce: Keeps in a sealed jar in the refrigerator for up to 5 days, or frozen for up to 3 months.
  • Cashew mozzarella: Keeps in a sealed container in the refrigerator for up to 3 days. It firms considerably when cold; reheat gently in the microwave for 20–30 seconds or in a saucepan with a tablespoon of water over low heat until soft and scoopable again.
  • Baked flatbread: Best eaten immediately. Leftover baked flatbread can be refrigerated for up to 1 day and reheated in a hot oven (220°C / 425°F) directly on the oven rack for 4–5 minutes — it will regain most of its crispness, though not all. Do not microwave baked flatbread; microwaving makes it steam and go soft irreversibly.

Frequently Asked Questions

Can I make this without a baking stone or heavy baking sheet?

Yes — a cast iron skillet or griddle preheated on the stove and then transferred to the oven works well. Alternatively, invert a heavy baking sheet and preheat it in the oven for at least 20 minutes before adding the flatbread; the difference in crispness between a preheated surface and a cold one is significant and worth the 20-minute wait. As a last resort, a room-temperature baking sheet lined with parchment produces a paler, less crisp result but a perfectly edible flatbread.

My cashew mozzarella isn’t stretching — what went wrong?

The stretchy texture of the mozzarella depends on the tapioca starch reaching the correct temperature and being stirred vigorously and continuously during the cooking stage. If the mozzarella has clumped but is not stretchy: it was not stirred vigorously enough during the activation stage (the stretching develops from the mechanical working of the activated starch, similar to the pasta filata technique used for traditional mozzarella). Return it to the heat with 1 tablespoon of water and stir vigorously for 2 further minutes. If the mozzarella is still liquid after 6 minutes of cooking: either the tapioca starch was measured inaccurately (tablespoon measures should be leveled), or a different starch was used — only tapioca produces this stretchy result.

Can I use shop-bought vegan mozzarella instead?

Yes — commercial vegan mozzarella (brands like Violife, Sheese, or Follow Your Heart are widely available) works well on this flatbread and is a legitimate shortcut that produces a very good result. The homemade cashew mozzarella has a creamier, richer flavor and a more convincing stretch, but the flatbread is excellent either way. If using commercial vegan mozzarella, slice or tear it and distribute over the flatbread in the same irregular pattern as described for the homemade version.

Can I make these flatbreads without yeast?

Yes — for a yeasted-dough-free version, make a simple unleavened flatbread by combining 2 cups of all-purpose flour, 1 tsp baking powder, ½ tsp salt, 2 tbsp olive oil, and ¾ cup of warm water. Mix, knead for 2 minutes until smooth, divide into 4, and stretch immediately (no resting required). The result is thinner, crispier, and less chewy than the cold-ferment version — more cracker-like than bread-like — and bakes in 6–7 minutes at maximum oven temperature. It lacks the complex flavor that cold fermentation develops but is a genuinely excellent quick alternative.


Tried this recipe? Leave a comment below and let us know how it turned out! Tag us on Instagram and Facebook — we love seeing your plant-powered creations. Looking for more addictive vegan snack and appetizer recipes? Browse all recipes on Easy Vegan Recipes — new recipes posted every single week!

Vegan Creamy Chickpea and Spinach Curry — The Most Warming Plant-Based Dinner You Will Make All Week

Vegan Creamy Chickpea and Spinach Curry

If there is one recipe that belongs permanently in your weekly dinner rotation it is this Vegan Creamy Chickpea and Spinach Curry. Rich, deeply spiced, and finished with silky coconut cream, this is the kind of meal that fills your kitchen with the most extraordinary aroma and delivers pure comfort in every single spoonful. It is everything a great curry should be — warming, satisfying, protein-packed, and ready in just 35 minutes from a single pot.

This curry is built on a foundation of pantry staples that most vegan kitchens already have on hand. Canned chickpeas provide the protein and substance. Fresh spinach adds color, nutrition, and a beautiful earthiness. Coconut cream creates the silky, luxurious sauce that makes this curry so deeply satisfying. And a carefully balanced blend of cumin, turmeric, coriander, and garam masala brings everything together into a dish that tastes like it simmered for hours.

What makes this recipe exceptional is how the flavors build in layers. The onion and garlic are cooked low and slow until deeply caramelized. The spices are bloomed in hot oil to release their full aromatic potential. The tomatoes are cooked until completely broken down into the base. And the coconut cream is added off the heat to preserve its delicate sweetness. Each step takes only minutes but together they create a curry of remarkable depth and complexity.

Whether you serve it over steamed basmati rice, alongside warm naan, or simply eat it from the pot with a large spoon because the smell made waiting impossible — this Vegan Creamy Chickpea and Spinach Curry will become one of the most requested dishes in your kitchen.


Recipe Information

Prep TimeCook TimeTotal TimeServingsCalories
10 mins25 mins35 mins4~420 kcal

Ingredients

For the Curry

  • 2 cans (800g) chickpeas, drained and rinsed
  • 5 cups (150g) fresh spinach, roughly chopped
  • 1 large white onion, finely diced
  • 6 cloves garlic, minced
  • 1 tbsp fresh ginger, grated
  • 1 can (400g) crushed tomatoes
  • 1 can (400ml) full-fat coconut cream
  • 3 tbsp olive oil or coconut oil
  • Juice of half a lemon
  • 1 tsp salt

The Spice Blend

  • 2 tsp ground cumin
  • 2 tsp ground coriander
  • 1½ tsp garam masala
  • 1 tsp turmeric
  • 1 tsp smoked paprika
  • ½ tsp chili powder
  • ¼ tsp cinnamon
  • ¼ tsp black pepper

Optional Add-ins

  • 1 medium sweet potato, diced (add with chickpeas)
  • 1 cup (150g) frozen peas (add in final 5 minutes)
  • 200g firm tofu, cubed (add with chickpeas)
  • 1 tbsp cashew butter (stir in at end for extra creaminess)

To Serve

  • Steamed basmati rice or brown rice
  • Warm vegan naan bread
  • Fresh cilantro, roughly chopped
  • Sliced red chili
  • Wedges of fresh lemon
  • Toasted cashews or almonds
  • Drizzle of coconut cream

Instructions

  1. Prepare all ingredients before you begin. Dice the onion, mince the garlic, grate the ginger, measure the spices into a small bowl, and open the canned tomatoes and coconut cream. Having everything ready makes the cooking process smooth and effortless from start to finish.
  2. Caramelize the onion. Heat the oil in a large heavy-bottomed pot over medium heat. Add the diced onion and a pinch of salt and cook for 8–10 minutes, stirring regularly, until deeply golden and caramelized. This is the most important step — properly caramelized onion creates the flavor foundation of the entire curry and cannot be rushed.
  3. Add garlic and ginger. Add the minced garlic and grated ginger to the caramelized onion and cook for 2 minutes, stirring continuously, until incredibly fragrant and the raw smell has completely cooked out.
  4. Bloom the spices. Add all the spices to the pot and stir continuously for 60–90 seconds until deeply fragrant and coating everything in a rich aromatic paste. This step activates the essential oils in the spices and creates a depth of flavor that simply cannot be achieved any other way.
  5. Cook the tomatoes down. Add the crushed tomatoes and stir well. Cook over medium-high heat for 5–6 minutes, stirring frequently, until the tomatoes have darkened and the oil begins to separate around the edges. This bhuna stage is critical for eliminating any raw tomato flavor.
  6. Add chickpeas and coconut cream. Add the drained chickpeas and stir to coat in the spiced tomato base. Pour in the coconut cream and stir to combine. Add the salt and bring to a gentle simmer. Cook for 10–12 minutes, stirring occasionally, until the sauce has thickened beautifully.
  7. Add the spinach. Add the fresh spinach in large handfuls, stirring between each addition until wilted. Cook for 2–3 minutes until all spinach is incorporated and bright green. Do not overcook.
  8. Finish and serve. Remove from heat and squeeze in the lemon juice. Taste and adjust seasoning. Serve immediately over steamed rice with warm naan, fresh cilantro, and a drizzle of additional coconut cream.

Pro Tips for the Best Vegan Chickpea Curry

  • Caramelize the onion fully. Eight to ten minutes at medium heat produces a sweetness and depth that is the defining characteristic of truly great curry. Never rush this step.
  • Bloom the spices in hot oil always. Sixty seconds of stirring spices in hot oil before adding any liquid activates their essential oils and produces rounded, complex flavors impossible to achieve any other way.
  • Cook tomatoes until oil separates. The visible separation of oil around the tomato base signals that it is properly cooked — sweet, concentrated, and ready to carry the rest of the curry.
  • Add coconut cream off the heat. High heat can cause coconut cream to split — reduce to the lowest setting before adding and stir gently and continuously.
  • Finish with lemon juice always. Added at the very end off the heat, lemon juice lifts and brightens the entire bowl in a way that makes every other flavor shine more intensely.

The Nutritional Power of This Curry

This curry is one of the most nutritionally complete plant-based meals available. Chickpeas provide 16 grams of plant-based protein per serving alongside 13 grams of dietary fiber — making every bowl deeply satisfying and genuinely sustaining for hours.

Turmeric contains curcumin — one of the most extensively studied anti-inflammatory compounds in nutritional science — with documented benefits for joint health, brain function, and cardiovascular protection. Ginger provides gingerols with potent anti-nausea and anti-inflammatory properties. Spinach delivers Vitamins K, A, C, and folate alongside iron and calcium.

Full-fat coconut cream contributes medium-chain triglycerides that provide immediate energy and support metabolic health. Together these ingredients create a curry that heals and nourishes as powerfully as it satisfies.


Flavor Variations

  • Extra Spicy: Double the chili powder and add one minced fresh green chili with the garlic for building, complex heat.
  • Butternut Squash and Chickpea: Add diced roasted butternut squash with the chickpeas for a sweet, earthy autumn version.
  • Tomato Free: Replace crushed tomatoes with additional coconut cream and 2 tablespoons of cashew butter for a lighter, creamier sauce.
  • Lemon and Herb: Replace spinach with fresh cilantro and mint stirred in completely off the heat for a brighter, fresher character.

Nutritional Highlights (Per Serving)

CaloriesProteinCarbsFiberFat
~420 kcal16g46g13g18g

Storage

  • Refrigerator: Store in an airtight container for up to 5 days. This curry improves with every passing day as the spices deepen and the chickpeas absorb more flavor. Add a splash of coconut cream or broth when reheating.
  • Freezer: Freezes beautifully for up to 3 months. Cool completely before transferring to freezer-safe containers. Thaw overnight in the refrigerator and reheat gently over medium-low heat.
  • Reheating: Always reheat gently over medium-low heat, stirring regularly. Do not boil aggressively as this can affect the coconut cream texture.

Frequently Asked Questions

Can I use dried chickpeas instead of canned?

Yes — soak 400g of dried chickpeas overnight and simmer for 45–60 minutes until tender before using. Home-cooked chickpeas have a firmer texture and absorb the curry sauce beautifully.

Can I make this less spicy?

Yes — reduce or omit the chili powder entirely and replace smoked paprika with sweet paprika for a mild, aromatic curry suitable for all heat tolerances including children.

Why did my coconut cream split?

Coconut cream splits when added to very high heat. Always reduce to the lowest setting before adding and stir continuously. If it does split the flavor is unaffected — stir vigorously over low heat to re-emulsify.

Can I use coconut milk instead of coconut cream?

Yes — use full-fat coconut milk and simmer uncovered for an additional 5 minutes to reduce and thicken. Add 2 tablespoons of cashew butter for additional richness.

What is the best rice to serve with this?

Basmati rice is the classic pairing — its long separate grains and delicate fragrance complement the rich spiced sauce perfectly. Brown basmati adds additional fiber and a nuttier flavor.

Can I make this in a slow cooker?

Yes — complete the onion caramelization and spice blooming on the stovetop first then transfer everything to the slow cooker. Cook on low for 6–8 hours. Add spinach in the final 30 minutes.


Tried this recipe? Leave a comment below and let us know how it turned out! Tag us on Instagram and Facebook — we love seeing your plant-powered creations. Looking for more warming vegan curry and dinner recipes? Browse all recipes on Easy Vegan Recipes — new recipes posted every single week!

Anti-Inflammatory Pickled Cucumber Onion and Bell Pepper Salad — The Most Refreshing Vegan Salad You Will Make All Week

Anti-Inflammatory Pickled Cucumber Onion & Bell Pepper Salad

Some salads are eaten once and forgotten. And then there are salads like this Anti-Inflammatory Pickled Cucumber Onion and Bell Pepper Salad — the kind you make on a Monday and find yourself eating straight from the jar with a fork on Wednesday because it has only gotten better with every passing day. This is that salad. The one that converts people who claim they do not like salads. The one that disappears first at every gathering it attends. The one that is equal parts extraordinarily delicious and genuinely, powerfully good for your body.

This is a quick-pickled salad — meaning the vegetables are marinated in a tangy, lightly sweetened apple cider vinegar brine that partially pickles them over time, creating the most incredible sweet-sour-tangy flavor that is deeply refreshing, beautifully bright, and absolutely addictive from the very first forkful. Crisp cucumber, sweet bell peppers in multiple colors, sharp red onion, fresh dill, and fragrant garlic all bathed in this extraordinary brine that transforms them from ordinary raw vegetables into something with genuine depth, complexity, and the kind of flavor that keeps you coming back for more.

The anti-inflammatory credentials of this salad are genuinely impressive. Every single ingredient has been studied for its anti-inflammatory and antioxidant properties — the quercetin in red onion, the capsaicin and Vitamin C in bell peppers, the cucurbitacin antioxidants in cucumber, the acetic acid in apple cider vinegar that supports gut health and blood sugar regulation, the allicin in garlic, and the powerful flavonoids in fresh dill. This is food as medicine in one of the most delicious forms available.

This salad is 100% vegan, naturally gluten-free, oil-free, requires zero cooking, and actually improves with time — making it the perfect make-ahead recipe for meal prep, gatherings, and anyone who wants a ready-to-eat nourishing side dish available in their fridge all week long.


Recipe Information

Prep TimeMarinate TimeTotal TimeServingsCalories
15 mins30 mins45 mins6~80 kcal

Ingredients

For the Salad

  • 2 large cucumbers (about 600g), thinly sliced into rounds or half moons
  • 1 large red bell pepper, deseeded and thinly sliced
  • 1 large yellow bell pepper, deseeded and thinly sliced
  • 1 large orange bell pepper, deseeded and thinly sliced
  • 1 medium red onion, very thinly sliced into half moons
  • 3 cloves garlic, very thinly sliced
  • 3 tbsp fresh dill, roughly chopped (or 1 tbsp dried dill)
  • 2 tbsp fresh parsley, roughly chopped
  • 1 tbsp fresh chives, finely sliced (optional)
  • 1 small jalapeño or red chili, very thinly sliced (optional — adds a beautiful gentle heat)

For the Anti-Inflammatory Pickling Brine

  • ½ cup (120ml) apple cider vinegar (with the mother for maximum probiotic benefit)
  • ½ cup (120ml) water
  • 2 tbsp maple syrup or agave (adjust to taste — more for sweeter, less for more tangy)
  • 1 tsp salt
  • ½ tsp black pepper
  • ½ tsp turmeric (one of the most powerful anti-inflammatory compounds known to science)
  • ½ tsp cumin seeds or ground cumin
  • ¼ tsp coriander
  • ¼ tsp chili flakes (optional)
  • 1 tsp mustard seeds (optional — adds a beautiful pop and traditional pickling flavor)

Optional Add-ins

  • ½ cup (80g) cherry tomatoes, halved
  • ½ cup (80g) radishes, very thinly sliced
  • ½ cup (80g) carrot, julienned or very thinly sliced
  • ¼ cup (40g) kalamata olives, halved
  • 2 tbsp capers, drained
  • ¼ cup (35g) toasted sunflower or pumpkin seeds (add just before serving — they soften in the brine)

To Serve

  • Over steamed rice or quinoa as a grain bowl
  • As a side dish alongside any vegan main
  • Stuffed into warm pita with hummus
  • On top of avocado toast
  • As a topping for grain bowls and wraps
  • Alongside vegan grilled dishes at a barbecue
  • As a vibrant condiment with any plant-based meal

Instructions

  1. Prepare the vegetables. Slice the cucumbers into thin rounds approximately 3–4mm thick — thin enough to absorb the brine quickly but thick enough to maintain their crunch. Deseed and thinly slice all three bell peppers. Slice the red onion as thinly as possible — a mandoline produces the most uniform, elegant results. Thinly slice the garlic. Slice the jalapeño if using.
  2. Salt the cucumber. Place the sliced cucumber in a colander, sprinkle with ½ teaspoon of salt, toss well, and allow to drain for 10 minutes. This draws out excess moisture from the cucumber and prevents the brine from becoming watered down. After 10 minutes pat the cucumber dry with kitchen paper.
  3. Make the anti-inflammatory pickling brine. In a medium bowl or large jar whisk together the apple cider vinegar, water, maple syrup, salt, black pepper, turmeric, cumin, coriander, chili flakes, and mustard seeds until the salt and sweetener are completely dissolved. Taste the brine — it should be pleasantly tangy, slightly sweet, and warmly spiced. Adjust the balance to your preference — more maple syrup for sweeter, more vinegar for tangier, more turmeric for extra anti-inflammatory power.
  4. Combine the vegetables. Place the salted and dried cucumber, sliced bell peppers, red onion, garlic, and jalapeño if using in a large bowl or a large jar with a lid.
  5. Pour the brine over the vegetables. Pour the pickling brine over the vegetables and toss thoroughly to coat every piece evenly. Add the fresh dill, parsley, and chives and toss again. The vegetables should be generously coated in the brine — if it does not cover everything press the vegetables down gently.
  6. Marinate. Cover the bowl tightly with plastic wrap or seal the jar and refrigerate for a minimum of 30 minutes — though 2 hours is significantly better and overnight is best of all. As the vegetables marinate they soften very slightly at the edges while maintaining their crunch in the center, absorb the brine flavors deeply, and the entire mixture develops into something far more complex and extraordinary than the sum of its parts.
  7. Toss and taste. Before serving toss the salad well to redistribute the brine and vegetables. Taste and adjust — add more maple syrup for sweetness, more vinegar for tang, or more salt for depth. The salad should be bright, tangy, slightly sweet, warmly spiced, and deeply refreshing.
  8. Serve. Spoon into a beautiful serving bowl ensuring every portion gets a generous amount of the brine along with the vegetables — the brine is liquid gold and should be consumed with every serving. Garnish with extra fresh dill, a scattering of toasted seeds if using, and a pinch of chili flakes for color and gentle heat.

Pro Tips for the Best Pickled Cucumber Salad

  • Slice everything as thin as possible. The thinner the vegetables the faster and more deeply they absorb the pickling brine and the better the finished salad tastes. A mandoline slicer produces the most elegant, consistent results. If slicing by hand take your time and aim for even, thin slices.
  • Use apple cider vinegar with the mother. Raw, unfiltered apple cider vinegar with the mother contains beneficial probiotic bacteria, enzymes, and compounds not found in clear distilled vinegar. It has a richer, more complex flavor and delivers significantly more anti-inflammatory benefit. This is worth seeking out for this recipe.
  • Salt the cucumber before marinating. This step removes excess moisture from the cucumber that would dilute the brine and prevent proper pickling. It takes 10 minutes and makes a significant difference to the final texture and flavor of the finished salad.
  • Use turmeric generously. Turmeric is the most powerful anti-inflammatory compound in this brine — do not reduce it. It turns the brine a beautiful golden color and adds a subtle warmth and earthiness that complements the vinegar and vegetables beautifully. Combine it with black pepper which dramatically increases the bioavailability of curcumin — the active compound in turmeric.
  • Make it ahead. Unlike most salads this one genuinely improves over time. The minimum marinating time is 30 minutes but 2 hours is notably better and overnight is extraordinary. The flavors deepen, meld, and develop in the most wonderful way the longer the vegetables sit in the brine.
  • Store with the brine. Always store this salad submerged in its brine — never drain it. The brine is what keeps the vegetables vibrant, flavorful, and perfectly pickled. Drained vegetables dry out and lose their extraordinary flavor within hours.

The Anti-Inflammatory Science Behind This Salad

Every ingredient in this recipe has been studied for its anti-inflammatory properties and here is what the science says:

Apple cider vinegar contains acetic acid which has been shown to reduce blood sugar spikes, support gut health through beneficial bacteria, and reduce systemic inflammation markers. Always choose raw, unfiltered ACV with the mother for maximum benefit.

Turmeric contains curcumin — one of the most extensively researched anti-inflammatory compounds in all of nutritional science. It has been shown in hundreds of clinical studies to reduce inflammatory markers, support joint health, protect brain function, and reduce the risk of chronic diseases. Black pepper increases curcumin absorption by up to 2000%.

Red onion is extraordinarily rich in quercetin — a powerful flavonoid antioxidant that has been shown to reduce histamine production, lower inflammation, support cardiovascular health, and protect against oxidative damage.

Bell peppers — particularly red and orange varieties — are among the richest plant sources of Vitamin C available, providing significantly more than citrus fruit. Vitamin C is essential for immune function and is one of the most powerful water-soluble antioxidants in the human diet.

Cucumber contains cucurbitacins and flavonoids that reduce inflammation, support kidney health, and provide powerful antioxidant protection for cells throughout the body.

Garlic contains allicin — a powerful antimicrobial and anti-inflammatory compound that has been shown to reduce blood pressure, lower cholesterol, boost immune function, and protect against cardiovascular disease.

Dill contains flavonoids including kaempferol that reduce inflammation, support digestive health, and have been studied for their antimicrobial properties.


Flavor Variations

  • Greek Inspired: Add sliced kalamata olives, capers, and crumbled vegan feta to the salad. Replace the cumin and turmeric with dried oregano and a pinch of cinnamon for a Mediterranean-inspired pickled salad that is extraordinary with warm pita and hummus.
  • Asian Inspired: Replace the apple cider vinegar with rice vinegar. Replace the cumin and turmeric with grated fresh ginger and sesame oil. Add thinly sliced carrot and radish and top with sesame seeds for a vibrant Asian-inspired quick pickle.
  • Sweet and Spicy: Double the jalapeño, add extra chili flakes to the brine, and increase the maple syrup to 3 tablespoons for a sweet, fiery, intensely flavored version that is extraordinary as a relish or condiment alongside vegan grilled dishes.
  • Herb Garden Version: Add fresh tarragon, fresh chervil, and fresh thyme to the herb mixture for a more complex, aromatic version that is particularly beautiful in early summer when fresh herbs are at their most vibrant.

Nutritional Highlights (Per Serving)

CaloriesProteinCarbsFiberVitamin C
~80 kcal2g16g3g180% DV

This salad is one of the lowest calorie yet highest nutritional impact recipes on the entire blog. At just 80 calories per serving it delivers an extraordinary concentration of Vitamins C, K, B6, and folate along with powerful antioxidants, anti-inflammatory compounds, and probiotic benefit from the apple cider vinegar. The three bell peppers alone provide nearly double the daily recommended Vitamin C intake. This makes it one of the most outstanding weight-management friendly recipes available — deeply flavorful, satisfying, and genuinely medicinal in the most delicious possible way.


Storage

  • Refrigerator: Store covered in the jar or bowl with the brine for up to 7 days. The salad improves continuously for the first 2–3 days and remains excellent through day 5–6. After day 7 the vegetables begin to soften too much and lose their crunch.
  • Do not freeze: This salad is not suitable for freezing. The vegetables lose all their crunch and the brine separates completely.
  • Brine reuse: The brine from finished salad is extraordinarily flavorful — use it as a salad dressing, a marinade for tofu or tempeh, a dipping sauce for spring rolls, or add to soups and stews for a bright, tangy, deeply complex flavor boost.

Frequently Asked Questions

How long does quick-pickled salad last?

This salad keeps beautifully in the refrigerator for up to 7 days when stored covered in its brine. It is genuinely one of the best make-ahead recipes available — improving in flavor for the first 2–3 days as the vegetables continue to absorb the brine more deeply.

Can I use white vinegar instead of apple cider vinegar?

White distilled vinegar produces a sharper, more intensely acidic brine with less of the complex, slightly fruity flavor of apple cider vinegar. It works but produces a notably different result. White wine vinegar or rice vinegar are both closer substitutes to apple cider vinegar in terms of flavor complexity and are excellent alternatives.

Does the turmeric stain?

Yes — turmeric stains plastic containers and light-colored surfaces permanently. Always use glass jars or bowls for this recipe and be careful when handling the brine. Turmeric stains on hands wash off with soap and water. Stains on kitchen surfaces can be removed with lemon juice or baking soda paste.

Can I add protein to make this a complete meal?

Yes — add sliced baked tofu, chickpeas, white beans, or edamame to the salad to boost the protein content significantly. Serve over a base of cooked quinoa or brown rice for a complete, nourishing grain bowl with the pickled salad as the centerpiece topping.

Is this salad suitable for people following specific diets?

Yes — this salad is naturally vegan, gluten-free, oil-free, refined sugar-free (when using maple syrup), and low calorie. It is suitable for whole food plant-based diets, anti-inflammatory diets, Mediterranean diets, and most elimination diets. Always check individual ingredients if following a specific medical dietary protocol.

Can I make this without sugar?

Yes. Replace the maple syrup with a few drops of liquid stevia or simply omit the sweetener entirely for a more intensely tangy, unsweetened brine. The salad will be noticeably more sour but still deeply flavorful and refreshing. Alternatively use ripe stone fruit juice — peach or apricot — for natural sweetness without refined sugar.


Tried this recipe? Leave a comment below and let us know how it turned out! Looking forward for more delicious recipe? Browse all our vegan recipes to keep enjoying ultimate delicious and healthy lifestyle.

Blueberry Broccoli Spinach Salad — The Most Nutritious, Vibrant Vegan Salad You Will Make All Summer

Blueberry Broccoli Spinach Salad

There are salads that are side dishes. And then there are salads that are genuinely the most exciting, most beautiful, most nourishing thing on the entire table — salads that make people stop mid-conversation to look at the bowl and immediately ask what is in it. This Blueberry Broccoli Spinach Salad is absolutely the latter — a spectacular combination of ingredients that on paper sounds surprising and in the bowl tastes extraordinary.

This is the salad that nutritionists dream about and food photographers obsess over. Deep green baby spinach and crisp broccoli florets studded with jewel-like blueberries, sweet dried cranberries, toasted walnuts, creamy sliced avocado, and a shower of toasted pumpkin seeds — all brought together with the most vibrant, bright, lemon-forward dressing that makes every single element sing. It is as visually stunning as it is deeply, genuinely nourishing.

What makes this salad so special beyond its extraordinary appearance is the way the flavors and textures interact with each other. The sweet-tart burst of fresh blueberries against the earthy crunch of raw broccoli. The creamy avocado against the firm, satisfying resistance of the pumpkin seeds. The slight bitterness of the spinach against the sweetness of the dried cranberries and the brightness of the lemon dressing. Every bite delivers something different and every bite is completely satisfying.

This recipe is 100% vegan, naturally gluten-free, requires absolutely zero cooking, and comes together in just 15 minutes. It is perfect as a stunning main course salad for lunch, a side dish at summer gatherings, a meal prep salad that holds up beautifully for days, or a vibrant and impressive starter at a dinner party. Make it once and it will immediately become one of the most regularly made salads in your entire plant-based repertoire.


Recipe Information

Prep TimeCook TimeTotal TimeServingsCalories
15 mins0 mins15 mins4~320 kcal

Ingredients

For the Salad

  • 4 large handfuls baby spinach (about 120g), washed and dried
  • 2 cups (200g) broccoli florets, cut into small bite-sized pieces (raw or blanched — see below)
  • 1½ cups (225g) fresh blueberries
  • ½ cup (60g) dried cranberries or dried cherries
  • 1 ripe avocado, peeled and sliced or diced
  • ½ cup (60g) walnuts, roughly chopped and toasted
  • ¼ cup (35g) toasted pumpkin seeds
  • ¼ small red onion, very finely sliced
  • 2 tbsp fresh chives, finely sliced (optional)
  • 2 tbsp fresh mint leaves, torn (optional — adds a beautiful freshness)

Optional Add-ins

  • ½ cup (90g) cooked quinoa or farro (adds protein and makes the salad even more filling)
  • ¼ cup (35g) toasted sunflower seeds
  • ¼ cup (40g) vegan feta, crumbled (adds creaminess and saltiness)
  • ¼ cup (35g) toasted sliced almonds
  • 1 tbsp hemp seeds (adds complete plant protein)
  • ½ cup (75g) cherry tomatoes, halved

For the Lemon Poppy Seed Dressing

  • 4 tbsp extra virgin olive oil
  • 3 tbsp fresh lemon juice (about 1 large lemon)
  • 1 tsp lemon zest
  • 1 tbsp maple syrup or agave
  • 1 tsp Dijon mustard
  • 1 small clove garlic, very finely grated
  • 1 tsp poppy seeds (optional — adds texture and visual beauty)
  • ½ tsp salt
  • ¼ tsp black pepper

Alternative Dressing — Blueberry Balsamic Vinaigrette

  • 3 tbsp extra virgin olive oil
  • 2 tbsp balsamic vinegar
  • 1 tbsp fresh blueberries, mashed
  • 1 tbsp maple syrup
  • 1 tsp Dijon mustard
  • ½ tsp salt
  • ¼ tsp black pepper

Instructions

  1. Prepare the broccoli. For this salad broccoli can be served two ways — raw for maximum crunch and nutritional value, or briefly blanched for a more tender, slightly more approachable texture. For raw broccoli simply cut into very small, bite-sized florets and use immediately. For blanched broccoli bring a small pot of salted water to a boil, add the florets for exactly 60 seconds, then immediately transfer to a bowl of ice water to stop the cooking and preserve the vibrant green color. Drain and pat completely dry before adding to the salad.
  2. Prepare the red onion. Place the very finely sliced red onion in a small bowl and cover with cold water and a pinch of salt. Allow to soak for 5 minutes then drain and pat dry. This removes the harsh raw bite while preserving the beautiful color and mild flavor.
  3. Toast the walnuts and pumpkin seeds. Place the roughly chopped walnuts in a dry skillet over medium heat. Toast for 3–4 minutes, stirring frequently, until golden and fragrant. Add the pumpkin seeds in the last 1–2 minutes of toasting. Remove from heat and allow to cool completely before adding to the salad — warm nuts wilt the delicate spinach and blueberries.
  4. Make the lemon poppy seed dressing. In a small bowl or jar whisk together the extra virgin olive oil, fresh lemon juice, lemon zest, maple syrup, Dijon mustard, grated garlic, poppy seeds, salt, and pepper until completely smooth and emulsified. Taste and adjust — add more lemon for brightness, more maple syrup for sweetness, or more mustard for depth. The dressing should be bright, slightly sweet, perfectly lemony, and beautifully balanced.
  5. Assemble the salad. Add the baby spinach to a large, wide salad bowl. Add the broccoli florets, fresh blueberries, dried cranberries, soaked and dried red onion, and any optional add-ins. Toss gently to distribute everything evenly.
  6. Add the delicate toppings. Arrange the sliced avocado over the salad. Scatter the toasted walnuts, toasted pumpkin seeds, fresh chives, and torn mint leaves over the top. Add the crumbled vegan feta if using.
  7. Dress the salad. Pour the lemon poppy seed dressing over the salad just before serving. Toss gently — using salad servers or two large spoons — until every leaf and every ingredient is lightly and evenly coated in the dressing. Do not overdress — the fresh blueberries and avocado are delicate and too much dressing overwhelms their natural flavors.
  8. Serve immediately. Transfer to individual plates or serve family-style directly from the bowl. This salad is most vibrant and most delicious the moment it is dressed — the spinach wilts slightly and the blueberries begin to release their juice after about 20 minutes of sitting dressed.

Pro Tips for the Most Beautiful Blueberry Broccoli Spinach Salad

  • Dry the spinach thoroughly. Wet spinach dilutes the dressing and produces a watery salad. Always wash spinach in advance and dry completely in a salad spinner or by patting with kitchen paper. Dry spinach stores beautifully in the fridge lined with paper towels for up to 3 days — always have it ready to go.
  • Cut the broccoli into very small florets. Large broccoli pieces are difficult to eat in a salad and distribute unevenly. Very small, bite-sized florets integrate beautifully with the spinach and blueberries and ensure every forkful contains a perfect balance of all the salad components.
  • Toast the nuts and seeds. Toasted walnuts and pumpkin seeds have a dramatically richer, deeper, more complex flavor than raw. Three to four minutes in a dry pan transforms them completely — never skip this step.
  • Use perfectly ripe avocado. An underripe avocado is hard, bitter, and adds nothing to the salad. A perfectly ripe avocado is creamy, buttery, and adds an extraordinary silky richness that perfectly balances the crisp broccoli and tart blueberries.
  • Dress at the last moment. This salad — particularly because of the fresh blueberries and delicate spinach — should be dressed immediately before serving. The dressing and the salt in it cause the spinach to wilt and the blueberries to release their juice over time.
  • Use the blueberry balsamic vinaigrette for a more dramatic flavor. The lemon poppy seed dressing is bright and refreshing. The blueberry balsamic vinaigrette is deeper, richer, and more dramatic — particularly beautiful for autumn and winter serving when you want something warmer and more complex.

Flavor Variations

  • Strawberry Broccoli Spinach Salad: Replace the blueberries with sliced fresh strawberries for a more traditionally summer-inspired salad with a beautiful rosy color that is equally vibrant and delicious.
  • Apple and Walnut Winter Version: Replace the fresh blueberries with thin apple slices and add dried cranberries and candied walnuts for a warmer, more autumnal version that is extraordinary as a Thanksgiving or Christmas salad.
  • Protein Packed Bowl: Add ½ cup of cooked quinoa, ½ cup of drained chickpeas, and 1 tablespoon of hemp seeds to transform this salad into a completely satisfying, protein-rich main course bowl that keeps you full for hours.
  • Asian Inspired: Replace the lemon poppy seed dressing with a sesame ginger dressing made from sesame oil, rice vinegar, soy sauce, ginger, and maple syrup. Replace the walnuts with toasted cashews and add sliced edamame and sesame seeds for a vibrant Asian-inspired version.

Nutritional Highlights (Per Serving)

CaloriesProteinCarbsFiberVitamin C
~320 kcal8g34g10g120% DV

This salad is genuinely one of the most nutritionally extraordinary recipes on the entire blog. Blueberries are one of the most antioxidant-dense foods on the planet — extraordinarily rich in anthocyanins that protect brain cells, support memory and cognitive function, reduce inflammation, and protect cardiovascular health. Broccoli is an outstanding source of Vitamin C — a single serving of this salad provides more than the complete daily recommended intake — along with Vitamin K, folate, and powerful glucosinolates that support cancer protection and liver health. Spinach delivers iron, Vitamin K, folate, and lutein for eye health. Walnuts provide omega-3 fatty acids and powerful polyphenol antioxidants. Avocado adds heart-healthy monounsaturated fats, potassium, and Vitamins E and K. Pumpkin seeds contribute zinc, iron, and magnesium. Together this salad delivers an extraordinary concentration of vitamins, minerals, antioxidants, and healthy fats in one of the most beautiful bowls available in plant-based cooking.


Storage and Meal Prep

  • Dressed salad: Best eaten immediately after dressing. Once dressed the spinach wilts and the blueberries begin releasing juice within 20–30 minutes.
  • Undressed components: Store all components separately in airtight containers in the fridge for the perfect meal prep salad. Spinach and broccoli keep for 3–4 days. Fresh blueberries keep for 4–5 days. Toasted nuts and seeds keep at room temperature for up to 1 week. Dressing keeps in a sealed jar in the fridge for up to 5 days. Avocado should be prepared fresh each day.
  • Meal prep tip: Prepare all components on Sunday — wash and dry the spinach, cut the broccoli, toast the nuts and seeds, make the dressing — and store separately. Each morning simply assemble a portion of salad and dress just before eating for a perfect grab-and-go lunch all week long.
  • Avocado storage: If you must prepare the avocado in advance toss the slices in fresh lemon juice and press plastic wrap directly onto the surface to minimize browning.

Frequently Asked Questions

Should I use raw or cooked broccoli in this salad?

Both work beautifully — it genuinely comes down to personal preference. Raw broccoli has maximum crunch, maximum nutritional value (heat destroys some of broccoli’s Vitamin C and enzymes), and a slightly more assertive, earthy flavor. Blanched broccoli is more tender, milder in flavor, and more accessible for people who find raw broccoli too firm. The 60-second blanch followed by ice water is the perfect middle ground — the broccoli is tender enough to eat comfortably but still has a satisfying bite and vibrant green color.

Can I use frozen blueberries?

Fresh blueberries are strongly recommended for this salad. Frozen blueberries thaw into a mushy, juice-releasing mess that will turn the entire salad a deep purple color. This is a case where fresh is non-negotiable for the best texture, color, and visual impact.

How do I make this salad more filling as a main course?

Add cooked quinoa, brown rice, or farro as a grain base. Increase the nuts and seeds significantly. Add a can of drained chickpeas or edamame for protein. Add sliced baked tofu or tempeh. Any combination of these additions transforms this salad from a vibrant side dish into a genuinely complete and deeply satisfying plant-based main course.

Can I make the dressing in advance?

Yes — the lemon poppy seed dressing stores beautifully in a sealed jar in the refrigerator for up to 5 days. Shake well before using as the oil and lemon juice will separate during storage. The blueberry balsamic vinaigrette also stores well for up to 5 days. Making the dressing in advance is one of the most practical meal prep strategies for getting this salad on the table quickly during busy weeks.

What makes poppy seeds special in the dressing?

Poppy seeds add a subtle, pleasantly nutty flavor, a beautiful visual texture to the dressing, and a satisfying tiny crunch that makes the dressing feel more complex and interesting than a plain lemon vinaigrette. They are particularly traditional in fruit-forward salad dressings and are worth including if you have them — but the dressing is equally delicious without them.

Is this salad suitable for children?

Yes — most children love this salad because of the sweet blueberries and mild broccoli. For children who find raw broccoli too firm use the blanched version which is significantly more tender and accessible. Omit the red onion and reduce the dressing quantity slightly for younger children. The sweetness of the blueberries, cranberries, and lemon maple dressing makes this one of the most child-friendly nutritious salads available.


Tried this recipe? Leave a comment below and let us know how it turned out! Browse all our vegan recipes to keep enjoying ultimate delicious and healthy lifestyle.