All Recipes

Homemade Vegan Pizza — Crispy Base, Melty Cheese, and Loaded with Toppings

homemade vegan pizza

There is a version of homemade pizza that most people have made at least once — the one where the dough is too thick or too thin, the base is pale and soft rather than crisp and blistered, the vegan cheese refuses to melt and sits on top in pale, rubbery chunks, and the whole thing arrives at the table looking nothing like what you had in mind. And then there is this version. The dough in this recipe uses a short, room-temperature proof and a technique that produces a base with genuine chew, a slight crisp on the underside, and the faint bubbling and char at the edges that signals a pizza cooked at the right temperature. The sauce is simple, uncooked, and bright. The vegan mozzarella is grated from a firm block at home — not pre-grated — so it melts cleanly and evenly across the surface without the anti-caking agents that prevent pre-grated vegan cheese from behaving like cheese in the oven. This homemade vegan pizza is 100% plant-based, dairy-free, and egg-free. It makes 2 large pizzas serving 4. It is on the table in under 2 hours including the dough proof, and the active work is less than 30 minutes. This is the pizza recipe you make once and then make every week.

The technique is the high-heat-and-preheated-surface method. The defining quality of a great pizza base — the crispness on the underside, the open, airy crumb, the blistered and charred edge — is produced by a combination of high heat and a hot surface that the dough contacts immediately on placement. A domestic oven at its standard 180–200°C setting produces a pizza that bakes slowly and evenly — which is exactly wrong for pizza, which needs rapid, intense heat from below and above simultaneously to cook the thin base through before the toppings are overdone and the edge is dried out rather than blistered. The high-heat-and-preheated-surface method exploits the maximum temperature available in a domestic oven (240–250°C, or as high as the oven will go) and uses a heavy baking tray or pizza stone preheated inside the oven for at least 30 minutes before baking — so the moment the pizza is slid onto the surface, the underside of the dough contacts extreme heat and begins to crisp and cook from below while the oven heat attacks from above. This rapid bilateral cooking — from the preheated surface below and the full-blast oven above — is what produces the crisp-based, properly blistered pizza in a domestic oven that would otherwise require a wood-fired oven to achieve. The dough itself is made slightly wetter than most home pizza doughs (a hydration of approximately 62–65%) because a wetter dough produces more steam in the oven, which is what creates the open, bubbly crumb structure at the crust edge; a drier dough produces a denser, more bready edge. The vegan mozzarella — grated from a firm block at the last minute — is added halfway through the bake rather than at the start, so the base has 5 minutes of undiluted top-oven heat to begin blistering before the cheese is added and the final 6–8 minutes melt it completely without overcooking the base.

This recipe makes 2 large pizzas, serving 4.


Recipe Information

Dough ProofPrep TimeBake TimeTotalServingsCalories
1 hr25 mins12–14 mins~1 hr 40 mins4~520 kcal

Ingredients

For the Pizza Dough (Makes 2 Bases)

  • 400g (3⅓ cups) strong white bread flour (bread flour) — bread flour only; its higher protein content (12–13%) develops a gluten network strong enough to trap the gas bubbles produced by the yeast and give the crust its chew; plain flour produces a flat, cracker-like base
  • 7g (1 sachet / 2¼ tsp) fast-action dried yeast (instant yeast)
  • 1 tsp fine sea salt
  • 1 tsp caster sugar — feeds the yeast during the initial activation
  • 1 tsp olive oil — plus extra for greasing
  • 260ml (1 cup + 1 tbsp) warm water — approximately 38–40°C; too hot kills the yeast; too cold slows the proof significantly; it should feel comfortably warm on the inside of your wrist, not hot

For the No-Cook Tomato Sauce

  • 1 × 400g tin good-quality chopped tomatoes — or passata; the quality of the tomatoes makes a significant difference to the finished pizza; use the best you can find
  • 2 cloves garlic, finely grated
  • 1 tbsp olive oil
  • 1 tsp dried oregano
  • ½ tsp fine sea salt
  • ½ tsp caster sugar — balances the acidity of the tomatoes
  • ¼ tsp chilli flakes — optional
  • Fresh basil — a few leaves torn and stirred through at the end

For the Toppings (Per Pizza)

  • 80–100g firm vegan mozzarella block — grated at home on the large holes of a box grater immediately before use; firm block-style only, never pre-grated (anti-caking agents prevent melting) and never fresh ball-style (too wet for pizza); the two main brands that grate and melt reliably are Violife and Sheese mozzarella-style blocks
  • Additional toppings of your choice — suggestions below; all toppings should be prepared and ready before the dough comes out of the oven

Suggested Toppings

  • Thinly sliced mushrooms — cremini, chestnut, or portobello; slice thinly so they cook through in the short bake time
  • Sliced roasted red peppers — from a jar, drained and patted dry; wet toppings make the base soggy
  • Marinated artichoke hearts — drained and roughly torn
  • Sun-dried tomatoes — oil-packed, drained
  • Pitted Kalamata olives, halved
  • Thinly sliced red onion
  • Capers — rinsed
  • Cherry tomatoes, halved — added in the last 3–4 minutes of baking so they blister without releasing too much liquid
  • Fresh rocket (arugula) — scattered over immediately after the pizza comes out of the oven; never baked
  • Fresh basil — torn and scattered after baking

Instructions

  1. Make the dough. In a large bowl, combine the bread flour, yeast, salt, and sugar. Make a well in the centre. Pour in the warm water and olive oil. Mix with a fork until a shaggy dough forms, then turn out onto a lightly floured surface and knead for 8–10 minutes until the dough is smooth, elastic, and springs back slowly when poked — it should be slightly tacky but not sticky. If using a stand mixer with a dough hook, knead on medium speed for 6 minutes. Form into a ball.
  2. First proof. Lightly oil a large bowl and place the dough ball inside. Cover tightly with cling film or a clean damp tea towel. Leave to rise at room temperature for 1 hour, or until roughly doubled in size. If your kitchen is cold (below 20°C), place the covered bowl in the oven with just the light on, or near a warm hob.
  3. Preheat the oven — and the surface. Place a heavy baking tray (or pizza stone if you have one) upside-down on the highest shelf of the oven. Preheat to the maximum temperature your oven will reach — 240–250°C fan / 260°C conventional / 500°F. Allow to preheat for a minimum of 30 minutes after reaching temperature. The surface must be genuinely scorching hot.
  4. Make the tomato sauce. While the dough proofs, combine all the sauce ingredients except the basil in a bowl and stir to combine. Leave for 15 minutes for the flavours to meld, then stir through the torn basil. The sauce should be slightly thick — if the tinned tomatoes are very liquid, drain off some of the liquid before mixing. Do not cook the sauce.
  5. Divide and shape the dough. Once the dough has doubled, punch it down gently to release the gas. Divide into 2 equal pieces. On a lightly floured surface, stretch and shape each piece into a rough circle approximately 28–30cm (11–12 inches) in diameter — use your hands rather than a rolling pin; a rolling pin presses out the gas bubbles in the dough and produces a flatter, denser edge. If the dough springs back as you stretch it, leave it to rest for 5 minutes and try again — the gluten is relaxing.
  6. Transfer to baking parchment. Place each shaped base on a piece of baking parchment cut to fit the tray. The parchment is the delivery mechanism — you will slide the pizza and its parchment directly onto the preheated surface.
  7. Sauce and pre-top. Spoon 3–4 tablespoons of the tomato sauce onto each base and spread with the back of a spoon, leaving a 2cm border at the edge for the crust. Add any toppings except the cheese, cherry tomatoes, and any fresh herbs — these go on later.
  8. Bake — high-heat stage. Carefully slide the pizza (still on its parchment) onto the preheated upside-down tray using a second flat baking tray or a pizza peel as a paddle. Bake for 5–6 minutes until the edges are beginning to puff and colour and the base is visibly setting.
  9. Add the cheese — mid-bake. Remove the oven shelf carefully and scatter the freshly grated vegan mozzarella evenly over the pizza surface. Add cherry tomatoes if using. Return to the oven for a further 6–8 minutes until the cheese is fully melted and beginning to blister in places, the crust is deep golden, and the underside (lift the edge with a spatula to check) is crisp and golden-brown with some char.
  10. Finish and serve. Remove from the oven. Scatter immediately with fresh basil, rocket, or any fresh herb toppings. Slice and serve at once — pizza waits for no one.

Pro Tips

  • Grate the mozzarella yourself, immediately before use — this is the most important single instruction in the recipe; pre-grated vegan mozzarella is coated in anti-caking agents (usually potato starch or rice flour) that form a physical barrier between the cheese particles, preventing them from melting together into the smooth, fluid, slightly blistered sheet that characterises a properly topped pizza; a firm mozzarella block grated at home arrives on the pizza free of that barrier, melts cleanly from the first minutes in the oven, and pools and bubbles in the way that pizza cheese should; do not substitute and do not grate in advance.
  • Preheat the surface for at least 30 minutes after the oven reaches temperature — an oven that has been at 250°C for 5 minutes has hot air but a relatively cold oven surface; thermal mass takes time to build; a pizza stone or heavy upside-down tray that has been in the oven for 30 minutes after reaching temperature is genuinely scorching; placing the pizza on it produces an immediate sizzle and a crust that begins to crisp from the first second of contact; a surface preheated for less time produces a pale, soft underside.
  • Keep the sauce thin and the toppings dry — too much sauce makes a soggy base that no amount of high heat can fully rescue; use 3–4 tablespoons per base, spread thinly; wet toppings (tinned artichokes, roasted peppers) must be drained and patted dry before use; fresh vegetables with high water content (zucchini, courgette) should be salted and pressed or pre-roasted before topping; every additional gram of moisture on the pizza surface works against the crisp base the technique is designed to produce.
  • Stretch, don’t roll — a rolling pin compresses the gas bubbles from the first proof into the dough and eliminates the open, airy structure that produces the chewy, blistered crust edge; hand-stretching preserves those bubbles and allows the edge to puff dramatically in the oven; the base does not need to be perfectly round; an irregular, hand-stretched shape is the mark of a pizza made correctly, not a mistake.

Pizza: From the Flatbreads of Ancient Naples to Every Kitchen in the World

Pizza as it is understood today — a yeasted flatbread base topped with tomato sauce and cheese and baked at high heat — is a product of a very specific place and a very specific period: the street food stalls of 18th-century Naples, where flatbreads topped with lard, salt, and anchovies had been sold to the city’s poor (the lazzaroni) since at least the 16th century, and where the gradual adoption of the tomato — introduced to Italy from the New World in the 16th century and initially regarded with profound suspicion as a potentially poisonous relative of deadly nightshade — transformed the flatbread from a vehicle for preserved meat into the tomato-based dish that would eventually conquer the world. The tomato’s rehabilitation in Italian cooking began in Naples and spread northward slowly over the 17th and 18th centuries; by the early 19th century, pizza marinara (tomato, garlic, olive oil, oregano) and pizza margherita — reportedly invented in 1889 by Neapolitan pizzaiolo Raffaele Esposito and named in honour of Queen Margherita of Savoy, whose visit to Naples prompted Esposito to create a pizza in the colours of the Italian flag (red tomato, white mozzarella, green basil) — had established the canonical form of the Neapolitan pizza that remains the reference point for every pizza made since. The globalisation of pizza is almost entirely the story of Italian immigration to the United States. The first documented pizzeria in America — Lombardi’s, on Spring Street in Manhattan — opened in 1905, founded by Gennaro Lombardi, a Neapolitan immigrant who had been selling pizza from his grocery store since 1897. The pizza that Italian-American communities developed over the following decades — thicker-crusted, more heavily topped, adapted to American ingredients and American portion sizes — diverged significantly from its Neapolitan origins, but carried the essential principle intact: dough, tomato, cheese, heat. The vegan pizza in this recipe stands in that lineage — from the street stalls of 18th-century Naples to a domestic oven at its maximum setting — with nothing changed except the cheese.


Flavor Variations

  • BBQ Vegan Chicken Pizza: Replace the tomato sauce with 4 tablespoons of your favourite vegan BBQ sauce per base. Top with sliced vegan chicken pieces (or shredded jackfruit cooked with BBQ sauce and smoked paprika), thinly sliced red onion, and sliced pickled jalapeños. Add the grated vegan mozzarella and bake as directed. Finish with a drizzle of additional BBQ sauce and fresh coriander. This is the crowd-pleasing, non-negotiable crowd-pleaser in the repertoire.
  • Roasted Garlic and Mushroom White Pizza: Instead of tomato sauce, blend 4 tablespoons of soaked cashews with 2 tablespoons of nutritional yeast, 1 tablespoon of lemon juice, 1 clove of roasted garlic, and enough water to reach a spreadable consistency. Use this as the base sauce. Top with thinly sliced mushrooms, caramelised onion, fresh thyme, and grated vegan mozzarella. Finish with truffle oil and fresh flat-leaf parsley after baking. The white pizza version is richer, more umami-forward, and deeply satisfying.
  • Margherita with Basil Oil: Keep it simple — tomato sauce, grated vegan mozzarella, and nothing else during the bake. The moment the pizza comes out of the oven, drizzle with a basil oil made by blending a large handful of fresh basil with 4 tablespoons of good olive oil and a pinch of salt. The simplicity of a margherita reveals the quality of every element — the dough, the sauce, the cheese — without anywhere for a weakness to hide.

Nutritional Highlights (Per Serving — Based on 4 Servings, ½ Pizza Each)

CaloriesProteinCarbsFiberFat
~520 kcal14g72g4g18g

Storage

  • Best eaten immediately — pizza is at its peak the moment it comes out of the oven; the base is crisp, the cheese is fluid, and the toppings are at the right temperature; within 20–30 minutes the base begins to soften as it absorbs moisture from the sauce and toppings.
  • Refrigerator: Store leftover pizza in a sealed container or wrapped in foil for up to 3 days. The vegan mozzarella firms back up as it cools and the base softens — both return to their correct state on reheating.
  • Reheating: The best method for reheating cold pizza is a hot dry frying pan with a lid; place the cold pizza slice in the pan over medium heat, cover with the lid, and heat for 3–4 minutes until the base is crisp again and the cheese is melted; the steam trapped by the lid remelts the cheese without drying out the toppings; do not microwave (soft, soggy base); an oven at 220°C for 8–10 minutes also works well.
  • Uncooked dough: The proofed, divided dough balls can be wrapped tightly in cling film and refrigerated for up to 48 hours — a slow cold proof actually improves the flavour of the dough. Remove from the refrigerator 30 minutes before shaping to allow the gluten to relax. Dough balls can also be frozen, wrapped tightly, for up to 1 month; defrost overnight in the refrigerator.
  • Sauce: The no-cook tomato sauce keeps in a sealed container in the refrigerator for up to 5 days — make a double batch and use it on pasta, as a dipping sauce, or on multiple pizza nights.

Frequently Asked Questions

Why is my pizza base soggy in the middle?

The most common causes are: the oven was not hot enough; the baking surface was not preheated long enough; too much sauce was used; the toppings were wet; or the pizza was too thick in the centre. Pizza needs maximum oven heat and a preheated surface — any compromise on either produces a soft centre. Use 3–4 tablespoons of sauce per base (not a thick layer), pat all wet toppings dry before use, and preheat the surface for a full 30 minutes after reaching temperature.

My vegan cheese isn’t melting — what can I do?

Pre-grated vegan cheese almost never melts properly due to its anti-caking coating. Use a firm mozzarella-style block (Violife and Sheese are the two most reliable for melting) and grate it yourself at home immediately before applying to the pizza. Adding the cheese halfway through the bake rather than at the beginning also helps — it goes into an already-hot oven and melts rapidly rather than spending the full bake time drying out.

Can I make the dough in advance?

Yes — the dough can be made up to 48 hours in advance and stored in the refrigerator after the first proof (punch down, divide into balls, wrap tightly in cling film, refrigerate). A cold-proofed dough has more flavour than a room-temperature-proofed dough and is often easier to handle as the gluten is more relaxed. Remove from the refrigerator 30 minutes before shaping.

Do I need a pizza stone?

No — a heavy baking tray (ideally a thick rimmed baking sheet or a cast-iron griddle) turned upside down and preheated for 30 minutes works very well. A pizza stone does retain heat more efficiently and produces marginally better results, but the difference is smaller than the preheating makes — a pizza stone that has been in the oven for 10 minutes performs worse than a heavy baking tray that has been in for 30.


Tried this recipe? Leave a comment below and let us know how it turned out! Tag us on Instagram and Facebook — we love seeing your plant-powered creations. Looking for more addictive vegan snack and appetizer recipes? Browse all recipes on Easy Vegan Recipes — new recipes posted every single week!

Vegan Sausage and Butternut Squash Soup — Hearty, Smoky, and Ready in 45 Minutes

vegan sausage and butternut squash soup

This is not a delicate soup. It is not a purée designed to be sipped from a shallow bowl with a swirl of cream on top. This vegan sausage and butternut squash soup is a proper, hearty, autumn-and-winter meal — thick, smoky, deeply savoury, with chunks of golden butternut squash and slices of vegan sausage that give every spoonful something substantial to get hold of. The squash brings natural sweetness and body; the sausages bring smokiness and the satisfying chew of something that feels like actual dinner rather than a starter that happens to be warm. Together, with a base of softened onion, garlic, and smoked paprika, and a stock that is given time to reduce and concentrate, the result is one of those soups that is better than you expect from its ingredient list and exactly what the weather demands. It is 100% plant-based, dairy-free, and egg-free. It serves 6. It is on the table in 45 minutes from a cold start. It is the kind of soup you make on a Sunday and eat three times during the week because it improves with every day in the refrigerator.

The technique is the sear-first-and-bloom method. Soups that are made by combining all their ingredients in a pot and simmering until done have a characteristic flavour: thin, one-dimensional, lacking depth — the flavour of individual ingredients that have been cooked together but have not truly combined into something greater than their parts. The sear-first-and-bloom method addresses this by building flavour at every stage before the liquid is added, rather than relying on the simmer to do the work. Step one — sear the sausages first: the vegan sausages are sliced and seared in the soup pot in a small amount of oil before anything else, until they are deeply golden on all cut surfaces; this Maillard browning on the sausage surface creates flavour compounds that dissolve into the soup when the liquid is added, giving the broth a depth and complexity that no amount of simmering can produce if the sausages go in raw. The seared sausage slices are removed and set aside — they will be added back to the soup in the final stage to prevent them from becoming too soft during the long simmer. Step two — bloom the aromatics and spices: the onion and garlic are softened in the sausage-flavoured fat remaining in the pot; the tomato paste is added and cooked for 3–4 minutes until it deepens to a dark brick-red (this Maillard-equivalent step for tomato paste concentrates and transforms its flavour from raw and acidic to deep and savoury); the smoked paprika, cumin, and dried thyme are stirred into the fat and cooked for 60 seconds, which causes the fat-soluble flavour compounds in the spices to dissolve into the oil rather than remaining locked in the dry spice powder — a process called blooming that dramatically increases the flavour intensity and colour the spices contribute to the soup. Step three — the squash goes in after the bloom: the butternut squash is added to the flavoured base, stirred to coat in the spice-and-tomato-infused fat, and then the stock is added; this brief coating step ensures the squash absorbs the base flavours from the first minute of simmering rather than cooking in a neutral liquid.

This recipe serves 6.


Recipe Information

Prep TimeCook TimeTotal TimeServingsCalories
15 mins30 mins45 mins6~390 kcal

Ingredients

For the Soup

  • 6 good-quality vegan sausages — the brand matters here; choose a sausage with a smoky, savoury flavour and a firm enough texture to hold its shape when sliced and simmered; Cumberland-style or Italian-style vegan sausages work well; avoid sausages that are very soft or crumbly as they will disintegrate during the simmer
  • 1 large butternut squash (approximately 1kg / 2.2lbs) — peeled, deseeded, and cut into 2cm cubes; the cubes should be consistent in size for even cooking; pre-cut supermarket butternut squash is convenient and works equally well
  • 2 medium onions, finely diced
  • 5 cloves garlic, finely minced
  • 2 sticks celery, finely sliced
  • 2 medium carrots, diced to approximately 1cm
  • 2 tbsp tomato paste (tomato purée) — bloomed in the oil before the liquid is added; do not skip this step
  • 2 tsp smoked paprika — the smokiness of the paprika is central to the flavour profile of this soup; sweet paprika can be used but produces a less characterful result
  • 1 tsp ground cumin
  • 1 tsp dried thyme — or 3–4 sprigs of fresh thyme, leaves stripped
  • ½ tsp chilli flakes — optional; adds background warmth without making the soup spicy
  • 1.5 litres (6 cups) good-quality vegan vegetable stock — the stock is the backbone of the soup’s flavour; use a good-quality stock cube or liquid stock; a thin, weak stock produces a thin, weak soup
  • 1 × 400g tin cannellini beans or butter beans — drained and rinsed; adds protein, creaminess, and body to the soup without needing to blend it
  • 2 tbsp olive oil — for searing and softening
  • Salt and freshly cracked black pepper — to taste
  • 1 tsp balsamic vinegar or red wine vinegar — added at the very end; a small amount of acid brightens and lifts the finished soup

To Serve

  • Fresh flat-leaf parsley, roughly chopped
  • Chilli flakes — for scattering over
  • Good crusty bread — for dipping
  • Extra virgin olive oil — for drizzling over each bowl

Instructions

  1. Sear the sausages — sear-first stage. Slice each vegan sausage into rounds approximately 1.5–2cm thick. Heat 1 tablespoon of olive oil in a large, heavy-based pot or Dutch oven over medium-high heat. When the oil is shimmering, add the sausage slices in a single layer — work in batches if necessary; do not crowd the pot. Sear for 2–3 minutes per side without moving until each side is deeply golden-brown. Remove the sausage slices to a plate and set aside. Do not wipe the pot — the fat and fond (the browned residue on the base of the pot) remaining in the pot after searing is the foundation of the soup’s depth of flavour.
  2. Soften the aromatics. Reduce the heat to medium. Add the remaining tablespoon of olive oil to the pot. Add the diced onion, celery, and carrot and cook, stirring occasionally, for 7–8 minutes until the onion is soft, translucent, and beginning to colour at the edges. Add the minced garlic and cook for a further 2 minutes.
  3. Bloom the tomato paste and spices — bloom stage. Push the vegetables to the edges of the pot. Add the tomato paste to the centre and cook, stirring and spreading it around the base of the pot, for 3–4 minutes until it has darkened from bright red to a deep brick-red colour. Add the smoked paprika, cumin, dried thyme, and chilli flakes if using, and stir everything together, cooking for 60 seconds until the spices are fragrant and fully incorporated into the fat and tomato paste.
  4. Add the squash and coat. Add the butternut squash cubes to the pot and stir to coat thoroughly in the spiced tomato base. Cook for 2 minutes, stirring occasionally, so the squash begins to absorb the base flavours before the stock is added.
  5. Add the stock and simmer. Pour in the vegetable stock and stir well, scraping up any fond from the base of the pot. Increase the heat to bring the soup to a brisk simmer. Reduce to a steady simmer (not a rolling boil — a vigorous boil clouds the soup and can make the squash break down unevenly) and cook for 18–20 minutes until the butternut squash is completely tender when pierced with a knife — it should offer no resistance.
  6. Partially blend — optional. For a soup with more body and creaminess while still maintaining chunks of squash, use a ladle to remove approximately one-third of the soup (aiming for squash-heavy ladlefuls) and blend until smooth in a blender or with a stick blender in a separate jug. Stir the blended portion back into the pot. This partial blend thickens the soup significantly without making it a purée. Skip this step entirely if you prefer a purely chunky soup.
  7. Add the beans and sausages. Add the drained cannellini beans to the pot. Return the seared sausage slices to the pot. Stir gently and simmer for a further 5 minutes until the beans are heated through and the sausages have warmed and absorbed some of the broth.
  8. Finish and season. Remove from the heat. Add the balsamic vinegar, stir through, and taste. Adjust salt and black pepper generously — this soup needs confident seasoning. If the soup feels too thick, add a splash of additional stock or water to loosen.
  9. Serve. Ladle into bowls. Scatter with fresh parsley and chilli flakes. Drizzle with extra virgin olive oil. Serve immediately with crusty bread.

Pro Tips

  • Sear the sausages before anything else, in the soup pot — the browned fond that remains in the pot after searing the sausages is the single greatest flavour contribution in this recipe; cooking the onions and aromatics directly in that fond dissolves it into the vegetable base, distributing its depth throughout the entire soup; if the sausages are added raw with the stock they contribute almost none of this flavour; 5 minutes of searing returns hours of slow-cooked depth.
  • Bloom the tomato paste until it darkens — raw tomato paste added to a soup and immediately covered with stock tastes raw, bright, and slightly acidic, because its natural sugars and amino acids have not had the sustained dry heat needed to undergo Maillard browning; 3–4 minutes of cooking in a hot, relatively dry pot transforms those same sugars and amino acids into the complex, savoury, concentrated flavour compounds that give a soup its backbone; do not rush this step and do not add stock until the paste is visibly darker.
  • Add sausages back in the final 5 minutes only — vegan sausages that simmer in the soup for the full 20-minute cooking time become soft, pale, and waterlogged, losing both their texture and the caramelised flavour developed during searing; returning them to the pot only for the final 5 minutes preserves their texture and allows them to warm through and absorb the soup’s flavour without deteriorating.
  • Season at the end, not throughout — the vegetable stock reduces slightly during the 20-minute simmer, concentrating its salt; seasoning aggressively at the beginning produces an over-salted final soup; taste and season only after the soup has finished cooking and any final adjustments (blending, adding beans, thinning with water) have been made.

Butternut Squash: A New World Vegetable Conquers the Old World Kitchen

Butternut squash (Cucurbita moschata) is a member of the Cucurbitaceae family — the same botanical family that includes cucumbers, melons, and all the other squashes and pumpkins — and like every member of that family, it is native to the Americas. The domestication of Cucurbita species in the Americas is among the oldest agricultural achievements in the world: archaeological evidence from the Oaxaca Valley in Mexico places the cultivation of Cucurbita pepo (a close relative) at approximately 8,000–10,000 BCE, making squash one of the oldest cultivated crops on earth and a central component of the “Three Sisters” agricultural system developed by Indigenous peoples across North and Central America — the polyculture of maize, beans, and squash that formed the nutritional and agricultural foundation of many pre-Columbian civilisations. Butternut squash specifically is a relatively modern variety: it was developed in the United States in the 1940s by Charles Leggett of Stow, Massachusetts, who crossed a gooseneck squash with a Hubbard squash to produce the butternut — notable for its smooth, easy-to-peel skin, its sweet, dense flesh, its long shelf life, and its consistent performance in cooking across a wide range of methods. The butternut’s global spread from Leggett’s Massachusetts garden to supermarket shelves in every country where this recipe might be made is a story that took less than 80 years — a remarkably rapid adoption driven by the vegetable’s practical virtues (easy preparation, long storage, versatile flavour) and by the shift in the 1970s–1990s toward a more internationally diverse food culture in the United Kingdom and across Europe, where the butternut squash found particular favour in autumn and winter cooking. The natural sweetness of butternut squash — a product of its high sugar content relative to most vegetables — makes it one of the ideal partners for smoky, savoury flavours like the sausage and smoked paprika in this soup: the sweetness and the smokiness calibrate each other, and the squash’s creamy, dense flesh gives a soup exactly the body it needs without requiring cream or a roux.


Flavor Variations

  • Spicy Nduja-Style Vegan Sausage and Squash Soup: Use a spicy vegan sausage (a chorizo-style or spicy Italian-style vegan sausage) and add 1–2 teaspoons of harissa paste to the pot when blooming the tomato paste. Increase the chilli flakes to 1 teaspoon. The heat of the spicy sausage and harissa against the sweetness of the butternut squash is one of the best flavour combinations in winter soup cookery. Finish with a swirl of vegan yogurt over each bowl to temper the heat.
  • Tuscan White Bean and Sausage Soup: Reduce the butternut squash to 500g and add one tin of chopped tomatoes alongside the stock. Replace the cannellini beans with borlotti beans. Add a parmesan rind (or a piece of nutritional-yeast-rubbed vegetable broth rind) to the pot with the stock for extra depth. Add 100g of shredded cavolo nero or kale in the final 5 minutes of simmering. The Tuscan version is denser, more tomato-forward, and deeply reminiscent of ribollita — the classic Tuscan bread-and-bean soup.
  • Curried Butternut Squash and Sausage Soup: Replace the smoked paprika, cumin, and thyme with 2 tablespoons of medium curry powder or a combination of 1 tsp turmeric, 1 tsp ground coriander, 1 tsp ground cumin, and ½ tsp garam masala. Add one 400ml tin of coconut milk alongside the stock for creaminess. Finish with fresh coriander and a squeeze of lime. The curried version is fragrant, warming, and works best with a mild vegan sausage that carries the curry spicing rather than competing with it.

Nutritional Highlights (Per Serving — Based on 6 Servings)

CaloriesProteinCarbsFiberFat
~390 kcal16g42g9g17g

Storage

  • Refrigerator: This soup improves significantly with time in the refrigerator as the flavours continue to develop and the starch from the squash thickens the broth. Store in a sealed container for up to 5 days — it is better on day three than on day one. Reheat gently on the hob over medium heat, adding a splash of water or stock if it has thickened too much on standing.
  • Freezer: This soup freezes exceptionally well. Allow to cool completely, transfer to freezer-safe containers or zip-lock bags in single-serving portions, and freeze for up to 3 months. Defrost overnight in the refrigerator and reheat on the hob. The sausage texture softens slightly after freezing and thawing but remains pleasant. The squash may break down further on reheating, creating a naturally thicker soup — add extra stock as needed.
  • Batch cooking: This soup is ideal for batch cooking — make a double quantity in the largest pot you own; the active time is almost identical and you produce 12 servings that can be divided between the refrigerator (5 days) and the freezer (3 months). A double batch is one of the most efficient uses of 45 minutes in a vegan kitchen.
  • Reheating from frozen: Transfer frozen soup to the refrigerator the night before needed. Reheat in a pot over medium heat, stirring occasionally, adding stock or water to adjust consistency. Do not boil aggressively — gentle reheating preserves the sausage texture and prevents the squash from breaking down into a purée.

Frequently Asked Questions

Which vegan sausages work best in this recipe?

The key properties to look for are: a firm enough texture to hold its shape when sliced and simmered (very soft or crumbly sausages disintegrate); a smoky, savoury flavour that contributes to the soup rather than disappearing into it; and a skin that can be removed if necessary (some vegan sausage skins become tough after searing — slice the sausage before searing to avoid this). Cumberland-style and Italian herb-style vegan sausages from brands such as Richmond, Heck, and Linda McCartney all work well. If your preferred brand is softer, reduce the simmering time after adding the sausages back to 2–3 minutes.

Can I use pumpkin instead of butternut squash?

Yes — any dense, sweet winter squash works in this soup. Pumpkin, kabocha, Red Kuri, and Delicata squash are all good substitutes and cook in approximately the same time as butternut. Avoid watery summer squashes (courgette, yellow squash) — they don’t provide the body or sweetness that butternut contributes.

Can I make this soup in a slow cooker?

Yes — sear the sausages and bloom the aromatics and spices on the hob as directed (this step cannot be done in a slow cooker), then transfer everything to the slow cooker. Cook on high for 3–4 hours or low for 6–8 hours until the squash is tender. Add the beans and sausage slices in the final 30 minutes. The slow cooker version develops an exceptionally deep, long-cooked flavour but the sausage texture is softer than the hob version.

My soup tastes thin and flat — how do I fix it?

If the soup tastes thin, the most effective fixes are: partial blending (scoop out and blend a third of the soup and stir back in — this immediately thickens and adds body); reduction (simmer with the lid off for 10 minutes to concentrate the broth); additional seasoning (flat soup is usually under-seasoned — add salt, black pepper, and an extra teaspoon of smoked paprika); or a tablespoon of soy sauce (adds immediate umami depth without a noticeable soy flavour). A combination of all four usually rescues even the flattest pot of soup.


Tried this recipe? Leave a comment below and let us know how it turned out! Tag us on Instagram and Facebook — we love seeing your plant-powered creations. Looking for more addictive vegan snack and appetizer recipes? Browse all recipes on Easy Vegan Recipes — new recipes posted every single week!
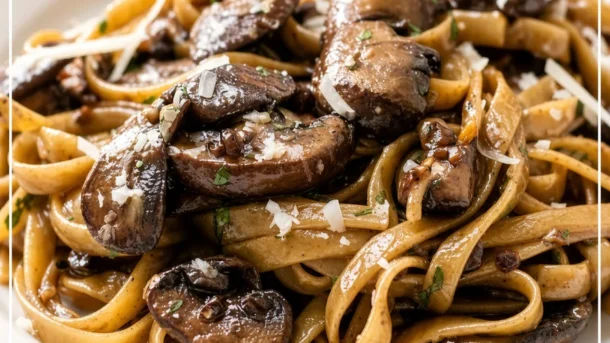
Balsamic Mushroom Pasta — Deeply Savoury, Glossy, and Ready in 30 Minutes

balsamic mushroom pasta

Mushrooms and balsamic vinegar is one of those flavour pairings that seems almost too obvious until you taste it done correctly — and then it becomes one of the combinations you reach for again and again. The earthy, meaty depth of well-cooked mushrooms against the sweet, complex acidity of reduced balsamic vinegar; the two flavours amplifying each other rather than competing; the sauce that clings to the pasta in a dark, glossy coat that looks as impressive as anything that has spent hours on the stove. This balsamic mushroom pasta is 100% plant-based, dairy-free, and egg-free. It serves 4. It is on the table in 30 minutes. It uses one pan for the sauce and one pot for the pasta. It is the kind of weeknight dinner that earns the compliment “you made this in 30 minutes?” — and the answer is yes, because the technique is the reason, not the ingredient list.

The technique is the deglaze-reduce-and-emulsify method. The failure mode of most mushroom pasta recipes is the pale, watery sauce: mushrooms are added to a pan and immediately begin releasing their internal moisture — up to 80–90% of their weight in water — which creates a steamy, liquid environment that prevents the mushrooms from browning and produces a thin sauce that coats nothing and flavours little. The deglaze-reduce-and-emulsify method reverses this through three sequential stages that transform mushroom moisture from an obstacle into a building block. Stage one — the dry sear: mushrooms are cooked in a large, wide pan in a single layer over high heat without any liquid added — no stock, no wine, no water; just oil and heat. In these conditions, the mushroom moisture evaporates from the surface as fast as it is released, keeping the pan surface dry enough to maintain the Maillard browning conditions that produce the deeply golden, almost caramelised mushroom exterior that is the foundation of the sauce’s flavour. If mushrooms are crowded in the pan they steam each other and never brown; if they are given space and high heat they brown rapidly and deeply. Stage two — the balsamic deglaze and reduction: once the mushrooms are golden, balsamic vinegar is added to the hot pan and bubbles violently on contact, dissolving the browned fond from the base of the pan (which carries the concentrated flavour from the mushroom sear) into the liquid; the balsamic then reduces over high heat for 2–3 minutes, concentrating from a thin vinegar into a thick, syrupy glaze that coats the mushrooms in a lacquered shell of sweet-acidic intensity. Stage three — the pasta water emulsification: reserved pasta cooking water, added to the glazed mushrooms alongside the drained pasta, provides the starch that emulsifies the balsamic reduction and any remaining fat in the pan into a cohesive sauce that clings to the pasta strands rather than pooling at the bottom of the bowl.

This recipe serves 4.


Recipe Information

Prep TimeCook TimeTotal TimeServingsCalories
10 mins20 mins30 mins4~450 kcal

Ingredients

For the Pasta

  • 400g (14oz) dried pasta — tagliatelle, pappardelle, or rigatoni; tagliatelle and pappardelle coat particularly well with this sauce; rigatoni is the best short-pasta option as its ridges and hollow interior trap the sauce

For the Balsamic Mushroom Sauce

  • 700g (25oz) mixed mushrooms — a combination of two or three varieties produces more complex flavour than a single variety; chestnut (cremini) and portobello form the base; shiitake adds umami; oyster adds delicacy and texture; avoid button mushrooms as the sole mushroom — they have too high a water content and too mild a flavour for a sauce that relies on mushroom depth
  • 5 cloves garlic, thinly sliced
  • 1 medium shallot or ½ small red onion, finely diced
  • 3 tbsp olive oil — divided; the pan needs sufficient oil to coat the mushrooms and allow Maillard browning rather than steaming
  • 3 tbsp good-quality balsamic vinegar — quality matters here; a thin, sour balsamic produces a sharp, one-dimensional reduction; a thick, slightly sweet aged balsamic (look for “invecchiato” or “riserva” on the label, or a balsamic glaze) produces a rounded, complex reduction; do not substitute balsamic glaze at the same volume — glaze is already reduced, so use 1–2 tbsp
  • 2 tbsp soy sauce or tamari — provides additional umami depth that amplifies the mushroom flavour; the soy does not make the dish taste Asian in character but rounds and deepens the overall savouriness of the sauce
  • 1 tbsp vegan block butter — added at the end of cooking; enriches the sauce and gives it a glossy finish
  • 1 tsp fresh thyme leaves — or ½ tsp dried thyme; thyme has a natural affinity with both mushrooms and balsamic
  • 1 tsp fresh rosemary, very finely minced — optional; adds a piney, resinous note; use sparingly
  • ½ tsp chilli flakes — optional; adds background warmth
  • 1 cup (240ml) pasta cooking water — reserved before draining; essential for emulsifying the sauce
  • Sea salt and freshly cracked black pepper

To Serve

  • Fresh flat-leaf parsley, roughly chopped — scattered generously over the finished dish
  • Nutritional yeast or vegan parmesan-style cheese — for serving
  • Extra virgin olive oil — a drizzle over the finished bowl
  • Fresh lemon wedges — optional; a squeeze of lemon at the table brightens the richness of the balsamic

Instructions

  1. Salt the pasta water and cook. Bring a large pot of water to a rolling boil. Salt generously. Cook the pasta according to the packet instructions minus 1 minute — it should be almost done but with a faint chalky core when bitten. Before draining, scoop out at least 1 cup (240ml) of pasta cooking water. Drain the pasta and set aside.
  2. Prepare the mushrooms. While the water is heating, clean the mushrooms — wipe with a damp cloth rather than washing under running water (washing adds the moisture you are trying to eliminate). Tear larger mushrooms (portobello, oyster) into irregular pieces by hand; slice chestnut and shiitake mushrooms thickly (approximately 5mm). Keeping the pieces large preserves texture in the final dish.
  3. Sear the mushrooms — dry sear stage. Heat 2 tablespoons of olive oil in the largest wide frying pan or sauté pan available over high heat until the oil is shimmering and almost smoking. Add the mushrooms in a single layer — do not crowd; work in two batches if necessary. Do not stir or move them for the first 2–3 minutes. When the underside is deeply golden and the mushroom has released most of its moisture and contracted to roughly half its original size, toss and cook for a further 1–2 minutes. Remove the first batch and sear the second in the same way, adding the remaining tablespoon of oil if needed. Return all the mushrooms to the pan.
  4. Add aromatics. Reduce the heat to medium. Push the mushrooms to the edges of the pan. Add the finely diced shallot to the centre and cook for 2 minutes until softened. Add the sliced garlic, thyme, rosemary (if using), and chilli flakes. Cook for 60–90 seconds until the garlic is fragrant and pale golden — not brown.
  5. Deglaze and reduce — balsamic stage. Increase the heat to high. Pour the balsamic vinegar and soy sauce directly into the pan — the liquid will spit and steam violently. Stir quickly, scraping up all the browned fond from the base of the pan. Let the balsamic reduce, stirring occasionally, for 2–3 minutes until it has thickened to a syrupy consistency and the mushrooms are coated in a dark, glossy glaze. The reduction is ready when a spatula dragged across the base of the pan leaves a clear line for a moment before the glaze flows back.
  6. Finish with pasta and emulsify — emulsify stage. Add the drained pasta directly to the glazed mushrooms in the pan. Add the reserved pasta cooking water in two or three additions — approximately a third at a time — tossing continuously between additions. Add the vegan block butter. Continue tossing over medium heat for 1–2 minutes until the sauce has emulsified into a cohesive, glossy coating that clings to every strand of pasta. The sauce should look silky and uniform, not watery or greasy. Add more pasta water if the sauce becomes too thick; the pasta continues to absorb liquid as it sits.
  7. Taste and season. Remove from the heat. Taste and adjust salt and black pepper generously. The balsamic and soy sauce contribute significant saltiness — taste before adding additional salt.
  8. Serve. Divide between warmed bowls. Scatter generously with fresh parsley. Add a drizzle of extra virgin olive oil and a grating of vegan parmesan or a spoonful of nutritional yeast. Serve immediately with lemon wedges on the side.

Pro Tips

  • Cook the mushrooms in batches — this is the most important instruction in the recipe and the one most commonly ignored; a pan crowded with mushrooms cannot maintain the high surface temperature needed for Maillard browning because the collective moisture released by the mushrooms drops the pan temperature and creates a steaming environment; each mushroom piece needs direct contact with a hot, dry pan surface; use the largest pan you own and still cook in two batches if necessary; the patience required is the 3–4 minutes it takes to sear each batch — the flavour payoff is entirely disproportionate to the effort.
  • Don’t add salt to the mushrooms during searing — salt draws moisture out of the mushrooms through osmosis, creating a wet, steamy environment in the pan at precisely the moment when you need it dry; add salt after the mushrooms are seared and the balsamic has been added; the soy sauce added with the balsamic provides seasoning at the correct stage.
  • Use a large, wide pan — the surface area of the pan is as important as the heat; a small pan forces the mushrooms into a pile rather than a single layer and makes batch cooking necessary even with modest quantities; a large (28–30cm) frying pan or sauté pan allows more mushrooms to sear simultaneously and reduces the total batch time.
  • Reduce the balsamic until it coats — the deglaze is only the beginning; the balsamic needs to reduce for 2–3 minutes at high heat after it hits the pan to transform from vinegar into glaze; added as a brief splash and immediately covered with pasta water or stock, it contributes acidity without depth; reduced to a syrup before the pasta is added, it contributes sweetness, complexity, and the glossy coating that makes this sauce look and taste as though it has been working for hours.

Balsamic Vinegar: The Long Patience of Modena

Balsamic vinegar — aceto balsamico — is the product of a fermentation and ageing process so slow, so demanding, and so specific to a small region of northern Italy that the authentic version of the product bears almost no resemblance to the bottle of dark vinegar available in every supermarket in the world. Traditional Balsamic Vinegar of Modena (Aceto Balsamico Tradizionale di Modena, protected under European PDO designation) begins with the must of Trebbiano and Lambrusco grapes grown in the province of Modena in Emilia-Romagna: the must — the crushed grape juice, skins, seeds, and all — is cooked slowly over an open fire until it has reduced to approximately one-third of its original volume, concentrating its sugars to a thick, dark syrup called mosto cotto. This cooked must is then transferred to a battery of barrels made from different woods — traditionally a succession of decreasing sizes, made from oak, cherry, chestnut, mulberry, ash, and juniper — and aged through a process of annual transfers between barrels that concentrates the liquid further each year as it evaporates through the wood. A balsamic labelled “Tradizionale” and bearing the consortium’s certification has been aged for a minimum of 12 years; the “Extra Vecchio” grade has been aged for 25 years or more. The result is a dense, syrupy, deeply complex liquid — sweet and sour simultaneously, with layers of fruit, wood, and age — that is used in Modena not as a salad dressing but as a finishing condiment, applied in drops to sliced aged Parmigiano-Reggiano, strawberries, or grilled meat. What is sold in supermarkets as “balsamic vinegar of Modena” — the commercially produced version, protected under a separate IGP designation — is an entirely different product: wine vinegar with grape must added, aged for as little as 60 days, and thickened with caramel or concentrate. It is useful and widely used (including in this recipe) but it is not what the citizens of Modena mean when they say balsamico. The best commercially available supermarket balsamic — not the cheapest, but the one with the thickest consistency and the most rounded flavour — is the appropriate choice for this pasta; a few tablespoons reduced into the mushroom pan becomes something genuinely excellent.


Flavor Variations

  • Creamy Balsamic Mushroom Pasta: After the balsamic reduction, stir in 150ml of vegan single cream or oat cream before adding the pasta. Allow the cream to come to a simmer and reduce slightly before adding the pasta and pasta water. The cream version is richer, paler, and more indulgent — the balsamic acidity cuts through the cream beautifully, preventing the sauce from feeling heavy.
  • Balsamic Mushroom and Spinach Pasta: Add 100g of fresh baby spinach to the pan immediately after the balsamic reduction — the spinach wilts in the residual heat in 60–90 seconds. Proceed with adding the pasta and pasta water as directed. The spinach adds colour, iron, and a slightly mineral note that pairs particularly well with the deep, sweet balsamic glaze.
  • Balsamic Mushroom and Sun-Dried Tomato Pasta: Add 60g of oil-packed sun-dried tomatoes (drained and roughly chopped) to the pan alongside the garlic. The concentrated sweetness and acidity of the sun-dried tomatoes adds another layer of flavour that amplifies the balsamic reduction rather than competing with it. Finish with fresh basil rather than parsley.

Nutritional Highlights (Per Serving — Based on 4 Servings)

CaloriesProteinCarbsFiberFat
~450 kcal14g68g5g14g

Storage

  • Best eaten immediately — this pasta is at its best the moment it leaves the pan; the balsamic glaze continues to absorb into the pasta on standing and the emulsified sauce can break if reheated carelessly.
  • Refrigerator: Store in a sealed container for up to 3 days. The pasta will absorb all remaining sauce during storage and look dry when cold — this is normal.
  • Reheating: Add the cold pasta to a pan with a generous splash of water (3–4 tablespoons) and a small knob of vegan block butter over medium heat. Toss continuously for 2–3 minutes until heated through and the sauce has re-emulsified. A small additional splash of balsamic vinegar (½ teaspoon) added on reheating restores some of the brightness that mellows during storage.
  • Freezer: Not recommended — the mushroom texture and the emulsified pasta sauce both suffer significantly through freezing and thawing.
  • Mushroom sauce alone: The balsamic mushroom sauce (without pasta) stores beautifully in the refrigerator for up to 4 days and freezes well for up to 2 months. Make the sauce in advance and cook fresh pasta to serve with it — a more flexible approach for batch cooking.

Frequently Asked Questions

Why are my mushrooms releasing lots of water and not browning?

The pan is too small, too cold, or too crowded — all three create the same result: a steamy, wet environment in which the mushrooms cannot brown. Use the largest pan you own, heat it until the oil is shimmering and almost smoking before adding the mushrooms, and cook in batches with space between each piece. Do not stir for the first 2–3 minutes — undisturbed contact with the hot surface is what creates the browning. Do not add salt until after searing.

Can I use dried mushrooms instead of fresh?

Dried mushrooms can be used as a flavour supplement but not as the primary mushroom in this recipe — they produce too concentrated a flavour and too little texture for a pasta sauce that relies on the chew and substance of well-seared fresh mushrooms. Soak 20g of dried porcini mushrooms in 200ml of hot water for 20 minutes; chop the rehydrated mushrooms finely and add them to the pan after searing the fresh mushrooms; strain the soaking liquid through a fine sieve and add it with the pasta water for an exceptional depth of flavour.

Can I use red wine vinegar instead of balsamic?

Red wine vinegar has a sharper, more purely acidic flavour without the sweetness that balsamic develops during its production and reduction. It can be used but produces a noticeably different (more acidic, less rounded) sauce. If substituting, use 2 tablespoons of red wine vinegar and add 1 teaspoon of maple syrup to compensate for the missing sweetness. A balsamic glaze from a bottle (thicker, pre-reduced) is a closer substitute than red wine vinegar.

My sauce is too thick/too thin — how do I fix it?

Too thick: add pasta cooking water one tablespoon at a time, tossing between additions, until the sauce reaches a consistency that coats the pasta without clumping. Too thin: continue tossing over medium heat — the residual starch in the pasta and the pasta water will thicken the sauce within 1–2 minutes of sustained tossing; alternatively, add a small additional splash of balsamic vinegar (½ tablespoon) and reduce briefly.


Tried this recipe? Leave a comment below and let us know how it turned out! Tag us on Instagram and Facebook — we love seeing your plant-powered creations. Looking for more addictive vegan snack and appetizer recipes? Browse all recipes on Easy Vegan Recipes — new recipes posted every single week!
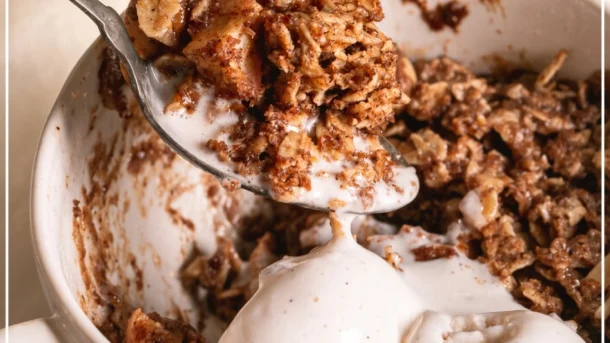
Vegan Cinnamon Apple Crisp in a Mug — The Easiest Most Comforting Plant-Based Dessert You Will Make Tonight

cinnamon apple crisp in a mug

There are desserts that take an afternoon and a sink full of dishes. And then there are desserts like this Vegan Cinnamon Apple Crisp in a Mug — the kind that comes together in under ten minutes with one apple, a handful of pantry ingredients, and a single mug, and comes out of the microwave bubbling at the edges with warm spiced apple filling and a golden, buttery oat crisp topping that smells so completely and perfectly of cinnamon and brown sugar that the entire kitchen transforms into something that feels like autumn, like comfort, like a hug in dessert form. This is that dessert. The one you make when you need something sweet and warm and satisfying right now. The one that feels far more indulgent than its ingredient list suggests. The one that proves that a great dessert does not require hours, a stand mixer, or a baking dish that needs soaking.

This mug crisp is built in three layers directly in the mug: first a base of sliced apple tossed with brown sugar, lemon juice, cinnamon, and nutmeg; then a crumble topping of rolled oats, flour, brown sugar, and melted vegan butter that goes on top raw and becomes golden and slightly crispy around the edges as the apple filling bubbles up through it during cooking; then a finish of vegan vanilla ice cream or coconut whipped cream that melts slowly into the warm crisp underneath, combining with the spiced apple juices into something so good it is almost difficult to understand why you were ever making dessert any other way.

What makes this recipe so outstanding is the ratio — enough apple to be genuinely fruity and not just a token layer beneath a sea of crumble, and enough crumble to deliver real texture and butterscotch sweetness in every bite, with the two in perfect proportion in a standard 350ml mug.

This recipe is 100% vegan, naturally dairy-free and egg-free, ready in under 10 minutes, requires no oven, and is the perfect single-serve dessert for any night of the week.


Recipe Information

Prep TimeCook TimeTotal TimeServingsCalories
5 mins3–4 mins8–10 mins1~320 kcal

Ingredients

For the Apple Filling

  • 1 medium apple (Granny Smith, Honeycrisp, or Fuji), peeled and finely diced
  • 1 tbsp brown sugar
  • ½ tsp ground cinnamon
  • ⅛ tsp nutmeg
  • 1 tsp lemon juice
  • ½ tsp cornstarch
  • 1 tsp water

For the Oat Crisp Topping

  • 3 tbsp rolled oats (not instant)
  • 2 tbsp all-purpose flour
  • 2 tbsp brown sugar
  • ¼ tsp ground cinnamon
  • Pinch of salt
  • 2 tbsp vegan butter, melted

To Serve

  • Vegan vanilla ice cream or coconut whipped cream
  • Extra pinch of cinnamon

Instructions

  1. Prepare the apple filling. In the bottom of a large, microwave-safe mug (at least 350ml capacity), combine the diced apple, brown sugar, cinnamon, nutmeg, lemon juice, cornstarch, and water. Stir well to coat the apple pieces evenly. The cornstarch will thicken the juices into a light sauce as the filling cooks.
  2. Make the crisp topping. In a small bowl combine the rolled oats, flour, brown sugar, cinnamon, and salt. Add the melted vegan butter and stir with a fork until the mixture clumps together into a rough, crumbly texture that resembles wet sand with larger oat clumps throughout.
  3. Top the mug. Spoon the crisp topping evenly over the apple filling in the mug. Do not press it down — let it sit loosely on top so steam can escape and the topping can crisp slightly at the edges.
  4. Microwave. Microwave on high for 2 minutes 30 seconds to 3 minutes, until the apple filling is bubbling visibly around the edges of the topping and the topping looks set. Cooking times vary by microwave wattage — start at 2 minutes 30 seconds and add 30-second increments if the filling is not yet bubbling.
  5. Rest briefly. Allow the mug to rest for 1–2 minutes before eating — the filling will be extremely hot directly from the microwave and needs a moment to cool slightly.
  6. Serve. Top with a scoop of vegan vanilla ice cream or a dollop of coconut whipped cream and a pinch of extra cinnamon. Eat immediately while the contrast between warm crisp and cold ice cream is at its best.

Pro Tips for the Best Mug Apple Crisp

  • Dice the apple small. Finely diced apple — roughly 1cm pieces — cooks through completely in the microwave in under 3 minutes. Larger pieces may still be firm in the center when the filling begins to bubble at the edges.
  • Use a large enough mug. The filling bubbles up as it cooks — a mug that is too small will overflow. A 350ml mug is the minimum; a 400ml mug gives more comfortable headroom.
  • Do not press the topping down. A loosely applied topping allows steam to escape and the oats at the edges to crisp very slightly in the microwave — something that cannot happen if the topping is packed tightly down.
  • Let it rest before eating. The apple filling reaches a very high temperature in the microwave. Two minutes of resting not only prevents burning your mouth but also allows the cornstarch-thickened sauce to set slightly into a glossier, jammy consistency.
  • Serve with ice cream immediately. The contrast between the warm, bubbling filling and the cold, melting ice cream is the defining experience of a great apple crisp, and it is at its best in the first 90 seconds after serving.

Apple Variety Guide for Mug Crisp

The apple you choose matters more in a quick-cooked preparation than in a long-baked pie, because there is less time for the heat to compensate for an apple’s natural flavor and texture shortcomings.

  • Granny Smith: The gold standard for baked apple desserts. Its firm texture holds up perfectly in a 3-minute microwave cook, and its bright tartness balances the brown sugar in the filling beautifully. The slight sharpness it brings cuts through the richness of the crisp topping and ice cream.
  • Honeycrisp: Exceptionally juicy and moderately tart, with a texture that softens beautifully in the microwave while still holding its shape. Produces the most abundant, glossy apple sauce of any variety.
  • Fuji: Sweeter than Granny Smith with a firm, crisp texture. Holds its shape well and produces a sweeter, softer filling — reduce the brown sugar by half a teaspoon if using Fuji.
  • Pink Lady: Aromatic and firm with a pleasant sweet-tart balance. An excellent choice if Granny Smith or Honeycrisp are unavailable.

Flavor Variations

  • Pear and Ginger Mug Crisp: Replace the apple with a ripe but firm pear and add ¼ teaspoon of ground ginger to both the filling and the topping for a warmly spiced autumn variation.
  • Apple Cranberry Mug Crisp: Add a tablespoon of fresh or frozen cranberries to the apple filling for a tart, jewel-bright variation that is especially good in autumn and winter.
  • Salted Caramel Apple Mug Crisp: Drizzle 1 teaspoon of vegan caramel sauce over the crisp topping before microwaving and finish with a pinch of flaky sea salt after serving.
  • Chocolate Chip Apple Crisp Mug: Scatter 1 tablespoon of dark chocolate chips over the crisp topping before microwaving for a chocolate-apple combination that works far better than it has any right to.

Nutritional Highlights (Per Serving)

CaloriesProteinCarbsFiberFat
~320 kcal3g52g4g12g

This single-serve dessert delivers 4 grams of dietary fiber from the apple and rolled oats — a meaningful contribution toward daily fiber goals from something that tastes this indulgent. The rolled oats also provide slow-releasing complex carbohydrates and a small amount of plant-based protein, while the apple contributes natural pectin, vitamin C, and antioxidants.


Storage

  • Best fresh: This dessert is designed to be eaten immediately while the filling is bubbling and the topping is at its crispiest. It does not store or reheat well once the ice cream or cream has been added.
  • Without topping: The filled mug without the ice cream can be covered and refrigerated for up to 24 hours. Reheat for 1 minute 30 seconds in the microwave until the filling is bubbling again, then top with fresh ice cream.
  • The crisp topping mixture: Can be made in a larger batch and stored in a sealed container in the refrigerator for up to 5 days — spoon 5 tablespoons per mug when ready to use.

Frequently Asked Questions

Can I make this in the oven instead of the microwave?

Yes — preheat the oven to 375°F (190°C), assemble in an oven-safe ramekin, and bake for 20–25 minutes until the filling is bubbling and the topping is golden. The oven version produces a crispier, more deeply flavored topping.

Can I use instant oats instead of rolled oats?

Rolled oats are strongly preferred — they hold their texture better and provide a more satisfying chew. Instant oats become mushy very quickly in the microwave and produce a less distinct topping texture.

Can I make this gluten-free?

Yes — use certified gluten-free rolled oats and replace the all-purpose flour with almond flour, oat flour, or a 1:1 gluten-free baking blend. The texture will be slightly more crumbly but still delicious.

My topping isn’t getting crispy. What am I doing wrong?

The topping will not become deeply crispy in a microwave in the way it would in an oven — it sets, firms slightly at the edges, and becomes golden in colour but remains tender overall. For a truly crispy topping, use the oven method in an oven-safe ramekin.

Can I double this recipe for two people?

Yes — use two separate mugs rather than doubling into one large mug. A single mug with double the filling will not cook evenly in the microwave and the filling will overflow.


Tried this recipe? Leave a comment below and let us know how it turned out! Tag us on Instagram and Facebook — we love seeing your plant-powered creations. Looking for more addictive vegan recipes? Browse all recipes on Easy Vegan Recipes — new recipes posted every single week!
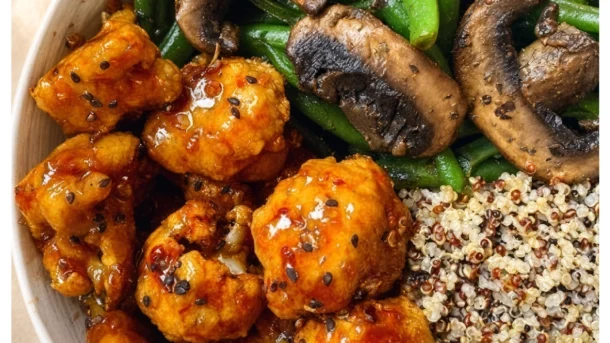
Vegan Sticky Sesame Cauliflower and Seasoned Vegetables — The Most Addictive Plant-Based Dinner You Will Make All Week

sticky sesame cauliflower and seasoned vegetables

There are weeknight dinners you make because something needs to be on the table. And then there are dinners like this Vegan Sticky Sesame Cauliflower and Seasoned Vegetables — the kind that fills the kitchen with the smell of caramelizing soy and toasted sesame the moment the sauce hits the pan, that delivers cauliflower florets roasted until their edges are almost charred and then coated in a sticky, glossy, garlicky sesame sauce so deeply savory and so satisfying that it has people leaning over the baking dish before it has even made it to the table. This is that dinner. The one that makes cauliflower genuinely, unexpectedly crave-worthy. The one that tastes like a better version of your favorite takeaway. The one that disappears from the serving bowl in minutes and always gets asked for again.

This recipe roasts cauliflower florets at high heat until deeply golden and caramelized at the edges, then tosses them in a homemade sticky sesame sauce built from soy sauce, rice vinegar, garlic, ginger, maple syrup, and toasted sesame oil — the combination of salt, acid, sweetness, and rich sesame character that defines the best sesame dishes of East Asian cuisine. The vegetables — bell pepper, broccoli, snap peas, and carrot — are seasoned and roasted alongside the cauliflower, absorbing the same flavors and providing color, texture, and variety so that every bite is different from the last.

What makes this recipe so outstanding is the sauce technique — making the sticky sauce separately and tossing the already-roasted cauliflower through it in the final minutes of cooking, then returning everything to the oven just long enough for the sauce to caramelize onto the cauliflower’s surface, creates the specific sticky, lacquered coating that makes this dish so irresistible and so completely unlike a simple roasted vegetable tray bake.

This recipe is 100% vegan, naturally dairy-free, ready in under 45 minutes, and spectacular served over steamed jasmine rice or noodles with a scatter of sesame seeds and sliced spring onions.


Recipe Information

Prep TimeCook TimeTotal TimeServingsCalories
15 mins30 mins45 mins4~280 kcal

Ingredients

For the Roasted Cauliflower and Vegetables

  • 1 large head cauliflower, cut into medium florets
  • 1 red bell pepper, cut into strips
  • 1 head broccoli, cut into florets
  • 2 medium carrots, peeled and sliced diagonally
  • 150g (1 cup) snap peas
  • 3 tbsp neutral vegetable oil
  • 1 tsp garlic powder
  • 1 tsp onion powder
  • ½ tsp salt
  • ½ tsp black pepper
  • 1 tsp smoked paprika

For the Sticky Sesame Sauce

  • 4 tbsp soy sauce or tamari
  • 2 tbsp rice vinegar
  • 2 tbsp maple syrup
  • 1 tbsp toasted sesame oil
  • 1 tbsp hoisin sauce
  • 4 cloves garlic, minced
  • 1 tsp fresh ginger, grated
  • 1 tbsp cornstarch mixed with 2 tbsp cold water
  • ½ tsp chili flakes (optional)

To Serve

  • Steamed jasmine rice or noodles
  • 2 tbsp sesame seeds, toasted
  • 3 spring onions, thinly sliced
  • Fresh lime wedges
  • Extra soy sauce or chili oil

Instructions

  1. Preheat and prep. Preheat the oven to 425°F (220°C). Line two large baking sheets with parchment paper. High heat is essential for caramelization — do not lower the temperature.
  2. Season and roast the cauliflower. In a large bowl, toss the cauliflower florets with 2 tablespoons of oil, garlic powder, onion powder, smoked paprika, salt, and pepper. Spread in a single layer on one baking sheet, giving each floret space. Crowding causes steaming rather than roasting. Roast for 20 minutes.
  3. Season and roast the vegetables. In the same bowl, toss the bell pepper, broccoli, carrots, and snap peas with the remaining tablespoon of oil, a pinch of salt, and a pinch of pepper. Spread on the second baking sheet and place in the oven when the cauliflower has been roasting for 10 minutes — the vegetables need only 20 minutes total and should go in 10 minutes after the cauliflower.
  4. Make the sticky sesame sauce. While the vegetables roast, combine the soy sauce, rice vinegar, maple syrup, sesame oil, hoisin, minced garlic, grated ginger, and chili flakes in a small saucepan over medium heat. Bring to a simmer, stirring. Add the cornstarch slurry and cook, stirring constantly, for 1–2 minutes until the sauce thickens to a glossy, coating consistency. Remove from heat.
  5. Coat the cauliflower. After 20 minutes of roasting, remove the cauliflower from the oven. Pour two-thirds of the sauce over the cauliflower and toss to coat every floret completely. Return to the oven for a further 8–10 minutes until the sauce has caramelized onto the cauliflower and the edges are sticky and deeply golden.
  6. Combine and serve. Transfer the sticky sesame cauliflower and all the roasted vegetables to a serving bowl or plate. Drizzle the remaining sauce over the vegetables. Scatter with toasted sesame seeds and sliced spring onions. Serve immediately over steamed rice or noodles with lime wedges.

Pro Tips for the Stickiest Sesame Cauliflower

  • Roast at high heat and give florets space. 425°F is the minimum temperature for proper caramelization. Florets crowded on the sheet steam in their own moisture and stay pale and soft — space them with at least 2cm between each one.
  • Add the sauce in two stages. Tossing the partially-roasted cauliflower in sauce and returning to the oven is what creates the sticky, lacquered coating. Sauce added before roasting burns before the cauliflower is cooked; sauce added only at the end stays raw and sharp rather than caramelized and sweet.
  • Keep the cornstarch slurry measured correctly. Too little cornstarch and the sauce stays watery and slides off; too much and it becomes paste-like. The 1 tablespoon to 2 tablespoons water ratio produces the right coating consistency.
  • Toast the sesame seeds. Raw sesame seeds are fine but toasted sesame seeds have a deep, nutty flavor that raw seeds simply do not match. Toast in a dry pan over medium heat for 2–3 minutes, stirring, until golden.

Why High-Heat Roasting Transforms Cauliflower

Cauliflower is one of the vegetables most dramatically transformed by high-heat roasting, and understanding why helps explain why this recipe works so differently from a simple steamed or boiled cauliflower dish. Raw cauliflower is composed primarily of water — up to 92% by weight — along with complex carbohydrates, a small amount of natural sugars, and sulfur-containing compounds that give it its characteristic mild, slightly bitter flavor. At temperatures above 300°F (150°C), two processes happen simultaneously that completely change the vegetable’s character: the Maillard reaction, in which amino acids and reducing sugars on the surface react to produce hundreds of new flavor compounds and the distinctive golden-brown color associated with properly roasted food; and caramelization, in which the natural sugars in the cauliflower convert under heat into complex caramel compounds that are simultaneously sweet, slightly bitter, and extraordinarily savory. The result is a cauliflower that tastes fundamentally different from its raw form — deeply savory, slightly sweet at the edges, with a dense, meaty texture and a concentrated flavor that makes it one of the most satisfying plant-based proteins in any recipe.


Flavor Variations

  • Teriyaki Sesame Vegetables: Replace the hoisin with 1 tablespoon of mirin and add an extra tablespoon of maple syrup for a sweeter, more traditional teriyaki profile.
  • Spicy Korean Gochujang Cauliflower: Replace the hoisin with 1 tablespoon of gochujang paste and omit the chili flakes for a deeply spicy, fermented-pepper version with a distinctly Korean character.
  • Peanut Sesame Cauliflower: Stir 2 tablespoons of natural peanut butter into the sauce for a richer, nuttier version that pairs especially well with rice noodles and cucumber.

Nutritional Highlights (Per Serving)

CaloriesProteinCarbsFiberFat
~280 kcal8g38g8g12g

This dish delivers an impressive 8 grams of dietary fiber per serving from the combination of cauliflower, broccoli, snap peas, and carrots — a meaningful contribution toward daily fiber goals. Cauliflower is also an excellent source of vitamin C, vitamin K, and choline, while broccoli contributes additional vitamin C, folate, and sulforaphane — one of the most studied plant compounds in nutritional research.


Storage

  • Refrigerator: Store in an airtight container for up to 4 days. The sticky coating firms and becomes even more intensely flavored as it sits.
  • Reheat: Reheat in a hot oven at 400°F (200°C) for 8–10 minutes to restore crispiness, or in a dry skillet over medium-high heat for 3–4 minutes. Microwave reheating softens the texture but preserves the flavor.
  • Freezer: Not recommended — the vegetables lose texture on thawing and the sauce becomes watery.
  • Meal prep: Roast the vegetables and make the sauce up to 3 days ahead. Combine and finish in the oven when ready to serve.

Frequently Asked Questions

Can I use frozen cauliflower?

Fresh cauliflower is strongly recommended — frozen cauliflower releases too much moisture during roasting to caramelize properly, producing a softer, paler result. If frozen is the only option, thaw completely, pat very dry, and roast at the highest temperature your oven allows.

Can I air fry the cauliflower instead?

Yes — air fry the seasoned cauliflower at 400°F (200°C) for 15 minutes, shaking halfway. Toss in two-thirds of the sauce and air fry for a further 5 minutes. The result is excellent and slightly crispier than the oven version.

Is this recipe gluten-free?

Use tamari instead of soy sauce and certified gluten-free hoisin sauce (or omit and add an extra teaspoon of maple syrup) for a completely gluten-free version.

What can I serve this with besides rice?

Noodles, quinoa, cauliflower rice, lettuce wraps, or wrapped in rice paper rolls all work beautifully. This is also excellent served as a side dish alongside a simple tofu stir-fry.


Tried this recipe? Leave a comment below and let us know how it turned out! Tag us on Instagram and Facebook — we love seeing your plant-powered creations. Looking for more addictive vegan recipes? Browse all recipes on Easy Vegan Recipes — new recipes posted every single week!

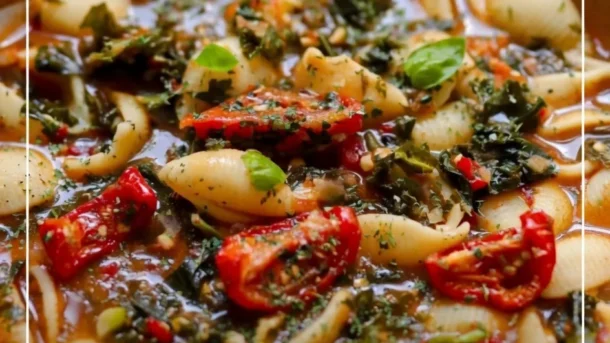
Vegan Sun-Dried Tomato Pasta Soup — The Creamiest Most Intensely Flavored Plant-Based Soup You Will Make All Season

sun dried tomato pasta soup

There are soups that warm you. And then there are soups like this Vegan Sun-Dried Tomato Pasta Soup — the kind that fills the kitchen with the rich, concentrated aroma of slow-roasted tomatoes and garlic from the very first moment the sun-dried tomatoes hit the pot, that builds into something so deeply savory, so silky, and so intensely flavored with the sweet-sharp intensity of tomatoes that have been dried in the sun until all their water is gone and only pure, concentrated tomato character remains, that it is genuinely difficult to believe this soup came together in under 30 minutes on a weeknight. This is that soup. The one that tastes like it simmered for hours. The one that makes pasta in soup seem like the best idea anyone ever had. The one that people ask for again the next day.

This soup is built on a foundation of sun-dried tomatoes sautéed in their own oil with onion, garlic, and red pepper flakes until deeply fragrant, then blended into a rich, velvety tomato base that is so much more intensely flavored than any fresh or canned tomato could ever achieve on its own. Small pasta — ditalini, orzo, or small shells — is cooked directly in the broth, absorbing flavor as it cooks. A finish of vegan cream cheese or coconut cream stirred in just before serving transforms the soup from bright and sharp to creamy, lush, and perfectly balanced between acidity and richness.

What makes this recipe so outstanding is the sun-dried tomato oil — the oil that sun-dried tomatoes are packed in is infused with concentrated tomato flavor, garlic, and herbs, and using it to sauté the aromatics rather than plain olive oil adds a layer of depth to the soup’s foundation that sets this recipe apart from anything built on plain canned tomatoes.

This recipe is 100% vegan, naturally dairy-free, ready in just 30 minutes, and the kind of warming, satisfying dinner that earns a permanent place in your weeknight rotation.


Recipe Information

Prep TimeCook TimeTotal TimeServingsCalories
10 mins20 mins30 mins4~360 kcal

Ingredients

For the Soup Base

  • 200g (7oz) sun-dried tomatoes in oil, drained (reserve the oil)
  • 2 tbsp reserved sun-dried tomato oil (or olive oil)
  • 1 medium yellow onion, finely diced
  • 6 cloves garlic, minced
  • ½ tsp red pepper flakes
  • 1 tsp dried oregano
  • 1 tsp dried basil
  • 1 tsp smoked paprika
  • 2 tbsp tomato paste
  • 1 can (400g) crushed tomatoes
  • 1 litre (4 cups) vegetable broth
  • 1 tsp sugar (to balance acidity)
  • Salt and black pepper to taste

For the Pasta

  • 200g (1 cup) ditalini, orzo, or small shell pasta

For the Creamy Finish

  • 120g (½ cup) vegan cream cheese or 120ml (½ cup) coconut cream
  • 3 tbsp nutritional yeast
  • 1 tbsp lemon juice

To Serve

  • Fresh basil leaves
  • Vegan parmesan or extra nutritional yeast
  • Drizzle of good olive oil
  • Crusty bread or garlic toast

Instructions

  1. Sauté the aromatics. Heat the reserved sun-dried tomato oil in a large pot over medium heat. Add the diced onion and cook for 4–5 minutes until softened and translucent. Add the garlic and red pepper flakes and cook for 1 minute until fragrant.
  2. Add the sun-dried tomatoes and spices. Add the drained sun-dried tomatoes, dried oregano, dried basil, smoked paprika, and tomato paste to the pot. Stir well and cook for 2–3 minutes, letting the tomato paste and sun-dried tomatoes caramelize slightly against the bottom of the pot — this step adds significant depth to the finished soup.
  3. Blend the base. Add the crushed tomatoes and 500ml (2 cups) of the vegetable broth. Use an immersion blender to blend the mixture until very smooth and silky. Alternatively, transfer to a blender in batches and blend carefully. Return to the pot.
  4. Add remaining broth and pasta. Pour in the remaining 500ml of broth. Stir in the sugar, salt, and pepper. Bring to a boil, then add the pasta. Cook, stirring occasionally, for 8–10 minutes until the pasta is just tender. The pasta will continue to absorb liquid as it sits — if the soup thickens too much, add a splash more broth.
  5. Finish with cream. Reduce the heat to low. Stir in the vegan cream cheese (or coconut cream), nutritional yeast, and lemon juice. Stir until the cream cheese is fully melted and incorporated and the soup is silky and uniform. Taste and adjust seasoning.
  6. Serve. Ladle into bowls and top with fresh basil, a scatter of vegan parmesan, and a drizzle of olive oil. Serve with crusty bread for dipping.

Pro Tips

  • Use the oil from the jar. Sun-dried tomato packing oil is infused with tomato, garlic, and herbs — the richest, most flavorful oil in your kitchen for this purpose. Do not substitute with plain olive oil if the jarred oil is available.
  • Caramelize the tomato paste. Letting the tomato paste cook against the bottom of the pot for 2–3 minutes before adding liquid deepens its flavor dramatically — raw tomato paste added directly to broth is sharp and flat; caramelized tomato paste is rich, complex, and savory.
  • Blend completely smooth. The silky, velvety texture of this soup depends on thorough blending. An immersion blender works but a high-speed countertop blender produces the smoothest result.
  • Add cream off the boil. Stir in the vegan cream cheese after reducing the heat — high heat can cause it to split or become grainy rather than melting smoothly into the soup.

Why Sun-Dried Tomatoes Are More Flavorful Than Fresh

The transformation that happens to a tomato when it is dried in the sun is one of the most dramatic flavor concentrations in all of cooking. A fresh tomato is approximately 94% water by weight — which means that when that water is removed through slow drying, the remaining 6% is a dense, concentrated package of sugars, acids, umami compounds, and aromatic flavor molecules that is gram for gram between 10 and 15 times more intensely flavored than the fresh fruit it came from. The slow drying process also causes a degree of caramelization — the natural sugars in the tomato converting under gentle prolonged heat into complex, sweet-savory caramel compounds — and a concentration of glutamates, the naturally occurring amino acids responsible for umami, that gives sun-dried tomatoes their characteristic deep savory depth. This is why a soup built on sun-dried tomatoes tastes as though it has simmered for hours even when it has been on the stove for fewer than thirty minutes: the flavor concentration that slow cooking achieves over time has already been done by the drying process.


Flavor Variations

  • Tuscan White Bean Sun-Dried Tomato Soup: Add a can of drained white cannellini beans with the broth for extra protein and a hearty, Tuscan-inspired character.
  • Spicy Arrabiata Pasta Soup: Double the red pepper flakes and add a pinch of cayenne for a fiery version inspired by the classic Italian arrabiata sauce.
  • Sun-Dried Tomato and Spinach Pasta Soup: Stir in 3 cups of baby spinach in the final minute of cooking for added nutrition and color.

Nutritional Highlights (Per Serving)

CaloriesProteinCarbsFiberFat
~360 kcal11g55g6g11g

Storage

  • Refrigerator: Store in a sealed container for up to 5 days. The pasta continues to absorb liquid as it sits — add a splash of broth when reheating and stir well.
  • Freezer: Freeze the soup base (before adding pasta) for up to 3 months. Cook fresh pasta directly in the reheated base. Soup with pasta already cooked can be frozen but the pasta texture suffers on thawing.
  • Make ahead: The soup base can be made up to 3 days ahead and refrigerated. Add pasta and cream finish just before serving.

Frequently Asked Questions

Can I use dry-packed sun-dried tomatoes instead of oil-packed?

Yes — rehydrate dry-packed tomatoes in boiling water for 15 minutes, drain, and use olive oil in place of the jar oil. The flavor will be slightly less rich but still excellent.

What pasta shape works best?

Small shapes that cook in 8–10 minutes work best — ditalini, orzo, small shells, or elbow macaroni. Larger shapes take too long and make the soup difficult to eat with a spoon.

Can I make this gluten-free?

Yes — use your preferred gluten-free small pasta shape and ensure your vegetable broth is certified gluten-free.

My soup is too thick. How do I fix it?

Add warm vegetable broth a splash at a time until the consistency is right. Sun-dried tomato pasta soup thickens significantly as the pasta absorbs liquid — this is normal and easy to correct.


Tried this recipe? Leave a comment below and let us know how it turned out! Tag us on Instagram and Facebook — we love seeing your plant-powered creations. Looking for more addictive vegan dinner recipes? Browse all recipes on Easy Vegan Recipes — new recipes posted every single week!
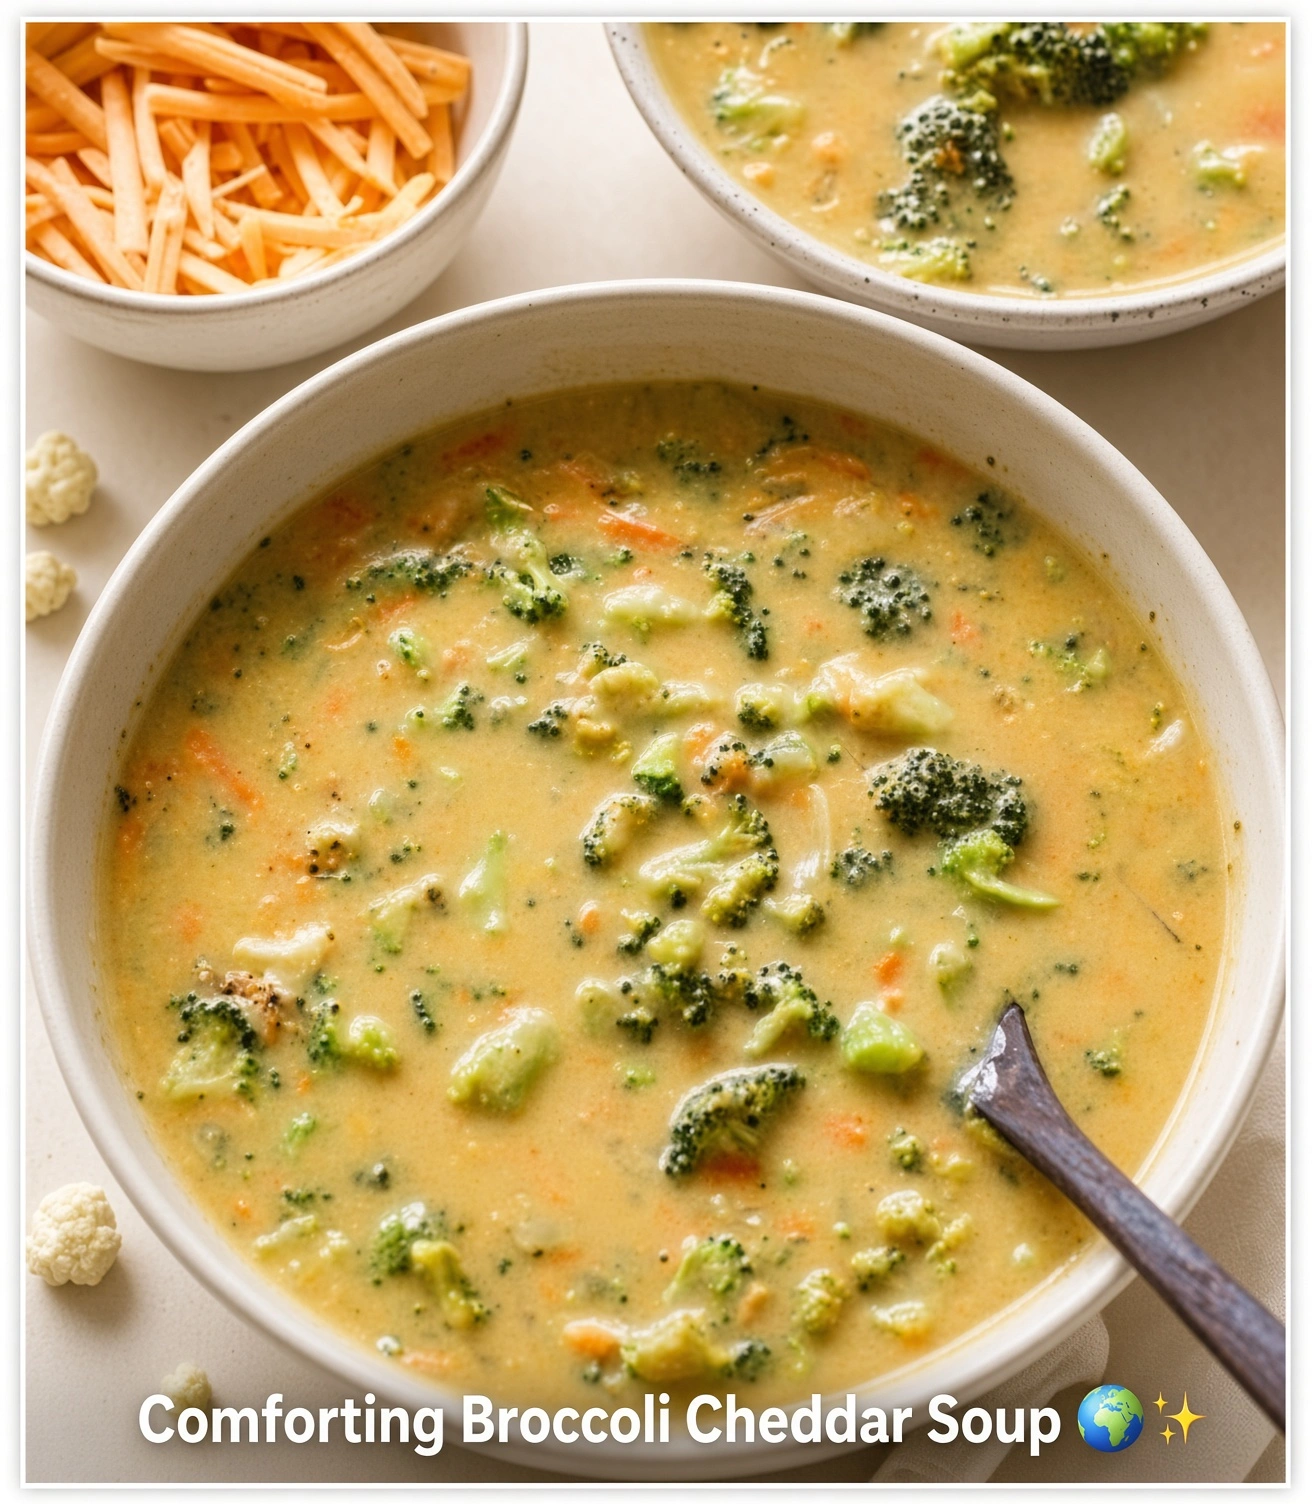
Vegan Roasted Tomato Spaghetti with Spinach and Chickpeas — The Most Satisfying Plant-Based Pasta You Will Make All Week

roasted tomato spaghetti with spinach and chickpeas

There are pasta dinners you make on autopilot. And then there are pasta dinners like this Vegan Roasted Tomato Spaghetti with Spinach and Chickpeas — the kind that starts with a tray of halved cherry tomatoes and a full head of garlic roasted at high heat until the tomatoes have collapsed into jammy, caramelized pools of intense sweetness and the garlic has softened into something almost buttery, and that becomes, once all of it is tossed through spaghetti with wilted spinach and golden chickpeas, one of the most deeply satisfying bowls of pasta you will ever put on a weeknight table. This is that dinner. The one where the roasting does all the real work and the assembly takes five minutes. The one where a handful of pantry staples — pasta, canned chickpeas, a bag of spinach, a punnet of cherry tomatoes — becomes something that tastes significantly more sophisticated than any of those individual ingredients could ever suggest on their own.

The secret is the roasting. Roasting cherry tomatoes at high heat drives off their water rapidly and caramelizes their natural sugars into deep, sweet-savory complexity that no amount of time simmering on the stove can replicate. The juices that pool on the baking sheet as the tomatoes collapse are concentrated tomato essence — intensely flavored, naturally thickened, and mixed with the roasted garlic oil that runs from the garlic head during cooking, they become the foundation of a sauce that coats every strand of spaghetti in something genuinely extraordinary.

The chickpeas, roasted alongside the tomatoes until their skins are beginning to crisp and their centers are tender and almost creamy, provide protein, texture, and a golden, nutty character that transforms this from a light vegetable pasta into a genuinely filling, nutritionally complete dinner.

This recipe is 100% vegan, naturally dairy-free, ready in just 40 minutes with mostly hands-off time, and the kind of dinner that earns a permanent place in your weekly rotation from the very first time you make it.


Recipe Information

Prep TimeCook TimeTotal TimeServingsCalories
10 mins30 mins40 mins4~450 kcal

Ingredients

For Roasting

  • 600g (about 21oz) cherry tomatoes, halved
  • 1 full head of garlic, top sliced off to expose cloves
  • 1 can (400g) chickpeas, drained, rinsed, and patted dry
  • 4 tbsp olive oil, divided
  • 1 tsp dried oregano
  • 1 tsp dried chili flakes
  • 1 tsp salt
  • ½ tsp black pepper
  • 1 tsp smoked paprika

For the Pasta

  • 400g spaghetti
  • 150g (5oz) baby spinach
  • 3 tbsp pasta cooking water (reserved before draining)
  • 1 tbsp lemon juice
  • 1 tbsp balsamic vinegar (optional, for depth)
  • Salt and black pepper to taste

To Serve

  • Fresh basil leaves
  • Vegan parmesan or nutritional yeast
  • Extra virgin olive oil
  • Chili flakes

Instructions

  1. Preheat the oven. Preheat to 425°F (220°C). Line a large baking sheet with parchment paper.
  2. Roast the tomatoes, garlic, and chickpeas. Spread the halved cherry tomatoes cut-side up on the baking sheet. Nestle the garlic head (cut-side up) in the center. Add the drained, dried chickpeas around the tomatoes. Drizzle everything with 3 tablespoons of olive oil. Scatter over the oregano, chili flakes, smoked paprika, salt, and pepper. Roast for 28–32 minutes until the tomatoes have collapsed and are caramelized at the edges, the chickpeas are golden, and the garlic is soft and fragrant.
  3. Cook the pasta. While everything roasts, bring a large pot of heavily salted water to a boil. Cook the spaghetti according to package directions until al dente. Before draining, scoop out 3 tablespoons of pasta cooking water and set aside. Drain the pasta.
  4. Extract the roasted garlic. When the baking sheet comes out of the oven, squeeze the softened garlic cloves out of their skins directly onto the baking sheet. Use a fork to mash them roughly into the roasted tomato juices and olive oil on the sheet — this becomes the base of your sauce. Add the lemon juice and balsamic vinegar if using and stir.
  5. Wilt the spinach. Return the drained pasta to its pot over low heat. Add the baby spinach in large handfuls and toss with the residual heat until wilted — about 1–2 minutes.
  6. Combine. Add the roasted tomato mixture (including all the juices from the baking sheet) and the chickpeas to the pasta and spinach. Add the reserved pasta water and the remaining tablespoon of olive oil. Toss everything together thoroughly until the spaghetti is evenly coated in the jammy, garlicky sauce. Taste and adjust seasoning.
  7. Serve. Divide between bowls. Top with fresh basil, vegan parmesan or a generous scatter of nutritional yeast, extra chili flakes, and a drizzle of good olive oil.

Pro Tips

  • Dry the chickpeas thoroughly before roasting. Wet chickpeas steam in the oven rather than roasting and stay soft rather than developing the golden, slightly crispy exterior that makes them so satisfying in this dish. Pat them dry with paper towel and spread them with space between each one.
  • Don’t skip the pasta water. The starchy pasta cooking water emulsifies with the tomato juices and olive oil to create a glossy sauce that clings to the spaghetti rather than pooling at the bottom of the bowl. Even 3 tablespoons makes a significant difference.
  • Scrape every drop from the baking sheet. The caramelized tomato juices and garlic-infused oil on the parchment paper are the most intensely flavored part of the entire dish — use a spatula to scrape them all into the pasta.
  • Roast the garlic whole. A whole head of garlic roasted cut-side up produces cloves that are sweet, mellow, and spreadable rather than sharp and pungent — a completely different flavor profile that is essential to this recipe.

Why Roasting Transforms Cherry Tomatoes

A raw cherry tomato is pleasant — sweet, slightly acidic, juicy. A roasted cherry tomato is something else entirely. At the high temperatures of oven roasting, three fundamental changes happen simultaneously that produce the extraordinary flavor concentration this recipe depends on. First, the water inside the tomato — which makes up roughly 94% of its weight — evaporates rapidly, concentrating the remaining sugars, acids, and flavor compounds into a fraction of the original volume. Second, the natural sugars at the cut surface undergo caramelization, converting into complex, sweet-savory caramel compounds that did not exist in the raw tomato. Third — and most significantly — the Maillard reaction occurs at the edges and surfaces where the tomato’s amino acids react with its reducing sugars under heat, producing hundreds of new aromatic flavor molecules responsible for the deeply savory, almost meaty character of a properly roasted tomato. The result is a tomato that is between 8 and 12 times more intensely flavored per gram than the raw fruit, with a completely different, far more complex flavor profile. This is why the sauce in this recipe — built from the juices of those collapsed, caramelized tomatoes mixed with roasted garlic — tastes as though it simmered for hours rather than roasted for 30 minutes.


Flavor Variations

  • Roasted Tomato Spaghetti with Olives and Capers: Add a handful of black olives and a tablespoon of capers to the baking sheet in the last 10 minutes of roasting for a puttanesca-inspired version.
  • Creamy Roasted Tomato Spaghetti: Stir 80ml of coconut cream or cashew cream through the pasta in the final step for a richer, creamier sauce.
  • Roasted Tomato Linguine with White Beans: Replace the chickpeas with canned white cannellini beans for a softer, creamier protein that blends more completely into the sauce.

Nutritional Highlights (Per Serving)

CaloriesProteinCarbsFiberFat
~450 kcal18g68g9g13g

This pasta delivers an exceptional 18 grams of plant-based protein per serving from the chickpeas combined with the pasta, making it one of the most nutritionally complete vegan pasta dishes available. The chickpeas also contribute 9 grams of dietary fiber per serving — nearly a third of the recommended daily intake — along with iron, folate, and manganese. Baby spinach adds vitamin K, vitamin A, and additional folate.


Storage

  • Refrigerator: Store in an airtight container for up to 4 days. The pasta absorbs the sauce as it sits and becomes thicker — add a splash of water or broth when reheating and toss well.
  • Reheat: Reheat in a skillet over medium heat with a splash of water, tossing until warmed through. Microwave works but slightly softens the chickpeas.
  • Freezer: Not recommended — spaghetti loses texture significantly on freezing and thawing.

Frequently Asked Questions

Can I use a different pasta shape?

Yes — linguine, fettuccine, bucatini, penne, and rigatoni all work well. Wider, flatter shapes catch the chunky tomato sauce particularly well.

Can I add protein besides chickpeas?

Yes — pan-fried tofu cubes, crumbled tempeh sautéed with garlic and soy sauce, or vegan sausage sliced and added to the baking sheet all work beautifully.

My tomatoes released a lot of liquid. Is this normal?

Yes — cherry tomatoes release significant juice during roasting, especially if very ripe. Continue roasting until the liquid has reduced and the tomatoes are caramelized at the edges. If there is still excess liquid when you remove from the oven, drain a little before adding to the pasta to avoid a watery sauce.

Can I use sun-dried tomatoes instead of fresh?

Yes — use 150g of oil-packed sun-dried tomatoes in place of the fresh cherry tomatoes. Skip the roasting and simply sauté the sun-dried tomatoes and squeezed garlic in olive oil before tossing with the pasta for a more intensely flavored, quicker version.


Tried this recipe? Leave a comment below and let us know how it turned out! Tag us on Instagram and Facebook — we love seeing your plant-powered creations. Looking for more addictive vegan dinner recipes? Browse all recipes on Easy Vegan Recipes — new recipes posted every single week!

Vegan Comforting Broccoli Cheddar Soup — The Creamiest Most Satisfying Plant-Based Soup You Will Make All Season

comforting broccoli cheddar soup

There are soups that warm you and there are soups like this Vegan Comforting Broccoli Cheddar Soup — the kind that comes out of the pot so thick, so deeply golden, and so richly flavored with sharp cheddar and sweet broccoli that it is genuinely difficult to believe there is not a single drop of dairy in it. This is that soup. The one that delivers every quality that makes broccoli cheddar soup so universally beloved — the silky, velvety base, the tender chunks of broccoli and carrot, the sharp, savory cheese flavor that runs through every spoonful — and does it completely from plants, in under 40 minutes, in a single pot. The one that makes people ask for the recipe before they have finished their first bowl. The one that proves, beyond any doubt, that comfort food does not require dairy to be genuinely, deeply comforting.

The cheddar flavor in this soup comes from a combination of nutritional yeast, white miso paste, apple cider vinegar, and smoked paprika — four ingredients that together create the sharp, savory, slightly tangy profile of a good cheddar without any animal products. The creamy base is built from blended cashews and potato, which thicken the broth into something luxuriously silky while adding their own mild, buttery flavor. Shredded vegan cheddar is stirred in at the end for extra richness and the stretchy, melted cheese texture that is impossible to replicate with nutritional yeast alone.

What makes this soup so outstanding is the two-texture technique — blending half the soup smooth while leaving the other half chunky, so every bowl has both the silky, velvety base and the satisfying, tender bite of whole broccoli florets and carrot pieces. It is the best of both a bisque and a chunky vegetable soup, in one bowl.

This recipe is 100% vegan, naturally dairy-free, ready in under 40 minutes, and the kind of soup that belongs in the regular rotation from the first cold day of the year to the last.


Recipe Information

Prep TimeCook TimeTotal TimeServingsCalories
10 mins30 mins40 mins4~380 kcal

Ingredients

For the Soup

  • 1 large head broccoli (about 500g), cut into small florets and stem diced
  • 2 medium carrots, peeled and finely diced
  • 1 medium yellow onion, finely diced
  • 4 cloves garlic, minced
  • 1 medium Yukon Gold potato, peeled and diced
  • 2 tbsp vegan butter or olive oil
  • 1 litre (4 cups) vegetable broth
  • 240ml (1 cup) unsweetened oat milk or other plant milk

For the Cheddar Flavor Base

  • 70g (½ cup) raw cashews, soaked in hot water for 20 minutes and drained
  • 4 tbsp nutritional yeast
  • 1 tbsp white miso paste
  • 1 tbsp apple cider vinegar
  • 1 tsp smoked paprika
  • ½ tsp turmeric (for color)
  • ½ tsp mustard powder
  • Salt and black pepper to taste

For Extra Cheesiness

  • 100g (1 cup) vegan cheddar, shredded
  • 1 tbsp cornstarch

To Serve

  • Extra shredded vegan cheddar
  • Toasted bread croutons or crusty bread
  • Pinch of smoked paprika
  • Fresh chives or parsley
  • Cracked black pepper

Instructions

  1. Sauté the aromatics. Melt the vegan butter in a large pot over medium heat. Add the diced onion and cook for 4–5 minutes until soft and translucent. Add the garlic and cook for 1 minute until fragrant.
  2. Add vegetables and broth. Add the diced carrot, potato, and broccoli stems (reserve the florets for later) to the pot. Pour in the vegetable broth and oat milk. Bring to a boil, then reduce to a simmer and cook for 12–15 minutes until the potato and carrot are completely tender.
  3. Make the cheddar base. While the vegetables simmer, blend the drained cashews, nutritional yeast, miso paste, apple cider vinegar, smoked paprika, turmeric, mustard powder, and 120ml (½ cup) of the hot soup broth in a high-speed blender until completely smooth. Set aside.
  4. Add broccoli florets. Add the reserved broccoli florets to the pot and simmer for 5 minutes until just tender but still bright green.
  5. Blend half the soup. Using a ladle, transfer roughly half of the soup to the blender and blend until completely smooth. Return to the pot with the remaining chunky soup and stir to combine. This creates the signature two-texture result — silky and chunky in every bowl.
  6. Add the cheddar base. Pour the blended cashew cheddar base into the soup and stir until fully incorporated. Toss the shredded vegan cheddar with the cornstarch, then stir into the soup over low heat until melted and the soup is glossy and thick. Season generously with salt and pepper.
  7. Serve. Ladle into bowls and top with extra shredded vegan cheddar, a pinch of smoked paprika, fresh chives, and cracked black pepper. Serve with crusty bread or croutons.

Pro Tips

  • Soak the cashews first. Even 20 minutes in hot water makes a significant difference to how smoothly the cashews blend — unsoaked cashews can leave small grains that make the soup slightly gritty rather than perfectly smooth.
  • Toss the shredded vegan cheddar in cornstarch before adding. The cornstarch helps the vegan cheese melt smoothly and evenly into the soup without clumping or separating, producing a glossier, more stable result.
  • Blend half, not all. Fully blended broccoli cheddar soup loses the textural contrast that makes the dish so satisfying. The half-blend technique gives you the creamiest possible base while preserving whole florets throughout.
  • Add turmeric for the right color. Nutritional yeast alone produces a pale, beige soup. A small amount of turmeric gives it the deep golden-yellow color that is visually associated with a great cheddar soup and makes it far more appetizing.

Why Nutritional Yeast Tastes Like Cheese

Nutritional yeast is a deactivated yeast — Saccharomyces cerevisiae grown on a medium of molasses, then harvested, heated to deactivate it, and dried — and its remarkable ability to mimic the flavor profile of aged cheese is not accidental but chemical. The primary flavor compounds in nutritional yeast are glutamates — naturally occurring amino acids produced during the yeast’s fermentation and growth — specifically glutamic acid, which is one of the most powerful umami-generating compounds in the natural world and is the same compound responsible for the savory depth of aged parmesan, miso paste, soy sauce, and mushrooms. Nutritional yeast also contains a range of sulfur-containing compounds produced during the yeast’s metabolic processes that are closely related to the sulfur compounds produced during cheese aging — the same family of molecules responsible for the sharp, slightly pungent character of aged cheddar. Combined with the acid from apple cider vinegar (which mimics the lactic acid produced by cheese-making bacteria), the fermented depth of white miso, and the smoky dimension of paprika, nutritional yeast becomes the foundation of a flavor profile that is unmistakably, satisfyingly cheese-like — entirely from plants.


Flavor Variations

  • Spicy Jalapeño Broccoli Cheddar Soup: Add 1–2 finely diced jalapeños with the onion and stir in a teaspoon of hot sauce with the cheddar base for a warmly spiced version.
  • Broccoli Cheddar Soup with White Beans: Add a drained can of cannellini beans with the broccoli florets for extra protein and a creamier, heartier soup.
  • Smoky Bacon Broccoli Cheddar Soup: Add 80g of diced smoked tempeh sautéed until crispy as a topping for a smoky, bacon-inspired finish.

Nutritional Highlights (Per Serving)

CaloriesProteinCarbsFiberFat
~380 kcal14g42g7g18g

Storage

  • Refrigerator: Store in a sealed container for up to 5 days. The soup thickens considerably as it sits — add a splash of broth or oat milk and stir well when reheating.
  • Freezer: Freeze the soup before adding the shredded vegan cheddar for up to 3 months. Thaw overnight in the refrigerator, reheat gently, and stir in fresh shredded vegan cheddar just before serving.
  • Reheat: Reheat over low-medium heat, stirring frequently, to prevent the cheese from sticking to the bottom of the pot.

Frequently Asked Questions

Can I make this nut-free?

Yes — replace the cashews with 1 cup of diced and boiled potato, blended smooth with the same seasonings. The result is slightly less rich but still very creamy and completely nut-free.

What vegan cheddar brand melts best in soup?

Violife and Daiya shredded cheddars melt most reliably in soups. Always toss the shredded cheese in cornstarch before adding to hot liquid for the smoothest result regardless of brand.

Can I use frozen broccoli?

Yes — frozen broccoli florets work well. Add directly from frozen in Step 4 and simmer for 6–7 minutes rather than 5.

My soup is too thick. How do I fix it?

Add warm vegetable broth or oat milk a splash at a time until the consistency is right, stirring well between additions.


Tried this recipe? Leave a comment below and let us know how it turned out! Tag us on Instagram and Facebook — we love seeing your plant-powered creations. Looking for more warming vegan soup and dinner recipes? Browse all recipes on Easy Vegan Recipes — new recipes posted every single week!
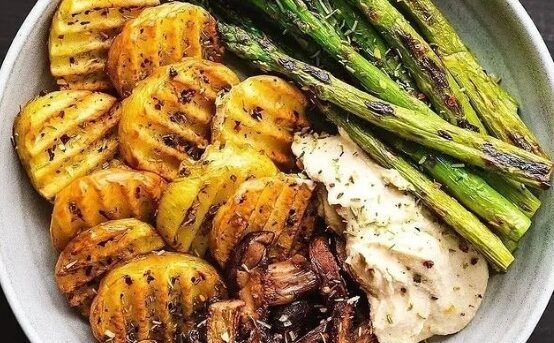
Vegan Potato Bake — The Creamiest Most Comforting Plant-Based Side Dish You Will Pull From the Oven All Year

vegan potato bake

There are side dishes that fill a role. And then there are side dishes like this Vegan Potato Bake — the kind that comes out of the oven bubbling at the edges, golden and crisp on top, with layers of thinly sliced potato so tender they offer no resistance to a spoon, all bound together in a creamy, garlicky cashew sauce that is so rich, so deeply savory, and so perfectly seasoned that it is genuinely difficult to stop eating it even after the plate has been cleared. This is that dish. The one that steals the show at every dinner table it appears on. The one that non-vegans request again before the meal is over. The one that proves, definitively, that the absence of dairy is no barrier whatsoever to a potato bake that is every bit as indulgent, as satisfying, and as impossibly creamy as any version made with heavy cream and gruyère.

This vegan potato bake is built on a foundation of thinly sliced Yukon Gold potatoes layered in a baking dish and bathed in a cashew cream sauce seasoned with garlic, nutritional yeast, white miso, Dijon mustard, and smoked paprika — a combination that delivers the rich, savory, slightly sharp flavor profile of a classic cream and cheese gratin without a single drop of dairy. Fresh thyme, rosemary, and a scatter of shredded vegan cheese on top complete the picture: when the dish comes out of the oven, that cheese is melted and golden, the sauce is bubbling, and the top layer of potato is crisp at the edges with a golden, deeply satisfying crust.

What makes this recipe so outstanding is the cashew cream — soaked, blended with vegetable broth and seasonings into a sauce that is as rich and coating as heavy cream but with an additional, subtle nuttiness that pairs beautifully with potato and gives the dish a depth that straight cream alone cannot always match.

This recipe is 100% vegan, naturally dairy-free and egg-free, ready in 70 minutes including baking time, and the kind of dish that belongs at every Sunday dinner, holiday table, and weeknight that deserves something genuinely special.


Recipe Information

Prep TimeCook TimeTotal TimeServingsCalories
20 mins50 mins70 mins6~390 kcal

Ingredients

For the Potatoes

  • 1.2kg (about 2.6 lbs) Yukon Gold potatoes, peeled and very thinly sliced (2–3mm)
  • 1 medium yellow onion, very thinly sliced
  • 3 cloves garlic, thinly sliced
  • 1 tsp salt
  • Fresh thyme and rosemary sprigs

For the Cashew Cream Sauce

  • 150g (1 cup) raw cashews, soaked in hot water for 30 minutes and drained
  • 480ml (2 cups) vegetable broth
  • 4 tbsp nutritional yeast
  • 1 tbsp white miso paste
  • 1 tbsp Dijon mustard
  • 1 tsp garlic powder
  • 1 tsp onion powder
  • 1 tsp smoked paprika
  • ½ tsp turmeric (for golden color)
  • 1 tsp salt
  • ½ tsp black pepper

For the Top

  • 100g (1 cup) vegan mozzarella or cheddar, shredded
  • 1 tbsp olive oil
  • Extra smoked paprika
  • Fresh thyme

Instructions

  1. Preheat and prepare. Preheat the oven to 375°F (190°C). Grease a 9×13 inch (23x33cm) baking dish generously with vegan butter or olive oil.
  2. Make the cashew cream sauce. Drain the soaked cashews and add to a high-speed blender with the vegetable broth, nutritional yeast, miso paste, Dijon mustard, garlic powder, onion powder, smoked paprika, turmeric, salt, and pepper. Blend for 60–90 seconds until completely smooth and silky. Taste and adjust seasoning — the sauce should be well-seasoned and deeply savory, as the potato layers are unseasoned.
  3. Layer the potatoes. Arrange one-third of the sliced potatoes in overlapping layers across the bottom of the prepared baking dish. Scatter over half the sliced onion and garlic. Pour over one-third of the cashew cream sauce. Repeat with another third of the potatoes, the remaining onion and garlic, and another third of the sauce. Finish with the final layer of potatoes, arranged as neatly as possible, and pour the remaining sauce over the top — it should just reach the top layer of potato.
  4. Add herbs and cover. Lay fresh thyme and rosemary sprigs across the top. Cover the dish tightly with foil.
  5. Bake covered. Bake covered at 375°F (190°C) for 35 minutes until the potatoes are beginning to soften — a knife inserted should meet some resistance but go through the top half easily.
  6. Add cheese and finish uncovered. Remove the foil. Scatter the shredded vegan cheese evenly over the top. Drizzle with olive oil and dust with extra smoked paprika. Return to the oven uncovered for 15–18 minutes until the cheese is melted and golden, the sauce is bubbling at the edges, and the top layer of potato is golden and slightly crisp.
  7. Rest before serving. Allow the potato bake to rest for 10 minutes before serving — this allows the sauce to thicken slightly and the layers to hold together when spooned out.

Pro Tips

  • Slice the potatoes very thin and evenly. A mandoline slicer set to 2–3mm is ideal — evenly thin slices cook through uniformly, while unevenly thick slices result in some layers that are overdone and others that are underdone.
  • Season the sauce generously. The potato layers themselves are not seasoned — all the salt and flavor comes from the sauce, so it needs to be well-seasoned. Taste before layering and adjust.
  • Cover for most of the baking time. Covering the dish creates a steam environment that cooks the potato layers through gently and evenly before the final uncovered phase develops the golden, cheesy top.
  • Rest before serving. The sauce thickens as the dish cools slightly — serving immediately produces a runny result. Ten minutes of resting makes each serving hold its shape and the sauce coat the potatoes properly.
  • Use Yukon Gold potatoes. Their naturally buttery, slightly creamy texture and moderate starch content make them ideal for a gratin-style bake — they hold their shape through cooking while becoming completely tender inside.

The Art of a Perfect Potato Gratin

The potato bake — known in France as gratin dauphinois — is one of the great dishes of European comfort cooking, and its principles translate beautifully to plant-based cooking. The essential elements are three: potatoes sliced thin enough to cook through in a reasonable oven time, a sauce rich enough in fat and flavor to coat every surface and infuse the layers as they bake, and enough time in the oven covered before the final uncovered phase so the interior is completely tender before the top begins to brown. The cashew cream used here behaves remarkably like heavy cream in this context — it coats the potato slices, absorbs their starch as it bakes, and gradually thickens through the combined effect of evaporation and starch release into something that is simultaneously a sauce and a binder, holding the layers together into a cohesive, sliceable dish. The nutritional yeast and miso provide the savory, cheese-like depth that dairy cream and gruyère would in the original, while the mustard and smoked paprika give the sauce the slight sharpness and complexity that prevents it from being simply rich without being interesting.


Flavor Variations

  • Vegan Potato Bake with Leek: Replace the sliced onion with thinly sliced leek for a sweeter, more delicate allium flavor that pairs beautifully with the cashew cream.
  • Herb-Crusted Potato Bake: Combine panko breadcrumbs, nutritional yeast, dried herbs, and olive oil and scatter over the cheese in the final uncovered phase for an extra-crispy, golden crust.
  • Sweet Potato and Regular Potato Bake: Alternate layers of sweet potato and Yukon Gold for a sweeter, more nutritionally complex version with beautiful color contrast.

Nutritional Highlights (Per Serving)

CaloriesProteinCarbsFiberFat
~390 kcal11g52g5g17g

Storage

  • Refrigerator: Store covered in the refrigerator for up to 5 days. The dish firms up as it cools and can be sliced cleanly when cold — reheat individual portions in the microwave or the whole dish covered in the oven at 350°F (175°C) for 20 minutes.
  • Freezer: Freeze individual portions wrapped tightly for up to 2 months. The texture changes slightly on thawing — the potatoes become softer — but the flavor is unaffected. Reheat from frozen in the oven covered with foil.
  • Make ahead: Assemble the entire dish the night before and refrigerate unbaked. Add 10–15 minutes to the covered baking time when cooking from cold.

Frequently Asked Questions

Can I use a different type of potato?

Yukon Gold is strongly recommended for its buttery texture. Russet potatoes can be used but absorb more liquid and can become slightly dry in the center layers. Waxy potatoes such as red-skinned varieties hold their shape very well but can take longer to become fully tender.

My sauce is not thick enough. What went wrong?

Blend the cashews for longer — a full 90 seconds in a high-speed blender is required for a truly smooth, thick sauce. Also ensure you are using raw cashews, not roasted, and that they were soaked for the full 30 minutes.

Can I make this without a high-speed blender?

Yes — soak the cashews for 2 hours in hot water for maximum softness, then blend in a regular blender for 2–3 minutes, stopping to scrape down the sides. The sauce may be slightly less silky but will still be very good.

Can I add more vegetables?

Yes — thinly sliced mushrooms, blanched and squeezed spinach, or finely diced bell pepper can all be scattered between layers for extra nutrition and flavor.


Tried this recipe? Leave a comment below and let us know how it turned out! Tag us on Instagram and Facebook — we love seeing your plant-powered creations. Looking for more comforting vegan side dish and dinner recipes? Browse all recipes on Easy Vegan Recipes — new recipes posted every single week!

CHARRED ASPARAGUS

311786815 185569373977564 5940749530633623683 N 1 554x343

There are side dishes that arrive on the table and are eaten politely alongside whatever else is being served. And then there are dishes like this Vegan Charred Asparagus — the kind that arrives on the table and becomes the thing everyone is reaching for first, scraping the last stalks from the plate before the main course is even finished, because the charring transforms asparagus from a pleasant vegetable into something deeply savory, smoky, and complex in a way that is genuinely extraordinary for how little effort it requires. This is that dish. The one that makes asparagus the star of the meal rather than the supporting act.

Charring asparagus — cooking it at very high heat until the exterior blackens and blisters while the interior remains tender and sweet — concentrates its natural sugars, develops deep Maillard browning that produces savory, nutty, almost smoky flavor compounds that raw or gently roasted asparagus simply cannot achieve. It is the same principle that makes charred corn and blistered tomatoes so irresistible — high heat and direct contact with a hot surface unlocking a dimension of flavor that lower-temperature cooking entirely misses.

This recipe chars the asparagus in a screaming-hot cast iron pan or grill pan, then finishes it with a bright, punchy dressing of lemon, garlic, capers, and fresh herbs that cuts through the char and adds the acidity and freshness that makes each bite completely balanced. The result is a side dish that is impressive enough to serve at a dinner party but honest enough to make on a Tuesday night alongside whatever else you are having.

This recipe is 100% vegan, naturally gluten-free, ready in under 20 minutes, and one of those rare dishes that delivers genuinely spectacular flavor for almost no work at all.


Recipe Information

Prep TimeCook TimeTotal TimeServingsCalories
5 mins12 mins17 mins4~95 kcal

Ingredients

For the Charred Asparagus

  • 2 bunches (about 500g) thick asparagus spears, woody ends snapped off
  • 1 tbsp olive oil
  • ½ tsp salt
  • ¼ tsp black pepper

For the Lemon Caper Dressing

  • 3 tbsp olive oil
  • 2 tbsp lemon juice
  • 1 tsp lemon zest
  • 1 clove garlic, very finely minced or grated
  • 2 tbsp capers, roughly chopped
  • 1 tbsp fresh parsley, finely chopped
  • 1 tsp Dijon mustard
  • Salt and black pepper to taste

Optional Garnishes

  • Toasted pine nuts or slivered almonds
  • Fresh basil or tarragon
  • Flaky sea salt
  • Chilli flakes

Instructions

  1. Prepare the asparagus. Snap off the woody ends of each asparagus spear by holding the stalk at both ends and bending — it will naturally snap at exactly the right point. Pat the spears completely dry with paper towels — any surface moisture will steam rather than char, preventing the deep browning you are looking for. Toss with olive oil, salt, and pepper.
  2. Heat the pan. Place a cast iron skillet or heavy grill pan over the highest heat your stove can produce. Allow it to heat for at least 3 minutes until it is smoking hot — this is not optional. A pan that is not hot enough will steam the asparagus rather than char it.
  3. Char the asparagus. Place the asparagus in a single layer in the dry, screaming-hot pan. Do not move them for 2–3 minutes — let them sit undisturbed against the hot surface to develop genuine char marks and deep browning. Turn and char the other side for another 2–3 minutes. Work in batches if necessary to avoid overcrowding, which causes steaming. The asparagus should be blistered and blackened in spots on the outside while still retaining a slight bite in the center.
  4. Make the dressing. While the asparagus chars, whisk together the olive oil, lemon juice, lemon zest, minced garlic, chopped capers, parsley, and Dijon mustard. Season to taste with salt and pepper.
  5. Dress and serve. Transfer the charred asparagus to a serving plate. Spoon the lemon caper dressing generously over the hot spears. Finish with flaky sea salt, toasted pine nuts, and chilli flakes if using. Serve immediately.

Pro Tips

  • Dry the asparagus thoroughly before charring — surface moisture is the enemy of good char. Pat each spear dry with paper towels and if time allows, lay them out for 10 minutes before cooking.
  • Use thick asparagus for charring — thin asparagus overcooks and becomes limp before the exterior can develop proper char. Choose spears that are at least pencil-thick.
  • Get the pan truly, genuinely hot — hotter than feels comfortable. The pan should be smoking before the asparagus goes in. This is the single most important step in the recipe.
  • Do not overcrowd the pan — charring requires direct contact between each spear and the hot surface. Work in batches if needed.

The Science of Charring Vegetables

Charring is controlled burning — the deliberate application of enough heat to cause the outermost layer of a vegetable to undergo Maillard browning and, at the blackened spots, actual carbonization. This sounds alarming but produces something remarkable: the Maillard reactions create hundreds of new flavor compounds that are savory, nutty, and deeply complex; the slight carbonization at the blackened spots adds genuine smokiness and a slight bitterness that, in small amounts, makes the overall flavor dramatically more interesting. Asparagus is particularly well suited to charring because its natural sugars caramelize beautifully under high heat while its firm texture means the interior remains tender and sweet — the contrast between the charred exterior and the sweet, green interior is what makes charred asparagus so compulsively delicious.


Flavor Variations

  • Charred Asparagus with Romesco: Serve alongside a smoky vegan romesco sauce instead of the lemon caper dressing for a Spanish-inspired version.
  • Charred Asparagus with Tahini: Drizzle with lemon tahini and sprinkle with za’atar and toasted sesame seeds for a Middle Eastern version.
  • Charred Asparagus with Miso Butter: Toss the hot charred spears with a mixture of white miso and vegan butter for an umami-rich Japanese-inspired finish.

Nutritional Highlights (Per Serving)

CaloriesProteinCarbsFiberFat
~95 kcal3g6g3g7g

Storage

  • Best eaten immediately while hot — charred asparagus loses its textural contrast as it cools and the char softens.
  • Leftovers keep in the refrigerator for up to 3 days and are excellent served cold or at room temperature the next day as part of a grain bowl or salad.
  • The lemon caper dressing keeps separately in a sealed jar for up to 5 days in the refrigerator — shake well before using.

Frequently Asked Questions

Can I char asparagus on a BBQ grill instead?

Yes — a hot charcoal or gas grill is actually ideal for charring asparagus and produces an even better smoky flavor. Grill directly over high heat for 3–4 minutes per side.

Can I use thin asparagus?

Thin asparagus will cook much faster and is harder to char without overcooking the interior. If using thin spears, reduce the cooking time significantly and watch carefully.

What can I serve this with?

Charred asparagus pairs beautifully with pasta, grain bowls, roasted tofu, vegan risotto, or as part of a mezze spread. It also works wonderfully over hummus as a light meal.


Tried this recipe? Leave a comment below and let us know how it turned out! Tag us on Instagram and Facebook — we love seeing your plant-powered creations. Looking for more addictive vegan snack and appetizer recipes? Browse all recipes on Easy Vegan Recipes — new recipes posted every single week!