kid friendly vegan

Vegan Sweet Potato Wedges

vegan sweet potato wedges

There are side dishes you make because something needs to accompany the main. And then there are side dishes like these Vegan Sweet Potato Wedges — the kind that upstage everything else on the table, that get eaten directly from the baking sheet before they even make it to the serving bowl, that combine the most extraordinary caramelized sweetness with a crispy, spiced exterior that shatters when bitten into and gives way to the softest, most yielding, most intensely sweet interior imaginable. These are those wedges. The ones that become the reason people come back for seconds when they thought they were already full. The ones that make sweet potato converts out of everyone who tries them. The ones that prove definitively and irrevocably that the humble sweet potato — treated with respect, seasoned with intention, and roasted at the correct temperature — is one of the most spectacular ingredients in the entire plant-based kitchen.

These wedges are everything a great roasted sweet potato should be and then considerably more. The exterior is genuinely, authentically crispy — a result of the specific combination of cornstarch coating, high oven temperature, and sufficient space on the baking sheet that allows the hot oven air to circulate completely around every wedge simultaneously. The interior is soft, yielding, and so intensely sweet that it tastes almost caramelized from the inside — a result of the natural sugars in the sweet potato concentrating during the long, hot roasting process into something that borders on confectionery. And the spice blend — smoked paprika, garlic powder, cumin, and a touch of cayenne — provides a warmth and depth that transforms the natural sweetness of the potato into something genuinely complex and sophisticated.

What makes these wedges so genuinely outstanding is the cornstarch coating. A thin dusting of cornstarch applied to the oiled wedges before roasting creates a barrier that sets to a crispy crust in the hot oven — drawing moisture away from the surface of the potato and creating the golden, crunchy exterior that distinguishes extraordinary roasted sweet potato wedges from the soft, pale, disappointing ones that give roasted sweet potato an undeserved reputation for sogginess.

This recipe is 100% vegan, naturally gluten-free, ready in just 35 minutes, and absolutely spectacular served with virtually anything — as a side dish for burgers and sandwiches, alongside curries and stews, as a snack with dipping sauce, or simply eaten straight from the pan standing at the kitchen counter because the smell made waiting impossible.


Recipe Information

Prep TimeCook TimeTotal TimeServingsCalories
10 mins25 mins35 mins4~220 kcal

Ingredients

For the Wedges

  • 4 medium sweet potatoes (approximately 800g total), scrubbed clean
  • 3 tbsp olive oil or avocado oil
  • 2 tbsp cornstarch
  • 1 tsp smoked paprika
  • 1 tsp garlic powder
  • ½ tsp ground cumin
  • ½ tsp onion powder
  • ¼ tsp cayenne pepper (adjust to heat preference)
  • 1 tsp fine salt
  • ½ tsp black pepper

Optional Seasonings

  • 1 tsp dried rosemary, finely chopped
  • 1 tsp dried thyme
  • ½ tsp cinnamon (adds beautiful warmth)
  • 1 tsp nutritional yeast (adds savory depth)
  • ½ tsp chili flakes

For the Dipping Sauce

  • ½ cup (120g) vegan mayonnaise
  • 1 tbsp sriracha or hot sauce
  • 1 tbsp lime juice
  • 1 tsp garlic powder
  • ½ tsp smoked paprika
  • Salt to taste

Optional Toppings After Roasting

  • Fresh parsley or cilantro, finely chopped
  • Flaky sea salt scattered over
  • Drizzle of tahini and lemon
  • Vegan parmesan or nutritional yeast
  • Chili flakes for heat and color
  • Fresh lime wedges for squeezing

To Serve

  • Alongside vegan burgers and sandwiches
  • With vegan aioli or chipotle mayo
  • Next to curries and grain bowls
  • As a snack with multiple dipping sauces
  • In a Buddha bowl with roasted vegetables
  • Alongside vegan BBQ dishes

Instructions

  1. Preheat the oven properly. Preheat your oven to 425°F (220°C) and place two large baking sheets inside to heat while the oven comes to temperature. Preheating the baking sheets is critical — placing cold wedges onto a hot pan creates immediate contact heat that starts the crisping process from the bottom the moment they touch the surface.
  2. Cut the wedges. Scrub the sweet potatoes clean — there is no need to peel them as the skin becomes deliciously crispy during roasting and adds both texture and nutrition. Cut each potato in half lengthwise then cut each half into 3–4 wedges depending on the size of the potato. Aim for wedges approximately 2–3cm thick at the widest point — thinner wedges crisp more but risk burning, thicker wedges stay softer inside which is also delicious but different.
  3. Dry the wedges. Place the cut wedges on a clean kitchen towel and pat completely dry — removing as much surface moisture as possible. Dry wedges roast and crisp dramatically better than wet ones. Surface moisture creates steam in the oven which prevents crisping and produces the pale, soft wedges that give roasted sweet potato a bad reputation.
  4. Season the wedges. Place the dried wedges in a large bowl. Drizzle with the olive oil and toss to coat every surface evenly in a thin layer of oil. Sprinkle the cornstarch over the oiled wedges and toss again until every wedge has a thin, even coating of cornstarch — no white clumps should remain visible. Add the smoked paprika, garlic powder, cumin, onion powder, cayenne, salt, and pepper and toss one final time until the spices are evenly distributed across all surfaces.
  5. Arrange on the hot baking sheets. Carefully remove the preheated baking sheets from the oven using oven mitts. Arrange the seasoned wedges in a single layer across both sheets — skin side down where possible — ensuring no wedges are touching or overlapping. Spacing is non-negotiable for crispy wedges — wedges that touch each other steam rather than roast and produce soft rather than crispy results. Use two baking sheets rather than one crowded sheet.
  6. Roast to crispy golden perfection. Place the baking sheets in the preheated oven and roast for 15 minutes. Remove from the oven and flip each wedge carefully with tongs or a thin spatula — they should release easily from the pan if properly crisped on the bottom. If they stick wait another 2 minutes — they will release when ready. Return to the oven and roast for a further 8–12 minutes until deeply golden, caramelized at the edges, and crispy on all surfaces. The edges should be beginning to char very slightly — this charring is desirable and contributes significantly to the extraordinary caramelized flavor.
  7. Make the dipping sauce. While the wedges roast whisk together the vegan mayonnaise, sriracha, lime juice, garlic powder, smoked paprika, and salt until completely combined and smooth. Taste and adjust — more sriracha for heat, more lime for brightness. Transfer to a small serving bowl.
  8. Serve immediately. Transfer the roasted wedges directly from the baking sheet to a serving platter or bowl. Scatter flaky sea salt and fresh herbs over the surface immediately — the salt adheres best to the hot surface. Add a squeeze of fresh lime and serve immediately with the dipping sauce alongside. Sweet potato wedges lose their crispiness relatively quickly as they cool — serve within 5 minutes of removing from the oven for the best texture.

Pro Tips for the Crispiest Vegan Sweet Potato Wedges

  • Preheat the baking sheets in the oven. This single technique — borrowed from professional restaurant kitchens — makes a more significant difference to the crispiness of roasted vegetables than almost any other factor. The immediate contact heat from the preheated pan starts the crisping process from the bottom the moment the wedge touches it, producing a crispier bottom surface than a cold pan can ever achieve.
  • Use cornstarch without exception. The cornstarch coating is what separates crispy sweet potato wedges from soft ones. Cornstarch absorbs surface moisture from the potato and sets to a light, crispy coating in the hot oven that oil alone cannot produce. Do not substitute flour which produces a thicker, doughier coating rather than the light, crispy result cornstarch achieves.
  • Never crowd the pan. This is the most repeated advice in roasted vegetable cooking because it is the most important and most frequently ignored. Every wedge must have clear space around it — hot air must circulate freely around all surfaces simultaneously for the roasting rather than steaming effect that produces crispiness. Two baking sheets are better than one crowded sheet every time.
  • Roast at the highest temperature your oven allows. 425°F (220°C) is the minimum for genuinely crispy sweet potato wedges. A lower temperature produces soft, pale, steamed-style wedges regardless of how long they are cooked. The high heat is what caramelizes the natural sugars and creates the golden, slightly charred edges that make these wedges so extraordinarily flavorful.
  • Flip once and only once. Flipping the wedges once during cooking — at the halfway point — allows both surfaces to develop a crispy crust while the interior cooks through gently. Flipping more frequently disrupts the crust formation and produces less evenly crisped wedges.
  • Do not peel the sweet potatoes. The skin becomes wonderfully crispy during roasting and adds both textural interest and nutritional value — sweet potato skin is rich in fiber, potassium, and antioxidants. Scrub thoroughly rather than peeling for the best result.

The Extraordinary Nutritional Power of Sweet Potato

Sweet potato is one of the most nutritionally impressive vegetables available anywhere in the plant kingdom — and understanding what makes it so remarkable helps explain why these wedges are so much more than simply a delicious side dish.

The beta-carotene content of sweet potato is one of its most extraordinary qualities. A single medium sweet potato provides over 400% of the daily recommended Vitamin A intake in the form of beta-carotene — the orange pigment compound that the body converts to Vitamin A as needed. Beta-carotene is a powerful antioxidant that supports immune function, vision health, skin integrity, and cellular protection from oxidative damage. The fat in the olive oil used to roast the wedges actually increases the absorption of beta-carotene significantly — fat-soluble vitamins require dietary fat to be absorbed from the digestive tract.

Sweet potatoes are also an exceptional source of Vitamin C — providing approximately 35% of the daily recommended intake per serving — alongside meaningful amounts of potassium, manganese, Vitamin B6, and dietary fiber. The fiber content — approximately 4 grams per serving — supports healthy digestion, feeds beneficial gut bacteria, and promotes the gradual release of the sweet potato’s natural sugars into the bloodstream rather than the rapid spike that refined carbohydrates produce.

The natural sugars in sweet potato — primarily sucrose, fructose, and glucose — are accompanied by fiber, vitamins, and minerals that fundamentally change how the body processes them compared to the isolated sugars in refined sweet foods. This combination of natural sweetness and nutritional substance is what makes sweet potato such a valuable ingredient in plant-based cooking — it provides the satisfaction of sweetness with the nutritional profile of a genuinely nourishing whole food.

Smoked paprika contributes capsaicin compounds with anti-inflammatory properties alongside Vitamins A and E. Garlic powder provides allicin precursors with antimicrobial and cardiovascular protective properties. Cumin contributes thymoquinone with antioxidant properties and enhanced iron absorption.


Flavor Variations

  • Honey Garlic Sweet Potato Wedges: Toss the roasted wedges in a glaze of vegan honey or maple syrup, minced garlic, soy sauce, and sesame oil in the final 5 minutes of roasting for a sticky, sweet-savory version that is particularly spectacular with sesame seeds and sliced scallions scattered over.
  • Za’atar Sweet Potato Wedges: Replace the spice blend with za’atar seasoning and finish with a drizzle of tahini, a squeeze of lemon, and fresh chopped parsley for a Middle Eastern-inspired version that is outstanding alongside hummus and warm pita.
  • Tandoori Sweet Potato Wedges: Replace the spice blend with tandoori masala and serve with a cooling coconut yogurt mint dip for an Indian-inspired version with a beautiful deep red color and a warmly spiced character.
  • Parmesan Sweet Potato Wedges: Toss the seasoned wedges in 3 tablespoons of nutritional yeast before roasting for a savory, umami-rich version with a beautiful golden crust that pairs magnificently with marinara sauce for dipping.

Nutritional Highlights (Per Serving)

CaloriesProteinCarbsFiberFat
~220 kcal3g38g5g8g

At just 220 calories per serving these wedges deliver extraordinary nutritional value — over 400% of the daily Vitamin A requirement, 35% of Vitamin C, meaningful amounts of potassium, manganese, and B6, and 5 grams of dietary fiber alongside their extraordinary flavor. The olive oil contributes heart-healthy monounsaturated fats that support the absorption of the fat-soluble beta-carotene. The spice blend contributes anti-inflammatory capsaicin, cardiovascular-protective allicin precursors, and antioxidant compounds. This is a side dish that nourishes as deeply as it satisfies.


Storage

  • Best fresh: Sweet potato wedges are at their crispiest within 10 minutes of coming out of the oven. They soften as they cool — serve immediately for the best texture experience.
  • Refrigerator: Store cooled wedges in an airtight container in the refrigerator for up to 4 days. Reheat in a hot oven at 400°F (200°C) for 8–10 minutes or in an air fryer at 375°F (190°C) for 4–5 minutes to restore crispiness. Do not microwave which makes them irreversibly soft.
  • Freezer: Freeze roasted wedges in a single layer until solid then transfer to a freezer bag for up to 2 months. Reheat from frozen in a 400°F (200°C) oven for 15–18 minutes until heated through and re-crisped.
  • Meal prep: Roast a large batch at the beginning of the week and store in the refrigerator for quick reheating throughout the week. They pair with virtually every plant-based meal — curry, grain bowls, sandwiches, salads — making them one of the most versatile meal prep items available.

Frequently Asked Questions

Why are my sweet potato wedges soft instead of crispy?

Soft wedges are caused by one of four things — insufficient drying before seasoning, no cornstarch coating, a crowded baking sheet, or oven temperature too low. Ensure the wedges are completely dry before oiling, coat thoroughly in cornstarch, spread with generous space between each wedge on two baking sheets, and roast at the full 425°F (220°C).

Do I need to peel the sweet potatoes?

No — the skin of sweet potato is completely edible, nutritious, and becomes deliciously crispy during roasting. Scrub the potatoes thoroughly under running water to remove any dirt. If you prefer peeled wedges the recipe works equally well — the exterior will be slightly less textured without the skin.

Can I make these in an air fryer?

Yes — air fryer sweet potato wedges are outstanding. Season as directed and air fry in a single layer at 400°F (200°C) for 15–18 minutes, shaking the basket every 5 minutes for even crisping. The air fryer produces wedges that are arguably crispier than oven-roasted ones and cooks them in significantly less time.

What sweet potatoes work best for wedges?

Medium-sized sweet potatoes with a uniform shape produce the most evenly sized wedges and the most consistent cooking results. The orange-fleshed variety — Beauregard or Jewel cultivars — produce the sweetest, most vibrantly colored wedges. Purple sweet potatoes produce a dramatically beautiful wedge with a slightly drier, nuttier flavor.

Can I prepare the wedges in advance?

Yes — cut, dry, and season the wedges up to 4 hours in advance and store in a single layer on parchment-lined baking sheets in the refrigerator. Roast directly from the refrigerator — the cold wedges may need an additional 3–5 minutes of roasting time. Do not oil and season more than 4 hours in advance as the salt draws moisture from the potato and can make the exterior less crispy.

What dipping sauces work best with sweet potato wedges?

The sriracha mayo in this recipe is the ideal pairing — its creamy richness and gentle heat complement the sweet, caramelized wedges perfectly. Other outstanding options include chipotle vegan aioli, tahini with lemon and garlic, vegan ranch dressing, hummus, mango chutney, and vegan sour cream with chives.


Tried this recipe? Leave a comment below and let us know how it turned out! Tag us on Instagram and Facebook — we love seeing your plant-powered creations. Looking for more crispy, vibrant vegan side dish recipes? Browse all recipes on Easy Vegan Recipes — new recipes posted every single week!

Vegan Homemade Krispy Kremes

vegan homemade krispy kremes

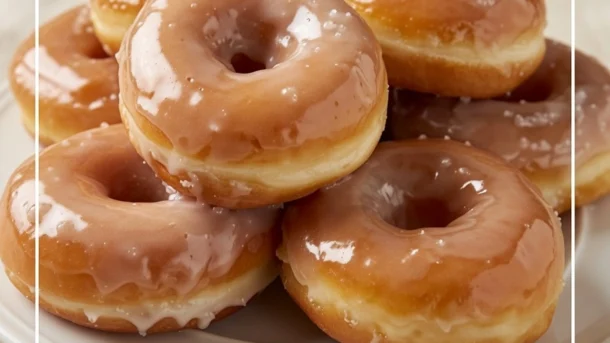
There are moments in baking that stop you completely. And then there are moments like pulling a batch of these Vegan Homemade Krispy Kremes from the hot oil — watching them emerge golden and impossibly light and already puffing up in that characteristic way that makes a great donut look like it is barely holding together from the inside out — dipping them immediately into the warm vanilla glaze and watching that glaze set to a barely-there, translucent, sweet coating that clings to the surface in a way that is so immediately, recognizably right that you understand in that moment exactly why Krispy Kreme became one of the most beloved donut brands in the entire world. These are those donuts. Light as air. Pillowy beyond belief. Glazed to perfection. And completely, entirely plant-based.

These donuts are built on a yeasted dough of extraordinary delicacy — enriched with oat milk, vegan butter, and just enough sugar to feed the yeast and create the characteristic sweetness that makes a great glazed donut so distinctive, and leavened with active dry yeast that produces a rise so dramatic and a crumb so impossibly light and airy that the finished donuts seem to weigh almost nothing despite their generous size. The secret to their legendary lightness is threefold — the enriched dough, the double rise that develops both flavor and structure, and the brief frying at the precise correct temperature that creates a barely-there crust and a completely, gloriously tender interior.

What makes this recipe so genuinely outstanding is its commitment to replicating not merely the flavor of a Krispy Kreme donut but its specific, extraordinary texture. The original Krispy Kreme donut is not merely sweet and fried — it is a specific textural experience of a crust so thin it is almost nonexistent, an interior so soft and pillowy it barely resists the bite, and a glaze so perfectly balanced between sweet and vanilla that it enhances rather than overwhelms everything beneath it. Achieving this in a plant-based version requires specific techniques — the right flour, the right liquid temperature for activating the yeast, the right oil temperature for frying, and the right glaze consistency for dipping — and this recipe delivers all of them.

This recipe is 100% vegan, ready in approximately 2 hours including rising time, and absolutely magnificent eaten warm — ideally within 30 seconds of being glazed, when the glaze is still slightly warm and the donut interior is at its most extraordinary.


Recipe Information

Prep TimeRise TimeCook TimeTotal TimeServingsCalories
20 mins1.5 hours20 mins2 hrs 10 mins12~280 kcal

Ingredients

For the Donut Dough

  • 3 cups (360g) all-purpose flour plus extra for dusting
  • 2¼ tsp (7g) active dry yeast or instant yeast
  • ¼ cup (50g) cane sugar
  • ½ tsp fine salt
  • ¾ cup (180ml) oat milk, warmed to 110°F (43°C)
  • ¼ cup (55g) vegan butter, melted and slightly cooled
  • 1 flax egg (1 tbsp flaxseed meal + 3 tbsp water — rest 5 minutes)
  • 1 tsp pure vanilla extract

For Frying

  • 4 cups (960ml) neutral vegetable oil (canola, sunflower, or refined coconut)

For the Krispy Kreme Style Glaze

  • 2 cups (240g) powdered sugar, sifted
  • ¼ cup (60ml) oat milk, warmed
  • 2 tbsp vegan butter, melted
  • 1½ tsp pure vanilla extract
  • Pinch of salt

Optional Variations

  • Chocolate glaze: Replace 3 tbsp powdered sugar with 3 tbsp cocoa powder and add 50g melted vegan dark chocolate
  • Strawberry glaze: Replace oat milk with fresh strawberry puree
  • Cinnamon sugar: Skip the glaze and roll warm donuts in cinnamon sugar
  • Filled donuts: Skip cutting the hole and fill with vegan vanilla cream or jam

To Serve

  • Warm from the fryer with fresh glaze
  • With a cup of coffee or oat milk latte
  • Stacked on a plate for the most beautiful presentation
  • With extra glaze for dipping alongside

Instructions

  1. Activate the yeast. Warm the oat milk to exactly 110°F (43°C) — warm enough to activate the yeast but not so hot it kills it. A kitchen thermometer is ideal here. Add the sugar and yeast to the warm milk, stir gently, and leave for 5–10 minutes until the surface is foamy and the mixture smells distinctly yeasty. If no foam develops after 10 minutes the yeast is dead — start again with fresh yeast and correctly tempered milk.
  2. Make the flax egg. Combine the flaxseed meal and water in a small bowl, stir, and rest for 5 minutes until gel-like.
  3. Make the dough. In a large bowl or stand mixer bowl combine the flour and salt. Add the activated yeast mixture, melted vegan butter, flax egg, and vanilla extract. Mix with a wooden spoon or dough hook until a shaggy dough forms then knead for 8–10 minutes by hand on a lightly floured surface — or 6 minutes on medium speed in a stand mixer — until the dough is smooth, elastic, and slightly tacky but not sticky. It should spring back slowly when poked. This kneading develops the gluten structure that gives the donuts their characteristic chew and ability to hold the light, airy texture created by the yeast.
  4. First rise. Place the dough in a lightly oiled bowl, cover with a clean damp kitchen towel or plastic wrap, and leave in a warm place for 60–75 minutes until doubled in size. The ideal proofing environment is a turned-off oven with just the light on — approximately 80°F (27°C) — which provides the consistent warmth that produces the most reliable, even rise.
  5. Shape the donuts. Turn the risen dough out onto a lightly floured surface and roll to approximately 1.5cm (½ inch) thickness — not thinner or the donuts will be dense after frying. Use a 9cm (3½ inch) round cutter to cut out circles and a 3cm (1¼ inch) cutter or the cap of a bottle for the holes. Re-roll the scraps once to cut additional donuts. Place the cut donuts and holes on a parchment-lined baking sheet with space between each one.
  6. Second rise. Cover the cut donuts loosely with a clean kitchen towel and allow to rise for a further 30–45 minutes until visibly puffed and pillowy — they will not double in size but should look noticeably lighter and more voluminous than when first cut. Do not skip this second rise — it is what produces the extraordinarily light, airy interior that defines a great glazed donut.
  7. Make the glaze. While the donuts complete their second rise whisk together the sifted powdered sugar, warm oat milk, melted vegan butter, vanilla extract, and salt until completely smooth and flowing — the glaze should be thick enough to coat the back of a spoon but thin enough to drip slowly from it. If too thick add oat milk one teaspoon at a time. If too thin add powdered sugar one tablespoon at a time. Keep warm — a glaze that has cooled and thickened will not create the characteristic thin, translucent Krispy Kreme coating.
  8. Fry the donuts. Heat the oil in a large deep pot to exactly 350°F (175°C) — use a thermometer and maintain this temperature throughout frying. Too cool and the donuts absorb oil and are greasy. Too hot and the exterior burns before the interior cooks. Carefully lower 2–3 donuts into the oil at a time — never crowd the pot. Fry for 60–90 seconds per side until deep golden on both sides. Remove with a slotted spoon and drain on a wire rack set over a baking sheet for 30 seconds — not paper towel which makes the bottom soggy.
  9. Glaze immediately. Dip each warm donut into the glaze face down, hold for 3 seconds, lift and allow excess to drip off, then place glaze-side up on the wire rack. The glaze should be thin, translucent, and set within 60–90 seconds on the warm donut. Glaze the donut holes too — they are arguably the best part. Eat immediately for the most extraordinary experience.

Pro Tips for Perfect Vegan Krispy Kreme Style Donuts

  • Temperature is everything — measure it. The yeast activation temperature, the oil frying temperature, and the glaze temperature are all critical variables that significantly affect the finished result. A kitchen thermometer is not optional for this recipe — it is essential. The difference between oil at 340°F and 360°F produces a meaningfully different donut.
  • Do not skip the second rise. The first rise develops flavor. The second rise — after the donuts are cut and shaped — develops the specific lightness and airy texture that makes a great glazed donut so extraordinary. Donuts fried without the second rise will be noticeably denser and less pillow-like than those given the full proofing time.
  • Fry in small batches and maintain oil temperature. Adding too many donuts to the oil at once drops the oil temperature dramatically — causing the donuts to absorb oil before the exterior can set and producing greasy, dense results. Two to three donuts per batch with the oil returned to temperature between batches produces the best results.
  • Glaze while warm — not hot, not cool. The ideal glazing temperature is approximately 30–60 seconds after the donuts come out of the oil — warm enough that the glaze flows and adheres beautifully but not so hot it slides off before setting. A donut glazed when completely cool will have a thicker, more opaque glaze coating rather than the characteristic thin, translucent Krispy Kreme finish.
  • Eat within 30 minutes of glazing. Yeasted donuts deteriorate faster than almost any other baked good — the extraordinary lightness and pillowy texture that makes them so spectacular lasts for approximately 2 hours after frying, after which they begin to firm and toughen. Make them, glaze them, eat them immediately.
  • Use a wire rack not paper towel for draining. Paper towel creates a steam trap under the donut that makes the bottom soggy. A wire rack allows air to circulate completely around the donut and maintains the integrity of the exterior on all surfaces.

The Science of the Perfect Yeasted Donut

A yeasted donut is one of the most technically demanding preparations in all of home baking — and understanding the science behind why each step matters helps explain why these donuts are so extraordinary when the technique is followed precisely.

The yeast is the heart of the recipe. Saccharomyces cerevisiae — the species of yeast used in bread and donut making — consumes the sugars in the dough and produces carbon dioxide gas and ethanol as metabolic byproducts. The carbon dioxide becomes trapped in the gluten network developed during kneading and causes the dough to expand dramatically during both rising periods. The ethanol evaporates during frying and contributes to the characteristic flavor compounds that distinguish a yeasted donut from a cake donut.

The gluten network — developed during the 8–10 minutes of kneading — is what gives the donut its ability to stretch and expand as the yeast produces carbon dioxide without tearing. Insufficient kneading produces a weak gluten network that tears during rising and produces a dense, uneven crumb. Proper kneading produces an elastic, extensible network that stretches smoothly as the dough rises and then sets during frying into the characteristic light, pillowy structure of a great glazed donut.

The frying temperature is critical because of how the starch and protein in the dough respond to heat. At 350°F (175°C) the exterior of the donut sets almost immediately on contact with the oil — creating a thin, sealed crust that traps the moisture inside the donut and keeps the interior extraordinarily tender while the exterior turns golden. At lower temperatures the exterior takes too long to set and absorbs oil before the crust forms. At higher temperatures the exterior burns before the interior has time to cook through.

The glaze — so simple in its ingredients — achieves its characteristic thinness and translucency through the specific ratio of sugar to liquid and the temperature at which it is applied. Applied warm to a warm donut the glaze flows freely over the surface and sets to a thin, even film as both the glaze and the donut cool simultaneously. This simultaneous cooling is what creates the perfectly uniform, paper-thin coating that is the defining visual and textural characteristic of a Krispy Kreme glaze.


Flavor Variations

  • Chocolate Frosted: Dip in a chocolate glaze made from melted vegan dark chocolate, powdered sugar, oat milk, and vanilla for a rich, deeply chocolatey version that is particularly spectacular with rainbow sprinkles pressed into the surface while the chocolate is still wet.
  • Strawberry Glazed: Replace the oat milk in the glaze with fresh strawberry puree for a beautiful pink glaze with a natural, vibrant strawberry flavor and color that is particularly stunning in summer.
  • Cinnamon Sugar: Skip the glaze entirely and roll the warm fried donuts immediately in a generous mixture of cinnamon and caster sugar for a churro-inspired version that is particularly extraordinary with a dipping sauce of vegan chocolate ganache.
  • Filled Cream Donuts: Skip cutting the hole and fry as full circles. Once cooled use a piping bag to fill each donut with vegan vanilla pastry cream, vegan lemon curd, or strawberry jam for a filled donut that is an entirely different but equally spectacular experience.

Nutritional Highlights (Per Serving — 1 donut with glaze)

CaloriesProteinCarbsFiberFat
~280 kcal4g42g1g11g

These donuts are unambiguously an indulgence — and they are completely, unreservedly worth it. Made from real, whole, plant-based ingredients without artificial flavors, preservatives, or additives of any kind, they are a significantly cleaner version of the commercial original while delivering every element of the flavor and texture experience that makes glazed donuts so universally beloved. The flaxseed meal contributes ALA omega-3 fatty acids and lignans. The oat milk base provides beta-glucan fiber. The vegan butter contributes plant-based fats without the cholesterol of dairy butter. This is an indulgence with integrity.


Storage

  • Best eaten immediately: Yeasted glazed donuts are at their absolute, unequivocal peak within 30–60 minutes of being glazed. The texture deteriorates significantly after 2–3 hours as the yeast structure firms and the glaze absorbs into the surface. Make them and eat them immediately whenever possible.
  • Room temperature: Store unglazed fried donuts in an airtight container at room temperature for up to 1 day. Warm briefly in a 300°F (150°C) oven for 3–4 minutes before glazing and serving — this partially restores the fresh-fried texture.
  • Freezer — unfried dough: After cutting the donut shapes freeze them on a parchment-lined baking sheet until solid then transfer to a freezer bag for up to 1 month. Thaw overnight in the refrigerator, complete the second rise at room temperature for 45–60 minutes, then fry and glaze as directed.
  • Freezer — fried unglazed: Freeze fried unglazed donuts for up to 1 month. Thaw at room temperature for 30 minutes and warm in a 300°F (150°C) oven for 5 minutes before glazing and serving.

Frequently Asked Questions

Can I bake these instead of frying?

Yes — bake at 375°F (190°C) for 12–15 minutes until golden. Baked donuts have a more bread-like texture than fried ones and lack the characteristic thin, barely-there crust of a fried donut but are still delicious and significantly lower in fat. An air fryer at 350°F (175°C) for 5–6 minutes per side produces a result closer to fried than the oven.

Why didn’t my dough rise?

Failed dough rise is almost always caused by dead yeast or milk that was too hot and killed the yeast. Always check that your yeast is within its expiration date and that the milk temperature is between 105–115°F (40–46°C). If the yeast does not foam after 10 minutes in the warm milk it is dead — start again with fresh yeast.

Can I make the dough the night before?

Yes — after the first rise punch the dough down, wrap tightly in plastic wrap, and refrigerate overnight. The next morning remove from the refrigerator, roll and cut the donuts, and allow to complete the second rise at room temperature for 60–75 minutes before frying — the cold dough takes longer to proof than room temperature dough.

What oil is best for frying donuts?

A neutral oil with a high smoke point is essential — canola oil, sunflower oil, or refined coconut oil all work beautifully. Avoid olive oil which has too low a smoke point and too strong a flavor. The oil should be clean and fresh — reused oil with food particles produces off-flavors in the finished donuts.

How do I keep the glaze from being too thick?

The glaze thickens as it cools — reheat briefly in the microwave for 15 seconds and stir well to restore a flowing consistency. If making the glaze in advance keep it in a bowl set over warm water to maintain the ideal dipping temperature and consistency throughout the glazing process.

Can I make these donuts gluten-free?

Gluten-free yeasted donuts are significantly more challenging than regular ones — the gluten network is essential for trapping the carbon dioxide produced by the yeast. A dedicated gluten-free donut flour blend with added psyllium husk or xanthan gum produces the best results. Expect a slightly denser texture than the regular version but still genuinely delicious.


Tried this recipe? Leave a comment below and let us know how it turned out! Tag us on Instagram and Facebook — we love seeing your plant-powered creations. Looking for more indulgent vegan baking and dessert recipes? Browse all recipes on Easy Vegan Recipes — new recipes posted every single week!

Vegan Peach Fritters

vegan peach fritters

There are breakfast recipes that make ordinary mornings feel genuinely special. And then there are recipes like these Vegan Peach Fritters — the kind that fill the kitchen with the most intoxicating aroma of caramelized peach and warm cinnamon and vanilla as they cook, that come out of the pan golden and crispy and pillowy all at once, and that deliver with every single bite a combination of sweet juicy peach and tender, lightly spiced batter that is so deeply satisfying it stops conversation completely. These are those fritters. The ones that make people wander into the kitchen in their pajamas drawn purely by the smell. The ones that disappear from the plate before they have properly cooled. The ones that turn an ordinary Saturday morning into something genuinely memorable.

These are fritters of extraordinary simplicity and extraordinary deliciousness — a lightly sweetened batter of all-purpose flour, oat milk, and flax egg folded generously with chunks of ripe, fragrant peach that caramelize against the hot pan into jammy, intensely sweet pockets of fruit surrounded by a crispy, golden exterior that gives way to the most tender, soft interior imaginable. They are finished with a drizzle of maple glaze that sets to a thin, sweet, barely-there coating that amplifies every other flavor in the fritter and makes them look genuinely irresistible on the plate.

What makes these fritters so genuinely outstanding is the peach. At peak summer ripeness a peach is one of the most extraordinarily flavored fruits available — sweet, slightly tart, intensely fragrant, and with a juiciness that releases into the batter during cooking and creates those extraordinary pockets of concentrated peach flavor that make every bite unpredictable and exciting. The key is using ripe but firm peaches — ripe enough to be intensely sweet and fragrant but firm enough to hold their shape in the batter rather than turning to mush during cooking.

This recipe is 100% vegan, ready in just 20 minutes, naturally dairy-free and egg-free, and absolutely spectacular served warm with maple glaze, a dusting of cinnamon sugar, or a scoop of vegan vanilla ice cream for the most indulgent summer breakfast dessert imaginable.


Recipe Information

Prep TimeCook TimeTotal TimeServingsCalories
10 mins10 mins20 mins4~290 kcal

Ingredients

For the Fritter Batter

  • 1½ cups (180g) all-purpose flour
  • 2 tsp baking powder
  • ½ tsp cinnamon
  • ¼ tsp nutmeg
  • ¼ tsp fine salt
  • 2 tbsp cane sugar or coconut sugar
  • 1 flax egg (1 tbsp flaxseed meal + 3 tbsp water — rest 5 minutes)
  • ¾ cup (180ml) unsweetened oat milk
  • 2 tbsp melted coconut oil or neutral vegetable oil
  • 1 tsp pure vanilla extract
  • 1 tsp apple cider vinegar

For the Peach Filling

  • 3 medium ripe but firm peaches (approximately 400g), peeled and diced into 1cm pieces
  • 1 tbsp coconut sugar or brown sugar
  • ½ tsp cinnamon
  • 1 tsp lemon juice

For Frying

  • ½ cup (120ml) neutral vegetable oil or coconut oil for shallow frying

For the Maple Glaze

  • 1 cup (120g) powdered sugar
  • 3 tbsp maple syrup
  • 2–3 tbsp oat milk
  • ½ tsp vanilla extract
  • Pinch of salt

Optional Toppings

  • Cinnamon sugar (2 tbsp sugar + ½ tsp cinnamon) for dusting
  • Vegan vanilla ice cream alongside
  • Fresh peach slices for garnish
  • Toasted crushed pecans scattered over
  • Whipped coconut cream
  • Extra maple syrup drizzled

To Serve

  • Warm from the pan with maple glaze
  • With vegan vanilla ice cream for a dessert version
  • Alongside fresh fruit salad
  • With a hot cup of coffee or tea
  • Dusted with powdered sugar for a classic finish

Instructions

  1. Prepare the peaches. Peel and dice the peaches into approximately 1cm cubes — small enough to distribute evenly throughout the fritters but large enough to provide distinct pockets of juicy peach in every bite. Toss the diced peaches in the coconut sugar, cinnamon, and lemon juice and set aside for 5 minutes. The sugar draws out some of the peach juice and the lemon prevents browning while adding brightness.
  2. Make the flax egg. In a small bowl combine the flaxseed meal and water, stir well, and rest for 5 minutes until thickened to a gel. This binding agent is essential for holding the fritters together during cooking.
  3. Mix the dry ingredients. In a large bowl whisk together the flour, baking powder, cinnamon, nutmeg, salt, and sugar until evenly combined.
  4. Add the wet ingredients. Add the oat milk, melted coconut oil, vanilla extract, apple cider vinegar, and prepared flax egg to the dry ingredients. Fold gently with a spatula until just combined — the batter should be thick and slightly lumpy. Do not overmix.
  5. Fold in the peaches. Add the sugared peach pieces and any accumulated juice to the batter and fold gently with two or three strokes until just distributed. The batter will be thick and chunky — this is correct and produces fritters with distinct peach pieces rather than a smooth, uniform mixture.
  6. Heat the oil. Pour the oil into a large heavy-bottomed skillet to a depth of approximately 1cm and heat over medium-high heat until shimmering. Test the oil temperature by dropping a small amount of batter into it — it should sizzle immediately and vigorously. Oil that is too cool produces greasy, pale fritters. Oil that is too hot burns the exterior before the center cooks through.
  7. Fry the fritters. Working in batches of 3–4 to avoid crowding, drop large spoonfuls of batter — approximately 3 tablespoons each — into the hot oil. Flatten slightly with the back of the spoon to approximately 1cm thickness. Cook for 2–3 minutes until the bottom is deep golden and the edges look set. Flip carefully with a spatula and cook for a further 2 minutes until equally golden on the second side. Transfer to a plate lined with paper towel to drain briefly.
  8. Make the maple glaze. Whisk together the powdered sugar, maple syrup, vanilla extract, and salt in a small bowl. Add oat milk one tablespoon at a time until the glaze reaches a thick but pourable, drizzleable consistency — it should fall from a spoon in a slow, steady ribbon rather than running freely.
  9. Glaze and serve immediately. Arrange the warm fritters on a serving plate and drizzle the maple glaze generously over the top — allowing it to run down the sides and pool slightly around the base of each fritter. Scatter any additional toppings over the glaze while it is still wet so they adhere to the surface. Serve immediately while the fritters are at their crispiest and the peach filling is still warm and jammy.

Pro Tips for Perfect Vegan Peach Fritters

  • Use ripe but firm peaches. This distinction is critical. Overripe peaches release too much juice into the batter during cooking and make the fritters dense and soggy rather than light and crispy. Perfectly ripe but still firm peaches hold their shape, caramelize beautifully against the hot oil, and release their sweetness gradually during cooking rather than all at once.
  • Do not overmix the batter. Ten folds maximum from the moment the wet ingredients hit the dry — the batter should still look rough and slightly lumpy when the peaches go in. Overmixed batter develops gluten that makes fritters dense and chewy rather than light and tender.
  • Maintain oil temperature throughout cooking. The biggest mistake in fritter making is allowing the oil temperature to drop between batches by cooking too many fritters at once. Cook in small batches of 3–4 and allow the oil to return to temperature between batches. A cooking thermometer showing 350°F (175°C) takes all the guesswork out of this.
  • Flatten the fritters slightly after dropping into the oil. A thinner fritter cooks more evenly all the way through than a thick dome-shaped one and produces a higher ratio of crispy exterior to soft interior — which is the ideal texture balance.
  • Drain briefly on paper towel — not for long. Fritters drained on paper towel for too long steam on the underside and lose their crispiness. Drain for 30–60 seconds maximum then transfer to a warm oven at 200°F (93°C) if making multiple batches — this keeps them warm and crispy while you finish cooking.
  • Glaze while warm. The maple glaze sets most beautifully on warm fritters — it flows into the crevices and sets to a thin, glossy, perfectly even coating. Applied to cold fritters it sits on the surface rather than flowing and produces an uneven, thick result.

Why Summer Peaches Are So Extraordinary

The peach is one of the most seasonally dependent fruits available — and at its peak in the height of summer it is an ingredient of such extraordinary flavor and fragrance that it barely needs anything done to it to be spectacular. Understanding what makes a perfectly ripe summer peach so remarkable helps explain why these fritters are so extraordinary when made with the right fruit.

Peaches accumulate their characteristic flavor compounds — primarily lactones, aldehydes, and terpenes — during the ripening process on the tree. Peaches that are picked before full ripeness and allowed to ripen off the tree never develop the full concentration of these compounds that tree-ripened fruit achieves. This is why a locally grown, tree-ripened summer peach tastes incomparably better than a supermarket peach purchased in winter — the flavor difference is not merely a matter of preference but of actual chemical composition.

The sugar content of a fully ripe peach — primarily fructose and glucose — is what produces the extraordinary caramelization that happens when the diced peach comes into contact with the hot oil in the pan. The natural fruit sugars undergo the Maillard reaction and caramelization simultaneously, creating the complex, slightly jammy, intensely sweet flavor of cooked peach that is entirely distinct from the fresh fruit and in many ways even more satisfying.

The natural acidity of the peach — from malic and citric acid — balances this sweetness and prevents the fritters from tasting cloying despite the significant amount of natural fruit sugar. The cinnamon amplifies both the sweetness and the acidity simultaneously through the mechanism by which warm spices enhance flavor perception. The lemon juice in the peach maceration brightens and preserves these volatile aromatic compounds during cooking.

Nutritionally peaches provide meaningful amounts of Vitamin C, Vitamin A as beta-carotene, potassium, and niacin alongside antioxidant compounds including chlorogenic acid and quercetin that have been studied for anti-inflammatory and cardiovascular protective properties.


Flavor Variations

  • Apple Cinnamon Fritters: Replace the peaches with peeled, diced apple tossed in cinnamon and brown sugar for a classic autumn fritter that is particularly spectacular with a salted caramel drizzle instead of maple glaze.
  • Blueberry Lemon Fritters: Replace the peaches with fresh blueberries and add the zest of one lemon to the batter for a vibrant summer version with a beautiful purple-studded interior and a bright citrusy character.
  • Mango Coconut Fritters: Replace the peaches with diced fresh mango and add 3 tablespoons of desiccated coconut to the batter for a tropical version that is particularly spectacular with a lime glaze instead of maple.
  • Banana Walnut Fritters: Replace the peaches with sliced ripe banana and add 3 tablespoons of chopped toasted walnuts to the batter for a deeply comforting version that is outstanding for autumn and winter breakfasts.

Nutritional Highlights (Per Serving — 3 fritters)

CaloriesProteinCarbsFiberFat
~290 kcal5g46g3g10g

At 290 calories per serving these fritters deliver a genuinely satisfying breakfast alongside meaningful nutrition. The peaches provide Vitamins C and A, potassium, and antioxidant flavonoids. The flaxseed meal contributes ALA omega-3 fatty acids and lignans with hormone-balancing properties. The oat milk base contributes beta-glucan fiber with documented cholesterol-lowering properties. The maple syrup glaze provides zinc and manganese alongside its natural sweetness. This is a breakfast that celebrates summer fruit in the most delicious way possible while delivering genuine nutritional substance.


Storage

  • Fresh is best: Peach fritters are at their absolute peak the moment they come out of the pan — crispy, golden, warm, and jammy. They are a breakfast that should be eaten immediately rather than stored wherever possible.
  • Room temperature: Store unglazed fritters in an airtight container at room temperature for up to 1 day. Reheat in a hot oven at 375°F (190°C) for 5 minutes or in an air fryer at 350°F (175°C) for 3–4 minutes to restore crispiness before glazing and serving.
  • Refrigerator: Store in an airtight container in the refrigerator for up to 2 days. Reheat in oven or air fryer before serving — do not microwave which makes them irreversibly soft and soggy.
  • Freezer: Freeze unglazed fritters in a single layer until solid then transfer to a freezer bag for up to 1 month. Reheat from frozen in a 375°F (190°C) oven for 12–15 minutes until heated through and re-crisped. Glaze immediately before serving.
  • Batter: Do not store the batter — the leavening activates immediately when the wet and dry ingredients are combined and loses its effectiveness within 30 minutes. Always make the batter fresh immediately before cooking.

Frequently Asked Questions

Can I use canned peaches instead of fresh?

Yes — drain canned peaches thoroughly and pat completely dry before dicing. Canned peaches contain significantly more moisture than fresh and must be dried as completely as possible to prevent the fritters from becoming soggy. The flavor of canned peaches is less intense than fresh but still delicious — add an extra half teaspoon of cinnamon to compensate.

Can I bake these instead of frying?

Yes — place spoonfuls of batter on a lined baking sheet, flatten slightly, and bake at 400°F (200°C) for 15–18 minutes, flipping once halfway through. Baked fritters are significantly less crispy than pan-fried ones but still delicious and considerably lighter in fat content. An air fryer at 375°F (190°C) for 8–10 minutes produces a result closer to pan-fried than the oven.

How do I peel peaches easily?

Score a small X on the bottom of each peach with a sharp knife. Blanch in boiling water for 30–60 seconds then transfer immediately to a bowl of ice water. The skin will slip off effortlessly. Alternatively use a vegetable peeler on firm peaches — it works well when the peaches are not too ripe.

Can I make these fritters gluten-free?

Yes — replace the all-purpose flour with a 1:1 gluten-free flour blend. Add half a teaspoon of xanthan gum if your blend does not already contain it. The texture will be slightly more delicate than the regular version but still golden, crispy, and deeply delicious.

Why are my fritters greasy?

Greasy fritters are almost always caused by oil that is not hot enough when the batter goes in. When oil is at the correct temperature the batter immediately forms a sealed crust that prevents oil from penetrating the interior. When oil is too cool the batter absorbs it before the crust has time to form. Always test the oil temperature before adding batter and maintain the temperature between batches.

Can I make these for a crowd?

Yes — double or triple the recipe as needed. Keep cooked fritters warm in a 200°F (93°C) oven while making subsequent batches. Glaze all fritters together immediately before serving. For very large batches set up an assembly line — one person frying, one person glazing — for the most efficient workflow.


Tried this recipe? Leave a comment below and let us know how it turned out! Tag us on Instagram and Facebook — we love seeing your plant-powered creations. Looking for more vibrant vegan breakfast and brunch recipes? Browse all recipes on Easy Vegan Recipes — new recipes posted every single week!
Vegan Blueberry Cobbler

vegan blueberry cobbler

There are desserts that feel like home. And then there are desserts like this Vegan Blueberry Cobbler — the kind that comes out of the oven bubbling and fragrant and so deeply, warmly inviting that people are already reaching for bowls before it has properly cooled, that fills the kitchen with the most extraordinary aroma of caramelized blueberry and warm butter and vanilla as it bakes, and that delivers with every single spoonful a combination of jammy, intensely sweet blueberry filling and golden, biscuity, tender cobbler topping that is one of the most satisfying dessert experiences imaginable. This is that cobbler. The one that makes summer feel complete. The one that has been requested at every gathering since the first time it was made. The one that tastes like the very best version of every blueberry dessert you have ever eaten, distilled into a single baking dish.

This is a cobbler of extraordinary simplicity and extraordinary deliciousness — a bubbling, deeply purple blueberry filling thickened with just enough cornstarch to hold its shape when spooned into a bowl while still flowing in slow, generous ribbons of juice around the golden cobbler biscuits that sit on top, their crispy, slightly caramelized tops giving way to the softest, most tender, buttermilk-style interiors that absorb the blueberry juices from below into something that is simultaneously biscuit and cake and pudding all at once. It is genuinely one of the finest things you will make all summer.

What makes this cobbler so genuinely outstanding is the cobbler topping. Made with vegan butter, oat milk curdled with apple cider vinegar into a plant-based buttermilk, and a touch of coconut sugar that caramelizes in the oven into a barely-there golden crust — these biscuits are extraordinary on their own and transcendent in combination with the blueberry filling beneath them. They are dropped onto the filling in rustic, irregular mounds rather than rolled and cut — a technique that produces a more tender, more interesting, more genuinely homemade result than any precision cutting could achieve.

This recipe is 100% vegan, ready in just 45 minutes, made with fresh or frozen blueberries, naturally adaptable to gluten-free, and absolutely magnificent served warm with a generous scoop of vegan vanilla ice cream that melts into the hot blueberry filling in the most extraordinary way.


Recipe Information

Prep TimeCook TimeTotal TimeServingsCalories
15 mins30 mins45 mins6~320 kcal

Ingredients

For the Blueberry Filling

  • 6 cups (900g) fresh or frozen blueberries (do not thaw if frozen)
  • ⅓ cup (65g) cane sugar or coconut sugar
  • 2 tbsp cornstarch
  • 1 tbsp lemon juice
  • Zest of 1 lemon
  • 1 tsp pure vanilla extract
  • ¼ tsp cinnamon
  • Pinch of salt

For the Cobbler Topping

  • 1½ cups (180g) all-purpose flour
  • ¼ cup (50g) cane sugar plus 1 tbsp for sprinkling
  • 1½ tsp baking powder
  • ¼ tsp baking soda
  • ¼ tsp fine salt
  • ½ tsp cinnamon
  • ⅓ cup (75g) cold vegan butter, cut into small cubes
  • ½ cup (120ml) oat milk
  • 1 tsp apple cider vinegar
  • 1 tsp pure vanilla extract

Optional Add-ins for the Filling

  • 1 cup (150g) fresh raspberries mixed with blueberries
  • 1 tbsp bourbon or dark rum (adds beautiful depth)
  • ¼ tsp cardamom (adds beautiful floral warmth)
  • 1 tbsp maple syrup in place of some sugar
  • Fresh basil leaves torn through the warm filling

Optional Toppings for the Cobbler Biscuits

  • 1 tbsp turbinado sugar sprinkled over before baking
  • 1 tsp lemon zest mixed into the biscuit dough
  • 2 tbsp sliced almonds pressed into the tops

To Serve

  • Vegan vanilla ice cream — the classic and essential pairing
  • Whipped coconut cream
  • Vegan custard poured over the top
  • Plain coconut yogurt for a lighter option
  • A drizzle of maple syrup
  • Fresh blueberries and mint alongside

Instructions

  1. Preheat the oven. Preheat your oven to 375°F (190°C). Lightly grease a 23 x 33cm (9 x 13 inch) baking dish or a similar sized deep casserole dish with vegan butter or coconut oil. A dish with some depth is important — the blueberry filling bubbles significantly during baking and needs room to expand without overflowing.
  2. Make the vegan buttermilk. Combine the oat milk and apple cider vinegar in a small bowl or measuring jug, stir briefly, and set aside for 5 minutes. The acid causes the plant milk to curdle slightly — creating a vegan buttermilk that produces a more tender, more flavorful cobbler topping than plain milk alone.
  3. Make the blueberry filling. In a large bowl combine the blueberries, sugar, cornstarch, lemon juice, lemon zest, vanilla extract, cinnamon, and salt. Toss gently until the blueberries are evenly coated and the cornstarch has completely dissolved into the juices. Pour the blueberry mixture into the prepared baking dish and spread in an even layer. The filling will look sparse at this stage — it compresses and releases juice dramatically during baking.
  4. Make the cobbler biscuit dough. In a large bowl whisk together the flour, sugar, baking powder, baking soda, salt, and cinnamon. Add the cold cubed vegan butter and work it into the flour using your fingertips — pressing each piece of butter between your fingers and thumbs until the mixture resembles coarse, sandy crumbs with some pea-sized pieces of butter still visible. These larger butter pieces are what create the flaky, layered texture of the finished biscuits — do not work the butter in too completely.
  5. Add the wet ingredients. Pour the vegan buttermilk and vanilla extract over the flour and butter mixture and fold gently with a spatula until just combined — the dough should be shaggy, slightly sticky, and rough rather than smooth. Do not overmix — overworked biscuit dough produces tough, dense biscuits rather than the light, tender result this recipe achieves.
  6. Top the filling with the biscuit dough. Drop the cobbler dough over the blueberry filling in large, irregular spoonfuls — approximately 6 to 8 generous mounds distributed evenly across the surface. Do not spread or flatten — the irregular, rustic mounds bake into beautifully varied textures with crispy peaks, tender valleys, and jammy blueberry-soaked edges that are the defining characteristic of a great cobbler. Leave gaps between the dough mounds — the blueberry filling should be visible between them and will bubble up through these gaps during baking.
  7. Sprinkle and bake. Sprinkle the remaining tablespoon of sugar evenly over the cobbler biscuits — this creates the barely-there caramelized crust that makes the tops so irresistible. Place in the center of the preheated oven and bake for 28–35 minutes until the cobbler topping is deeply golden, the biscuits have puffed and set, and the blueberry filling is bubbling vigorously around the edges and through the gaps — the bubbling is essential and indicates the cornstarch has activated and the filling has properly thickened.
  8. Rest briefly before serving. Remove from the oven and allow to rest for 10 minutes before serving — the filling is extraordinarily hot directly from the oven and resting allows it to thicken slightly from its liquid state to the jammy, spoonable consistency that makes it so spectacular. Serve warm — directly from the baking dish at the table — with generous scoops of vegan vanilla ice cream that melt into the hot blueberry filling in the most extraordinary way.

Pro Tips for the Perfect Vegan Blueberry Cobbler

  • Use cold vegan butter for the biscuit topping always. The temperature of the butter is one of the most critical factors in cobbler biscuit success. Cold butter — cut into the flour quickly before it has time to warm — creates steam pockets during baking that produce the flaky, layered texture that distinguishes great cobbler biscuits from dense, cakey ones. Room temperature butter produces a uniform, greasy dough with none of this texture.
  • Do not spread or flatten the biscuit dough. The dropped, irregular mounds of dough bake into beautifully varied textures — crispy peaks, tender centers, jammy edges — that a smoothed or rolled topping simply cannot achieve. The rusticity is intentional and is what makes homemade cobbler so much more interesting than any commercial version.
  • Leave gaps between the biscuit mounds. The blueberry filling visible between the biscuit mounds bubbles up through these gaps during baking — basting the edges of the biscuits in blueberry juice and creating those extraordinary jammy, purple-stained cobbler edges that are arguably the best bites in the entire dish.
  • Use frozen blueberries directly from the freezer. Frozen blueberries added directly from the freezer without thawing hold their shape better during baking, release their juice more gradually, and produce a filling with more body and structure than thawed berries which collapse into mush and produce a watery filling.
  • Bake until the filling is visibly bubbling. The bubbling of the blueberry filling is not merely aesthetic — it indicates that the filling has reached the temperature at which the cornstarch activates and thickens the blueberry juices into a glossy, coating sauce rather than a thin, watery liquid. A cobbler removed from the oven before the filling is bubbling will have a thin, runny filling that pools rather than holds when served.
  • Serve warm — not hot, not cold. Cobbler served immediately from the oven is too hot to eat comfortably and the filling is too liquid to serve cleanly. Cobbler served cold loses all the extraordinary contrast between the warm, jammy filling and the cool, melting ice cream. The 10-minute rest produces the perfect serving temperature — warm enough to melt the ice cream dramatically, cool enough to eat immediately and enjoy every element of the dish at its best.

The Story of Cobbler in American Baking

Cobbler is one of the most beloved and most distinctly American desserts in the entire baking canon — a preparation born of necessity and improvisation that became a classic through the sheer power of how extraordinarily delicious it is when made well.

The origins of cobbler trace to the early nineteenth century American frontier where British settlers attempting to recreate the suet puddings and steamed dumplings of their homeland found themselves without the proper equipment and many of the correct ingredients. The solution was characteristically practical — a simple biscuit or dumpling dough dropped onto stewed or fresh fruit and baked in a dutch oven or camp fire until the topping set and the fruit beneath it became jammy and intensely concentrated in flavor.

The name cobbler is thought to derive from the irregular, cobblestone-like appearance of the dropped biscuit topping — each mound a different size and shape, like the varied stones of a cobbled street — though some food historians argue it derives from the British word cobbler meaning to mend or patch, a reference to the patched appearance of the topping over the fruit beneath.

What distinguishes cobbler from crumble, crisp, and buckle — the other great American fruit bake traditions — is the biscuit topping. Where a crumble uses a dry, sandy, streusel-like topping and a crisp adds oats for additional texture, a cobbler uses a soft, wet, buttermilk-style biscuit dough that bakes into something simultaneously crispy on top and tender throughout — absorbing the fruit juices from below as it cooks into a genuinely extraordinary hybrid of biscuit and pudding that has no equivalent in any other baking tradition.

This vegan version honours every element of the classical preparation — the jammy, intensely flavored fruit filling, the dropped biscuit topping, the bubbling, caramelized edges — while replacing the dairy and eggs with plant-based alternatives that perform identically and produce a cobbler that is indistinguishable in flavor and texture from the finest dairy version.


Flavor Variations

  • Mixed Berry Cobbler: Replace half the blueberries with raspberries, blackberries, and sliced strawberries for a vibrant mixed berry version with more complex, layered fruit flavor and a beautiful deep purple filling.
  • Peach and Blueberry Cobbler: Add 2 cups of diced fresh peach to the blueberry filling for a classic Southern-inspired combination that is particularly spectacular in late summer when both fruits are at their peak.
  • Lemon Blueberry Cobbler: Add the zest of two additional lemons to both the filling and the biscuit dough and replace 2 tablespoons of the oat milk with fresh lemon juice for a brighter, more citrus-forward version that is particularly refreshing in summer.
  • Lavender Blueberry Cobbler: Add 1 teaspoon of culinary dried lavender to the blueberry filling for a sophisticated, floral version with a beautiful Provençal character that is particularly elegant for dinner party desserts.

Nutritional Highlights (Per Serving)

CaloriesProteinCarbsFiberFat
~320 kcal4g54g5g10g

At 320 calories per serving this cobbler delivers genuine summer dessert satisfaction alongside meaningful nutrition from its whole food ingredients. Blueberries are among the most antioxidant-rich foods available — providing extraordinary concentrations of anthocyanins that have been studied for their ability to reduce inflammation, protect brain cells from oxidative damage, improve memory and cognitive function, and support cardiovascular health. A single serving of this cobbler provides approximately one and a half cups of blueberries — a genuinely significant dose of these extraordinary compounds. The lemon juice and zest contribute Vitamin C and limonene with antioxidant and anti-cancer properties. The oat milk base contributes beta-glucan fiber.


Storage

  • Serve fresh: Blueberry cobbler is at its absolute peak within 2 hours of coming out of the oven — when the topping is still slightly crispy, the filling is warm and jammy, and the contrast with cold ice cream is at its most spectacular. Make it fresh whenever possible.
  • Refrigerator: Store covered with plastic wrap or in an airtight container in the refrigerator for up to 4 days. The topping softens during refrigeration as it absorbs moisture from the filling — the texture changes but the flavor remains extraordinary. Reheat individual portions in a 350°F (175°C) oven for 10 minutes or in a microwave for 90 seconds.
  • Freezer: Cobbler freezes well for up to 2 months. Cool completely before wrapping tightly in plastic wrap and foil. Thaw overnight in the refrigerator and reheat in a 350°F (175°C) oven for 15–20 minutes until heated through and the topping has regained some crispiness.
  • Make ahead: The blueberry filling can be prepared up to 24 hours in advance and stored in the refrigerator. Make the biscuit topping fresh on the day of baking — the leavening in the biscuit dough loses its effectiveness if stored before baking.

Frequently Asked Questions

Can I use frozen blueberries instead of fresh?

Yes — frozen blueberries work beautifully in cobbler and in many ways produce a better result than out-of-season fresh blueberries. Add them directly from frozen without thawing — thawed berries release too much liquid and produce a watery filling. You may need to add an additional teaspoon of cornstarch when using frozen berries to account for the additional moisture they release during baking.

Why is my cobbler topping raw in the middle?

An undercooked cobbler topping is caused by biscuit mounds that are too thick, oven temperature too low, or insufficient baking time. Drop the biscuit dough in mounds no thicker than 2–3cm, ensure the oven is fully preheated to the correct temperature, and bake until a toothpick inserted in the center of the largest biscuit mound comes out clean. If the topping is browning too quickly before the center is cooked, cover loosely with foil for the remaining baking time.

Can I make individual cobblers?

Yes — divide the blueberry filling between 6 individual ramekins and top each with one large mound of biscuit dough. Reduce the baking time to 20–25 minutes. Individual cobblers are particularly elegant for dinner party desserts — each guest receives their own perfectly formed cobbler with its own bubbling filling and golden biscuit topping.

How do I know when the cobbler is done?

The cobbler is done when the biscuit topping is deeply golden and set — dry rather than shiny on top — and a skewer inserted in the center of the largest biscuit comes out clean. Most importantly the blueberry filling should be visibly bubbling vigorously around the edges and through the gaps between the biscuits. If the topping is golden but the filling is not yet bubbling, continue baking until it is.

Can I make this cobbler gluten-free?

Yes — replace the all-purpose flour in the biscuit topping with a 1:1 gluten-free flour blend and add half a teaspoon of xanthan gum if your blend does not already contain it. The cornstarch in the filling is already gluten-free. The gluten-free biscuit topping will be slightly more delicate in texture than the regular version but still delicious, golden, and beautifully flavored.

Can I reduce the sugar in this recipe?

Yes — the sugar in the filling can be reduced to 3 tablespoons for a less sweet, more tart filling that allows the natural flavor of the blueberries to dominate. The sugar in the biscuit topping can be reduced to 2 tablespoons. Do not eliminate the sugar entirely as it contributes to the texture and browning of the biscuits as well as their flavor.


Tried this recipe? Leave a comment below and let us know how it turned out! Tag us on Instagram and Facebook — we love seeing your plant-powered creations. Looking for more comforting vegan dessert and baking recipes? Browse all recipes on Easy Vegan Recipes — new recipes posted every single week!

Vegan Cheesy Garlic Breadsticks

vegan cheesy garlic breadsticks

There are side dishes you make because something needs to accompany the pasta. And then there are side dishes like these Vegan Cheesy Garlic Breadsticks — the kind that come out of the oven golden and pulling apart, drenched in garlic butter and bubbling with melted vegan cheese, so deeply savory and so completely irresistible that they upstage whatever they are supposed to be accompanying. This is that breadstick. The one that disappears before the main dish has even been plated. The one that makes people reach across the table without waiting to be offered one.

These breadsticks start with a simple yeasted dough that bakes into a soft, pillowy base, brushed generously with garlicky vegan butter and topped with a generous layer of shredded vegan mozzarella that melts into long, glossy strands, then scattered with fresh parsley and a pinch of chili flakes for color and warmth. They are simultaneously one of the simplest and most crowd-pleasing things you can pull out of an oven.

What makes these breadsticks so outstanding is the garlic butter — made with real minced garlic, vegan butter, fresh parsley, and a pinch of salt, brushed both under and over the cheese layer so that the garlic flavor permeates every component of the finished stick rather than sitting only on the surface.

This recipe is 100% vegan, ready in about 90 minutes including rising time, and absolutely wonderful served immediately from the oven, pulled apart by hand, alongside pasta, soup, or a simple salad.


Recipe Information

Prep TimeRise TimeCook TimeTotal TimeServingsCalories
20 mins60 mins15 mins95 mins8~280 kcal

Ingredients

For the Dough

  • 2½ cups (300g) all-purpose flour
  • 2¼ tsp (7g) active dry yeast
  • 1 tsp sugar
  • ¾ tsp salt
  • ¾ cup (180ml) warm water (110°F / 43°C)
  • 2 tbsp olive oil

For the Garlic Butter

  • 5 tbsp vegan butter, softened
  • 4 cloves garlic, very finely minced
  • 2 tbsp fresh parsley, finely chopped
  • Pinch of salt
  • ¼ tsp chili flakes (optional)

For the Topping

  • 1½ cups (180g) vegan mozzarella, shredded
  • Extra fresh parsley for garnish
  • Flaky sea salt for finishing

Optional Add-ins

  • 2 tbsp nutritional yeast mixed into the garlic butter for extra savory depth
  • A light dusting of smoked paprika before baking
  • Vegan parmesan scattered over alongside the mozzarella

Instructions

  1. Activate the yeast. Combine the warm water, sugar, and yeast in a small bowl. Stir gently and let sit for 5–10 minutes until foamy.
  2. Make the dough. In a large bowl combine the flour and salt. Add the activated yeast mixture and olive oil. Mix until a shaggy dough forms, then knead for 7–8 minutes until smooth and elastic.
  3. First rise. Place the dough in a lightly oiled bowl, cover, and let rise in a warm place for 45–60 minutes until doubled.
  4. Make the garlic butter. Mix together the softened vegan butter, minced garlic, fresh parsley, salt, and chili flakes if using until well combined.
  5. Shape the breadsticks. Punch down the risen dough and roll or press into a rectangle approximately 25 x 30cm on a lined baking sheet. Spread half the garlic butter evenly over the surface.
  6. Top with cheese. Scatter the shredded vegan mozzarella evenly over the garlic butter surface. Spread the remaining garlic butter over the cheese.
  7. Rest briefly. Cover loosely and let rest for 15 minutes while preheating the oven to 425°F (220°C).
  8. Bake. Bake for 12–15 minutes until the dough is golden at the edges and the cheese is melted and bubbling with golden patches.
  9. Cut and serve. Remove from the oven and immediately scatter with extra fresh parsley and a pinch of flaky sea salt. Cut into sticks and serve immediately while the cheese is still melted and the garlic butter is fragrant.

Pro Tips

  • Use plenty of garlic butter — these breadsticks are not the place for restraint. A generous, even coating under and over the cheese is what makes them so deeply flavored and satisfying.
  • Shred the vegan mozzarella yourself from a block if possible, as pre-shredded vegan cheese often contains anti-caking agents that prevent it from melting as smoothly.
  • Bake at a high temperature for the best melt and golden color — a lower temperature produces paler, less appealing cheese.
  • Serve immediately while the cheese is still in its best melted state — vegan cheese firms up more quickly than dairy cheese as it cools.

Why These Breadsticks Are Universally Irresistible

Garlic bread in any form occupies a specific category of food that combines three of the most universally appealing flavors — butter, garlic, and bread — in a single preparation. Adding melted cheese introduces a fourth deeply satisfying element (the specific umami and textural satisfaction of molten cheese), and the combination of all four becomes almost impossible to resist for most people regardless of dietary preference.


Flavor Variations

  • Pesto Cheesy Breadsticks: Replace the garlic butter with a generous layer of vegan pesto under the cheese for a herby, nutty version.
  • Marinara Dipping Breadsticks: Serve with a bowl of warm marinara sauce alongside for dipping for a classic Italian-American combination.
  • Everything Bagel Breadsticks: Replace the chili flakes with everything bagel seasoning scattered over the cheese before baking.

Nutritional Highlights (Per Serving — 2 breadsticks)

CaloriesProteinCarbsFiberFat
~280 kcal7g34g1g12g

Storage

  • Best fresh: Cheesy garlic breadsticks are at their absolute peak straight from the oven while the cheese is still melted. Serve immediately whenever possible.
  • Refrigerator: Store in an airtight container for up to 2 days. Reheat in a hot oven or air fryer for 4–5 minutes to restore some of the original texture.
  • Freezer: Freeze baked, cooled breadsticks for up to 1 month. Reheat from frozen in a 375°F (190°C) oven for 10–12 minutes.

Frequently Asked Questions

Can I make these without yeast using store-bought dough?

Yes — store-bought vegan pizza dough works beautifully as the base for these breadsticks and reduces the total time to under 30 minutes.

What vegan mozzarella melts best?

Brands specifically marketed as melting or stretchy vegan mozzarella perform best — check the packaging for melting claims. Block-style vegan mozzarella shredded fresh generally outperforms pre-shredded varieties.

Can I make these gluten-free?

Yes — use a gluten-free pizza dough or a gluten-free flour blend for the yeasted dough. The texture will be slightly different but still delicious when topped generously with garlic butter and cheese.


Tried this recipe? Leave a comment below and let us know how it turned out! Tag us on Instagram and Facebook — we love seeing your plant-powered creations. Looking for more irresistible vegan bread and side dish recipes? Browse all recipes on Easy Vegan Recipes — new recipes posted every single week!

Vegan Broccoli and Quinoa Cakes

vegan broccoli and quinoa cakes

There are vegetable patties you make because something healthy is needed. And then there are patties like these Vegan Broccoli and Quinoa Cakes — the kind that fry up golden and crisp on the outside while staying tender and savory throughout, packed with finely chopped broccoli, fluffy quinoa, and just enough binder and seasoning to hold together perfectly without ever feeling dry or bland. This is that patty. The one that makes broccoli genuinely exciting. The one that disappears from the plate before anyone admits how good it actually is for them.

These cakes combine cooked quinoa and finely chopped broccoli with garlic, nutritional yeast, and a flax egg binder, pan-fried until deeply golden on both sides. They hold together beautifully, have a satisfying bite from the quinoa, and carry enough savory seasoning to stand on their own as a main course or alongside a simple sauce.

What makes these cakes so outstanding is the texture balance — quinoa provides a slightly chewy bite and structure, finely chopped broccoli adds freshness and a subtle vegetal sweetness once cooked, and a generous hit of nutritional yeast and garlic provides the savory depth that makes them so easy to eat several of in one sitting.

This recipe is 100% vegan, naturally gluten-free, ready in about 35 minutes, and absolutely wonderful served with a simple lemon tahini sauce or a dollop of vegan yogurt alongside a fresh salad.


Recipe Information

Prep TimeCook TimeTotal TimeServingsCalories
15 mins20 mins35 mins4~230 kcal

Ingredients

For the Cakes

  • 2 cups (370g) cooked quinoa, cooled
  • 2 cups (180g) broccoli florets, very finely chopped (almost minced)
  • 2 flax eggs (2 tbsp flaxseed meal + 6 tbsp water — rest 5 minutes)
  • ½ cup (50g) breadcrumbs (or oat flour for gluten-free)
  • 3 tbsp nutritional yeast
  • 3 cloves garlic, minced
  • ¼ cup (30g) finely diced onion
  • 1 tbsp lemon juice
  • ½ tsp smoked paprika
  • ½ tsp salt
  • ¼ tsp black pepper

For Cooking

  • 3 tbsp olive oil, for the pan

For the Lemon Tahini Sauce

  • 3 tbsp tahini
  • 2 tbsp lemon juice
  • 1 clove garlic, grated
  • 2–3 tbsp water, to thin
  • Salt to taste

Optional Add-ins

  • ¼ cup (30g) sun-dried tomatoes, finely chopped
  • 2 tbsp fresh dill or parsley, chopped
  • ¼ tsp chili flakes

To Serve

  • Lemon tahini sauce
  • Fresh herbs
  • A simple green salad
  • Lemon wedges

Instructions

  1. Prepare the broccoli. Finely chop the broccoli florets, almost to a mince — small enough to bind well into the patties without large chunks breaking them apart.
  2. Make the flax eggs. Combine the flaxseed meal and water in a small bowl, stir, and let rest for 5 minutes until gel-like.
  3. Combine the mixture. In a large bowl combine the cooked quinoa, finely chopped broccoli, breadcrumbs, nutritional yeast, garlic, onion, lemon juice, smoked paprika, salt, and pepper. Add the prepared flax eggs and mix thoroughly until everything holds together when pressed.
  4. Shape the patties. Divide the mixture into 8 equal portions and shape into patties about 7–8cm wide, pressing firmly so they hold together well.
  5. Cook the patties. Heat the olive oil in a large skillet over medium heat. Cook the patties for 4–5 minutes per side until deeply golden and crisp on both sides, pressing gently with a spatula.
  6. Make the sauce. Whisk together the tahini, lemon juice, garlic, and water until smooth and pourable. Adjust with salt and additional water as needed.
  7. Serve. Serve the warm cakes drizzled with lemon tahini sauce alongside a fresh salad or lemon wedges.

Pro Tips

  • Chop the broccoli very finely — large pieces make the patties harder to hold together and more likely to fall apart while cooking.
  • Let the mixture sit for a few minutes after combining to allow the flax egg and breadcrumbs to absorb moisture, making the patties easier to shape.
  • Press patties firmly when shaping and avoid flipping too early — let a proper golden crust form before turning.
  • Use cooled, not warm, cooked quinoa for the best texture and easiest shaping.

Why This Combination Works

Quinoa provides both protein and a pleasant chewy texture that helps these cakes feel substantial rather than purely vegetable-based, while finely chopped broccoli contributes nutrients and a subtle sweetness once cooked that balances the savory garlic and nutritional yeast. Together they create a patty that is genuinely filling and satisfying rather than feeling like a diet substitute for something else.


Flavor Variations

  • Curried Broccoli Quinoa Cakes: Add 1 teaspoon of curry powder to the mixture for a warmly spiced version.
  • Cheesy Version: Add ¼ cup of shredded vegan cheese to the mixture for extra richness.
  • Mediterranean Style: Add chopped sun-dried tomatoes and a pinch of dried oregano, serving with a dollop of vegan tzatziki.

Nutritional Highlights (Per Serving — 2 cakes)

CaloriesProteinCarbsFiberFat
~230 kcal9g28g5g9g

Storage

  • Refrigerator: Store cooked cakes in an airtight container for up to 4 days. Reheat in a skillet or air fryer to restore crispness.
  • Freezer: Freeze cooked, cooled cakes for up to 2 months. Reheat from frozen in an air fryer or oven until heated through and crisp.
  • Meal prep: These cakes are excellent for meal prep, holding their texture well across the week when reheated properly.

Frequently Asked Questions

Can I bake these instead of pan frying?

Yes — bake at 400°F (200°C) for 20–25 minutes, flipping halfway, though the crust will be slightly less crisp than pan frying.

Can I use a different grain instead of quinoa?

Yes — cooked rice or millet can be substituted, though the texture and protein content will be slightly different.

Why are my patties falling apart?

This is usually caused by broccoli pieces that are too large or insufficient binder. Chop the broccoli more finely and ensure the flax egg mixture has properly thickened before adding.


Tried this recipe? Leave a comment below and let us know how it turned out! Tag us on Instagram and Facebook — we love seeing your plant-powered creations. Looking for more satisfying vegan main dish and bowl recipes? Browse all recipes on Easy Vegan Recipes — new recipes posted every single week!

Crispy and juicy Sour Cream & Onion Chick’n Tofu Nuggets

crispy sour cream and onion chick'n tofu nuggets

There are snacks you make because something crispy is needed. And then there are snacks like these Crispy Sour Cream and Onion Chick’n Tofu Nuggets — the kind that come out of the oil or air fryer shatteringly golden, with a tangy, savory sour cream and onion coating that makes them taste like your favorite potato chip flavor transformed into the most satisfying bite-sized nugget imaginable. This is that snack. The one that disappears the moment it hits the plate. The one that has both kids and adults reaching for one more.

This recipe marinates pressed tofu in a tangy buttermilk-style brine flavored with onion and garlic powder, then double-coats it in a seasoned flour mixture loaded with sour cream and onion seasoning before frying or air frying to a deeply crispy, golden exterior with a tender, juicy interior. The result is a nugget that captures the iconic sour cream and onion flavor in genuinely crunchy, craveable form.

What makes these nuggets so outstanding is the marinating step — soaking the pressed tofu in a tangy, seasoned plant milk brine before coating allows the flavor to penetrate the tofu itself rather than sitting only on the surface, producing nuggets that taste deeply seasoned throughout rather than only on the crust.

This recipe is 100% vegan, ready in about 40 minutes including marinating time, and absolutely wonderful served hot with extra dipping sauce alongside.


Recipe Information

Prep TimeMarinate TimeCook TimeTotal TimeServingsCalories
15 mins15 mins12 mins42 mins4~310 kcal

Ingredients

For the Tofu and Marinade

  • 450g extra firm tofu, pressed and cut into nugget-sized pieces
  • 1 cup (240ml) plant milk
  • 1 tbsp apple cider vinegar
  • 1 tsp onion powder
  • ½ tsp garlic powder
  • ½ tsp salt

For the Sour Cream and Onion Coating

  • 1½ cups (180g) all-purpose flour
  • 2 tbsp cornstarch
  • 2 tbsp dried onion flakes, finely crushed
  • 1½ tsp onion powder
  • 1 tsp garlic powder
  • 1 tsp citric acid or 1 tbsp nutritional yeast (for the tangy “sour cream” note)
  • 1 tsp salt
  • ½ tsp black pepper

For Frying

  • 3 cups (720ml) neutral vegetable oil (for deep frying), or oil spray for air frying

For the Dipping Sauce

  • ½ cup (120g) vegan sour cream
  • 1 tbsp fresh chives, finely chopped
  • 1 tsp lemon juice
  • Pinch of salt

Instructions

  1. Press the tofu. Press the tofu for at least 15 minutes to remove as much water as possible — this is essential for the nuggets to absorb the marinade and crisp properly. Cut into bite-sized nugget shapes.
  2. Make the marinade and soak. Whisk together the plant milk, apple cider vinegar, onion powder, garlic powder, and salt in a shallow dish. Add the tofu pieces and let marinate for 15 minutes, turning once halfway.
  3. Make the coating. In a wide shallow dish whisk together the flour, cornstarch, crushed onion flakes, onion powder, garlic powder, citric acid or nutritional yeast, salt, and pepper.
  4. Coat the nuggets. Remove a tofu piece from the marinade, letting excess drip off, and dredge thoroughly in the seasoned flour, pressing to coat well on all sides. Repeat with all pieces, placing them on a wire rack as you go.
  5. Fry or air fry. For deep frying, heat the oil to 350°F (175°C) and fry the nuggets in batches for 3–4 minutes until deeply golden and crispy, draining on a wire rack. For air frying, spray the coated nuggets generously with oil and air fry at 390°F (200°C) for 10–12 minutes, shaking halfway, until golden and crispy.
  6. Make the dipping sauce. Whisk together the vegan sour cream, fresh chives, lemon juice, and salt until smooth.
  7. Serve immediately. Serve the hot nuggets with the dipping sauce while at their crispiest.

Pro Tips

  • Press the tofu thoroughly before marinating — well-pressed tofu absorbs the marinade more effectively and crisps better during cooking.
  • The citric acid or nutritional yeast in the coating is what mimics the tangy character of classic sour cream and onion seasoning — do not skip both.
  • Press the flour coating firmly onto each piece of tofu for the thickest, craggiest, most satisfying crust.
  • Maintain oil temperature throughout frying and work in small batches to avoid greasy results.

Why Sour Cream and Onion Flavor Works So Well Here

The classic sour cream and onion flavor profile relies on a balance of tangy acidity, savory onion, and a hint of garlic — a combination that has proven enduringly popular in snack foods for decades because it satisfies the palate’s craving for both tang and savory depth simultaneously. Applying this same flavor profile to a crispy fried nugget translates the appeal of a favorite chip flavor into a more substantial, satisfying format.


Flavor Variations

  • Spicy Sour Cream and Onion Nuggets: Add cayenne pepper and chili flakes to the coating for a spicy version.
  • BBQ Coated Nuggets: Replace the sour cream and onion coating with a smoky barbecue seasoning blend for a different flavor profile.
  • Ranch Tofu Nuggets: Replace the onion-forward seasoning with dried dill, parsley, and extra garlic for a ranch-flavored version.

Nutritional Highlights (Per Serving)

CaloriesProteinCarbsFiberFat
~310 kcal14g28g2g16g

Storage

  • Best fresh: These nuggets are at their crispiest within 10 minutes of cooking. Serve immediately whenever possible.
  • Refrigerator: Store cooked nuggets in an airtight container for up to 3 days. Reheat in an air fryer at 375°F (190°C) for 5 minutes to restore crispiness.
  • Freezer: Freeze cooked, cooled nuggets in a single layer for up to 1 month. Reheat from frozen in an air fryer or oven until crispy and heated through.

Frequently Asked Questions

Can I bake these instead of frying or air frying?

Yes — bake at 425°F (220°C) for 18–20 minutes, flipping halfway, on a wire rack set over a baking sheet for even crisping on both sides.

What is citric acid and where do I find it?

Citric acid is a sour, tangy powder available in the baking or canning section of most grocery stores, used to mimic the tangy “sour cream” flavor in seasoning blends. Nutritional yeast with a squeeze of extra lemon juice in the dipping sauce can be used as an alternative if citric acid is unavailable.

Can I make these gluten-free?

Yes — use a gluten-free flour blend with cornstarch for the coating, and check that the dried onion flakes have no gluten-containing additives.


Tried this recipe? Leave a comment below and let us know how it turned out! Tag us on Instagram and Facebook — we love seeing your plant-powered creations. Looking for more crispy, crave-worthy vegan snack recipes? Browse all recipes on Easy Vegan Recipes — new recipes posted every single week!