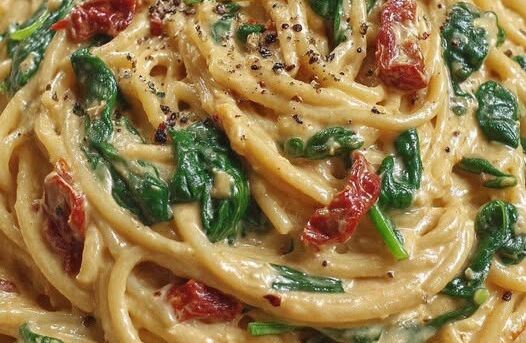
Spaghetti with Spinach & Sun-Dried Tomato Cream Sauce
This creamy, comforting Spaghetti with Spinach & Sun-Dried Tomato Cream Sauce is a restaurant-quality pasta dish you can make in just 25 minutes. Al dente spaghetti is tossed in a luscious, garlicky cream sauce loaded with fresh spinach and sweet-tangy sun-dried tomatoes. It’s rich, satisfying, and easy to make vegan — perfect for weeknight dinners, date nights, or meal prep. A beautiful balance of creamy, savory, and bright flavors that even non-vegans will love!
Ingredients (Serves 4)
For the Pasta:
12 oz (340g) spaghetti (regular or gluten-free)
Announcement for our recipe lovers: We’ve taken all our most loved, beginner-friendly recipes and packed them into one simple, easy-to-follow digital cookbook — created especially for people who want delicious results without confusion and Ads-free Experience:
For the Cream Sauce:
2 tablespoons olive oil
4–5 garlic cloves, minced
½ teaspoon red pepper flakes (optional, for gentle heat)
½ cup sun-dried tomatoes (oil-packed), drained and chopped
5–6 oz (about 5 cups) fresh baby spinach
1 cup heavy cream OR full-fat coconut milk (for vegan version)
½ cup grated Parmesan cheese OR 3–4 tbsp nutritional yeast (vegan)
½ cup pasta cooking water (reserved)
Zest and juice of ½ lemon
Salt and freshly ground black pepper, to taste
Optional Garnishes:
Extra sun-dried tomatoes
Fresh basil or parsley, chopped
More black pepper or chili flakes
Toasted pine nuts
Instructions
Cook the pasta: Bring a large pot of salted water to a boil. Cook spaghetti according to package instructions until al dente. Reserve 1 cup of pasta water, then drain.
Make the sauce: While pasta cooks, heat olive oil in a large skillet over medium heat. Add minced garlic and red pepper flakes. Sauté for 30–60 seconds until fragrant.
Add sun-dried tomatoes: Stir in the chopped sun-dried tomatoes and cook for 1–2 minutes to release their flavor.
Wilt the spinach: Add fresh spinach in batches and cook until just wilted (2–3 minutes).
Create the cream sauce: Pour in the cream (or coconut milk). Bring to a gentle simmer. Stir in Parmesan (or nutritional yeast), lemon zest, lemon juice, salt, and pepper. Simmer for 2 minutes until slightly thickened.
Combine: Add the drained spaghetti to the skillet. Toss everything together, adding reserved pasta water ¼ cup at a time until you reach a silky, creamy consistency.
Serve immediately: Plate and finish with extra black pepper, herbs, and a drizzle of olive oil if desired.
Nutritional Facts (Approximate per Serving – vegan version with coconut milk)
Calories: 420–460 kcal
Protein: 12–14g
Total Fat: 16–20g (healthy fats)
Carbohydrates: 58–62g
Dietary Fiber: 6–8g
Key micronutrients: High in Vitamin K, Vitamin A, iron, folate, and antioxidants from spinach and tomatoes.
Note: Using heavy cream and Parmesan adds about 50–70 extra calories per serving. Values are estimates.
Health Benefits
Nutrient-Dense: Spinach delivers iron, Vitamin K, and folate for energy and bone health.
Antioxidant Power: Sun-dried tomatoes are rich in lycopene, which supports heart health and fights inflammation.
Satisfying & Balanced: The combination of carbs, healthy fats, and greens keeps you full without heaviness.
Vegan & Weight-Loss Friendly: The coconut milk version is fully plant-based and still feels indulgent while being lighter than traditional cream sauces.
Gut-Friendly: High fiber from spinach and whole-grain pasta options supports digestion.
Tips and Variations
Make it Vegan: Use coconut milk + nutritional yeast — it’s incredibly creamy!
Lower Carb: Serve over zucchini noodles or spaghetti squash.
Protein Boost: Add white beans, chickpeas, grilled chicken, or shrimp.
Extra Veggies: Toss in cherry tomatoes, mushrooms, or roasted red peppers.
Storage: Best fresh, but leftovers keep in the fridge for 2–3 days. Reheat with a splash of water or plant milk.
Oil-Free Option: Sauté in a splash of vegetable broth instead of oil.
Serving Suggestions
Pair with a simple green salad or garlic bread.
Great alongside grilled tofu, chicken, or salmon.
Perfect for meal prep — portion into containers for quick lunches.
This Spaghetti with Spinach & Sun-Dried Tomato Cream Sauce is creamy comfort food that’s secretly good for you! It’s one of those recipes that feels fancy but is super easy.
Tried this recipe? Leave a comment below and let us know how it turned out! Browse all our vegan recipes to keep enjoying ultimate delicious and healthy lifestyle.
There are pasta dishes you make when you need something quick and there are pasta dishes like this Vegan Spinach Mushroom Orzo — the kind that comes together in a single pan in under 30 minutes with golden, deeply browned mushrooms, wilted baby spinach, and tiny orzo pasta cooked directly in a silky, garlicky broth until it absorbs every drop of flavor and swells into something so creamy, so rich, and so deeply satisfying that it is genuinely difficult to stop eating it, even when the pan is almost empty and you know you should save some for tomorrow. This is that dish. The one that looks more impressive than it deserves to, given how little effort it asks of you. The one that makes orzo feel like the most underrated pasta shape in the world, which it probably is.
The method here is the key to everything — cooking the orzo directly in seasoned broth rather than boiling it separately in water transforms its character entirely. As the orzo cooks, it releases its starch into the broth, thickening the liquid gradually into a sauce that is luxuriously creamy without a single drop of cream, coating every piece of pasta in a glossy, flavorful gloss that no amount of separately cooked pasta tossed in sauce can replicate. This is the same principle behind risotto — orzo cooked this way is essentially a faster, more forgiving risotto, with all of the creaminess and none of the constant stirring.
What makes this recipe so outstanding is the mushroom technique — cooking the mushrooms in a dry pan at high heat before anything else is added produces deeply golden, caramelized, almost meaty mushrooms with concentrated flavor and a firm, satisfying texture. Crowded, wet mushrooms steam and stay pale; these mushrooms are given space, heat, and time to develop the kind of browned, savory depth that makes the entire dish taste as though it took far longer than it did.
This recipe is 100% vegan, naturally dairy-free, made in one pan, ready in 30 minutes, and the kind of weeknight dinner that belongs in permanent rotation — deeply satisfying, nutritionally balanced, and endlessly adaptable.
Recipe Information
Prep Time
Cook Time
Total Time
Servings
Calories
5 mins
25 mins
30 mins
4
~390 kcal
Ingredients
For the Dish
300g (1½ cups) orzo pasta
400g (about 14oz) cremini or chestnut mushrooms, sliced
150g (5oz) baby spinach
1 medium yellow onion, finely diced
6 garlic cloves, minced
750ml (3 cups) vegetable broth, warm
120ml (½ cup) dry white wine or extra broth
2 tbsp olive oil, divided
2 tbsp nutritional yeast
1 tsp soy sauce or tamari
1 tsp dried thyme
½ tsp smoked paprika
Salt and black pepper to taste
For Finishing
2 tbsp vegan butter
Zest of 1 lemon
1 tbsp fresh lemon juice
Fresh flat-leaf parsley, roughly chopped
Vegan parmesan or nutritional yeast, for serving
Red pepper flakes (optional)
Instructions
Brown the mushrooms. Heat a large, wide pan or skillet over high heat — no oil yet. Add the sliced mushrooms in a single layer (work in two batches if needed) and cook without stirring for 3–4 minutes until deeply golden on one side. Stir and cook for a further 2 minutes. Season with salt and pepper and transfer to a plate. The mushrooms should be golden and slightly shrunken, not pale and steaming.
Sauté the aromatics. Reduce the heat to medium. Add 2 tablespoons of olive oil to the same pan. Add the diced onion and cook for 4–5 minutes, stirring occasionally, until softened and translucent. Add the garlic and cook for 1 minute until fragrant. Add the dried thyme and smoked paprika and stir for 30 seconds.
Toast the orzo. Add the orzo to the pan and stir to coat in the olive oil and aromatics. Cook for 1–2 minutes, stirring frequently, until the orzo smells lightly toasted and the edges begin to look faintly golden. This step adds a nutty depth to the finished dish.
Deglaze. Pour in the white wine (or extra broth) and stir, scraping up any browned bits from the bottom of the pan. Cook for 1 minute until the wine is mostly absorbed.
Cook the orzo. Add the warm vegetable broth in one addition. Stir in the nutritional yeast and soy sauce. Bring to a simmer, then reduce the heat to medium-low. Cook, stirring every 2–3 minutes, for 10–12 minutes until the orzo is tender and has absorbed most of the broth, and the sauce has thickened to a creamy, glossy consistency. If the orzo absorbs the liquid before it is fully cooked, add a splash more broth.
Add the spinach and mushrooms. Return the browned mushrooms to the pan. Add the baby spinach in large handfuls, folding it into the orzo — it will wilt quickly. Stir until the spinach is fully wilted and incorporated.
Finish. Remove from heat. Stir in the vegan butter, lemon zest, and lemon juice. Taste and adjust seasoning — the dish should be savory, bright, and well-seasoned. Serve immediately, scattered with fresh parsley, vegan parmesan, and red pepper flakes if using.
Pro Tips
Cook the mushrooms dry at high heat — this is the single most important step. A dry, very hot pan evaporates the mushrooms’ surface moisture immediately and allows caramelization to happen. Add oil to a cold pan or crowd the mushrooms and they steam, turn grey, and never develop the deep, savory flavor that makes this dish.
Toast the orzo before adding liquid — this two-minute step transforms the flavor. Toasted orzo has a nuttiness that plain boiled orzo does not. The heat also creates a slight surface seal that helps the orzo hold its shape as it cooks in the broth.
Use warm broth — adding cold broth to a hot pan drops the temperature sharply and can cause the orzo to cook unevenly. Warm the broth in a saucepan or microwave before adding.
Finish with lemon off the heat — lemon juice added to a hot pan loses its brightness almost immediately. Adding it off the heat preserves the sharp, fresh citrus note that lifts the entire dish.
Why Orzo Releases Starch Differently Than Other Pasta
Orzo’s tiny, rice-like shape is not just aesthetic — it changes how the pasta behaves when cooked in broth, and understanding this explains why the one-pan method works so extraordinarily well with orzo and less well with larger pasta shapes. Orzo has a very high surface-area-to-volume ratio compared to penne, rigatoni, or spaghetti: for its total mass, it exposes more starch to the cooking liquid per gram of pasta. When cooked in a measured amount of broth rather than a large pot of water, this abundant surface starch dissolves gradually into the liquid as the pasta cooks, thickening the broth from within rather than diluting it into cloudy pasta water that gets poured down the drain. The result is a sauce that is genuinely creamy — not cream-added creamy, but starch-thickened creamy, in the same way that risotto becomes creamy through the progressive release of starch from arborio rice. This is also why the dish must be stirred periodically during cooking: the agitation encourages starch release, just as the constant stirring of risotto does. Larger pasta shapes release far less surface starch for the same volume of liquid, which is why the same broth-cooking method with penne produces a soupy result rather than a creamy one.
Flavor Variations
Vegan Spinach Mushroom Orzo with Sun-Dried Tomatoes: Add 60g of finely chopped sun-dried tomatoes with the garlic for an intensely savory, slightly sweet, Mediterranean version.
Creamy Cashew Spinach Mushroom Orzo: Stir in 80ml of cashew cream (blended soaked cashews and water) with the broth for an even richer, more indulgent result.
Lemon Herb Orzo with Asparagus: Replace half the mushrooms with asparagus cut into 2-inch pieces and add the asparagus in the last 5 minutes of cooking for a spring version with bright, clean flavors.
Nutritional Highlights (Per Serving)
Calories
Protein
Carbs
Fiber
Fat
~390 kcal
13g
58g
5g
11g
Storage
Refrigerator: Store in an airtight container for up to 4 days. The orzo continues to absorb liquid as it sits and thickens considerably — reheat with a splash of broth or water stirred in over medium heat to restore the creamy consistency.
Freezer: Not ideal — orzo becomes mushy on thawing. This dish is best made fresh or eaten within 2 days for optimal texture.
Make ahead: The browned mushrooms can be prepared up to 2 days ahead and refrigerated. Add them back in the final step when reheating.
Frequently Asked Questions
Can I use a different pasta shape?
Small pasta shapes with high surface area work best — ditalini, pearl couscous, and small shell pasta all produce excellent results. Larger shapes such as penne or rigatoni do not release enough starch to create the creamy sauce and are better cooked separately.
What mushrooms work best?
Cremini and chestnut mushrooms are the workhorses — they brown beautifully, hold their texture, and have a savory depth that generic white button mushrooms lack. For a more luxurious version, add a handful of shiitake or oyster mushrooms alongside. Portobello mushrooms can be used but should be diced rather than sliced so they don’t overwhelm the orzo.
Can I make this without wine?
Yes — replace the white wine with an equal amount of additional vegetable broth plus 1 teaspoon of apple cider vinegar or a squeeze of lemon juice. The vinegar provides the slight acidity the wine contributes without any alcohol.
Tried this recipe? Leave a comment below and let us know how it turned out! Tag us on Instagram and Facebook — we love seeing your plant-powered creations. Looking for more warming vegan curry and dinner recipes? Browse all recipes on Easy Vegan Recipes — new recipes posted every single week!
There are pasta dishes that take an hour and taste like it was worth the effort. And then there are dishes like this Vegan Angel Hair with Roasted Tomatoes — the kind that takes twenty-five minutes, uses a handful of the most honest ingredients in any kitchen, and produces a plate of pasta so deeply flavored, so beautifully fragrant, and so completely satisfying that it is difficult to believe you did not spend the afternoon at it. This is that pasta. The one that makes a Tuesday evening feel like a proper occasion. The one that tastes unmistakably of summer even in the depths of winter, because the oven does something to tomatoes that no other technique can replicate — concentrating their sweetness, deepening their acidity, intensifying their fragrance until they are no longer simply tomatoes but something closer to a sauce that has cooked for hours, achieved in thirty minutes at high heat.
The technique here is everything. Whole cherry or grape tomatoes go into a hot oven with olive oil, garlic, and salt and emerge twenty to twenty-five minutes later burst, caramelized at the edges, and swimming in their own intensely flavored juices — which become the sauce. Tossed with angel hair pasta that has been cooked to the barest side of al dente and finished in the tomato juices with a generous handful of fresh basil and a thread of excellent extra virgin olive oil, this dish is a lesson in what happens when you treat a few ingredients with the attention and heat they deserve.
What makes this recipe so outstanding is the roasting technique and the pasta choice together — angel hair’s extreme delicacy means it absorbs the tomato juices immediately and completely, becoming suffused with flavor in a way that thicker pasta cannot achieve. Every strand is coated, every bite delivers the full concentrated flavor of the roasted tomatoes, and the whole dish comes together in the time it takes to boil water and heat an oven.
This recipe is 100% vegan, naturally dairy-free, ready in about 30 minutes, requires no blender or food processor, and is the kind of recipe that earns a permanent place in your weekly rotation — elegant enough for guests, simple enough for a weeknight, and so deeply satisfying that it needs nothing alongside it but a glass of something good and a piece of bread for the sauce.
Recipe Information
Prep Time
Cook Time
Total Time
Servings
Calories
5 mins
25 mins
30 mins
4
~420 kcal
Ingredients
For the Roasted Tomatoes
600g (about 4 cups) cherry or grape tomatoes, left whole
6 cloves garlic, peeled and left whole
4 tbsp extra virgin olive oil
½ tsp salt
½ tsp black pepper
½ tsp chilli flakes (optional but excellent)
1 tsp sugar (optional — balances acidity if tomatoes are not perfectly ripe)
For the Pasta
350g (12 oz) angel hair pasta (capellini)
1 tsp salt for pasta water
Large handful fresh basil leaves, torn
2 tbsp extra virgin olive oil, for finishing
Flaky sea salt and cracked black pepper, to finish
Optional Additions
2 tbsp capers, drained
1 tbsp balsamic glaze drizzled over at the end
¼ cup (30g) toasted pine nuts
Vegan parmesan, to serve
Instructions
Roast the tomatoes. Preheat the oven to 425°F (220°C). Spread the whole cherry tomatoes and garlic cloves in a single layer in a large roasting dish or on a rimmed baking sheet. Drizzle with olive oil, sprinkle with salt, pepper, chilli flakes, and sugar if using. Toss to coat. Roast for 20–25 minutes until the tomatoes have burst, their skins have blistered and caramelized at the edges, and the pan is full of fragrant, deeply colored tomato juices. The garlic should be soft and golden.
Cook the pasta. While the tomatoes roast, bring a large pot of generously salted water to a rolling boil. Add the angel hair pasta and cook for 2–3 minutes only — or 1 minute less than the package instructs. Angel hair cooks extremely fast; watch it carefully. Reserve 1 cup of pasta cooking water before draining.
Combine. Drain the pasta and add it immediately to the roasting dish with the tomatoes — directly into the pan with all the juices. Use tongs to toss everything together, pressing some of the softer tomatoes gently to release more of their juice. If the sauce seems tight, add pasta water a splash at a time until the pasta is glossy and coated but not soupy. The pasta will absorb the tomato juices rapidly — work quickly.
Finish and serve. Tear the fresh basil over the pasta and toss once more. Drizzle with the finishing olive oil. Taste and adjust seasoning with flaky sea salt and cracked black pepper. Add capers or toasted pine nuts if using. Divide between warm bowls and serve immediately — angel hair does not wait.
Pro Tips
Do not overcook the angel hair — it goes from perfect to mushy in under a minute. Pull it from the water when it still has a very slight bite; it will finish cooking in the tomato juices.
Use the best tomatoes you can find — roasting concentrates flavor, which means great tomatoes become extraordinary and mediocre tomatoes become merely better. Cherry tomatoes and grape tomatoes are the best choices year-round for this recipe.
Don’t skip the pasta water — the starchy cooking water is what allows the tomato juices to coat the pasta properly and what gives the finished dish its glossy, saucy consistency. Reserve a full cup before draining.
Work fast after draining — angel hair absorbs liquid quickly. Have the tomatoes out of the oven and the bowls warm before you drain the pasta.
The Simplicity of Southern Italian Pasta
Angel hair with tomatoes — capellini al pomodoro — is one of the foundational preparations of southern Italian cucina povera, the “poor kitchen” tradition that produced some of the most enduringly beloved dishes in the world from the fewest and humblest ingredients. The principle underlying all cucina povera cooking is the same: start with the best raw ingredients you can find, apply a technique that honours rather than obscures them, and add nothing that doesn’t need to be there. Roasting the tomatoes rather than making a cooked sauce is a modern adaptation of this spirit — using high heat to achieve in thirty minutes the depth of flavor that a long-simmered sauce takes an hour to develop, and producing something that feels simultaneously ancient and contemporary. The vegan version of this dish, with its glossy olive oil finish and fresh basil, is arguably closer to the original tradition than any version involving cheese — which was always a luxury addition, never the point.
Flavor Variations
Olive and Caper Angel Hair: Add ¼ cup sliced black olives and 2 tbsp capers to the roasting pan in the final 5 minutes for a puttanesca-inspired version with salt, brine, and depth.
Sun-Dried Tomato and Basil: Add 3 tbsp oil-packed sun-dried tomatoes, roughly chopped, to the finished pasta for a double-tomato intensity that is extraordinary.
Roasted Garlic and White Wine: Add ¼ cup dry white wine to the roasting pan in the final 5 minutes of cooking for a more complex, wine-scented sauce.
Nutritional Highlights (Per Serving)
Calories
Protein
Carbs
Fiber
Fat
~420 kcal
11g
62g
4g
15g
Storage
Refrigerator: Store leftovers in an airtight container for up to 3 days. Reheat gently in a pan with a splash of water or olive oil to loosen — angel hair reheats quickly and can become sticky if overheated.
This dish is best eaten fresh. The pasta absorbs the sauce as it sits, so leftovers will be drier than the original — add a drizzle of olive oil and a splash of water when reheating and toss well.
The roasted tomatoes can be made up to 3 days ahead and stored in the refrigerator — reheat in the pan while the pasta cooks and proceed as normal. This makes the recipe genuinely weeknight-instant.
Frequently Asked Questions
Can I use a different pasta shape?
Yes — spaghetti, linguine, or thin spaghetti all work well with this sauce. Angel hair is ideal for its delicacy and its ability to absorb the juices fully, but any long pasta works. Avoid very thick pasta shapes; they do not have the same relationship with a light tomato pan sauce.
What if my tomatoes aren’t very sweet?
Add the optional teaspoon of sugar to the roasting pan — it nudges under-ripe or out-of-season tomatoes toward the sweetness that perfectly ripe ones have naturally. A drizzle of balsamic glaze at the end achieves the same effect.
Can I add protein to this dish?
Absolutely — white beans tossed in with the pasta add protein and creaminess; pan-fried tofu cubes alongside it make it a more substantial meal; or add a handful of rocket and serve with toasted pine nuts for a salad element that turns it into a complete dinner.
Tried this recipe? Leave a comment below and let us know how it turned out! Tag us on Instagram and Facebook — we love seeing your plant-powered creations. Looking for more addictive vegan snack and appetizer recipes? Browse all recipes on Easy Vegan Recipes — new recipes posted every single week!
There are pasta dishes and then there are pasta dishes like this Vegan Fettuccine Alfredo Bread Bowl — the kind where you hollow out a warm, crusty sourdough boule and ladle in a fettuccine Alfredo so impossibly creamy and so deeply rich with cashew cream and nutritional yeast and roasted garlic and white wine and freshly cracked black pepper that the first bite — pasta and bread together, the sauce soaking into the inner walls of the loaf, the crust giving its satisfying resistance before yielding completely — is one of those moments in cooking where you stop and just stand there, because what you are eating is better than you prepared yourself for. This is that dish. The one that belongs on a dinner party table and a Tuesday night in equal measure. The one that makes the bread bowl not a gimmick but a revelation — because the bread is not a vehicle for the pasta; the pasta and the bread are made for each other, and the sauce that saturates the inner walls of the loaf over the course of the meal is the best part of both.
The secret to this Alfredo’s extraordinary creaminess is the cashew base — raw cashews soaked and blended with vegetable broth, nutritional yeast, roasted garlic, lemon juice, and a small amount of white wine into a sauce that is genuinely, textually indistinguishable from a cream-and-butter Alfredo and considerably more interesting in flavor. Where traditional Alfredo relies on butter and Parmesan for its richness, this sauce builds its depth through layered umami: the roasted garlic adds a rounded, slightly sweet savoriness; the nutritional yeast contributes a fermented, cheesy depth; the white wine adds an acidic brightness that keeps the heavy sauce from tipping into cloying; and the cashews provide a fat-soluble richness that coats every strand of fettuccine in a way that cream alone cannot match.
What makes this recipe so outstanding is the warm bread bowl itself — not simply a serving vessel but an active component of the dish. A sourdough boule with its top removed and its interior hollowed out and toasted in the oven develops an inner crust that is simultaneously firm enough to hold the sauce and absorbent enough to soak it up slowly over the course of the meal, transforming the bread from accompaniment into the final, extraordinary course: the sauce-soaked walls of the loaf, torn and eaten at the end, are quite possibly better than the pasta itself.
This recipe is 100% vegan, ready in about 50 minutes, deeply impressive to serve, and the kind of dinner that earns its place in permanent rotation the first time you make it.
Recipe Information
Prep Time
Cook Time
Total Time
Servings
Calories
15 mins
35 mins
50 mins
4
~720 kcal
Ingredients
For the Bread Bowls
4 small sourdough boules (individual-sized, about 15cm / 6 inches diameter) — or 2 larger boules halved
2 tbsp olive oil or vegan butter, melted
1 clove garlic, finely grated (for brushing the inside of the bowl)
For the Roasted Garlic Cashew Alfredo Sauce
1½ cups (210g) raw cashews, soaked in hot water for 20–30 minutes, drained
1 whole head of garlic, roasted (see instructions)
1¼ cups (300ml) vegetable broth, plus more to thin
¼ cup (60ml) dry white wine (or additional broth)
4 tbsp nutritional yeast
Juice of 1 lemon
1 tsp onion powder
½ tsp white pepper
½ tsp salt (plus more to taste)
Pinch of freshly grated nutmeg
For the Fettuccine
400g (14oz) fettuccine pasta (or linguine)
1 tbsp salt for pasta water
2 tbsp vegan butter
½ cup (120ml) pasta cooking water, reserved
For Finishing and Serving
Freshly cracked black pepper (generous)
3 tbsp fresh flat-leaf parsley, finely chopped
Extra nutritional yeast for dusting
Lemon zest from 1 lemon
Vegan parmesan (store-bought or homemade from cashews and nutritional yeast)
Chilli flakes (optional)
Instructions
Roast the garlic. Preheat the oven to 400°F (200°C). Slice the top off the head of garlic to expose the cloves. Drizzle with olive oil, wrap tightly in foil, and roast for 35–40 minutes until the cloves are completely soft, golden, and fragrant. Squeeze the roasted cloves out of the skin — they should slip out like a paste. Set aside.
Prepare the bread bowls. While the garlic roasts, cut the tops off the sourdough boules and hollow out the interior, leaving a 2–3cm wall of bread all around. Reserve the removed bread for dipping. Brush the inside of each hollowed loaf generously with melted vegan butter mixed with the grated raw garlic. Place on a baking sheet and toast in the oven alongside the garlic for the final 10 minutes until the interior is golden, fragrant, and lightly crisped. Remove and keep warm.
Make the cashew Alfredo sauce. Drain the soaked cashews and add to a high-speed blender with the roasted garlic cloves, vegetable broth, white wine, nutritional yeast, lemon juice, onion powder, white pepper, salt, and nutmeg. Blend on high for 2–3 minutes until the sauce is completely smooth and silky — no graininess should remain. The sauce should be thick enough to coat a spoon. If too thick, add vegetable broth a tablespoon at a time. Taste and adjust seasoning.
Cook the fettuccine. Bring a large pot of heavily salted water to a rolling boil. Cook the fettuccine until just al dente — 1 minute less than the package instructs, as it will continue cooking in the sauce. Before draining, reserve ½ cup of the starchy pasta cooking water. Drain the pasta and return to the pot.
Finish the sauce. In a large saucepan or skillet over medium-low heat, melt the vegan butter. Pour in the blended cashew Alfredo sauce and warm through, stirring gently — do not boil, as high heat can cause the cashew sauce to break. Add the cooked fettuccine to the sauce and toss to coat. Add the reserved pasta water a splash at a time to loosen the sauce to a silky, flowing consistency that coats every strand without pooling. The sauce should be fluid but clinging — not watery, not stiff. Taste and adjust salt and pepper generously. The pasta should be boldly seasoned; Alfredo lives and dies on its seasoning.
Fill the bread bowls and serve. Place a warm, toasted bread bowl on each plate. Twirl generous portions of fettuccine Alfredo into each bowl using tongs, allowing the sauce to pool against the toasted walls. Crack black pepper generously over the top. Scatter fresh parsley and lemon zest. Dust with nutritional yeast and vegan parmesan. Add chilli flakes if using. Serve immediately with the reserved bread pieces alongside for dipping and the sauce-soaked walls of the loaf eaten last.
Pro Tips
Soak the cashews in hot water, not cold — 20–30 minutes in just-boiled water softens raw cashews sufficiently for silky blending. Cold-water soaking takes 4–6 hours and produces an equally smooth result, but hot soaking is faster and equally effective for this application. Do not skip the soak; unsoaked cashews produce a sauce with detectable graininess even in a high-speed blender.
Reserve pasta water before draining — this is the single most important pasta technique and it is non-negotiable. The starchy, salted pasta cooking water is the ingredient that transforms a thick cashew sauce into something silky and emulsified that clings to the pasta. Added a splash at a time, it loosens the sauce without thinning its flavor. A half cup is enough; have it ready before you drain.
Toast the bread bowl interior before filling — a raw, untoasted bread bowl will become soggy within minutes of the hot sauce being ladled in. Toasting the interior for 10 minutes creates a lightly crisped inner crust that resists soaking long enough for the meal to be enjoyed while remaining absorbent enough to slowly saturate with sauce toward the end — which is the point. Do not skip this step.
Do not boil the cashew sauce — cashew cream sauces can separate under very high heat, breaking into a grainy, uneven texture. Warm the sauce gently over medium-low heat and never allow it to reach a full boil. A gentle simmer for 2–3 minutes is all it needs to come together around the pasta.
The Bread Bowl: A History
The bread bowl — a hollowed loaf used as both serving vessel and edible dish — has appeared in various forms across European and American food history, but its modern popularity as a restaurant staple is largely the product of American chain dining culture and, specifically, the Boudin Bakery of San Francisco, which began serving sourdough bread bowls filled with clam chowder on Fisherman’s Wharf in the 1980s and became so synonymous with the format that the bread bowl became a fixture across American casual dining chains throughout the 1990s. The bread bowl’s genius is structural and philosophical simultaneously: it solves the problem of a vessel that must be firm enough to hold hot liquid while being edible enough to be worth eating, and it rewards patience — the longer the meal takes, the better the bread becomes, as the sauce gradually permeates the walls and transforms the bread from container into component. In this vegan Alfredo version, sourdough is the ideal choice: its dense, chewy crumb holds its structure under the weight of the sauce far longer than a soft white loaf, and its mild tang is a natural complement to the rich, slightly acidic cashew Alfredo — a bread that was made for this sauce before either of them knew it.
Flavor Variations
Roasted Mushroom Alfredo Bread Bowl: Add 300g of cremini or mixed mushrooms, roasted in olive oil and thyme until golden and concentrated, stirred into the finished Alfredo for a deeply earthy, umami-rich version where the mushrooms and cashew cream build an extraordinary depth together.
Sun-Dried Tomato and Basil Alfredo Bread Bowl: Stir ¼ cup of finely chopped oil-packed sun-dried tomatoes and a large handful of fresh basil into the finished pasta for a Tuscan-inspired version with a sweet, acidic counterpoint to the rich cream sauce.
Truffle Alfredo Bread Bowl: Add 1 tablespoon of truffle oil to the blended cashew sauce and top the finished bowl with shaved vegan truffle or an extra drizzle of truffle oil for an indulgent, dinner-party version where the truffle’s earthiness and the cashew cream become one extraordinary thing.
Nutritional Highlights (Per Serving)
Calories
Protein
Carbs
Fiber
Fat
~720 kcal
24g
95g
6g
28g
Storage
Pasta: Store leftover fettuccine Alfredo separately from the bread bowls in an airtight container in the refrigerator for up to 3 days. The cashew sauce thickens considerably on refrigeration — reheat gently over low heat with a splash of vegetable broth or plant milk, stirring until smooth and silky. Do not microwave at high power; it can cause the sauce to separate.
Bread bowls: Best eaten on the day of making. If making ahead, store the toasted, unfilled boules at room temperature and refresh in a 375°F (190°C) oven for 5 minutes before filling and serving.
Sauce ahead: The cashew Alfredo sauce keeps well in a sealed jar in the refrigerator for up to 5 days and freezes for up to 2 months. Thaw overnight in the refrigerator and reheat gently. Having the sauce pre-made makes this a 20-minute weeknight dinner.
Frequently Asked Questions
Can I use store-bought vegan cream instead of cashew cream?
Yes — store-bought vegan heavy cream (oat-based, soy-based, or coconut cream) can be substituted for the cashew cream in equal measure. The flavor will be slightly less complex and the sauce less nutty, but the result is excellent and significantly faster to prepare. Reduce the vegetable broth to ½ cup as store-bought creams are thinner than cashew cream.
What bread works best for bread bowls?
Sourdough is the gold standard — its dense, chewy crumb holds its structure under hot liquid far longer than softer breads. A country loaf or batard also works well. Avoid soft sandwich bread or ciabatta, which will collapse within minutes of being filled. The bread should have a thick, firm crust and a tight, dense crumb.
How do I stop the bread bowl from getting soggy too quickly?
Two things: toast the interior and fill at the last moment. Toasting the hollowed loaf for 10 minutes creates a lightly crisped inner surface that resists immediate saturation. Filling the bread bowl just before serving, rather than in the kitchen during plating, gives the bread maximum time before the sauce penetrates. The soaking is gradual and desirable; the goal is bread firm enough to hold through the meal and saturated enough to be extraordinary by the end.
Can I make this gluten-free?
Yes — use certified gluten-free fettuccine (rice-based or corn-based pasta works well) and serve the Alfredo in bowls rather than bread bowls, or use gluten-free bread rolls for individual bread bowl versions. The cashew Alfredo sauce itself is naturally gluten-free. The nutritional yeast should be verified gluten-free if celiac disease is a concern, as some brands are processed in facilities that handle wheat.
Tried this recipe? Leave a comment below and let us know how it turned out! Tag us on Instagram and Facebook — we love seeing your plant-powered creations. Looking for more addictive vegan snack and appetizer recipes? Browse all recipes on Easy Vegan Recipes — new recipes posted every single week!
There is a moment in the development of every vegan cook’s repertoire when a convincing meatball becomes a genuine ambition. Not a ball of rolled-up grain and vegetable that falls apart on the fork, or a dense sphere that tastes like compressed chickpea, but a proper meatball: browned and slightly crisped on the outside, yielding but firm within, with enough structural integrity to be lifted on a fork, torn apart by a spoon, or rolled through a sauce without disintegrating. Lentils are the best possible base for a plant-based meatball, and not merely because of their protein content or their cultural familiarity as a meat substitute — they are the best base because their starch composition, when cooked to exactly the right degree and combined with the right binders, produces a binding matrix that holds together under heat in a way that beans, chickpeas, and most other legumes do not. These vegan lentil meatballs are everything the category should be: deeply savoury and umami-forward, fragrant with Italian herbs and garlic, firm enough to hold their shape through pan-frying and simmering in sauce, and satisfying in a way that a bowl of pasta or a plate of crusty bread and tomato sauce deserves. They are 100% plant-based, dairy-free, and egg-free. They serve 4, making approximately 20 meatballs. They can be made ahead and frozen, both before and after cooking. They work in a tomato sauce over spaghetti, stuffed into a sub roll, baked with passata and served with polenta, or eaten cold from the refrigerator with mustard — versatile in the way that only a genuinely well-made meatball can be. The technique is the reason these hold together and develop a proper exterior crust rather than crumbling in the pan.
The technique is the undercook-chill-and-sear method. The central challenge of a lentil meatball is the starch binding problem: lentils contain abundant natural starch, and that starch, when cooked to the point that the lentil is fully tender and easily mashable, becomes so gelatinous and sticky that it holds the meatball together in the bowl but releases steam during cooking that breaks the ball apart. The paradox is that fully cooked, fully soft lentils make a mixture that is too wet and too fragile to survive pan contact without falling. The solution is counterintuitive: deliberately undercooking the lentils — cooking them until just barely tender but still holding their shape, with some resistance at the centre — before using them in the meatball mixture. Undercooked lentils retain intact starch granules that have not fully swelled and burst; when the meatball mixture is formed and chilled, these intact granules absorb the moisture in the mixture during the resting period rather than releasing it back. The chilling step is the second stage: the formed meatballs are refrigerated for a minimum of 30 minutes (ideally 1 hour or overnight) before cooking. During this cold rest, the starch sets into a firm, stable matrix — the meatballs can be handled, rolled, and moved without deforming, and crucially, they hold their shape when they first contact the hot pan. The sear is the third stage: the chilled meatballs go into a hot pan with a generous amount of oil and are not moved until a proper golden-brown crust has formed on the contact side. This crust sets the exterior structure that keeps the meatball intact through all subsequent cooking — sauce simmering, baking, reheating — in the same way that a seared meat surface seals and stabilises the exterior of a traditional meatball.
This recipe makes approximately 20 meatballs, serving 4.
Recipe Information
Prep Time
Chill Time
Cook Time
Total Time
Servings
Calories
20 mins
30–60 mins
20 mins
~1 hr 20 mins
4 (5 meatballs each)
~310 kcal
Ingredients
For the Lentils
200g (1 cup) dried green or brown lentils — green or brown lentils (not red lentils, which cook too quickly and become completely mushy; not Puy lentils, which hold their shape too firmly and do not bind well); rinse before cooking
600ml (2½ cups) cold water or vegetable stock — stock gives significantly more flavour than water; use a good-quality low-sodium vegetable stock
½ tsp fine salt — added to the cooking water
For the Meatball Mixture
1 tbsp olive oil — for sautéing the aromatics
1 medium onion (approximately 150g), very finely diced — finely diced, not chopped; large pieces of onion create weak points in the meatball structure
4 cloves garlic, finely minced
1 tsp dried oregano
1 tsp dried basil
½ tsp dried thyme
½ tsp smoked paprika — adds depth and a subtle warmth; do not substitute unsmoked paprika
¼ tsp red chilli flakes — optional; provides background heat without making the meatballs spicy
1 tbsp tomato purée (tomato paste) — adds umami depth and helps with colour; cook it briefly in the pan with the aromatics before adding the other ingredients
1 tbsp soy sauce or tamari — the primary umami amplifier in this recipe; do not omit; tamari for a gluten-free version
80g (¾ cup) rolled oats — blended or ground into a rough oat flour in a food processor or blender; the oat flour provides the primary structural binder; do not use instant oats (too fine) or steel-cut oats (too coarse); rolled oats ground for 20–30 seconds is ideal
2 tbsp ground flaxseed — combined with 4 tbsp water and rested 5 minutes to form a flaxseed slurry; acts as the egg-replacer binder
2 tbsp nutritional yeast — provides a savoury, slightly cheesy depth; also adds B vitamins; do not substitute
½ tsp fine salt — in addition to the salt in the lentil cooking water
¼ tsp freshly cracked black pepper
For Pan-Frying
3–4 tbsp olive oil — enough to generously coat the base of the pan; the meatballs need oil to form the exterior crust; do not reduce the oil
To Serve (Optional)
400g (14oz) passata or crushed tomatoes — warmed with a clove of garlic and a pinch of sugar for a simple sauce
Cooked pasta, polenta, or crusty bread
Fresh basil leaves and extra nutritional yeast — for finishing
Instructions
Cook the lentils — undercook stage. Rinse the lentils and place in a medium saucepan with the water or stock and ½ teaspoon of salt. Bring to the boil over high heat, then reduce to a steady simmer. Cook for 18–20 minutes until the lentils are just barely tender — they should be cooked through but still holding their shape with a slight resistance when pressed. They should not be soft, mushy, or falling apart. This undercooking is intentional and critical to the technique. Drain immediately and spread on a plate or tray to cool and dry slightly — any excess moisture will weaken the meatball mixture.
Make the flaxseed slurry. In a small bowl, combine the ground flaxseed with 4 tablespoons of cold water. Stir briefly and leave to rest for 5 minutes until thickened and gel-like.
Sauté the aromatics. While the lentils cool, heat the 1 tablespoon of olive oil in a frying pan over medium heat. Add the finely diced onion and cook for 5–6 minutes until softened and translucent. Add the minced garlic, dried oregano, basil, thyme, smoked paprika, and chilli flakes (if using) and cook for 1 minute until fragrant. Add the tomato purée and cook, stirring, for 1 further minute — cooking the tomato purée briefly in oil removes its raw flavour and deepens its colour and umami character. Remove from the heat.
Grind the oats. In a food processor or blender, blitz the rolled oats for 20–30 seconds until they form a rough, slightly coarse oat flour — not completely fine, as some texture is desirable for binding. Set aside.
Combine the mixture. In a large bowl, add two-thirds of the cooled lentils. Use a fork or potato masher to roughly mash them — aim for a coarse mash with some whole lentil pieces remaining; a completely smooth mash produces a dense, uniform meatball without texture. Add the remaining whole lentils, the sautéed aromatics, the flaxseed slurry, the ground oat flour, nutritional yeast, soy sauce, fresh parsley, salt, and black pepper. Mix well with a wooden spoon or clean hands until a cohesive, somewhat sticky mixture forms. The mixture should hold its shape when pressed in your palm without crumbling. If too wet to hold shape, add an additional tablespoon of ground oats; if too dry, add a teaspoon of water.
Form the meatballs. Using lightly dampened hands (damp hands prevent sticking), scoop approximately 1½ tablespoons of mixture per meatball and roll into smooth balls. Place on a parchment-lined tray as you go. Aim for consistency in size — approximately 3–3.5cm diameter. This recipe makes approximately 20 meatballs.
Chill — chill stage. Cover the tray with cling film and refrigerate for a minimum of 30 minutes, preferably 1 hour or overnight. The cold rest sets the starch matrix and firms the meatballs so they can withstand pan contact without deforming. Do not skip this step.
Sear — sear stage. Heat 3–4 tablespoons of olive oil in a large, heavy-based frying pan (cast iron or stainless steel work best) over medium-high heat until hot and shimmering. Add the chilled meatballs in a single layer, working in two batches if needed — do not crowd the pan. Leave completely undisturbed for 2 minutes until a deep golden-brown crust forms on the base. Turn gently — a fish slice or thin spatula works better than tongs, which can break the meatball — and sear the opposite side for a further 2 minutes. Roll the meatballs gently to sear the sides, in 30–45 second intervals, until browned all over. The total searing time is approximately 6–8 minutes per batch.
Finish in sauce (recommended). After searing, add the meatballs to a warmed tomato sauce and simmer gently for 10 minutes. The sauce finishes cooking the meatballs through, infuses them with tomato flavour, and produces the glossy, sauce-coated exterior of a traditional meatball dish. Alternatively, transfer to a preheated oven at 180°C fan and bake for 10 minutes after searing if finishing in sauce is not desired.
Serve. Serve over pasta, polenta, or with bread. Finish with fresh basil and an extra scatter of nutritional yeast if desired.
Pro Tips
Resist the urge to move the meatballs during searing — the most common cause of meatballs breaking in the pan is premature movement: the meatball is lifted or turned before the crust has fully formed, tearing away the exterior that provides structural support. Leave the meatballs completely undisturbed for the full 2 minutes on each side; if they resist the spatula, they are not ready to turn.
The overnight chill produces the best meatball — a 30-minute chill is the minimum, 1 hour is noticeably better, and overnight is better still. A meatball that has chilled overnight has a firmer, more cohesive exterior and holds together more reliably through searing and sauce simmering than one chilled briefly. Forming the meatballs the evening before and cooking the next day is an excellent make-ahead strategy.
Undercooking the lentils is a feature, not an error — lentils in this recipe should still have slight resistance when you bite them at the draining stage; fully soft, falling-apart lentils make the mixture too wet and the meatballs too fragile. If in doubt, start checking the lentils at 15 minutes and drain as soon as they are tender-but-firm.
Nutritional yeast is load-bearing here — it provides a depth of savoury, slightly cheesy flavour that makes these meatballs convincingly rich; without it the meatballs taste clean but thin. It is available in most health food shops and large supermarkets. If truly unavailable, add an extra tablespoon of soy sauce and accept a slightly less complex flavour.
The Meatball Through History: From Roman Isicia to the Global Table
The meatball — the practice of mincing or grinding protein, mixing it with binders and aromatics, and forming it into a rounded shape before cooking — is one of the most geographically widespread and historically deep preparations in the human culinary record, appearing independently across cultures separated by thousands of miles and centuries, and suggesting that the combination of ground protein, binder, and spherical form satisfies something fundamental about how human beings conceptualise and cook food. The earliest documented meatball-adjacent preparation in the Western record appears in Apicius, the collection of ancient Roman recipes compiled in the 4th or 5th century CE, which describes isicia — minced meat patties shaped and cooked in wine and oil — though the spherical form that defines the modern meatball as distinct from a patty or a rissole appears clearly across multiple cultures somewhat later. The Italian polpette (from “polpa,” meaning fleshy pulp) have been documented in Italian cooking since at least the Renaissance, with Bartolomeo Scappi’s “Opera” (1570) including several preparations; the Swedish köttbullar, now globally familiar through a chain of flat-pack furniture stores, appear in Swedish household records from the 18th century and are thought to have arrived in Scandinavia via King Charles XII, who encountered something similar in Ottoman Turkey during his military campaigns. The köfte of Turkey and the Middle East, the kefta of North Africa, the kofta of South Asia, the Chinese lion’s head meatball (shizi tou), the Spanish albóndiga — every major culinary tradition has its own version, adapted to local protein, local spice, and local technique. In the Italian-American tradition from which the most globally recognised meatball aesthetic derives, the polpette were transformed by immigration into the large, beef-and-pork meatball simmered in long-cooked Sunday gravy that became one of the most iconic dishes of the American immigrant table — a dish rooted in southern Italian cooking but scaled up and adapted to the American abundance of cheap meat in a way that would have been unrecognisable to the Neapolitan or Sicilian grandmother whose recipe it ostensibly continued. The lentil meatball belongs to this global tradition of shaped, bound, cooked ground-or-mashed protein — different in its base ingredient, identical in its culinary logic.
Flavor Variations
Middle Eastern Kofta-Style Lentil Meatballs: Replace the Italian herbs (oregano, basil, thyme) with 1 teaspoon of ground cumin, ½ teaspoon of ground coriander, ¼ teaspoon of ground cinnamon, and ¼ teaspoon of allspice. Add 2 tablespoons of finely chopped fresh coriander (cilantro) and 1 tablespoon of finely chopped fresh mint to the mixture. Serve with warm flatbread, a cucumber-tomato salad, and a tahini sauce (tahini, lemon juice, garlic, water) rather than tomato sauce. The kofta variation is fragrant, warmly spiced, and completely different in character from the Italian original.
Smoky BBQ Lentil Meatballs: Replace the tomato purée with 2 tablespoons of vegan barbecue sauce stirred into the mixture, and add ¼ teaspoon of liquid smoke. After searing, toss in additional barbecue sauce and either serve immediately or bake at 180°C fan for 10 minutes until the sauce caramelises. Serve in a toasted bun with slaw and pickles — these are excellent as a party food or a game-night dish.
Lentil Meatball Sub: Sear the meatballs as directed and nestle 4–5 into a split sub roll or baguette. Spoon over warm marinara sauce and top with sliced firm vegan mozzarella. Place under a hot grill (broiler) for 2–3 minutes until the mozzarella is melted and bubbly. Finish with fresh basil and a drizzle of extra-virgin olive oil. The meatball sub format is one of the most satisfying applications for these meatballs — the seared exterior holds up through the grilling step without disintegrating.
Nutritional Highlights (Per Serving — Based on 4 Servings, Meatballs Only)
Calories
Protein
Carbs
Fiber
Fat
~310 kcal
18g
38g
12g
9g
Storage
Refrigerator (cooked): Store cooked meatballs in a sealed container in the refrigerator for up to 4 days. Reheat in a saucepan of tomato sauce over low heat for 8–10 minutes (the gentlest and best-quality reheating method), or in a preheated oven at 170°C fan for 10 minutes. Avoid microwaving where possible — the microwave heats unevenly and can cause the exterior to toughen while the interior is still cold.
Refrigerator (uncooked): Formed, chilled meatballs can be stored on their parchment-lined tray, covered with cling film, in the refrigerator for up to 24 hours before searing. This is an excellent make-ahead strategy for a dinner party — all preparation the day before, searing and saucing on the day.
Freezer (uncooked): Freeze formed, chilled meatballs on their tray until solid (approximately 2 hours), then transfer to a sealed freezer bag. Store for up to 3 months. Cook from frozen, adding 5 minutes to the searing time and ensuring the interior is hot through before serving.
Freezer (cooked): Cooked meatballs freeze well, in or out of sauce. Store in a sealed container for up to 3 months. Defrost overnight in the refrigerator and reheat as above.
Sauce for storage: Meatballs stored in sauce retain their moisture and flavour better than meatballs stored dry; if storing for more than 24 hours, nestle the meatballs in the sauce before refrigerating.
Frequently Asked Questions
My meatballs fell apart in the pan. What went wrong?
The three most common causes are: the lentils were overcooked and too wet when added to the mixture (drain promptly as soon as tender-but-firm and spread to cool and dry); the meatballs were not chilled long enough before searing (minimum 30 minutes, 1 hour is better); or the meatballs were moved in the pan before the crust had fully formed (leave completely undisturbed for 2 full minutes before attempting to turn). All three causes reinforce each other — overcooked lentils plus insufficient chilling plus premature movement produces meatballs that disintegrate completely; any one of these problems alone is usually survivable.
Can I bake these instead of pan-frying?
Yes — place the chilled meatballs on a parchment-lined, lightly oiled baking tray. Drizzle or brush generously with olive oil. Bake at 200°C fan / 210°C conventional for 20–25 minutes, turning once at the halfway point, until golden-brown and firm. The baked version is less golden and has a less pronounced exterior crust than the pan-fried version but is still excellent — particularly useful when making a large batch. Finish in sauce as directed.
Can I use canned lentils instead of dried?
Canned lentils are significantly wetter and softer than dried lentils cooked to the undercooking specification in this recipe, and they produce a wetter mixture that is more prone to falling apart. If using canned lentils, drain and rinse thoroughly, then spread on a clean tea towel and blot dry. Add an additional tablespoon of ground oats to the mixture to compensate for the extra moisture. The undercook-chill-and-sear method was specifically designed around dried lentils cooked to the right degree; canned lentils will produce an acceptable but less reliable result.
Can I make these gluten-free?
Yes — use tamari instead of soy sauce (tamari is gluten-free; standard soy sauce is not), and ensure the rolled oats are certified gluten-free (oats are naturally gluten-free but are frequently cross-contaminated in processing). Everything else in the recipe is naturally gluten-free.
Tried this recipe? Leave a comment below and let us know how it turned out! Tag us on Instagram and Facebook — we love seeing your plant-powered creations. Looking for more addictive vegan snack and appetizer recipes? Browse all recipes on Easy Vegan Recipes — new recipes posted every single week!
Sometimes the best meal is the one that asks the least of you. Not every dinner needs a long ingredient list, an hour at the stove, or a technique that requires a second read-through. This tender pasta tossed in vegan butter and herbs is, at its core, as simple as it looks: pasta, vegan block butter, garlic, fresh herbs, lemon, and a generous amount of pasta cooking water to pull it all into a glossy, silky sauce that coats every strand. It is 100% plant-based, dairy-free, and egg-free. It serves 4. It is on the table in 20 minutes from a cold start. And yet — because the technique is right — it does not taste simple. The sauce is properly emulsified, not just buttery; the garlic is fragrant without being raw or sharp; the herbs are bright and verdant rather than wilted and grey; the pasta itself is genuinely tender at the centre with just enough resistance at the bite. This is the dish you make on a Tuesday when the week has been long. It is also the dish you make for guests who say they eat simply, because simple done correctly is always impressive.
The technique is the butter-emulsion-and-starchy-water method. Pasta sauces that rely on fat — butter, olive oil, a nut-based cream — fail in one of two predictable ways: either the fat pools on the plate in visible puddles rather than coating the pasta evenly, or the pasta is overdressed and heavy, the sauce thick and cloying rather than light and silky. Both failures share a root cause: the fat was never properly emulsified into the pasta cooking water. Pasta cooking water is not merely hot water. After 10 minutes of boiling pasta, it contains a significant concentration of surface starch released from the pasta — a natural emulsifier that allows fat and water to combine into a stable, homogenous sauce that clings to pasta rather than sliding off it. The butter-emulsion-and-starchy-water method exploits this deliberately. Step one: the pasta is cooked in well-salted water and pulled from the pot 1 minute before it is fully cooked — while it still has a slightly undercooked core. A full cup of cooking water is reserved before draining. Step two: the pasta is finished in the pan with the butter, garlic, and herbs over medium heat, and the reserved starchy cooking water is added gradually — a splash at a time — while the pan is tossed continuously. The starch in the water combines with the fat molecules in the butter to form a stable emulsion; the remaining cooking time drives off excess water so the sauce reduces to a coating consistency rather than a pooling one; the pasta absorbs the last of its cooking directly in the sauce, so the pasta and sauce finish simultaneously and at the same temperature. This is the same fundamental principle that makes a proper cacio e pepe or aglio e olio work — and it works equally well with vegan block butter.
This recipe serves 4.
Recipe Information
Prep Time
Cook Time
Total Time
Servings
Calories
5 mins
15 mins
20 mins
4
~420 kcal
Ingredients
Pasta
400g (14oz) dried pasta — linguine, spaghetti, tagliatelle, or pappardelle; long pasta works best with this sauce style as the strands coat more evenly than short shapes; use a good-quality pasta with a rougher surface (bronze-die extruded if available) as the texture holds the butter emulsion better
For the Butter and Herb Sauce
80g (3oz) vegan block butter — block-style only; tub-style spread contains added water and emulsifiers that prevent the butter from browning and can make the sauce greasy; the block must be cold, cut into 1cm cubes, and added to the pan in stages rather than all at once
6 cloves garlic, thinly sliced — thin slices rather than minced; thin slices infuse their flavour into the butter more gently over the cooking time without the risk of burning that minced garlic carries
1 cup (240ml) pasta cooking water — reserved just before draining; this is not optional and cannot be substituted with plain water (which contains no starch)
30g fresh flat-leaf parsley, roughly chopped — about one large bunch; added in two stages (half during cooking, half off heat) to preserve the colour and bright flavour of the second addition
15g fresh basil leaves, torn — added off heat only; basil turns dark and bitter the moment it hits a hot pan
1 tbsp fresh lemon juice — added at the very end; the acid lifts the richness of the butter and brightens the entire dish
1 tsp lemon zest — finely grated; adds the aromatic top notes that lemon juice alone cannot provide
½ tsp chilli flakes — optional but recommended; adds background warmth without making the dish spicy
Generous black pepper — freshly cracked; at least ½ tsp
Sea salt — for pasta water and to finish
To Serve
Extra fresh parsley and basil scattered over
Additional cracked black pepper
Vegan parmesan-style cheese or nutritional yeast — optional, for serving
Good quality extra virgin olive oil — a drizzle over the finished dish adds richness and sheen
Crusty bread — to mop the plate
Instructions
Salt the water properly. Bring a large pot of water to a rolling boil. Salt it generously — it should taste pleasantly salty, like mild seawater, not fresh water. This is the only opportunity to season the pasta itself; under-salted pasta water produces pasta that tastes flat regardless of how good the sauce is. Use at least 1 tablespoon of fine sea salt per litre of water.
Cook the pasta to one minute before done. Add the pasta and cook according to the packet instructions minus 1 minute. The pasta should be almost done but with a slightly chalky, undercooked core when you bite into a strand — it will finish cooking in the pan. Before draining, use a heatproof jug or mug to scoop out at least 1 full cup (240ml) of the pasta cooking water. Set it aside. Drain the pasta.
Build the base. While the pasta cooks, place a large, wide frying pan or sauté pan (large enough to eventually hold all the pasta) over medium-low heat. Add half the cold butter cubes. When the butter begins to foam, add the sliced garlic and chilli flakes if using. Cook for 2–3 minutes, stirring frequently, until the garlic is soft, fragrant, and pale golden — not brown. If the garlic begins to colour too quickly, reduce the heat or add a splash of pasta water to slow the cooking.
Begin the emulsion. Add a splash (around 4–5 tablespoons) of the reserved pasta cooking water to the pan with the garlic butter. The liquid will sputter and foam. Stir or swirl the pan continuously — you are beginning to build the emulsion between the starch in the water and the fat in the butter.
Add the pasta and finish in the pan. Add the drained pasta directly to the pan. Increase the heat to medium. Add the remaining cold butter cubes and begin tossing the pasta continuously using tongs or a large fork and spoon. Add the pasta cooking water in small additions — 3–4 tablespoons at a time — tossing after each addition. Continue for 2–3 minutes, adding water as needed to maintain a loose, glossy consistency. The sauce should coat the pasta strands rather than pool at the bottom of the pan. Add half the chopped parsley during this stage.
Finish with herbs and lemon. Remove the pan from the heat. Add the lemon juice, lemon zest, remaining parsley, and the torn basil leaves. Toss everything together for another 30 seconds — the residual heat will wilt the basil gently without cooking it aggressively. Taste and adjust salt and pepper. If the sauce feels too thick or the pasta has absorbed too much liquid, add one final splash of pasta water and toss through.
Serve immediately. Divide between warm bowls. Drizzle with extra virgin olive oil, crack over additional black pepper, and scatter with extra fresh herbs. Serve at once — this dish waits for no one.
Pro Tips
Use cold butter in stages, not warm butter all at once — the temperature differential between the cold butter and the hot pasta water is what creates the emulsion; warm butter added all at once melts immediately and slides off the pasta rather than emulsifying into the sauce; add the butter in two or three batches, each addition cold from the refrigerator, and toss continuously between additions to work each batch into the starchy water before adding the next.
Never drain without reserving — the pasta cooking water is the single most important ingredient in the sauce after the butter itself; set a reminder, put a mug in the colander, do whatever it takes to remember to scoop it out before draining; plain water added later contains no starch and will not emulsify with the butter, producing a greasy, watery pan rather than a silky sauce.
Finish basil off the heat — basil contains volatile aromatic compounds (primarily linalool and eugenol) that evaporate immediately at high temperatures; adding basil while the pan is still on the heat produces flat, slightly bitter cooked-herb flavour rather than the bright, fragrant freshness that makes this dish; add it after removing the pan from the heat, toss once, and serve immediately.
Warm the bowls — a simple step that makes a significant difference; pasta in a cold bowl drops in temperature within 30 seconds of plating, the butter sauce congeals, and the glossy emulsion breaks into a greasy film; warm the serving bowls in a low oven (80°C) for 10 minutes before serving, or fill them with hot water for 2 minutes and dry before plating.
Pasta: Forty Centuries of Simplicity
The history of pasta is, at its heart, the history of a very simple technology — ground grain mixed with water, shaped, and dried — that turned out to be one of the most consequential food inventions in the story of human civilisation. The origins of pasta are contested, though the most durable popular myth — that Marco Polo brought pasta to Italy from China after his journey to the court of Kublai Khan in the 13th century — has been largely dismissed by food historians, who point to Arabic texts referencing dried pasta in Sicily as early as the 12th century CE and to Roman-era sources describing pasta-like preparations made from spelt flour and water. The Arab traders and settlers who governed Sicily between the 9th and 11th centuries CE are now widely credited with introducing dried pasta to the Mediterranean world — specifically itriyya, a dried string pasta made in Sicily that is referenced in the Arab geographer Muhammad al-Idrisi’s 1154 description of the town of Trabia, which he describes as producing so much dried pasta that it was exported in ship-loads to Calabria and beyond. What the Arab world contributed was not pasta itself — wheat-and-water doughs shaped and cooked existed in various forms across the ancient Mediterranean — but the technology of drying: the recognition that pasta dried in the sun could be stored for months and transported long distances without spoiling, transforming a perishable fresh food into a durable commodity. It was this dried, shelf-stable pasta that became the foundation of Italian regional cooking over the following eight centuries, developing into the extraordinary diversity of regional shapes — tagliatelle in Bologna, orecchiette in Puglia, pici in Tuscany, trofie in Liguria — that each region evolved to suit its local sauces, climates, and cooking traditions. The butter-dressed pasta of northern Italy — where the dairy traditions of Emilia-Romagna, Lombardy, and Piedmont dominated the kitchen — is among the oldest of these regional traditions; a simple pasta tossed with good butter and nothing else appears in Italian cooking manuscripts as early as the 15th century. The vegan butter version in this recipe stands in that same unbroken line — the same principle of fat, starch, and heat producing a silky emulsion from the simplest possible ingredients — updated with plant-based fat that achieves the same result with none of the dairy.
Flavor Variations
Lemon and Caper Herb Pasta: Add 2 tablespoons of rinsed capers to the garlic butter at the same stage as the garlic, and increase the lemon juice to 2 tablespoons and the lemon zest to 2 teaspoons. The capers add a briny, sharp counterpoint to the richness of the butter that brightens the entire dish. Finish with extra parsley and a handful of rocket (arugula) tossed through off the heat. The peppery rocket wilts gently and adds colour and a slightly bitter edge that balances the fat beautifully.
Brown Butter and Sage Pasta: In place of the standard technique, cook the vegan block butter in the pan over medium heat, swirling continuously, until it turns a deep amber colour and smells nutty and caramel-like — this is the vegan equivalent of beurre noisette, and vegan block butter achieves it well. Add 12–15 fresh sage leaves and fry for 30–45 seconds until crisp. Add the pasta and cooking water and proceed as directed. The brown butter and sage version is richer, nuttier, and more autumnal in character than the fresh herb version. Finish with a squeeze of lemon and a grating of vegan parmesan.
Garlic, White Wine, and Herb Pasta: After cooking the garlic to pale golden, deglaze the pan with 100ml of dry white wine and reduce for 2 minutes until the wine is almost completely evaporated. Add the pasta, cooking water, butter, and herbs as directed. The white wine adds an acidic, slightly fruity layer beneath the butter that gives the sauce more complexity without changing the essential simplicity of the dish. Use a wine you would drink — poor-quality wine produces poor-quality sauce.
Nutritional Highlights (Per Serving — Based on 4 Servings)
Calories
Protein
Carbs
Fiber
Fat
~420 kcal
11g
62g
3g
15g
Storage
Best eaten immediately — this dish is at its absolute peak the moment it leaves the pan; the butter emulsion is a dynamic structure that begins to break as the pasta cools and absorbs the remaining sauce liquid; eating it immediately is strongly recommended.
Refrigerator: Leftovers store in a sealed container for up to 3 days. The pasta will absorb the sauce completely during storage; it will look dry when cold. Do not be alarmed — it reheats well.
Reheating: Add the cold pasta to a pan with a generous splash of water (2–4 tablespoons) and a small knob of vegan block butter over medium heat. Toss continuously for 2–3 minutes until the pasta is hot and the sauce has re-emulsified from the fresh water and butter. Do not microwave — microwaved butter pasta becomes oily as the emulsion breaks under uneven microwave heat.
Freezer: Not recommended — the pasta texture changes significantly after freezing and thawing; the emulsified butter sauce does not survive the freeze-thaw cycle and separates on reheating.
Batch cooking note: This dish does not lend itself to advance preparation. The pasta and sauce must be made together, finished together, and eaten immediately. What can be prepared in advance: the garlic can be sliced, the herbs washed and roughly chopped, and the butter cubed and kept cold — all steps that reduce the active cooking time to under 10 minutes.
Frequently Asked Questions
Why does my butter pasta always end up greasy?
Greasy butter pasta is almost always caused by adding too much butter too quickly to a pan that is too hot, without enough starchy pasta water to emulsify it. The fat does not have time to combine with the water and starch; it pools as visible grease instead. Fix: use cold butter added in stages, add pasta water gradually in small splashes rather than all at once, and toss continuously — the physical action of tossing is what drives the emulsification. The pan should be medium heat, not high, during the emulsification stage.
Can I use olive oil instead of vegan butter?
Yes — the technique works with olive oil too, though the flavour profile is quite different. Olive oil produces a lighter, more Mediterranean-style dish. Use 4–5 tablespoons of good quality extra virgin olive oil in place of the butter, and add it to the pasta and cooking water directly in the pan, tossing continuously. The starch emulsion works the same way with olive oil. For the richest version of this dish, use half olive oil and half vegan block butter.
What pasta shape works best?
Long pasta — spaghetti, linguine, tagliatelle, pappardelle, bucatini — works best because the long strands coat more evenly in a tossed butter sauce and the continuous tossing motion distributes the sauce along their length. Short pasta works but requires more stirring rather than tossing. Whatever shape you use, use bronze-die extruded pasta if possible — the rougher surface texture holds emulsified sauces significantly better than the smooth surface of standard extruded pasta.
My sauce has disappeared by the time I serve it — where did it go?
The pasta absorbed it. This is the most common issue with butter pasta and has a simple fix: err on the side of too much sauce when finishing in the pan — it should look slightly too saucy, almost pooling at the bottom, when you plate it; the pasta will absorb the last of the liquid in the bowl in the 30–60 seconds between plating and eating, and it will be perfect by the time the first forkful is taken. If it arrives at the table already dry, you finished the sauce too far. Add a final splash of cooking water and a last knob of butter at the plating stage.
Tried this recipe? Leave a comment below and let us know how it turned out! Tag us on Instagram and Facebook — we love seeing your plant-powered creations. Looking for more addictive vegan snack and appetizer recipes? Browse all recipes on Easy Vegan Recipes — new recipes posted every single week!
8 ounces dry pasta 1 medium head broccoli, cut into bite-size florets (about 2 ½ cups) ½ packet extra-firm tofu, pressed, cut into ¾-inch cubes ½ tbsp tamari 2 tbsp cornstarch 1 tsp garlic powder 1 tsp onion powder 1 tsp paprika Salt to taste ½ tsp sesame or neutral flavored oil
For the sauce: 3 tbsp olive oil 2 tbsp whole-wheat pastry or all-purpose flour 2 cups unsweetened nondairy milk 1 tbsp white miso, dissolved in 1 tablespoon water Dash of garlic powder Dash of onion powder Salt and freshly ground black pepper to taste
Method:
1. Cook the pasta according to packet directions until al dente.
2. Steam the broccoli florets with a tight fitting lid for about 3 minutes, or until just tender.
3. Transfer the tofu to a medium bowl. Add the tamari. Toss to combine. Add the cornstarch, garlic powder, onion powder, paprika, salt, and oil.
4. Toss until the tofu is evenly coated. Air fry in a single layer at 400ºF for 10 minutes. Toss and cook for about 2 minutes more, or until crispy.
5. Heat the olive oil in a large nonstick skillet over medium heat. Add the flour and whisk vigorously for 1 minute, or until fully incorporated. Add the nondairy milk and stir to combine.
6. Add the dissolved miso and cook over medium-low heat for about 5 minutes, or until the sauce is thickened to the desired consistency, stirring constantly. Mix in garlic powder, onion powder, salt, and pepper.
7. Mix in the tofu and broccoli. Add the desired amount of pasta. Serve immediately.
7. Mix in the tofu and broccoli. Add the desired amount of pasta. Serve immediately.
There are pasta dishes you make on a weeknight because pasta is easy and everyone loves it. And then there are pasta dishes like this Vegan Mushroom Alfredo — the kind that stops conversation at the dinner table, that makes people put down their forks and look at you with genuine disbelief when you tell them there is not a single gram of dairy anywhere in the bowl, that coats every ribbon of pasta in a sauce so impossibly silky, so deeply rich, so extraordinarily creamy that it is indistinguishable in every meaningful way from the finest dairy-based Alfredo you have ever tasted. This is that pasta. The one that becomes the dish people request at every gathering. The one that converts the most committed dairy lovers. The one that proves beyond any conceivable doubt that plant-based cooking is not a compromise — it is an elevation.
This is a Alfredo sauce of extraordinary sophistication — a base of raw cashews blended with roasted garlic and nutritional yeast into the most velvety, dairy-free cream imaginable, enriched with a splash of white wine, brightened with lemon, and folded through with golden pan-seared mushrooms that have been cooked low and slow until they are deeply caramelized, nutty, and concentrated in flavor to an intensity that borders on the transcendent. The mushrooms are not a supporting player in this dish — they are the co-star, contributing an earthy, umami-laden depth that transforms the creamy Alfredo base into something with layers of complexity and character that no amount of Parmesan could replicate.
What makes this recipe so genuinely exceptional is the cashew cream base. Raw cashews soaked briefly in hot water and blended until completely smooth create a cream with a richness, a mouthfeel, and a neutral sweetness that is so close to heavy dairy cream in every sensory respect that blind tasters consistently fail to identify the difference. Combined with nutritional yeast — which contributes a deep, savory, genuinely cheesy flavor through its naturally occurring glutamates — the result is an Alfredo sauce that is not merely a reasonable plant-based substitute but is in its own right one of the finest pasta sauces imaginable.
This recipe is 100% vegan, ready in just 30 minutes, naturally gluten-free when served with gluten-free pasta, high in plant-based protein and healthy fats, and absolutely spectacular served over fettuccine, tagliatelle, pappardelle, or any wide, flat pasta shape that can carry the generous, silky sauce in its every fold and ribbon.
Recipe Information
Prep Time
Cook Time
Total Time
Servings
Calories
10 mins
20 mins
30 mins
4
~520 kcal
Ingredients
For the Cashew Alfredo Sauce
1½ cups (200g) raw cashews, soaked in boiling water for 15 minutes then drained
1 cup (240ml) vegetable broth, plus more as needed
½ cup (120ml) unsweetened oat milk or plant milk of choice
4 cloves garlic, roasted or sautéed until golden
4 tbsp nutritional yeast
2 tbsp lemon juice
1 tbsp white miso paste (adds extraordinary depth and umami)
1 tsp onion powder
½ tsp salt, plus more to taste
¼ tsp white pepper
¼ tsp nutmeg (the classic Alfredo finishing spice)
For the Mushrooms
500g mixed mushrooms (cremini, shiitake, oyster, or portobello — or a combination)
4 cloves garlic, thinly sliced
2 tbsp olive oil
2 tbsp vegan butter
½ cup (120ml) dry white wine (or vegetable broth)
2 tbsp fresh thyme leaves (or 1 tsp dried thyme)
2 tbsp fresh parsley, finely chopped
Salt and black pepper to taste
For the Pasta
400g fettuccine or tagliatelle (use gluten-free pasta if needed)
1 tbsp salt (for pasta water)
½ cup (120ml) pasta cooking water, reserved before draining
Optional Add-ins
1 cup (30g) fresh baby spinach (stir in at the end)
½ cup (60g) frozen peas (add to sauce while warming)
1 medium zucchini, ribboned with a vegetable peeler
Sun-dried tomatoes, roughly chopped
Toasted pine nuts or walnuts for crunch
Fresh truffle oil drizzled at the end for extraordinary luxury
To Serve
Fresh parsley, finely chopped
Freshly cracked black pepper — generous
Vegan Parmesan or nutritional yeast sprinkled over
Chili flakes for warmth and color
A wedge of fresh lemon for squeezing
Crusty sourdough bread or garlic bread alongside
Instructions
Soak the cashews. Place the raw cashews in a heatproof bowl and cover with boiling water. Soak for a minimum of 15 minutes — 30 minutes produces an even silkier result. Drain completely before blending. Properly soaked cashews blend to a perfectly smooth, completely lump-free cream in any standard blender. Under-soaked cashews produce a grainy sauce regardless of blending time — do not rush this step.
Cook the pasta. Bring a large pot of generously salted water to a rolling boil. Add the pasta and cook according to package instructions until al dente — tender with a very slight resistance at the center. Before draining reserve at least half a cup of the starchy pasta cooking water — this liquid is liquid gold in pasta making, used to adjust the consistency of the sauce and help it adhere to the pasta with extraordinary effectiveness. Drain the pasta and set aside.
Sear the mushrooms to golden perfection. While the pasta cooks heat a large skillet over high heat until very hot — almost smoking. Add the olive oil and vegan butter and allow the butter to melt and foam. Add the mushrooms in a single layer — do not stir for the first 2–3 minutes, allowing them to develop a deep golden sear on the bottom. A mushroom that is stirred immediately after hitting the pan will steam in its own moisture rather than caramelizing. Once golden on the bottom flip and cook for a further 2 minutes. Season generously with salt and pepper.
Add garlic, wine, and thyme. Reduce the heat to medium and add the sliced garlic and fresh thyme to the seared mushrooms. Cook for 60 seconds until the garlic is golden and fragrant — watch carefully as thin-sliced garlic burns quickly. Pour in the white wine and allow to bubble and reduce for 2–3 minutes, scraping up any caramelized bits from the bottom of the pan — these concentrated caramelized bits are some of the most flavorful elements in the entire dish. Add the fresh parsley and stir to combine. Remove from heat and set aside.
Blend the cashew Alfredo sauce. Drain the soaked cashews and place in a high-speed blender with the vegetable broth, oat milk, roasted garlic, nutritional yeast, lemon juice, white miso paste, onion powder, salt, white pepper, and nutmeg. Blend on the highest speed for a full 90 seconds — stopping to scrape down the sides halfway through — until the sauce is completely smooth, silky, and pourable with absolutely no graininess or texture remaining. Taste and adjust — more nutritional yeast for cheesiness, more lemon for brightness, more salt for depth.
Warm the sauce. Pour the blended cashew sauce into the large skillet used for the mushrooms over medium-low heat. Warm gently, stirring continuously, until the sauce is heated through and beginning to thicken slightly — approximately 2–3 minutes. Add a splash of the reserved pasta cooking water if the sauce seems too thick — it should be pourable and silky rather than stiff or gluey.
Combine pasta and sauce. Add the drained pasta directly to the warm sauce in the skillet and toss vigorously to coat every strand in the creamy Alfredo sauce. Add the seared mushrooms and toss again to incorporate throughout. If the sauce is too thick add the reserved pasta water one tablespoon at a time, tossing between additions, until the sauce coats the pasta in a silky, flowing way that pools slightly at the bottom of the bowl when served.
Taste and serve immediately. Taste the finished pasta and adjust the seasoning one final time — Alfredo requires confident seasoning with salt, pepper, and lemon to reach its full extraordinary potential. Divide immediately between warmed bowls — pasta waits for no one and Alfredo in particular loses its silky texture as it cools. Finish each bowl with fresh parsley, a very generous crack of black pepper, a drizzle of olive oil, chili flakes, and an additional dusting of nutritional yeast or vegan Parmesan. Serve immediately.
Pro Tips for the Most Extraordinary Vegan Alfredo
Soak the cashews in boiling rather than cold water. Boiling water softens raw cashews in 15 minutes — cold water requires 4–6 hours of soaking time. For a last-minute sauce boiling water makes this recipe genuinely achievable in 30 minutes without compromising the silkiness of the finished cream.
Never stir the mushrooms immediately after adding to the pan. The single most common mushroom cooking mistake is stirring too soon. Mushrooms placed in a hot pan and left completely undisturbed for 2–3 minutes develop a deep, caramelized, golden-brown crust that concentrates their flavor dramatically. Stirring immediately causes them to steam in their own released moisture and produces grey, flaccid mushrooms with none of the extraordinary depth of properly seared ones.
Use white miso paste in the sauce. This single ingredient transforms the cashew Alfredo from very good to genuinely outstanding. White miso contributes a deep, fermented, savory complexity — a roundness and depth of umami that makes the sauce taste aged and sophisticated rather than simply creamy. It is the secret weapon of plant-based sauce making and its contribution here is irreplaceable.
Reserve more pasta water than you think you need. Pasta cooking water — enriched with dissolved starch from the pasta — is one of the most powerful tools in pasta cooking. It adjusts sauce consistency, helps sauce adhere to pasta, and creates that glossy, emulsified quality that characterizes great pasta dishes. Reserve at least one full cup even if you think you will not need it all.
Serve in warmed bowls. Cashew-based sauces thicken as they cool — serving in warmed bowls keeps the sauce at the perfect silky consistency for significantly longer. Run hot water into your serving bowls for 60 seconds before ladling in the pasta.
Use a combination of mushroom varieties. A single variety of mushroom produces a one-dimensional flavor. A combination of cremini for earthiness, shiitake for deep umami, oyster for delicacy, and portobello for meaty substance creates a mushroom component with extraordinary complexity and textural interest that elevates the entire dish to restaurant quality.
The Magic of Cashew Cream in Plant-Based Cooking
Cashew cream is perhaps the single most transformative ingredient in the entire plant-based cooking repertoire — and understanding why it works so extraordinarily well helps explain why this Alfredo is so indistinguishable from its dairy counterpart.
Raw cashews have a unique fat composition among all nuts — their fat is predominantly oleic acid, the same monounsaturated fatty acid that dominates olive oil and dairy cream, which gives them a neutral, clean flavor and a richness on the palate that is remarkably similar to dairy fat. When soaked and blended they release this fat into a stable emulsion with their natural starches and proteins — creating a cream that has the same mouthfeel, the same richness, and the same coating quality as heavy dairy cream.
The protein content of cashews — approximately 5 grams per serving in this recipe — contributes to the sauce’s ability to emulsify and thicken when heated in the same way that milk proteins contribute to the texture of dairy-based sauces. This protein-fat emulsion is what gives the finished Alfredo its characteristic silky, coating quality rather than a thin, watery one.
Nutritional yeast — the other hero ingredient in this sauce — provides its cheesy flavor through naturally occurring glutamic acid — the same amino acid compound responsible for the savory, umami depth of aged Parmesan cheese. It is not an artificial flavoring or an approximation of cheese flavor — it is the same underlying chemistry, derived from a completely different and entirely plant-based source, producing a flavor that is genuinely, authentically cheesy in every meaningful respect.
The combination of cashew cream and nutritional yeast in this sauce does not merely approximate dairy Alfredo — it creates something that is chemically and sensorially remarkably similar to it through entirely plant-based means. This is not compromise. This is ingenuity.
Flavor Variations
Truffle Mushroom Alfredo: Add 1 tablespoon of truffle oil to the finished sauce and use exclusively oyster and cremini mushrooms for the most luxurious, restaurant-quality version of this dish imaginable. Finish with shaved vegan truffle cheese if available for an extraordinary special occasion pasta that is genuinely spectacular.
Roasted Garlic and Sun-Dried Tomato: Roast a full head of garlic until deeply caramelized and sweet and blend the entire head into the cashew sauce. Add half a cup of finely chopped sun-dried tomatoes to the mushrooms for a version with extraordinary depth and a beautiful Mediterranean character.
Spinach and Mushroom: Stir two large handfuls of fresh baby spinach into the warm sauce in the final minute of cooking until just wilted for a vibrant green-flecked version that adds additional nutrition and a beautiful visual contrast to the creamy white sauce.
Lemon and Herb: Add the zest of two lemons and a generous handful of fresh basil and tarragon to the blended sauce for a brighter, more herbaceous version with a fresh, spring-like character that is particularly beautiful in warmer months.
Nutritional Highlights (Per Serving)
Calories
Protein
Carbs
Fiber
Fat
~520 kcal
18g
62g
5g
22g
At 520 calories per serving this pasta delivers a genuinely satisfying and nutritionally substantial meal — 18 grams of plant-based protein from the cashews, pasta, and nutritional yeast, meaningful dietary fiber, and an exceptional concentration of healthy monounsaturated fats from the cashews and olive oil that support cardiovascular health and provide sustained satiety. The mushrooms contribute B vitamins including B12 precursors, selenium, and powerful antioxidant compounds including ergothioneine — a unique antioxidant found almost exclusively in mushrooms that has been studied for its extraordinary cellular protective properties. The nutritional yeast contributes B vitamins including B12 in fortified varieties, making this an outstanding choice for anyone following a plant-based diet who wants to maintain adequate B12 intake.
Storage
Sauce separately: The cashew Alfredo sauce stores beautifully in an airtight container in the refrigerator for up to 5 days. It thickens considerably during refrigeration — thin with a splash of vegetable broth or oat milk and reheat gently over low heat, stirring continuously, before tossing with freshly cooked pasta for the finest result.
Pasta and sauce combined: Store leftover assembled pasta in an airtight container in the refrigerator for up to 3 days. Reheat gently in a pan over medium-low heat with a generous splash of vegetable broth or water to loosen the sauce and restore its silky consistency. Do not reheat at high heat as the cashew sauce can become grainy.
Freezer: The cashew Alfredo sauce freezes well for up to 2 months — freeze before combining with pasta. Thaw overnight in the refrigerator and reheat gently with a splash of broth to restore consistency. Cooked pasta does not freeze well — cook fresh pasta when serving the frozen sauce.
Mushrooms: The seared mushrooms store in the refrigerator for up to 4 days and can be reheated quickly in a hot pan with a small amount of olive oil. They also freeze well for up to 1 month — freeze separately from the sauce for the most flexible meal prep system.
Frequently Asked Questions
Can I make this recipe without cashews?
Yes — silken tofu blended until completely smooth is the most effective cashew-free alternative for this sauce. Use 300g of silken tofu in place of the soaked cashews and reduce the plant milk to 2 tablespoons. The flavor profile is slightly different — less rich and buttery than the cashew version — but still produces a genuinely creamy, satisfying Alfredo sauce. Sunflower seeds soaked and blended in the same way as the cashews are another excellent nut-free alternative.
What is the best pasta shape for Alfredo?
Wide, flat pasta shapes carry creamy Alfredo sauce most effectively — fettuccine is the classic and most traditional choice, tagliatelle is an equally excellent alternative, and pappardelle produces an extraordinarily luxurious result with the wide ribbons holding generous amounts of sauce in every fold. Avoid thin pasta shapes like spaghetti or angel hair which do not carry thick, creamy sauces as effectively.
Can I make this recipe without white wine?
Yes — replace the white wine with an equal amount of vegetable broth and add an additional teaspoon of lemon juice and a teaspoon of white wine vinegar to approximate the acidity and complexity that the wine contributes to the mushroom cooking liquid. The result is slightly less complex but still deeply delicious.
Why is my cashew sauce grainy?
A grainy cashew sauce is almost always the result of insufficient soaking time or insufficient blending time. Ensure the cashews are soaked in boiling water for a minimum of 15 minutes and blend on the highest speed for a full 90 seconds. A high-speed blender produces a significantly smoother result than a standard blender — if using a standard blender blend for 2–3 minutes and strain through a fine mesh sieve if any graininess remains.
Can I add protein to this dish?
Yes — this pasta pairs beautifully with additional plant-based protein. Pan-seared tofu cubes, tempeh crumbles browned in soy sauce and garlic, white beans stirred into the sauce, or chickpeas roasted until crispy all work extraordinarily well alongside the mushrooms and creamy Alfredo sauce. Lentil-based pasta used in place of regular pasta also significantly increases the protein content of the finished dish.
Is this recipe suitable for meal prep?
Yes — with the caveat that the sauce and pasta should be stored separately for the finest reheated result. Store the cashew Alfredo sauce and the seared mushrooms in the refrigerator for up to 5 days and cook fresh pasta each time for the best texture. The sauce reheats beautifully in under 5 minutes making this an outstanding weeknight meal prep recipe that requires minimal effort on the day of serving.
Tried this recipe? Leave a comment below and let us know how it turned out! Tag us on Instagram and Facebook — we love seeing your plant-powered creations. Looking for more luxuriously creamy vegan pasta and dinner recipes? Browse all recipes on Easy Vegan Recipes — new recipes posted every single week!
We use cookies on our website to give you the most relevant experience by remembering your preferences and repeat visits. By clicking “Accept”, you consent to the use of ALL the cookies.
This website uses cookies to improve your experience while you navigate through the website. Out of these, the cookies that are categorized as necessary are stored on your browser as they are essential for the working of basic functionalities of the website. We also use third-party cookies that help us analyze and understand how you use this website. These cookies will be stored in your browser only with your consent. You also have the option to opt-out of these cookies. But opting out of some of these cookies may affect your browsing experience.
Necessary cookies are absolutely essential for the website to function properly. These cookies ensure basic functionalities and security features of the website, anonymously.
Cookie
Duration
Description
cookielawinfo-checkbox-analytics
11 months
This cookie is set by GDPR Cookie Consent plugin. The cookie is used to store the user consent for the cookies in the category "Analytics".
cookielawinfo-checkbox-functional
11 months
The cookie is set by GDPR cookie consent to record the user consent for the cookies in the category "Functional".
cookielawinfo-checkbox-necessary
11 months
This cookie is set by GDPR Cookie Consent plugin. The cookies is used to store the user consent for the cookies in the category "Necessary".
cookielawinfo-checkbox-others
11 months
This cookie is set by GDPR Cookie Consent plugin. The cookie is used to store the user consent for the cookies in the category "Other.
cookielawinfo-checkbox-performance
11 months
This cookie is set by GDPR Cookie Consent plugin. The cookie is used to store the user consent for the cookies in the category "Performance".
viewed_cookie_policy
11 months
The cookie is set by the GDPR Cookie Consent plugin and is used to store whether or not user has consented to the use of cookies. It does not store any personal data.
Functional cookies help to perform certain functionalities like sharing the content of the website on social media platforms, collect feedbacks, and other third-party features.
Performance cookies are used to understand and analyze the key performance indexes of the website which helps in delivering a better user experience for the visitors.
Analytical cookies are used to understand how visitors interact with the website. These cookies help provide information on metrics the number of visitors, bounce rate, traffic source, etc.
Advertisement cookies are used to provide visitors with relevant ads and marketing campaigns. These cookies track visitors across websites and collect information to provide customized ads.