There are dinners you make because something quick and satisfying is needed. And then there are dinners like these Vegan Spicy Jalapeño Tofu Bowls — the kind that combine crispy golden tofu coated in a fiery, glossy jalapeño sauce with fluffy rice, crunchy fresh vegetables, and a cooling dollop of avocado or vegan crema, building one of the most genuinely exciting and balanced bowls you will make all week. This is that bowl. The one where every element pulls its own weight — heat, crunch, freshness, and richness all present simultaneously. The one that disappears the moment it is set on the table.
This recipe coats crispy pan-fried tofu in a vibrant sauce built on fresh jalapeño, garlic, lime, and a touch of honey-style maple syrup, served over rice with fresh vegetables and a cooling element to balance the heat. It is a build-your-own bowl that comes together in well under thirty minutes and delivers genuine restaurant-quality flavor.
What makes this dish so outstanding is the jalapeño sauce — blended fresh rather than cooked down, preserving the bright, grassy heat of the chili and the sharp freshness of lime in a way that a long-simmered sauce never achieves, producing a sauce that tastes alive and vibrant against the rich, crispy tofu.
This recipe is 100% vegan, naturally gluten-free when made with tamari, ready in just 30 minutes, and absolutely wonderful served over steamed rice or quinoa with extra lime wedges alongside.
Recipe Information
Prep Time
Cook Time
Total Time
Servings
Calories
15 mins
15 mins
30 mins
4
~420 kcal
Ingredients
For the Crispy Tofu
450g firm tofu, pressed and cubed
2 tbsp cornstarch
2 tbsp neutral oil
½ tsp salt
For the Jalapeño Sauce
3 jalapeños, roughly chopped (deseeded for less heat)
4 cloves garlic
¼ cup (15g) fresh cilantro
3 tbsp fresh lime juice
2 tbsp soy sauce or tamari
2 tbsp maple syrup
2 tbsp olive oil
2 tbsp water, to thin
For the Bowls
2 cups (370g) cooked rice
1 cup (175g) corn kernels, fresh or grilled
1 cup (175g) black beans, drained and rinsed
1 avocado, sliced
½ small red onion, thinly sliced
¼ cup (15g) fresh cilantro, chopped
1 lime, cut into wedges
Optional Add-ins
Vegan crema or vegan sour cream, drizzled over
Pickled jalapeños for extra heat
Shredded red cabbage for crunch
Crumbled vegan cotija or feta
To Serve
Extra lime wedges
Tortilla chips alongside
Hot sauce for those who want more heat
Instructions
Press and prepare the tofu. Press the tofu for at least 10 minutes to remove excess water. Cut into 2cm cubes and toss with the cornstarch and salt until evenly coated.
Crisp the tofu. Heat the oil in a large skillet over medium-high heat. Add the tofu in a single layer and cook for 3–4 minutes per side, turning occasionally, until golden and crispy on all sides. Remove and set aside.
Make the jalapeño sauce. Place the jalapeños, garlic, cilantro, lime juice, soy sauce, maple syrup, and olive oil in a blender. Blend until mostly smooth, adding water a tablespoon at a time to reach a thick but pourable consistency.
Coat the tofu. Toss the crispy tofu in the jalapeño sauce until evenly coated, reserving a small amount of sauce for drizzling over the finished bowls.
Assemble the bowls. Divide the rice between four bowls. Top each with the jalapeño-coated tofu, corn, black beans, sliced avocado, and red onion.
Finish and serve. Drizzle with the reserved jalapeño sauce, scatter fresh cilantro over the top, and serve with lime wedges alongside.
Pro Tips
Press the tofu thoroughly for the crispiest result — excess moisture prevents proper browning.
Deseed the jalapeños for a milder sauce, or leave the seeds and membranes in for significantly more heat.
Toss the tofu in the sauce just before serving to maintain maximum crispiness.
Taste the sauce before using and adjust the lime, maple syrup, or salt to balance the heat to your preference.
Why This Bowl Works So Well
This bowl balances heat, freshness, crunch, and richness in a single dish — the fiery jalapeño sauce is balanced by the cooling avocado, the crispy tofu is balanced by the soft rice and beans, and the bright lime cuts through the richness of everything else. This kind of deliberate balance across multiple sensory dimensions is what makes a bowl meal genuinely satisfying rather than simply a collection of ingredients in a dish.
Flavor Variations
Mango Jalapeño Bowls: Add diced fresh mango for a sweet contrast against the spicy tofu.
Cilantro Lime Rice Version: Toss the cooked rice with extra lime juice and chopped cilantro before assembling for a more vibrant base.
Extra Spicy Version: Leave the jalapeño seeds in and add a fresh serrano pepper to the sauce for serious heat.
Nutritional Highlights (Per Serving)
Calories
Protein
Carbs
Fiber
Fat
~420 kcal
18g
50g
11g
17g
Storage
Refrigerator: Store components separately for up to 4 days. The tofu is best reheated in a hot pan or air fryer to restore crispiness; assemble fresh with cold components like avocado added just before eating.
Sauce: The jalapeño sauce keeps in the refrigerator for up to 5 days and is excellent on tacos, grain bowls, or as a dip.
Freezer: The crispy tofu can be frozen for up to 1 month; reheat in an air fryer or oven before using.
Frequently Asked Questions
How spicy is this dish?
With seeds removed, the heat is moderate and approachable. Leaving seeds in or adding additional fresh chili significantly increases the heat for those who prefer it spicier.
Can I use a different protein instead of tofu?
Yes — tempeh or chickpeas work well with the same sauce and crisping technique.
Can I make this ahead for meal prep?
Yes — prepare all components and store separately, assembling fresh each day. The tofu reheats best in an air fryer to restore its crispy texture.
Tried this recipe? Leave a comment below and let us know how it turned out! Tag us on Instagram and Facebook — we love seeing your plant-powered creations. Looking for more vibrant vegan bowl and dinner recipes? Browse all recipes on Easy Vegan Recipes — new recipes posted every single week!
There are falafels that come out soft and pale and vaguely disappointing. And then there are falafels like this Air Fryer Falafel — the kind that come out of the air fryer shatteringly crispy on the outside, with a crust that genuinely shatters on the first bite, giving way to a vivid green, herb-packed, fluffy interior of such extraordinary freshness and depth that it rivals any falafel from any restaurant you have ever visited. This is that falafel. The one made from dried chickpeas rather than canned — the single most important decision in falafel making. The one that uses generous amounts of fresh herbs, garlic, and spices for a flavor so vivid and so aromatic that the kitchen smells extraordinary from the moment the mixture hits the processor.
This recipe uses the traditional method of soaking dried chickpeas overnight rather than using canned, which is non-negotiable for authentic falafel texture — canned chickpeas are too wet and produce a dense, heavy falafel that falls apart rather than the light, crispy exterior and airy, herb-flecked interior that defines a genuinely great falafel.
What makes this air fryer falafel so outstanding is how it delivers the authentic deep-fried falafel experience with a fraction of the oil — the circulating high heat of the air fryer produces an exterior crunch that is genuinely comparable to deep-frying, while the herb-loaded interior stays vivid green and perfectly textured.
This recipe is 100% vegan, naturally gluten-free, ready in about 30 minutes after soaking, and absolutely magnificent served in warm pita with tahini sauce, pickled vegetables, and fresh herbs.
Recipe Information
Soak Time
Prep Time
Cook Time
Total Time
Servings
Calories
Overnight
15 mins
15 mins
~8 hours
4
~280 kcal
Ingredients
For the Falafel
1½ cups (300g) dried chickpeas, soaked overnight in cold water (do NOT use canned)
1 small onion, roughly chopped
4 cloves garlic
1 cup (30g) fresh parsley, packed
½ cup (15g) fresh cilantro, packed
1½ tsp ground cumin
1 tsp ground coriander
½ tsp smoked paprika
¼ tsp cayenne pepper
1 tsp salt
½ tsp black pepper
1 tsp baking powder
2 tbsp chickpea flour or all-purpose flour (only if mixture is too wet)
2 tbsp olive oil for brushing
For the Tahini Sauce
4 tbsp tahini
3 tbsp lemon juice
1 clove garlic, finely grated
4–5 tbsp cold water to thin
Salt to taste
To Serve
Warm pita bread or flatbread
Shredded lettuce or cabbage
Sliced tomato and cucumber
Pickled red onion or turnip
Fresh parsley leaves
Extra tahini sauce drizzled over
Instructions
Soak the chickpeas. Place the dried chickpeas in a large bowl and cover with at least double their volume of cold water. Soak overnight or for a minimum of 12 hours. They will roughly double in size. Drain and rinse thoroughly before using.
Make the falafel mixture. Place the drained soaked chickpeas, onion, garlic, parsley, cilantro, cumin, coriander, smoked paprika, cayenne, salt, and pepper in a food processor. Pulse repeatedly — do not blend continuously — until the mixture resembles coarse, slightly crumbly sand with no whole chickpeas remaining but not so fine that it becomes a smooth paste. The texture should hold together when pressed but still feel slightly grainy. Add the baking powder and pulse twice to incorporate. If the mixture seems very wet, add 1–2 tablespoons of flour and pulse again.
Rest the mixture. Transfer to a bowl, cover, and refrigerate for 30 minutes if time allows — this resting period firms the mixture and makes shaping significantly easier.
Shape the falafel. Scoop heaped tablespoons of the mixture and shape into balls or flat patties approximately 4cm in diameter. Press firmly — they should hold their shape cleanly when placed on a surface.
Air fry until crispy. Preheat the air fryer to 375°F (190°C). Brush or spray the falafel generously with olive oil on all sides — this is essential for achieving the crispy exterior. Arrange in a single layer in the basket with space between each piece. Air fry for 12–15 minutes, flipping halfway, until deeply golden and shatteringly crispy on the outside.
Make the tahini sauce. Whisk together the tahini, lemon juice, and grated garlic. Add cold water a tablespoon at a time until the sauce reaches a smooth, drizzleable consistency. Season with salt.
Serve immediately. Serve the hot falafel in warm pita with tahini sauce, fresh vegetables, and herbs while the exterior is at its crispiest.
Pro Tips
Use dried soaked chickpeas only — this is the most important rule in falafel making and cannot be bypassed. Canned chickpeas contain too much moisture and produce falafel that is dense, gummy, and falls apart during cooking.
Pulse rather than blend — the food processor should produce a coarse, sandy mixture with visible texture rather than a smooth paste. Over-processing produces dense falafel; under-processing produces crumbly falafel that falls apart.
Brush generously with oil before air frying — without oil the exterior stays dry rather than crisping into the characteristic golden crust.
Do not overcrowd the basket — every piece needs direct exposure to circulating hot air. Work in batches if your air fryer is small.
Serve immediately — falafel softens as it cools and is at its peak crispiness within 10 minutes of cooking.
The History of Falafel
Falafel is one of the most ancient and most beloved street foods in the Middle East, with a history that stretches back centuries through the culinary traditions of Egypt, the Levant, and the broader Arab world. The precise origin is contested — Egypt, Israel, Lebanon, and Palestine all claim falafel as their own — but the preparation’s roots in the Coptic Christian tradition of Egypt, where it was made with fava beans as a meat substitute during Lent, are well-documented and widely accepted as the oldest form of the dish.
The word falafel is believed to derive from the Arabic word for pepper or spice, reflecting the generously seasoned nature of the preparation. As it spread through the Middle East and eventually the world, the fava bean original gave way to chickpeas as the primary ingredient in most regional traditions, and the preparation became one of the most widely eaten street foods on the planet — equally beloved in Jerusalem, Cairo, Beirut, Berlin, London, and New York.
This air fryer version honors every element of the traditional preparation — the dried chickpea base, the generous fresh herbs, the aromatics — while using modern technology to deliver the characteristic crispy exterior with significantly less oil than traditional deep frying.
Flavor Variations
Extra Herb Falafel: Double the parsley and add a handful of fresh mint for a more intensely green, herbaceous version.
Spicy Falafel: Increase the cayenne and add a diced fresh chili to the processor for a version with building heat throughout.
Beet Falafel: Add a small cooked beetroot to the processor for a dramatically pink falafel with a slightly sweeter, earthier flavor.
Nutritional Highlights (Per Serving — 4 falafel)
Calories
Protein
Carbs
Fiber
Fat
~280 kcal
12g
34g
9g
11g
Storage
Best fresh: Falafel is at its crispiest within 10 minutes of cooking. Serve immediately whenever possible.
Refrigerator: Store cooked falafel in an airtight container for up to 4 days. Reheat in the air fryer at 375°F (190°C) for 4–5 minutes to restore crispiness.
Freezer: Freeze uncooked shaped falafel on a tray until solid then transfer to a freezer bag for up to 2 months. Air fry directly from frozen, adding 3–4 extra minutes.
Mixture: The uncooked falafel mixture keeps in the refrigerator for up to 2 days before shaping and cooking — make a large batch and cook fresh portions daily.
Frequently Asked Questions
Can I bake these instead of air frying?
Yes — brush generously with oil and bake at 425°F (220°C) for 20–25 minutes, flipping halfway. The result is slightly less crispy than air fried but still excellent.
Why is my falafel falling apart?
Falafel that falls apart is almost always caused by using canned chickpeas instead of soaked dried chickpeas, or by over-processing to a paste rather than a coarse, sandy texture. The mixture should feel grainy and slightly crumbly but hold together firmly when pressed.
Can I make the mixture ahead?
Yes — the falafel mixture improves with overnight refrigeration as the flavors meld and the mixture firms. Make the mixture the night before and shape and cook fresh the next day for the best result.
Tried this recipe? Leave a comment below and let us know how it turned out! Tag us on Instagram and Facebook — we love seeing your plant-powered creations. Looking for more addictive vegan snack and appetizer recipes? Browse all recipes on Easy Vegan Recipes — new recipes posted every single week!
There are dinners you make because something needs to be on the table. And then there are dinners like this Tofu and Mushroom Cheezy Florentine — the kind that comes together in one pan, bubbling with a creamy, cheesy spinach sauce studded with golden mushrooms and tender tofu, deeply savory and satisfying enough to make anyone forget there is no dairy or eggs anywhere in the dish. This is that dinner. The one that turns a handful of simple ingredients into something that tastes genuinely indulgent. The one that gets requested again before the leftovers are even finished.
Florentine, in classical cooking, refers to dishes prepared with spinach, often bound in a rich, creamy sauce. This plant-based version combines that beloved spinach and cream pairing with seared mushrooms and pan-fried tofu, all brought together in a cashew-based cheese sauce that thickens beautifully and coats every component in deeply savory richness.
What makes this dish so outstanding is the layering of textures and flavors — crisp-edged tofu, deeply golden mushrooms, and silky wilted spinach all bound together in a sauce that tastes remarkably close to a classic cream and cheese florentine, without a trace of dairy.
This recipe is 100% vegan, naturally gluten-free, ready in about 35 minutes, and absolutely wonderful served over rice, pasta, or simply with crusty bread to soak up every bit of the sauce.
Recipe Information
Prep Time
Cook Time
Total Time
Servings
Calories
10 mins
25 mins
35 mins
4
~340 kcal
Ingredients
For the Tofu and Mushrooms
400g firm or extra firm tofu, pressed and cubed
250g mushrooms (cremini or button), sliced
2 tbsp olive oil, divided
1 tsp soy sauce
Salt and black pepper to taste
For the Cheezy Florentine Sauce
1 cup (130g) raw cashews, soaked in boiling water for 20 minutes then drained
1½ cups (360ml) vegetable broth
4 tbsp nutritional yeast
4 cloves garlic, minced
1 tbsp lemon juice
½ tsp onion powder
¼ tsp nutmeg
½ tsp salt
¼ tsp white pepper
For the Spinach
5 cups (150g) fresh spinach, roughly chopped
1 small onion, finely diced
Optional Add-ins
¼ tsp chili flakes for gentle heat
½ cup (60g) shredded vegan mozzarella stirred in at the end
Sun-dried tomatoes, chopped
To Serve
Crusty bread
Steamed rice or pasta
Fresh parsley, chopped
Instructions
Press and cube the tofu. Press the tofu for at least 10 minutes to remove excess water, then cut into 2cm cubes.
Sear the tofu. Heat 1 tablespoon of olive oil in a large skillet over medium-high heat. Add the tofu cubes and cook for 6–8 minutes, turning occasionally, until golden on most sides. Drizzle with soy sauce in the final minute of cooking. Remove and set aside.
Sear the mushrooms. In the same pan, heat the remaining oil and add the mushrooms in a single layer. Sear undisturbed for 2–3 minutes before stirring, then continue cooking for another 2–3 minutes until deeply golden. Season with salt and pepper and remove from the pan.
Cook the onion and spinach. Add the diced onion to the pan and cook for 3–4 minutes until softened. Add the spinach in batches, stirring until wilted, about 2–3 minutes total.
Make the cheese sauce. Blend the drained cashews, vegetable broth, nutritional yeast, garlic, lemon juice, onion powder, nutmeg, salt, and white pepper until completely smooth.
Combine everything. Pour the cashew sauce into the pan with the spinach and onion. Add the seared mushrooms and tofu back to the pan. Stir gently to combine and simmer for 4–5 minutes until the sauce has thickened slightly and everything is heated through.
Serve immediately. Garnish with fresh parsley and serve hot over rice, pasta, or with crusty bread.
Pro Tips
Press the tofu thoroughly before cooking to ensure it sears properly rather than steaming in the pan.
Sear the tofu and mushrooms separately to give each enough space to brown properly.
Blend the cashew sauce until completely smooth for the silkiest texture.
Taste and adjust seasoning generously, as the sauce needs to flavor the entire dish.
Why This Combination Works
Tofu provides protein and a satisfying bite once properly seared, mushrooms contribute deep umami richness, and spinach adds the classic florentine character along with color and nutrients. Bound together in a rich cashew cheese sauce, these components create a dish that is balanced in texture and deeply satisfying in flavor.
Flavor Variations
Florentine Pasta Bake: Toss the finished dish with cooked pasta and bake with a breadcrumb topping for a baked pasta version.
Spicy Florentine: Add chili flakes or a diced jalapeño for gentle heat throughout.
Mushroom Lovers Version: Double the mushrooms and use a mix of varieties for extra depth.
Nutritional Highlights (Per Serving)
Calories
Protein
Carbs
Fiber
Fat
~340 kcal
18g
18g
5g
22g
Storage
Refrigerator: Store in an airtight container for up to 4 days. Reheat gently on the stovetop, adding a splash of broth if the sauce has thickened too much.
Freezer: Freezes reasonably well for up to 2 months, though the tofu texture softens slightly after thawing.
Frequently Asked Questions
Can I use a different protein instead of tofu?
Yes — tempeh or chickpeas can be substituted for a different texture and flavor.
Can I make this without a blender?
Yes — use store-bought vegan cream cheese thinned with broth and seasoned with the same garlic and nutritional yeast as an alternative base.
Can I add pasta directly into this dish?
Yes — toss cooked pasta directly into the finished sauce for a complete one-pan meal.
Tried this recipe? Leave a comment below and let us know how it turned out! Tag us on Instagram and Facebook — we love seeing your plant-powered creations. Looking for more comforting vegan dinner recipes? Browse all recipes on Easy Vegan Recipes — new recipes posted every single week!
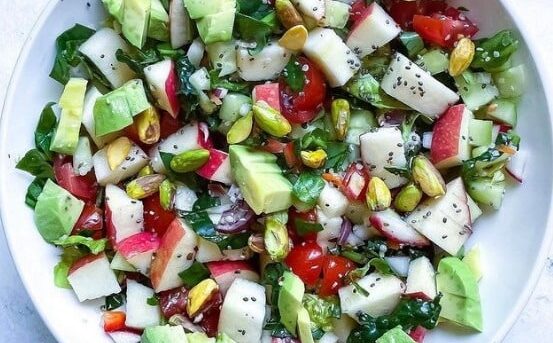
There are salads you make because something light is needed. And then there are salads like this Vegan Apple and Pistachio Salad — the kind that combines crisp, thinly sliced apple with crunchy toasted pistachios, peppery arugula, shaved fennel, and a bright lemon maple dressing into something so elegant and so perfectly balanced between sweet, crunchy, bitter, and bright that it feels genuinely special from the very first forkful. This is that salad. The one that looks effortlessly beautiful on the table. The one that is as appropriate at a weeknight dinner as it is at a dinner party. The one that proves a salad made with care and the right combination of ingredients is one of the most satisfying things you can eat.
This recipe builds the salad around the contrast between sweet, crisp apple and rich, buttery pistachios — two ingredients that complement each other so naturally that their combination has appeared in cuisines from the Middle East to Italy for centuries. Peppery arugula provides a bitter counterpoint that keeps the sweetness of the apple in check, shaved fennel adds anise-scented crunch and a beautiful visual texture, and a simple lemon maple dressing ties every element together with bright acidity and gentle sweetness.
What makes this salad so outstanding is its textural range — every single forkful delivers something different: the snap of fresh apple, the crunch of toasted pistachio, the tender bite of arugula, the thin crispness of shaved fennel — all dressed in a light, bright dressing that enhances rather than overwhelms.
This recipe is 100% vegan, naturally gluten-free, ready in just 15 minutes, and absolutely wonderful served as a starter, a side salad, or a light lunch alongside crusty bread.
Recipe Information
Prep Time
Cook Time
Total Time
Servings
Calories
15 mins
0 mins
15 mins
4
~220 kcal
Ingredients
For the Salad
2 medium crisp apples (Honeycrisp, Pink Lady, or Granny Smith), cored and thinly sliced
½ cup (65g) shelled pistachios, toasted
4 cups (80g) baby arugula or mixed greens
1 small fennel bulb, very thinly shaved (use a mandoline if available)
¼ small red onion, very thinly sliced
¼ cup (30g) vegan feta, crumbled (optional)
2 tbsp fresh mint leaves
For the Lemon Maple Dressing
3 tbsp extra virgin olive oil
2 tbsp fresh lemon juice
1 tsp maple syrup
1 tsp Dijon mustard
1 small clove garlic, very finely grated
Salt and black pepper to taste
Optional Add-ins
¼ cup (30g) dried cranberries for extra sweetness
2 tbsp toasted pumpkin seeds alongside the pistachios
Thinly sliced celery for extra crunch
A handful of fresh watercress in place of some of the arugula
Instructions
Toast the pistachios. Place the pistachios in a dry skillet over medium heat and toast for 2–3 minutes, stirring frequently, until lightly golden and fragrant. Watch carefully as they burn quickly. Transfer immediately to a plate to cool.
Make the dressing. In a small bowl whisk together the olive oil, lemon juice, maple syrup, Dijon mustard, and grated garlic until completely emulsified. Season generously with salt and pepper. Taste and adjust — it should be bright, slightly sweet, and well-rounded.
Prepare the apple. Core and slice the apple as thinly as possible — ideally 2–3mm slices. If preparing ahead, toss lightly with a teaspoon of extra lemon juice to prevent browning.
Assemble the salad. Spread the arugula across a large serving platter or in a wide bowl. Arrange the apple slices, shaved fennel, and red onion over the greens. Scatter the toasted pistachios, crumbled vegan feta if using, and fresh mint leaves over the top.
Dress and serve. Drizzle the lemon maple dressing over the salad just before serving. Toss gently at the table or serve undressed with the dressing alongside. Serve immediately.
Pro Tips
Slice the apple as thinly as possible — thin apple slices integrate beautifully with the greens and dressing while thick slices dominate and feel heavy.
Shave the fennel on a mandoline if available — paper-thin fennel shavings have a completely different, far more elegant texture than thicker hand-cut pieces.
Dress the salad immediately before serving — dressed arugula wilts quickly and loses its peppery freshness within minutes of being dressed.
Toast the pistachios even if they are already roasted — a brief dry toast in a hot pan dramatically intensifies their flavor and adds a warmth that raw pistachios lack.
Why Apple and Pistachio Work So Well Together
Apple and pistachio is one of the great natural flavor pairings — the clean, slightly tart sweetness of crisp apple and the rich, buttery, slightly sweet nuttiness of pistachio complement each other in a way that highlights the best qualities of both. Apple’s high acidity and water content provide freshness and lift against the richness of the nut, while pistachio’s fat content and complex flavor add depth and satisfaction to what might otherwise be an overly light combination. Together they create a pairing that feels simultaneously indulgent and refreshing — a quality that is rare and genuinely compelling in salad making.
Flavor Variations
Pear and Pistachio Salad: Replace the apple with thinly sliced ripe pear for a sweeter, more floral version that pairs particularly beautifully with vegan blue cheese.
Apple Walnut Salad: Replace the pistachios with toasted walnuts for a more classic autumn flavor combination.
Citrus Apple Pistachio Salad: Add segments of blood orange or navel orange alongside the apple for a citrus version with extraordinary color.
Nutritional Highlights (Per Serving)
Calories
Protein
Carbs
Fiber
Fat
~220 kcal
5g
22g
4g
14g
Storage
Best fresh: This salad is best assembled and dressed immediately before serving. The apple browns and the arugula wilts quickly once dressed.
Components: Store all components separately — greens, apple (tossed with lemon juice), toasted pistachios, and dressing — for up to 2 days and assemble fresh when ready to serve.
Dressing: The dressing keeps in a sealed jar in the refrigerator for up to 1 week. Shake well before using as it will separate during storage.
Frequently Asked Questions
What apple variety works best?
Crisp, firm apples with a balance of sweet and tart work best — Honeycrisp, Pink Lady, and Granny Smith are all excellent choices. Avoid soft, floury varieties like Red Delicious which lack the crunch that makes the salad so texturally interesting.
Can I make this salad ahead for a dinner party?
Yes — prepare all components in advance and store separately. Toast the pistachios, make the dressing, and slice the apple (tossed in lemon juice) up to a day ahead. Assemble and dress the salad at the table just before serving for the freshest result.
Can I use a different nut instead of pistachios?
Yes — toasted walnuts, pecans, or almonds all work well. Pistachios are specifically recommended for their distinctive green color and buttery flavor but any well-toasted nut produces a delicious result.
Tried this recipe? Leave a comment below and let us know how it turned out! Tag us on Instagram and Facebook — we love seeing your plant-powered creations. Looking for more addictive vegan snack and appetizer recipes? Browse all recipes on Easy Vegan Recipes — new recipes posted every single week!
There are takeout dishes you crave on a Friday evening when the week has been long and the thought of cooking feels impossible. And then there are dishes like this Vegan Orange Tofu — the kind that are so extraordinary, so vibrant, so deeply satisfying that they make you forget entirely that you ever wanted takeout in the first place, that fill the kitchen with the most intoxicating aroma of caramelizing citrus and soy and ginger as the sauce reduces in the pan, and that deliver a plate so beautiful — the glossy, burnished orange-glazed tofu cubes scattered over steamed rice with their lacquered surface catching the light — that you pause for a moment before eating simply to appreciate what you have made. This is that dish. The one that becomes your Friday night tradition. The one that is faster than any delivery, more delicious than any restaurant version, and so thoroughly, completely satisfying that the idea of ordering in seems almost absurd once you have made it.
This is crispy tofu at its absolute finest — extra firm tofu pressed until completely dry, cut into perfect cubes, coated lightly in cornstarch, and pan-fried in hot oil until every surface is a deep, shatteringly golden brown with a crust so crispy it audibly crunches when you bite through it — then tossed in a fresh orange sauce of such extraordinary brightness and complexity that it is simultaneously one of the simplest and most spectacular sauces in all of plant-based cooking. Fresh orange juice. Soy sauce. Fresh ginger. Garlic. Rice vinegar. Maple syrup. Sesame oil. A touch of cornstarch to thicken everything into a glossy, coating, restaurant-quality glaze that clings to every crispy cube of tofu in a lacquer of pure concentrated orange flavor that is sweet and tangy and savory and deeply, deeply delicious all at once.
What makes this recipe so genuinely outstanding is the double commitment to texture. The tofu is pressed for a minimum of 20 minutes to remove every drop of excess moisture — producing a cube that is dense, dry-surfaced, and primed for the cornstarch coating to adhere perfectly and create the extraordinary crust. The sauce is made separately and added to the already-crispy tofu only at the very end of cooking — preserving the crust rather than softening it during a long braise. The result is tofu that is crispy on the outside, tender on the inside, and coated in a sauce that clings rather than pools — every bite an extraordinary combination of textures and flavors that is simply, completely irresistible.
This recipe is 100% vegan, naturally gluten-free when made with tamari, ready in just 30 minutes, and absolutely spectacular served over steamed jasmine rice, brown rice, or cauliflower rice with steamed broccoli, bok choy, or snap peas alongside.
Recipe Information
Prep Time
Cook Time
Total Time
Servings
Calories
20 mins
15 mins
35 mins
4
~420 kcal
Ingredients
For the Crispy Tofu
2 blocks (800g total) extra firm tofu, pressed for minimum 20 minutes
4 tbsp cornstarch
1 tsp garlic powder
1 tsp salt
½ tsp white pepper
3 tbsp neutral oil (avocado oil or vegetable oil — high smoke point essential)
For the Orange Sauce
1 cup (240ml) fresh orange juice (from approximately 3–4 large oranges — fresh is non-negotiable)
Zest of 2 oranges
3 tbsp soy sauce or tamari
2 tbsp maple syrup or agave nectar
2 tbsp rice vinegar
1 tbsp sesame oil
4 cloves garlic, very finely minced
1 tbsp fresh ginger, peeled and very finely grated
1 tsp chili flakes or sriracha (optional — adds beautiful warmth)
2 tbsp cornstarch dissolved in 3 tbsp cold water (slurry for thickening)
Optional Add-ins
1 red bell pepper, cut into 1-inch pieces (add to pan with sauce)
1 cup (90g) broccoli florets, lightly steamed (toss in with tofu)
½ cup (75g) snap peas (add to pan with sauce)
2 spring onions, thinly sliced (garnish)
1 tsp black bean paste (adds extraordinary depth to sauce)
To Serve
Steamed jasmine rice or brown rice
Steamed broccoli, bok choy, or snap peas
Sesame seeds — white and black
Thinly sliced spring onions
Fresh red chili, thinly sliced
Orange slices for garnish
Extra sriracha for heat lovers
Instructions
Press the tofu — this step is non-negotiable. Remove the tofu from its packaging and drain completely. Wrap each block in several layers of clean kitchen towel or paper towel and place on a flat surface. Place a heavy cutting board, cast iron skillet, or stack of books on top and press for a minimum of 20 minutes — 30 minutes produces an even better result. The goal is to remove as much moisture as possible from the tofu — the drier the tofu the crispier the finished crust will be. After pressing unwrap and cut into 1-inch cubes. Pat the cut surfaces dry with additional paper towel.
Make the orange sauce. In a small bowl whisk together the fresh orange juice, orange zest, soy sauce, maple syrup, rice vinegar, sesame oil, minced garlic, grated ginger, and chili flakes until completely combined. Taste the sauce — it should be bright, tangy, sweet, savory, and intensely orange-forward. Adjust with additional maple syrup for sweetness, rice vinegar for tartness, or soy sauce for depth. In a separate small bowl mix the cornstarch with cold water until completely smooth to create the thickening slurry. Set both aside.
Coat the tofu in seasoned cornstarch. In a large bowl combine the cornstarch, garlic powder, salt, and white pepper. Add the pressed tofu cubes and toss gently but thoroughly until every surface of every cube is evenly coated in the seasoned cornstarch. The coating should be thin and uniform — shake off any excess. This cornstarch coating is what creates the extraordinary crispy crust and also helps the orange sauce adhere to the tofu rather than sliding off.
Pan-fry the tofu to golden perfection. Heat the neutral oil in a large non-stick skillet or wok over high heat until shimmering and almost smoking. Add the coated tofu cubes in a single layer — do not crowd the pan, work in two batches if necessary. Cook without touching for 2–3 minutes until the bottom is deeply golden and releases easily from the pan. Flip each cube and cook for a further 2 minutes. Continue turning until all four sides are deeply golden and shatteringly crispy — approximately 8–10 minutes total. Transfer to a plate lined with paper towel to drain briefly.
Make the sauce in the same pan. Pour off any excess oil from the skillet leaving approximately one teaspoon. Reduce the heat to medium and pour in the prepared orange sauce mixture. It will bubble and steam dramatically — stir immediately to incorporate any caramelized bits from the bottom of the pan. Cook for 2–3 minutes until the sauce has reduced slightly and is deeply fragrant. Add the cornstarch slurry — pour it in gradually while stirring continuously — and cook for a further 60–90 seconds until the sauce has thickened to a glossy, coating consistency that falls from a spoon in a slow, thick ribbon.
Toss the tofu in the sauce. Add the crispy tofu back to the pan with the thickened orange sauce and toss gently but quickly to coat every cube in the glossy, fragrant glaze. The tofu should be coated on all surfaces in a thin, even lacquer of orange sauce — not swimming in excess sauce. If adding bell pepper or snap peas add them now and toss for 60 seconds until just heated through and bright in color.
Serve immediately and beautifully. Divide steamed rice between four warmed bowls and spoon the orange-glazed tofu over the top in a generous, generous pile. Scatter sesame seeds over the top — both white and black for visual contrast. Add thinly sliced spring onions and fresh red chili. Arrange any steamed vegetables alongside or underneath the tofu. Finish with a small drizzle of sesame oil and serve immediately — the tofu is at its absolute crispiest and most extraordinary the moment it leaves the pan.
Pro Tips for the Most Extraordinary Vegan Orange Tofu
Press the tofu for longer than you think necessary. Twenty minutes is the minimum — thirty is better and forty is better still. The single most significant factor in achieving crispy, golden tofu rather than soft, pale tofu that steams rather than fries is the complete removal of surface and internal moisture before cooking. Every minute of pressing time is paid back with superior crispiness in the finished dish.
Use extra firm tofu and no other variety. Firm, silken, or soft tofu contains too much water to achieve the crispy crust this recipe requires. Extra firm tofu — the driest variety available — is the only suitable choice. Some brands sell pre-pressed or super-firm tofu that requires no pressing at all and produces an outstanding result straight from the packet.
Use fresh orange juice always. The difference between fresh-squeezed orange juice and carton orange juice in this sauce is significant and immediately apparent. Fresh orange juice has a brightness, a complexity, and a depth of citrus flavor that processed juice simply cannot replicate. Three to four large oranges produce the one cup of juice needed — the five minutes required to juice them is completely worth the result.
Add the sauce to already-crispy tofu. Never add the tofu to the sauce to cook together — this produces soft, sauce-saturated tofu that has lost every element of the crispy crust. Always make the sauce separately, thicken it in the pan, and toss the already-crispy tofu through it for the minimum time needed to coat it. Speed is everything in this final step.
Get the oil genuinely hot before adding the tofu. The oil must be almost smoking before the tofu goes in — this immediate, intense heat is what creates the crispy outer crust in the first 30 seconds of contact. Tofu added to insufficiently hot oil absorbs the oil rather than searing against it and produces a greasy, soft result rather than the shatteringly crispy crust this recipe achieves.
Do not move the tofu for the first 2–3 minutes. Place the coated tofu in the hot oil and leave it completely undisturbed for the first 2–3 minutes of cooking. Premature movement prevents the crust from forming and causes the tofu to stick to the pan. The tofu will release naturally from the pan surface when the crust has properly formed — if it resists, wait another 30 seconds.
The Extraordinary Versatility of Tofu in Plant-Based Cooking
Tofu is one of the most misunderstood and underestimated ingredients in the entire plant-based pantry — and this recipe represents perhaps the finest single argument for why it deserves to be reconsidered by anyone who has ever dismissed it as bland, soft, or unsatisfying.
Tofu is made from coagulated soy milk — a preparation that dates back over two thousand years in Chinese culinary history and that has been refined across centuries of East and Southeast Asian cooking into one of the most versatile, nutritionally impressive, and texturally remarkable ingredients available anywhere in the world. Extra firm tofu — the variety used in this recipe — is pressed during production to remove most of its water content, producing a dense, protein-rich block that responds to heat in ways that are entirely distinct from softer varieties.
When pressed, dried, coated in cornstarch, and cooked in very hot oil, extra firm tofu undergoes a remarkable transformation. The cornstarch coating creates a physical barrier that prevents moisture from escaping the tofu interior during frying — trapping steam inside and keeping the center tender and moist while the exterior dehydrates and crisps in the hot oil into a crust of extraordinary texture. The contrast between this shatteringly crispy exterior and the yielding, tender interior is one of the most satisfying textures in all of cooking and is what makes properly prepared crispy tofu such a compelling food experience.
Nutritionally extra firm tofu is one of the most impressive plant-based proteins available. A single serving in this recipe provides approximately 18 grams of complete protein — containing all nine essential amino acids in proportions that closely match the human body’s requirements — alongside meaningful amounts of calcium, iron, manganese, and selenium. It is also one of the few plant foods that provides isoflavones — phytoestrogen compounds that have been studied extensively for their potential protective effects against hormone-sensitive cancers, cardiovascular disease, and bone density loss.
Flavor Variations
Sticky Lemon Tofu: Replace the orange juice and zest with fresh lemon juice and lemon zest and reduce the maple syrup to one tablespoon for a brighter, sharper, more intensely citrusy version that is particularly spectacular with fresh dill and steamed asparagus alongside.
Honey Garlic Tofu: Replace the orange sauce with a sauce made from 3 tablespoons of vegan honey or maple syrup, 3 tablespoons of soy sauce, 6 cloves of minced garlic, and 1 tablespoon of rice vinegar for an intensely garlicky, sticky-sweet version that is one of the most addictive tofu preparations imaginable.
Spicy Orange Tofu: Double the chili flakes, add a tablespoon of gochujang, and reduce the maple syrup by half for a version with building, complex heat balanced by the bright orange — spectacular for anyone who loves intensely spiced food.
Orange Sesame Tofu: Add 2 tablespoons of tahini to the orange sauce and double the sesame oil for a richer, nuttier version with a beautiful sesame depth that pairs magnificently with toasted sesame seeds and a simple cucumber salad alongside.
Nutritional Highlights (Per Serving)
Calories
Protein
Carbs
Fiber
Fat
~420 kcal
22g
42g
3g
16g
At 420 calories per serving this dish delivers an outstanding nutritional profile — 22 grams of complete plant-based protein from the tofu, meaningful complex carbohydrates from the rice alongside, and an exceptional concentration of calcium, iron, and selenium from the tofu itself. The fresh orange juice and zest contribute an extraordinary amount of Vitamin C — a single cup of fresh orange juice provides over 100% of the daily recommended Vitamin C intake — alongside flavonoids including hesperidin and naringenin that have been studied for their antioxidant, anti-inflammatory, and cardiovascular protective properties. The ginger contributes gingerols with potent anti-inflammatory and digestive support properties. The sesame oil provides sesamin and sesamolin — unique lignans found almost exclusively in sesame that have been studied for their antioxidant and liver-protective properties.
Storage
Cooked orange tofu: Store in an airtight container in the refrigerator for up to 4 days. The tofu will lose some of its crispiness during storage as the sauce continues to absorb into the crust — this is expected and the flavor actually deepens and improves overnight. Reheat in a hot skillet with a small amount of oil for 3–4 minutes, or in an air fryer at 375°F (190°C) for 5 minutes, to restore some of the original crispiness.
Crispy tofu without sauce: For the finest meal prep result fry the tofu and store it separately from the sauce in the refrigerator for up to 4 days. Make the sauce fresh when serving and toss with re-crisped tofu for a result that is virtually indistinguishable from freshly made.
Orange sauce: The sauce stores beautifully in a sealed jar in the refrigerator for up to 1 week — make a double batch and use throughout the week as a stir-fry sauce, noodle sauce, or marinade for roasted vegetables. Shake well before each use as the sauce may separate slightly during storage.
Freezer: Crispy tofu without sauce freezes well for up to 2 months. Freeze in a single layer on a baking sheet until solid then transfer to a freezer bag. Reheat from frozen in a hot oven at 400°F (200°C) for 12–15 minutes until heated through and re-crisped before tossing with freshly made orange sauce.
Frequently Asked Questions
How do I get tofu extra crispy without deep frying?
The four keys to extraordinarily crispy pan-fried tofu are pressing thoroughly, coating in cornstarch, using very hot oil, and not moving the tofu for the first 2–3 minutes of cooking. Each of these steps is essential — skipping any one of them significantly reduces the crispiness of the finished result. An air fryer is an excellent alternative to pan frying — coat the pressed tofu in cornstarch and oil and air fry at 400°F (200°C) for 15–18 minutes, shaking halfway through, for an outstanding crispy result with significantly less oil.
Can I bake the tofu instead of frying it?
Yes — baking produces a less crispy but still excellent result. Toss the cornstarch-coated tofu in 2 tablespoons of oil and spread in a single layer on a lined baking sheet. Bake at 425°F (220°C) for 25–30 minutes, flipping once halfway through, until golden and firm on all surfaces. The baked version is significantly lighter in fat than the pan-fried version and still produces a tofu that is firm, flavorful, and holds its shape beautifully when tossed in the orange sauce.
Can I use a different protein instead of tofu?
Yes — this orange sauce is spectacular with virtually any plant-based protein. Tempeh — pressed and cubed — produces an outstanding result with a nuttier, more complex flavor than tofu. Seitan produces a particularly meaty, chewy result that is extraordinary for anyone who misses the texture of chicken in orange sauce. Cauliflower florets roasted until golden and then tossed in the orange sauce produce a lighter, vegetable-forward version that is beautiful in its own right.
Can I use bottled orange juice instead of fresh?
Fresh orange juice is strongly recommended for this recipe — its brightness, complexity, and depth of flavor are significantly superior to bottled juice in a sauce where orange is the primary and defining flavor. If fresh oranges are genuinely unavailable use a good quality not-from-concentrate orange juice rather than reconstituted concentrate which has a flat, one-dimensional flavor that produces a noticeably inferior sauce.
Is this recipe suitable for meal prep?
Yes — with the caveat that the tofu and sauce should be stored separately for the finest reheated result. The pressed and fried tofu stores in the refrigerator for up to 4 days and re-crisps beautifully in a hot pan or air fryer. The orange sauce stores in the refrigerator for up to a week. Combining them fresh at each meal — which takes under 5 minutes — produces a result that is virtually indistinguishable from freshly made.
How do I know when the tofu has been pressed enough?
Properly pressed tofu should feel noticeably denser and firmer than unpressed tofu — the blocks will be visibly smaller and the paper towels surrounding them will be saturated with extracted water. Press for a minimum of 20 minutes under significant weight. For the driest possible result — and the crispiest possible finished tofu — press for 30–40 minutes, replacing the paper towels once when they become saturated.
Tried this recipe? Leave a comment below and let us know how it turned out! Tag us on Instagram and Facebook — we love seeing your plant-powered creations. Looking for more vibrant, crispy vegan dinner and Asian-inspired recipes? Browse all recipes on Easy Vegan Recipes — new recipes posted every single week!
There are dips you make because something needs to be on the table. And then there are dips like this Chunky Asian Guacamole — the kind that takes the beloved chunky texture and richness of classic guacamole and gives it an entirely new character with sesame oil, fresh ginger, lime, and a hit of soy sauce, finished with crunchy peanuts and fresh cilantro. This is that dip. The one that surprises people on the first bite and then has them reaching for chip after chip. The one that turns a familiar favorite into something genuinely new.
This recipe keeps the classic technique of a great chunky guacamole — ripe avocado mashed only partially, leaving plenty of texture rather than blending smooth — but builds the seasoning around an Asian-inspired flavor profile of toasted sesame oil, fresh ginger, garlic, lime, and soy sauce, finished with crunchy roasted peanuts and fresh herbs for texture and brightness.
What makes this guacamole so outstanding is the contrast between the rich, creamy avocado and the bright, savory, slightly nutty seasoning blend, finished with the satisfying crunch of peanuts that makes every single scoop genuinely interesting.
This recipe is 100% vegan, naturally gluten-free when made with tamari, ready in just 15 minutes, and absolutely wonderful served with tortilla chips, wonton crisps, or fresh cucumber slices alongside.
Recipe Information
Prep Time
Cook Time
Total Time
Servings
Calories
15 mins
0 mins
15 mins
4
~210 kcal
Ingredients
For the Guacamole
4 ripe avocados
2 tbsp lime juice
1 tbsp soy sauce or tamari
1 tsp toasted sesame oil
1 tbsp fresh ginger, finely grated
2 cloves garlic, minced
2 spring onions, thinly sliced
¼ cup (15g) fresh cilantro, roughly chopped
¼ cup (35g) roasted peanuts, roughly chopped
Salt to taste
Optional Add-ins
½ small red chili, finely diced, for gentle heat
1 tsp rice vinegar for extra brightness
1 tbsp toasted sesame seeds scattered over the top
¼ cup (40g) finely diced mango for a sweet contrast
To Serve
Tortilla chips
Wonton crisps
Sliced cucumber
Rice crackers
Instructions
Prepare the avocado. Halve and pit the avocados, then scoop the flesh into a large bowl.
Mash with texture. Using a fork, mash the avocado only partially, leaving plenty of chunky pieces rather than mashing completely smooth.
Add the seasonings. Add the lime juice, soy sauce, sesame oil, grated ginger, and minced garlic to the bowl. Fold gently to combine without overmixing.
Fold in the rest. Gently fold in the spring onions, cilantro, and chopped peanuts, reserving a small amount of each for garnish.
Season and serve. Taste and add salt as needed. Transfer to a serving bowl, top with the reserved peanuts, cilantro, and spring onions, and serve immediately.
Pro Tips
Use ripe but firm avocados that yield gently to pressure for the best chunky texture.
Mash only partially, leaving visible chunks, for the most satisfying texture rather than a smooth puree.
Add the peanuts just before serving to keep them crunchy rather than softening in the mixture.
Taste before adding extra salt, as the soy sauce already contributes a fair amount of saltiness.
Why This Flavor Combination Works
Sesame oil and soy sauce bring deep, savory, slightly nutty notes that pair surprisingly well with the natural richness of avocado, while fresh ginger and garlic add brightness and depth that lime alone cannot achieve. The roasted peanuts echo the nuttiness of the sesame oil while adding essential crunch against the creamy avocado base.
Flavor Variations
Spicy Asian Guacamole: Add finely diced fresh chili or a drizzle of chili oil for building heat.
Mango Asian Guacamole: Fold in finely diced fresh mango for a sweet, tropical contrast.
Crispy Shallot Topping: Top with store-bought or homemade crispy fried shallots for extra crunch and flavor.
Nutritional Highlights (Per Serving)
Calories
Protein
Carbs
Fiber
Fat
~210 kcal
4g
12g
7g
18g
Storage
Refrigerator: Store in an airtight container with plastic wrap pressed directly onto the surface to limit browning, for up to 1 day.
Best fresh: Like all guacamole, this is best enjoyed the day it is made, as avocado browns over time even with proper storage.
Frequently Asked Questions
Can I make this without peanuts?
Yes — substitute toasted cashews or sunflower seeds for a similar crunch without peanuts.
How do I keep guacamole from browning?
Press plastic wrap directly onto the surface of the guacamole before refrigerating, and add a thin layer of extra lime juice on top before covering.
Can I make this ahead for a party?
Guacamole is best made as close to serving time as possible. If you need to prepare ahead, make it up to a few hours in advance and store with plastic wrap pressed directly on the surface.
Tried this recipe? Leave a comment below and let us know how it turned out! Tag us on Instagram and Facebook — we love seeing your plant-powered creations. Looking for more addictive vegan dip and appetizer recipes? Browse all recipes on Easy Vegan Recipes — new recipes posted every single week!
There are noodle soups that warm you. And then there are noodle soups like this Vegan Balinese Laksa — the kind that fills the kitchen with the most extraordinary aroma of toasted lemongrass, galangal, and kaffir lime as the spice paste blooms in hot oil, that pours into the bowl a deeply golden, coconut-rich broth of such extraordinary fragrance and complexity that it stops you before the first spoonful and makes you simply breathe it in for a moment. This is that laksa. The one that transports you. The one that makes every other noodle soup taste straightforward by comparison. The one that proves plant-based cooking is not about simplifying cuisine but about honoring it entirely.
Laksa is one of the great noodle soups of Southeast Asia — a preparation of such extraordinary depth and aromatic complexity that it has become beloved far beyond its regional origins, with regional variations found throughout Malaysia, Singapore, Indonesia, and beyond. Balinese laksa draws on the island’s distinctive spice tradition — richer in fresh aromatics, warmer in spice, and more coconut-forward than many other regional versions — producing a soup that is simultaneously lighter and more fragrant than the heavier Malay laksa styles.
This vegan version builds the characteristic aromatic laksa paste from scratch using lemongrass, galangal, shallots, garlic, candlenuts, and chili, simmered in rich coconut milk into a broth of extraordinary richness and depth, served over rice noodles with crispy tofu, bean sprouts, and fresh herbs that bring lightness and contrast to the deeply savory, fragrant broth.
What makes this laksa so outstanding is the paste — making it from scratch rather than using a commercial laksa paste produces a broth of dramatically superior freshness and complexity, with each aromatic contributing its specific character to the whole rather than the homogenized, preservative-tinged flavor of any jar.
This recipe is 100% vegan, naturally gluten-free when made with tamari, ready in about 50 minutes, and absolutely magnificent served immediately while the broth is at its most fragrant and the noodles are perfectly tender.
Recipe Information
Prep Time
Cook Time
Total Time
Servings
Calories
20 mins
30 mins
50 mins
4
~480 kcal
Ingredients
For the Laksa Paste
3 stalks lemongrass, white part only, roughly chopped
3cm piece galangal or fresh ginger, peeled and roughly chopped
4 shallots, roughly chopped
4 cloves garlic
3 dried red chilies, soaked in hot water for 10 minutes (or 1 tsp chili flakes)
4 candlenuts or macadamia nuts (for body and richness)
1 tsp ground turmeric
1 tsp ground coriander
½ tsp ground cumin
1 tsp shrimp paste substitute — use 1 tbsp white miso + 1 tsp soy sauce
2 tbsp neutral oil for blending the paste
For the Laksa Broth
2 cans (800ml) full-fat coconut milk
2 cups (480ml) vegetable broth
2 kaffir lime leaves
1 tsp sugar or maple syrup
1 tbsp soy sauce or tamari
Salt to taste
1 tbsp lime juice (added at the very end)
For the Toppings and Noodles
300g dried rice noodles, cooked according to package instructions
400g firm tofu, pressed, cubed, and pan-fried until golden
2 cups (200g) bean sprouts
4 spring onions, thinly sliced
½ cup (30g) fresh cilantro, roughly chopped
Fresh mint leaves
2 limes, cut into wedges
Chili oil or fresh sliced chili for heat
Optional Toppings
Crispy fried shallots scattered over the top
Vegan fish sauce substitute (soy sauce with nori) for extra depth
Sliced cucumber for freshness
Hard set tofu scramble as an egg substitute
Instructions
Make the laksa paste. Place the lemongrass, galangal, shallots, garlic, soaked chilies, candlenuts, turmeric, coriander, cumin, miso mixture, and oil in a food processor or blender. Blend for 2–3 minutes, scraping down the sides repeatedly, until a smooth, fragrant paste forms. The paste should be completely smooth with no large fibrous pieces remaining — particularly important for the lemongrass which can remain stringy if under-processed.
Cook the paste. Heat a large, wide pot over medium heat. Add the laksa paste directly to the dry pot and cook for 5–6 minutes, stirring continuously, until the paste has darkened slightly, the oil has begun to separate around the edges, and the kitchen smells extraordinarily fragrant. This cooking step is essential — raw paste produces a harsh, unintegrated flavor; properly cooked paste produces depth and sweetness.
Build the broth. Add both cans of coconut milk and the vegetable broth to the cooked paste. Add the kaffir lime leaves, sugar, and soy sauce. Stir well to combine. Bring to a gentle simmer — not a vigorous boil, which can cause coconut milk to separate — and cook for 15 minutes, stirring occasionally, until the broth has deepened in color and aroma and the flavors have fully integrated.
Prepare the toppings. While the broth simmers, prepare the noodles according to package instructions, pan-fry the cubed tofu until golden and crispy on all sides, and arrange all toppings in individual bowls or on a large platter for table-side serving.
Finish the broth. Remove and discard the kaffir lime leaves. Add the lime juice and taste the broth — adjust with additional soy sauce for saltiness, lime for acidity, sugar for sweetness, or chili oil for heat. The broth should taste deeply complex, fragrant, slightly sweet, and warmly spiced with a pronounced coconut richness.
Assemble and serve. Divide the cooked noodles between warmed bowls. Ladle the hot laksa broth generously over the noodles. Top with the crispy tofu, bean sprouts, spring onions, fresh cilantro, and mint. Serve immediately with lime wedges, chili oil, and extra soy sauce alongside for individual seasoning at the table.
Pro Tips
Blend the paste until genuinely smooth — lemongrass is fibrous and requires extended blending to break down completely. Stopping before the paste is truly smooth produces a stringy, unpleasant texture in the finished broth.
Cook the paste until the oil separates — this signals that the water content has cooked off and the aromatic compounds have been properly released and concentrated. It is the moment the paste transforms from raw and harsh to sweet, complex, and fragrant.
Simmer the broth gently — vigorous boiling causes coconut milk to separate into grainy curds rather than remaining as a smooth, silky emulsion. Keep the heat at the lowest simmer that maintains gentle movement.
Add lime juice at the very end off the heat — citrus added during cooking loses its bright, volatile aromatic compounds rapidly and contributes only sourness without fragrance.
Prepare everything before serving — laksa is a last-minute assembly dish. Have the noodles cooked, the tofu ready, and all toppings prepared before the broth is finished so everything can be assembled and served at its best temperature.
The Story of Laksa
Laksa is one of the most iconic dishes of the Malay Archipelago — a noodle soup of extraordinary regional diversity that reflects the layered cultural and culinary history of Southeast Asia. The word laksa is believed to derive either from the Sanskrit word for “many” (referring to the many ingredients in the dish) or from the Persian word for “noodle,” reflecting the complex trading history of the region that brought Persian, Indian, Chinese, and indigenous Malay influences into contact over centuries of maritime trade.
Balinese laksa — sometimes called Soto Bali or Balinese soto — reflects the distinct culinary character of Bali, where Hindu cultural traditions have shaped a cuisine that is simultaneously richer in fresh aromatics and more vibrant in spice than much of the surrounding Indonesian archipelago. Balinese cooking places extraordinary emphasis on fresh spice pastes called basa gede or bumbu Bali — complex mixtures of lemongrass, galangal, shallot, garlic, candlenut, and chili that form the aromatic foundation of virtually every significant dish in the tradition.
This vegan version replaces the traditional shrimp paste with a combination of white miso and soy sauce that replicates its fermented, deeply savory character without any animal products, and omits any animal protein in favor of crispy tofu that absorbs the extraordinary laksa broth beautifully during the brief time it spends in the bowl before the first spoonful.
Flavor Variations
Extra Spicy Laksa: Add additional dried chilies to the paste and finish with a generous drizzle of chili oil at serving for a version with serious building heat.
Tempeh Laksa: Replace the crispy tofu with pan-fried tempeh for a meatier, earthier protein with a nuttier flavor that pairs particularly well with the coconut broth.
Mushroom Laksa: Add a handful of shiitake or king oyster mushrooms to the broth during the final 5 minutes of simmering for extra umami depth and a more substantial broth.
Nutritional Highlights (Per Serving)
Calories
Protein
Carbs
Fiber
Fat
~480 kcal
18g
52g
5g
24g
Storage
Broth only: The laksa broth stores beautifully in the refrigerator for up to 4 days and freezes well for up to 3 months — store separately from the noodles and toppings and assemble fresh each time.
Noodles: Store cooked noodles separately, tossed with a tiny drizzle of oil to prevent sticking, for up to 2 days.
Do not store assembled: Assembled laksa should not be stored — the noodles absorb the broth and become bloated and mushy. Always store components separately and assemble fresh.
Laksa paste: The raw laksa paste stores in the refrigerator for up to 1 week and freezes beautifully for up to 3 months — freeze in tablespoon-sized portions for easy single-serving use.
Frequently Asked Questions
Can I use store-bought laksa paste instead of making from scratch?
Yes — several brands produce vegan laksa paste that works well as a shortcut, reducing the total cooking time significantly. Check the label carefully as many commercial laksa pastes contain shrimp paste. Use approximately 3–4 tablespoons in place of the homemade paste.
What can I use instead of galangal?
Fresh ginger is the most widely available substitute and produces a good result with a slightly sharper, less piney flavor than galangal. Use the same quantity. Galangal is available fresh or frozen at Asian grocery stores and is worth seeking out for the most authentic flavor.
What are kaffir lime leaves and where do I find them?
Kaffir lime leaves are the aromatic leaves of the kaffir lime tree, with a distinctive citrusy, slightly floral fragrance that is impossible to replicate with any substitute. They are available fresh or frozen at Asian grocery stores and many health food stores. If unavailable, add extra lime zest to the broth, though the character will be different.
Tried this recipe? Leave a comment below and let us know how it turned out! Tag us on Instagram and Facebook — we love seeing your plant-powered creations. Looking for more addictive vegan snack and appetizer recipes? Browse all recipes on Easy Vegan Recipes — new recipes posted every single week!
There are soups you make because something warm is needed. And then there are soups like this Vegan Creamy Potato Sausage Soup — the kind that comes together in a single pot in under forty minutes, filling the kitchen with the most extraordinary aroma of caramelized onion, garlic, and smoked paprika, thickening slowly around tender chunks of potato and sliced vegan sausage into a creamy, deeply savory broth that is one of the most genuinely comforting things you will eat all winter. This is that soup. The one that makes cold evenings feel genuinely warm. The one that gets requested again the very next week without fail.
This recipe builds a creamy, substantial soup around vegan sausage, potato, and a cashew-based cream that produces a thick, rich, almost chowder-like broth without a drop of dairy. Kale or spinach stirred in at the end adds freshness, color, and nutrition alongside a splash of lemon juice that brightens the entire bowl beautifully.
What makes this soup so outstanding is the vegan sausage — sliced and browned in the pot before building the soup around it, producing caramelized, slightly charred sausage pieces that release their smoky, savory flavor into every element of the surrounding broth.
This recipe is 100% vegan, naturally gluten-free when made with gluten-free sausage, ready in just 40 minutes, and absolutely magnificent served with crusty bread for soaking up every last drop of the creamy broth.
Recipe Information
Prep Time
Cook Time
Total Time
Servings
Calories
10 mins
30 mins
40 mins
6
~360 kcal
Ingredients
For the Soup
400g vegan sausages, sliced into rounds
800g potatoes, peeled and diced into 2cm cubes
1 large onion, finely diced
4 cloves garlic, minced
2 stalks celery, sliced
2 tbsp olive oil
4 cups (960ml) vegetable broth
2 cups (60g) kale or spinach, roughly chopped
1 tbsp lemon juice
1 tsp smoked paprika
1 tsp dried thyme
Salt and black pepper to taste
For the Cashew Cream
¾ cup (100g) raw cashews, soaked in boiling water for 20 minutes then drained
1 cup (240ml) water or vegetable broth
2 tbsp nutritional yeast
Salt to taste
Optional Add-ins
1 cup (150g) frozen corn, added with the potatoes
¼ tsp chili flakes for gentle heat
A splash of white wine added after the garlic
To Serve
Crusty bread
Extra black pepper
Fresh parsley, chopped
A drizzle of olive oil
Instructions
Brown the sausage. Heat 1 tablespoon of olive oil in a large pot over medium-high heat. Add the sliced vegan sausage and cook for 3–4 minutes, stirring occasionally, until golden and caramelized on both sides. Remove and set aside.
Build the aromatics. Add the remaining olive oil to the same pot over medium heat. Add the onion and celery and cook for 5–6 minutes until softened and golden. Add the garlic, smoked paprika, and thyme and cook for 60 seconds until fragrant.
Add potatoes and broth. Add the diced potatoes and vegetable broth. Bring to a boil then reduce to a simmer and cook for 15–18 minutes until the potatoes are completely tender.
Make the cashew cream. While the soup simmers, blend the drained cashews with the water or broth and nutritional yeast until completely smooth.
Add the cream and sausage. Pour the cashew cream into the simmering soup and stir to combine. Return the browned sausage to the pot. Simmer for 3–4 minutes until the broth has thickened and everything is heated through.
Add the greens and finish. Add the kale or spinach and stir until wilted, about 2–3 minutes. Add the lemon juice and season generously with salt and pepper. Taste and adjust.
Serve immediately. Ladle into bowls and serve hot with crusty bread alongside.
Pro Tips
Brown the sausage before building the soup — the caramelization produces a deeper, more complex flavor that permeates the entire broth during cooking.
Blend the cashew cream until completely smooth for the silkiest result — any graininess will be noticeable in the finished soup.
Add the greens in the final few minutes of cooking to keep them vibrant and slightly textured rather than overcooked and grey.
The lemon juice added at the end is non-negotiable — it lifts and brightens the entire creamy broth dramatically.
Why This Soup Is So Satisfying
This soup hits multiple satisfaction triggers simultaneously — the creaminess of the cashew broth, the hearty substance of the potato, the savory, smoky punch of the browned sausage, and the freshness of the kale and lemon. Together these elements create a bowl that satisfies on every dimension, which is why soups like this feel so genuinely comforting rather than merely filling.
Flavor Variations
Spicy Sausage Potato Soup: Add chili flakes and a diced jalapeño for a spicier version with building heat.
White Bean Potato Soup: Add a can of white beans alongside the potatoes for extra protein and fiber.
Smoky Chipotle Version: Add a tablespoon of chipotle in adobo sauce for a smoky, slightly spicy depth.
Nutritional Highlights (Per Serving)
Calories
Protein
Carbs
Fiber
Fat
~360 kcal
14g
38g
5g
17g
Storage
Refrigerator: Store in an airtight container for up to 4 days. Reheat gently on the stovetop, adding a splash of broth if the soup has thickened too much during storage.
Freezer: Freezes well for up to 3 months. Thaw overnight in the refrigerator and reheat gently on the stovetop.
Meal prep: This soup is an outstanding meal prep option — it reheats beautifully and the flavors deepen during storage.
Frequently Asked Questions
What vegan sausage works best?
Any vegan sausage with a firm, sliceable texture works well — look for varieties with a smoky or Italian-style seasoning for the most complementary flavor. Both soy-based and pea protein-based vegan sausages produce excellent results.
Can I make this without cashews?
Yes — use a full-fat coconut cream or a store-bought vegan cream as a direct substitute in the same quantity.
Can I use sweet potato instead of regular potato?
Yes — sweet potato adds a natural sweetness and a beautiful color to the broth that pairs particularly well with smoked sausage.
Tried this recipe? Leave a comment below and let us know how it turned out! Tag us on Instagram and Facebook — we love seeing your plant-powered creations. Looking for more comforting vegan soup and dinner recipes? Browse all recipes on Easy Vegan Recipes — new recipes posted every single week!
There are snacks you make because something crispy is needed. And then there are snacks like these Crispy Sour Cream and Onion Chick’n Tofu Nuggets — the kind that come out of the oil or air fryer shatteringly golden, with a tangy, savory sour cream and onion coating that makes them taste like your favorite potato chip flavor transformed into the most satisfying bite-sized nugget imaginable. This is that snack. The one that disappears the moment it hits the plate. The one that has both kids and adults reaching for one more.
This recipe marinates pressed tofu in a tangy buttermilk-style brine flavored with onion and garlic powder, then double-coats it in a seasoned flour mixture loaded with sour cream and onion seasoning before frying or air frying to a deeply crispy, golden exterior with a tender, juicy interior. The result is a nugget that captures the iconic sour cream and onion flavor in genuinely crunchy, craveable form.
What makes these nuggets so outstanding is the marinating step — soaking the pressed tofu in a tangy, seasoned plant milk brine before coating allows the flavor to penetrate the tofu itself rather than sitting only on the surface, producing nuggets that taste deeply seasoned throughout rather than only on the crust.
This recipe is 100% vegan, ready in about 40 minutes including marinating time, and absolutely wonderful served hot with extra dipping sauce alongside.
Recipe Information
Prep Time
Marinate Time
Cook Time
Total Time
Servings
Calories
15 mins
15 mins
12 mins
42 mins
4
~310 kcal
Ingredients
For the Tofu and Marinade
450g extra firm tofu, pressed and cut into nugget-sized pieces
1 cup (240ml) plant milk
1 tbsp apple cider vinegar
1 tsp onion powder
½ tsp garlic powder
½ tsp salt
For the Sour Cream and Onion Coating
1½ cups (180g) all-purpose flour
2 tbsp cornstarch
2 tbsp dried onion flakes, finely crushed
1½ tsp onion powder
1 tsp garlic powder
1 tsp citric acid or 1 tbsp nutritional yeast (for the tangy “sour cream” note)
1 tsp salt
½ tsp black pepper
For Frying
3 cups (720ml) neutral vegetable oil (for deep frying), or oil spray for air frying
For the Dipping Sauce
½ cup (120g) vegan sour cream
1 tbsp fresh chives, finely chopped
1 tsp lemon juice
Pinch of salt
Instructions
Press the tofu. Press the tofu for at least 15 minutes to remove as much water as possible — this is essential for the nuggets to absorb the marinade and crisp properly. Cut into bite-sized nugget shapes.
Make the marinade and soak. Whisk together the plant milk, apple cider vinegar, onion powder, garlic powder, and salt in a shallow dish. Add the tofu pieces and let marinate for 15 minutes, turning once halfway.
Make the coating. In a wide shallow dish whisk together the flour, cornstarch, crushed onion flakes, onion powder, garlic powder, citric acid or nutritional yeast, salt, and pepper.
Coat the nuggets. Remove a tofu piece from the marinade, letting excess drip off, and dredge thoroughly in the seasoned flour, pressing to coat well on all sides. Repeat with all pieces, placing them on a wire rack as you go.
Fry or air fry. For deep frying, heat the oil to 350°F (175°C) and fry the nuggets in batches for 3–4 minutes until deeply golden and crispy, draining on a wire rack. For air frying, spray the coated nuggets generously with oil and air fry at 390°F (200°C) for 10–12 minutes, shaking halfway, until golden and crispy.
Make the dipping sauce. Whisk together the vegan sour cream, fresh chives, lemon juice, and salt until smooth.
Serve immediately. Serve the hot nuggets with the dipping sauce while at their crispiest.
Pro Tips
Press the tofu thoroughly before marinating — well-pressed tofu absorbs the marinade more effectively and crisps better during cooking.
The citric acid or nutritional yeast in the coating is what mimics the tangy character of classic sour cream and onion seasoning — do not skip both.
Press the flour coating firmly onto each piece of tofu for the thickest, craggiest, most satisfying crust.
Maintain oil temperature throughout frying and work in small batches to avoid greasy results.
Why Sour Cream and Onion Flavor Works So Well Here
The classic sour cream and onion flavor profile relies on a balance of tangy acidity, savory onion, and a hint of garlic — a combination that has proven enduringly popular in snack foods for decades because it satisfies the palate’s craving for both tang and savory depth simultaneously. Applying this same flavor profile to a crispy fried nugget translates the appeal of a favorite chip flavor into a more substantial, satisfying format.
Flavor Variations
Spicy Sour Cream and Onion Nuggets: Add cayenne pepper and chili flakes to the coating for a spicy version.
BBQ Coated Nuggets: Replace the sour cream and onion coating with a smoky barbecue seasoning blend for a different flavor profile.
Ranch Tofu Nuggets: Replace the onion-forward seasoning with dried dill, parsley, and extra garlic for a ranch-flavored version.
Nutritional Highlights (Per Serving)
Calories
Protein
Carbs
Fiber
Fat
~310 kcal
14g
28g
2g
16g
Storage
Best fresh: These nuggets are at their crispiest within 10 minutes of cooking. Serve immediately whenever possible.
Refrigerator: Store cooked nuggets in an airtight container for up to 3 days. Reheat in an air fryer at 375°F (190°C) for 5 minutes to restore crispiness.
Freezer: Freeze cooked, cooled nuggets in a single layer for up to 1 month. Reheat from frozen in an air fryer or oven until crispy and heated through.
Frequently Asked Questions
Can I bake these instead of frying or air frying?
Yes — bake at 425°F (220°C) for 18–20 minutes, flipping halfway, on a wire rack set over a baking sheet for even crisping on both sides.
What is citric acid and where do I find it?
Citric acid is a sour, tangy powder available in the baking or canning section of most grocery stores, used to mimic the tangy “sour cream” flavor in seasoning blends. Nutritional yeast with a squeeze of extra lemon juice in the dipping sauce can be used as an alternative if citric acid is unavailable.
Can I make these gluten-free?
Yes — use a gluten-free flour blend with cornstarch for the coating, and check that the dried onion flakes have no gluten-containing additives.
Tried this recipe? Leave a comment below and let us know how it turned out! Tag us on Instagram and Facebook — we love seeing your plant-powered creations. Looking for more crispy, crave-worthy vegan snack recipes? Browse all recipes on Easy Vegan Recipes — new recipes posted every single week!
There are meals you make because dinner is needed. And then there are meals like these Spicy Tomato Sushi Rolls with Forbidden Rice — the kind that arrive on the board as sixteen dramatic, jewel-like rounds of deep purple-black forbidden rice wrapped around a vivid filling of spicy marinated tomato, creamy avocado, and fresh greens, so visually extraordinary that people stop and stare before they reach for one. This is that meal. The one that looks like it belongs on the table of a fine dining restaurant and is made entirely in your own kitchen. The one that proves plant-based cooking is not just nourishing but genuinely, breathtakingly beautiful.
These inside-out sushi rolls use cooked forbidden rice — the striking deep purple-black short grain rice that turns the entire roll into something visually dramatic — seasoned with rice vinegar, sugar, and salt in the traditional sushi rice manner, then rolled outside-in around a filling of roma tomatoes marinated in sesame oil, soy sauce, and chili until they take on a rich, deeply savory, slightly spicy character, with layers of ripe avocado and fresh greens that add creaminess and brightness to every single piece.
What makes these rolls so outstanding is the forbidden rice — its natural deep purple-black pigment from anthocyanins produces a color so dramatic against the vivid red tomato and green avocado filling that each sliced roll is a genuinely beautiful thing, making this one of the most visually impressive plant-based dishes in the entire collection.
This recipe is 100% vegan, naturally gluten-free when made with tamari, ready in about 60 minutes, and absolutely magnificent arranged on a board and served with pickled ginger, wasabi, and a small bowl of soy sauce alongside.
Recipe Information
Prep Time
Cook Time
Total Time
Servings
Calories
30 mins
30 mins
60 mins
4
~380 kcal
Ingredients
For the Forbidden Rice
1½ cups (300g) black forbidden rice
2 cups (480ml) water
3 tbsp rice vinegar
1 tbsp sugar
1 tsp salt
For the Spicy Marinated Tomato Filling
4 roma tomatoes, deseeded and cut into long strips
2 tbsp soy sauce or tamari
1 tbsp sesame oil
1 tbsp rice vinegar
1 tsp sriracha or chili garlic sauce
1 tsp maple syrup
½ tsp smoked paprika
For the Roll Filling
2 ripe avocados, sliced into long strips
1 cup (30g) fresh spinach, watercress, or microgreens
½ cucumber, cut into thin matchsticks
4 nori sheets
For Serving
Soy sauce or tamari for dipping
Pickled ginger
Wasabi paste
Sesame seeds scattered over the finished rolls
Edible flowers for garnish (optional — as shown)
Instructions
Cook the forbidden rice. Rinse the black rice thoroughly until the water runs less purple. Combine with 2 cups of water in a saucepan, bring to a boil, reduce to the lowest simmer, cover, and cook for 30–35 minutes until the water is absorbed and the rice is tender. Remove from heat and let steam covered for 10 minutes. Transfer to a wide bowl.
Season the rice. In a small bowl dissolve the sugar and salt in the rice vinegar by whisking or warming briefly. Pour over the warm rice and fold through gently with a rice paddle or spatula until evenly seasoned. Fan the rice gently as you fold to help it cool — seasoned sushi rice should be used at body temperature, not hot. Cover with a damp towel while preparing the filling.
Marinate the tomatoes. Combine the soy sauce, sesame oil, rice vinegar, sriracha, maple syrup, and smoked paprika in a shallow dish. Add the tomato strips and toss gently to coat. Marinate for 15 minutes — the tomatoes absorb the marinade and take on a deeply savory, spicy character that replicates the umami depth of traditional sushi fillings.
Prepare the rolling station. Place a bamboo sushi mat on a clean surface and cover with plastic wrap — this prevents the rice from sticking to the mat during inside-out rolling. Fill a small bowl with water for wetting your hands.
Build the inside-out roll. Place a sheet of nori shiny-side down on the plastic-wrapped mat. With wet hands, spread a thin, even layer of forbidden rice over the entire nori sheet, pressing gently to adhere. The rice layer should be approximately 5mm thick — thin enough to roll cleanly, thick enough to hold the filling.
Flip the nori. Carefully flip the entire nori sheet rice-side down onto the plastic wrap so the rice is now on the outside and the nori is facing up. This is the inside-out configuration that puts the dramatic black rice on the exterior.
Add the filling. Arrange a line of marinated tomato strips, avocado slices, fresh greens, and cucumber along the bottom third of the now-upward-facing nori.
Roll tightly. Using the mat, lift the bottom edge and roll firmly and tightly over the filling, pressing as you go to maintain a compact, even cylinder. Continue rolling to the far edge, pressing firmly at the end to seal.
Slice and serve. Using a very sharp knife dipped in water and wiped between each cut, slice each roll into 8 even pieces. Arrange on a board, scatter sesame seeds over the top, add edible flowers if using, and serve immediately with soy sauce, pickled ginger, and wasabi alongside.
Pro Tips
Wet your hands thoroughly before handling the rice — forbidden rice is stickier than white sushi rice and sticks to dry hands, tearing the nori and disrupting the even layer.
Use the rice at body temperature — hot rice tears the nori; cold rice does not adhere properly. Body temperature is the traditional sushi rice standard and produces the cleanest rolling experience.
Cover the mat with plastic wrap before rolling — this is essential for inside-out rolls and prevents the rice from sticking to the mat surface.
Use a very sharp knife and wipe between every cut — forbidden rice is stickier than white rice and requires a clean, sharp blade to slice without dragging the filling out of the roll.
Pat the marinated tomato strips gently dry before placing in the roll — excess marinade makes the roll too wet and can cause it to fall apart during slicing.
Why Forbidden Rice Makes This Dish So Spectacular
Forbidden rice — also known as black rice or purple rice — gets its dramatic deep purple-black color from anthocyanins, the same group of pigments that give blueberries, purple cabbage, and acai their distinctive colors. These pigments are powerful antioxidants, making forbidden rice not only visually extraordinary but also one of the most antioxidant-rich rice varieties available.
The name “forbidden” derives from ancient China, where black rice was so prized for its nutritional value and rarity that it was reserved exclusively for the Emperor and the imperial court — commoners who grew or consumed it faced severe punishment. Today it is widely available and its dramatic color, slightly nutty flavor, and firm, slightly chewy texture make it one of the most rewarding ingredients in plant-based cooking.
When used as the exterior rice in inside-out sushi rolls, the deep purple-black color creates a visual contrast against any filling that is genuinely dramatic — particularly against the vivid red of spicy marinated tomato and the bright green of avocado, producing rolls that look almost too beautiful to eat.
Flavor Variations
Mango and Avocado Forbidden Rice Rolls: Replace the spicy tomato filling with fresh mango strips and avocado for a sweeter, more tropical version with an equally beautiful color contrast.
Crispy Tofu Forbidden Rice Rolls: Add thin strips of sesame-crusted crispy tofu alongside the tomato filling for extra protein and texture.
Cucumber and Cream Cheese Rolls: Fill with vegan cream cheese and cucumber for a simpler, more accessible version that is particularly appealing as a first sushi-making project.
Nutritional Highlights (Per Serving — 8 pieces)
Calories
Protein
Carbs
Fiber
Fat
~380 kcal
9g
58g
8g
14g
Storage
Best fresh: These rolls are at their best within 1 hour of making — the rice begins to harden and the nori softens during storage.
Refrigerator: Store wrapped tightly in plastic wrap for up to 1 day. The texture will be slightly different but the flavor remains excellent.
Do not freeze: Sushi rolls do not freeze well — the rice becomes hard and grainy and the fillings lose their texture entirely.
Components: The marinated tomato filling and seasoned rice can be made ahead and stored separately — assemble the rolls fresh when ready to serve.
Frequently Asked Questions
Where do I find forbidden rice?
Black forbidden rice is available at Asian grocery stores, health food stores, and increasingly at mainstream supermarkets in the rice or health food aisle. It is also widely available online.
Can I use regular sushi rice instead of forbidden rice?
Yes — regular short grain white sushi rice works with the same technique and filling for a more classic visual result. The forbidden rice is specifically chosen for its dramatic color and slightly nuttier flavor.
Do I need a bamboo sushi mat?
A bamboo sushi mat makes rolling significantly easier and produces more even, professional rolls. A clean kitchen towel covered with plastic wrap can be used as a substitute, though the rolls may be slightly less even.
Tried this recipe? Leave a comment below and let us know how it turned out! Tag us on Instagram and Facebook — we love seeing your plant-powered creations. Looking for more addictive vegan snack and appetizer recipes? Browse all recipes on Easy Vegan Recipes — new recipes posted every single week!
We use cookies on our website to give you the most relevant experience by remembering your preferences and repeat visits. By clicking “Accept”, you consent to the use of ALL the cookies.
This website uses cookies to improve your experience while you navigate through the website. Out of these, the cookies that are categorized as necessary are stored on your browser as they are essential for the working of basic functionalities of the website. We also use third-party cookies that help us analyze and understand how you use this website. These cookies will be stored in your browser only with your consent. You also have the option to opt-out of these cookies. But opting out of some of these cookies may affect your browsing experience.
Necessary cookies are absolutely essential for the website to function properly. These cookies ensure basic functionalities and security features of the website, anonymously.
Cookie
Duration
Description
cookielawinfo-checkbox-analytics
11 months
This cookie is set by GDPR Cookie Consent plugin. The cookie is used to store the user consent for the cookies in the category "Analytics".
cookielawinfo-checkbox-functional
11 months
The cookie is set by GDPR cookie consent to record the user consent for the cookies in the category "Functional".
cookielawinfo-checkbox-necessary
11 months
This cookie is set by GDPR Cookie Consent plugin. The cookies is used to store the user consent for the cookies in the category "Necessary".
cookielawinfo-checkbox-others
11 months
This cookie is set by GDPR Cookie Consent plugin. The cookie is used to store the user consent for the cookies in the category "Other.
cookielawinfo-checkbox-performance
11 months
This cookie is set by GDPR Cookie Consent plugin. The cookie is used to store the user consent for the cookies in the category "Performance".
viewed_cookie_policy
11 months
The cookie is set by the GDPR Cookie Consent plugin and is used to store whether or not user has consented to the use of cookies. It does not store any personal data.
Functional cookies help to perform certain functionalities like sharing the content of the website on social media platforms, collect feedbacks, and other third-party features.
Performance cookies are used to understand and analyze the key performance indexes of the website which helps in delivering a better user experience for the visitors.
Analytical cookies are used to understand how visitors interact with the website. These cookies help provide information on metrics the number of visitors, bounce rate, traffic source, etc.
Advertisement cookies are used to provide visitors with relevant ads and marketing campaigns. These cookies track visitors across websites and collect information to provide customized ads.