Fresh, creamy, and packed with plant-based nutrition, this Chickpea Avocado Salad is the perfect quick lunch, healthy side dish, or light dinner. Made with protein-rich chickpeas, creamy avocado, crisp vegetables, and a zesty lemon dressing, this easy vegan salad comes together in minutes and is full of refreshing flavor.
Whether you need a healthy meal prep idea or a simple summer salad, this recipe is both satisfying and nourishing.
Why You’ll Love This Chickpea Avocado Salad
Quick and easy to make
Naturally vegan and gluten-free
Rich in plant-based protein and fiber
Perfect for meal prep and healthy lunches
Fresh, creamy, and full of flavor
Ingredients
For the Salad
1 can (15 oz) chickpeas, drained and rinsed
2 ripe avocados, diced
1 cup cherry tomatoes, halved
1 cucumber, diced
1/4 red onion, finely sliced
2 tablespoons fresh parsley or cilantro, chopped
For the Dressing
2 tablespoons olive oil
2 tablespoons lemon juice
1 garlic clove, minced
Salt and black pepper to taste
Optional: pinch of chili flakes
How to Make Chickpea Avocado Salad
Step 1: Prepare the Ingredients
Drain and rinse the chickpeas thoroughly. Dice the avocado, cucumber, and tomatoes, and thinly slice the red onion.
Step 2: Make the Dressing
In a small bowl, whisk together olive oil, lemon juice, garlic, salt, black pepper, and chili flakes if using.
Step 3: Combine Everything
Add chickpeas, avocado, tomatoes, cucumber, onion, and herbs to a large mixing bowl.
Pour the dressing over the salad and gently toss until everything is evenly coated.
Step 4: Serve
Serve immediately for the freshest flavor and texture.
Serving Suggestions
This Chickpea Avocado Salad pairs perfectly with:
Toasted sourdough bread
Pita bread or wraps
Grilled vegetables
Rice bowls
Fresh greens or spinach
It can also be served as a filling for sandwiches or lettuce wraps.
Nutrition Facts
Per Serving (Approximate)
Calories: 280 kcal
Protein: 9 g
Carbohydrates: 20 g
Fat: 18 g
Fiber: 9 g
Sugar: 4 g
Nutritional values may vary depending on ingredients used.
Health Benefits of Chickpea Avocado Salad
Excellent Source of Plant-Based Protein
Chickpeas provide protein and fiber that help keep you full and energized.
Rich in Healthy Fats
Avocados contain heart-healthy monounsaturated fats that support overall wellness.
Supports Digestion
Fiber from chickpeas and vegetables promotes healthy digestion and gut health.
Packed with Vitamins and Minerals
This salad contains vitamin C, potassium, folate, and antioxidants from fresh vegetables and avocado.
Great for Weight Management
The combination of protein, healthy fats, and fiber helps promote satiety and balanced eating.
Easy Variations
Customize your salad with these delicious additions:
Add corn for sweetness and texture
Mix in quinoa for extra protein
Add vegan feta cheese for a Mediterranean twist
Include jalapeños for extra heat
Top with sunflower or pumpkin seeds for crunch
Final Thoughts
This Chickpea Avocado Salad is a simple yet flavorful recipe that’s perfect for busy days, healthy meal prep, or refreshing summer meals. With creamy avocado, hearty chickpeas, and vibrant vegetables, every bite is satisfying and nutritious.
It’s one of those easy vegan recipes you’ll want to make again and again. Tried this recipe? Leave a comment below and let us know how it turned out! Browse all our vegan recipes to keep enjoying ultimate delicious and healthy lifestyle.
These Vegan Stuffed Sweet Potatoes are a hearty, colorful, and incredibly satisfying meal! Roasted sweet potatoes are filled with garlicky sautéed spinach, mushrooms, and roasted red peppers, then generously drizzled with a creamy, zesty lemon tahini sauce. This wholesome dish is 100% plant-based, gluten-free, and perfect for healthy weeknight dinners, meal prep, or impressing guests.
Ingredients (Serves 4)
For the Sweet Potatoes:
4 medium-large sweet potatoes
1 tablespoon olive oil
Salt and black pepper, to taste
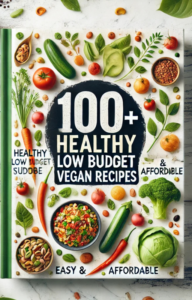
Announcement for our recipe lovers: We’ve taken all our most loved, beginner-friendly recipes and packed them into one simple, easy-to-follow digital cookbook — created especially for people who want delicious results without confusion and Ads-free Experience:
3–4 tablespoons fresh lemon juice (about 1 large lemon)
2–3 tablespoons water (to thin)
1 garlic clove, minced or grated
½ teaspoon maple syrup or agave (optional)
Salt and black pepper, to taste
Garnishes:
Fresh parsley, chopped
Roasted red pepper pieces
Optional: Vegan feta crumbles, pumpkin seeds, or chili flakes
Instructions
Roast the sweet potatoes: Preheat oven to 425°F (220°C). Wash and pierce the sweet potatoes several times with a fork. Rub with olive oil, sprinkle with salt and pepper, and place on a baking sheet. Roast for 45–55 minutes until fork-tender.
Make the tahini dressing: While potatoes roast, whisk together tahini, lemon juice, water, garlic, maple syrup, salt, and pepper until smooth and creamy. Adjust consistency with more water if needed. Set aside.
Prepare the filling: Heat olive oil in a large skillet over medium heat. Add onion and cook for 3–4 minutes until softened. Add garlic and mushrooms, sauté for 5–6 minutes until mushrooms are golden.
Add greens and peppers: Stir in spinach, roasted red peppers, smoked paprika, thyme, salt, and pepper. Cook until spinach is wilted (2–3 minutes). Taste and adjust seasoning.
Assemble: Once sweet potatoes are done, let them cool slightly. Slice them open lengthwise and gently fluff the flesh with a fork.
Stuff and serve: Fill each sweet potato generously with the spinach-mushroom mixture. Drizzle liberally with lemon tahini sauce and garnish with parsley and extra red peppers.
Prep time: 15 minutes Cook time: 50–55 minutes Total time: About 1 hour
Nutritional Facts (Approximate per Serving)
Calories: 380–420 kcal
Protein: 10–12g
Total Fat: 14–16g (mostly healthy fats from tahini & olive oil)
Carbohydrates: 55–60g
Dietary Fiber: 10–12g (excellent source)
Key micronutrients: Extremely high in Vitamin A, Vitamin C, Vitamin K, iron, potassium, and antioxidants.
Note: Values are estimates based on standard portions.
Health Benefits
Weight-Loss Friendly: High fiber and volume keep you full for hours with moderate calories.
Nutrient Powerhouse: Sweet potatoes provide beta-carotene (Vitamin A) for immunity and skin health.
Anti-Inflammatory: Spinach, mushrooms, and tahini offer antioxidants and anti-inflammatory compounds.
Heart Healthy: Rich in fiber and healthy fats that support cholesterol levels.
Plant-Based Protein: Tahini and mushrooms contribute to daily protein needs.
Perfect for vegan, vegetarian, gluten-free, and clean-eating lifestyles.
Tips and Variations
Make it Faster: Microwave the sweet potatoes for 8–10 minutes first, then finish in the oven for crisp skin.
Protein Boost: Add chickpeas, lentils, or crumbled tofu to the filling.
Spicy Version: Add chili flakes or harissa to the filling.
Meal Prep: Roast potatoes and make filling/dressing ahead. Reheat and assemble when ready.
Low-Carb Option: Use smaller sweet potatoes or serve the filling over cauliflower rice.
Storage: Leftovers keep in the fridge for 3–4 days.
Serving Suggestions
Serve as a complete meal on its own.
Pair with a simple side salad or quinoa.
Great for meal prep lunches or dinner parties.
These Vegan Stuffed Sweet Potatoes are comforting, nutritious, and full of flavor — a true crowd-pleaser for anyone on a vegan or healthy weight-loss journey!
A bright, crunchy, and refreshing Apple Cranberry Carrot Salad that’s perfect for any season! This vibrant salad combines sweet apples, earthy carrots, and tangy dried cranberries with a simple zesty dressing. It’s quick to make, naturally vegan, gluten-free, and bursting with color and texture. Ideal as a light lunch, side dish for grilled proteins, or a healthy addition to your meal-prep rotation — especially great for weight loss and vegan lifestyles.
Ingredients (Serves 4–6 as a side)
For the Salad:
4 large carrots, shredded or julienned (about 3–4 cups)
2 medium crisp apples (like Honeycrisp, Gala, or Granny Smith), julienned or thinly sliced
½ cup dried cranberries (unsweetened or lightly sweetened)
⅓ cup chopped fresh parsley or cilantro
¼ cup chopped walnuts or pecans (optional, for crunch)
2–3 green onions, thinly sliced (optional)
For the Dressing:
3 tablespoons extra virgin olive oil
2 tablespoons fresh lemon juice or apple cider vinegar
1 tablespoon pure maple syrup or honey (adjust to taste)
½ teaspoon Dijon mustard (optional, for depth)
¼ teaspoon ground cinnamon (optional, for warmth)
Salt and freshly ground black pepper, to taste
Announcement for our Recipe Lovers: We’ve taken all our most loved, beginner-friendly recipes and packed them into one simple, easy-to-follow digital cookbook — created especially for people who want delicious results without confusion and Ads-free Experience:
Prepare the vegetables and fruits: Shred or julienne the carrots. Core the apples and cut them into thin matchsticks (julienne) or thin slices. Toss the apple slices with a little lemon juice to prevent browning.
Make the dressing: In a small bowl or jar, whisk together olive oil, lemon juice, maple syrup, Dijon mustard, cinnamon (if using), salt, and pepper until well combined.
Assemble the salad: In a large mixing bowl, combine shredded carrots, apple slices, dried cranberries, parsley, and nuts (if using).
Dress and toss: Pour the dressing over the salad and toss gently until everything is evenly coated. Taste and adjust seasoning or sweetness.
Rest and serve: Let the salad sit for 5–10 minutes so the flavors meld. Serve chilled or at room temperature.
Prep time: 15 minutes Total time: 15 minutes (no cooking required!)
Nutritional Facts (Approximate per Serving – 1 of 4 servings)
Calories: 180–220 kcal
Protein: 2–3g
Total Fat: 8–10g (mostly healthy fats)
Carbohydrates: 28–32g
Dietary Fiber: 5–7g
Sugars: 18–22g (mostly natural from fruits)
Key micronutrients: Excellent source of Vitamin A, Vitamin C, antioxidants, and potassium.
Note: Values are estimates. Without nuts, calories drop to ~160 per serving.
Health Benefits
Weight-Loss Friendly: Low in calories but high in fiber and volume — keeps you full and satisfied.
Rich in Antioxidants: Apples and cranberries provide polyphenols that fight inflammation; carrots deliver beta-carotene for eye and skin health.
Gut Health: High fiber content supports digestion and a healthy microbiome.
Immune Boost: Loaded with Vitamin C from apples and lemon.
Heart Healthy: The combination of fiber, healthy fats (if nuts are added), and anti-inflammatory ingredients supports cardiovascular health.
Perfect for vegan, vegetarian, and clean-eating diets.
Tips and Variations
Make it Crunchier: Add toasted walnuts, pecans, sunflower seeds, or pumpkin seeds.
Sweeter Version: Use sweeter apples (Honeycrisp) and a touch more maple syrup.
Tangier Twist: Add crumbled feta or goat cheese (if not vegan) or a handful of pomegranate seeds.
Storage: Best eaten fresh, but leftovers keep well in an airtight container in the fridge for up to 2 days. The apples may soften slightly.
Meal Prep: Prepare the carrots and dressing ahead; add apples just before serving.
Spicy Kick: Add a pinch of chili flakes or grated fresh ginger to the dressing.
Serving Suggestions
As a side dish with grilled chicken, fish, or tofu.
Over a bed of greens or quinoa for a complete meal.
In wraps or alongside hummus and pita.
Perfect for potlucks, BBQs, holiday tables, or weekly meal prep.
This Apple Cranberry Carrot Salad is proof that healthy food can be simple, beautiful, and absolutely delicious. It’s refreshing, satisfying, and full of natural sweetness — a staple recipe for anyone on a vegan or weight-loss journey!
This vibrant Roasted Veggie and Hummus Bowl is a wholesome, plant-based powerhouse that’s perfect for busy weeknights, meal prep, or a satisfying lunch. Tender, caramelized roasted vegetables sit atop creamy, protein-rich hummus, creating a delicious balance of flavors and textures. Packed with fiber, antioxidants, and healthy fats, it’s naturally vegan, gluten-free, and ideal for anyone aiming to eat healthier, go vegan, or support weight-loss goals. Ready in under 40 minutes, it’s customizable and bursting with Mediterranean-inspired goodness!
Ingredients (Serves 4)
For the Roasted Vegetables:
1 large sweet potato (or 2 medium), peeled and cubed
2 cups broccoli florets
2 cups cauliflower florets
2 medium carrots, sliced into rounds
1 red bell pepper, sliced
1 zucchini, sliced into half-moons
1 red onion, cut into wedges
3 tablespoons olive oil
1 teaspoon garlic powder
1 teaspoon smoked paprika
½ teaspoon ground cumin
½ teaspoon dried oregano (optional)
Salt and freshly ground black pepper, to taste
For the Bowl Base & Toppings:
2–2½ cups hummus (homemade or your favorite store-bought variety)
2 cups cooked quinoa, brown rice, or farro (optional, for added heartiness)
2 cups fresh greens (arugula, spinach, or mixed greens)
Announcement for our recipe lovers: We’ve taken all our most loved, beginner-friendly recipes and packed them into one simple, easy-to-follow digital cookbook — created especially for people who want delicious results without confusion and Ads-free Experience:
Optional: Crumbled feta (if not vegan), avocado slices, or a sprinkle of chili flakes
Instructions
Preheat the oven: Set your oven to 425°F (220°C). Line two large baking sheets with parchment paper for easy cleanup.
Prepare the vegetables: In a large bowl, toss all the chopped vegetables with olive oil, garlic powder, smoked paprika, cumin, oregano, salt, and pepper until evenly coated.
Roast the veggies: Spread the vegetables in a single layer on the baking sheets (don’t overcrowd—use two sheets if needed). Roast for 25–35 minutes, stirring halfway through, until the vegetables are tender and nicely caramelized with golden edges.
Warm the hummus (optional): While the veggies roast, you can gently warm the hummus in the microwave for 20–30 seconds or leave it at room temperature for a creamier spread.
Assemble the bowls: Spread a generous layer of hummus (about ½ cup per bowl) at the bottom of each serving bowl. Add a scoop of cooked quinoa or greens if using. Pile the hot roasted vegetables on top.
Garnish and serve: Sprinkle with pumpkin seeds, fresh herbs, a squeeze of fresh lemon juice, and a light drizzle of olive oil. Serve immediately and enjoy!
Based on 4 servings (without optional quinoa/grains):
Calories: 380–420 kcal
Protein: 12–15g (from hummus and veggies)
Total Fat: 18–22g (mostly healthy fats from olive oil and hummus)
Carbohydrates: 45–50g
Dietary Fiber: 12–15g (excellent source!)
Sugars: 8–10g (natural from veggies)
Key micronutrients: High in Vitamin A, C, K, folate, potassium, and iron.
Note: Values are estimates and can vary slightly based on exact ingredients and portion sizes. Adding quinoa increases protein and calories modestly.
Health Benefits
This bowl is a true wellness winner:
Weight Management Support: Loaded with fiber and volume from vegetables, it keeps you full longer while being naturally low in processed ingredients—perfect for healthy weight loss.
Digestive Health: The high fiber content from roasted veggies and chickpeas in hummus promotes gut health and regular digestion.
Heart & Immune Boost: Olive oil and hummus provide heart-healthy fats; vegetables deliver antioxidants, vitamins, and anti-inflammatory compounds.
Blood Sugar Friendly: The combination of fiber, protein, and complex carbs helps stabilize energy levels.
Plant-Based Nutrition: Naturally vegan, rich in plant protein, and a great way to increase your daily veggie intake without feeling deprived.
Tips and Variations
Make it Even Faster: Use pre-cut vegetables or your favorite frozen veggie mix (roast straight from frozen).
Spice It Up: Add chili powder, harissa, or za’atar to the veggies for different flavor profiles.
Protein Boost: Top with chickpeas, grilled tofu, or a boiled egg (if not vegan).
Meal Prep Friendly: Roast veggies ahead and store in the fridge for up to 4 days. Assemble fresh each day.
Low-Carb Option: Skip the grains and double up on greens for a lighter bowl.
Homemade Hummus Hack: Blend chickpeas, tahini, garlic, lemon, and olive oil for an ultra-fresh version.
Serving Suggestions
Enjoy this bowl as a complete meal on its own or pair it with warm pita bread, a side salad, or your favorite soup. It’s fantastic for lunchboxes, potlucks, or a colorful addition to any dinner table. For your vegan or weight-loss journey, it’s satisfying enough to keep cravings at bay!
This Roasted Veggie and Hummus Bowl proves that healthy eating can be beautiful, flavorful, and incredibly easy. Whip one up today and feel the difference! 🌿🥕🍋
There are breakfast bars and then there are breakfast bars like these Coconut Lime Chia Pudding Bars — the kind that you make the night before and when you lift the first bar from the pan in the morning it is so perfectly set and so cool and so silky and so fragrant with toasted coconut and fresh lime that it feels less like breakfast and more like something you would find at a resort brunch buffet, and when you take the first bite the creamy, yielding chia pudding gives way to the crunchy coconut date base and the bright, citrus-forward lime hits at the back and the toasted coconut on top is sweet and nutty and everything together is so complete and so satisfying that you eat the whole bar standing at the counter before you have made your coffee, and then you cut another one, and the container in the refrigerator is half-empty before the week has properly started. This is that recipe. The one that makes meal-prep feel less like a chore and more like an act of self-care. The one that is simultaneously a proper breakfast, a post-workout snack, and a dessert that passes as healthy. The one that is made entirely the night before and requires zero effort in the morning beyond the cutting of a bar and the pouring of coffee.
The secret is the bloom-and-press technique. Chia pudding bars fail when the chia pudding is too thin — poured into a pan at the consistency of a cold drink, it never fully sets through the center and produces bars that are wet, shapeless, and impossible to cut cleanly. The correct technique is to bloom the chia seeds in the full quantity of coconut milk at room temperature for 20 minutes — stirring every 5 minutes to prevent clumping — and then press the thickened pudding firmly into the pan over the base layer, smoothing the surface with the back of a wet spoon. This compression step removes air pockets and ensures the pudding layer is dense, uniform, and fully in contact with the base, producing a bar that sets into a firm, sliceable slab overnight. The technique is simple, takes 20 minutes of watching and stirring, and is the difference between a bar and a bowl.
What makes this recipe so outstanding is the toasted coconut date base — a no-bake crust made from Medjool dates, desiccated coconut toasted in a dry pan until golden and nutty, rolled oats, and a pinch of salt, processed together into a mixture that presses into a firm, chewy, slightly crisp foundation for the chia pudding layer. The base is sweet from the dates, nutty from the toasted coconut, and substantial enough to hold the bar together when lifted from the pan — it provides texture and structure that the chia pudding layer alone cannot provide, and its sweetness is calibrated to complement the tart lime and the creamy coconut of the pudding without overwhelming either.
This recipe is 100% vegan, gluten-free when made with certified GF oats, naturally sweetened, ready to eat after an overnight set, and one of the most elegant meal-prep breakfasts in the plant-based repertoire.
Recipe Information
Prep Time
Cook Time
Total Time
Servings
Calories
25 mins
5 mins
30 mins + overnight set
9 bars
~220 kcal
Ingredients
For the Toasted Coconut Date Base
1 cup (100g) desiccated coconut (unsweetened)
1 cup (100g) rolled oats (certified GF if needed)
200g (7oz) Medjool dates, pitted (about 10–12 large dates — must be soft and sticky)
2 tbsp coconut oil, melted
Pinch of fine salt
½ tsp pure vanilla extract
For the Coconut Lime Chia Pudding
1 × 400ml (14oz) can full-fat coconut milk, well shaken
½ cup (120ml) coconut cream (from the top of a second chilled can)
6 tbsp (60g) white chia seeds (white chia produces a cleaner, paler pudding — black chia works equally well in flavor)
3 tbsp pure maple syrup (or agave)
Zest of 2 large limes (the zest carries the citrus oil — this is the dominant lime flavor)
3 tbsp fresh lime juice (from the zested limes)
1 tsp pure vanilla extract
Pinch of fine salt
For the Topping
¼ cup (25g) desiccated coconut or coconut flakes, toasted
Zest of ½ lime
Optional: thin lime slices or lime zest curls for decoration
Instructions
Toast the coconut for the base. In a dry skillet over medium heat, toast the desiccated coconut for the base, stirring constantly, for 3–4 minutes until golden and intensely fragrant. Watch carefully — coconut goes from golden to burnt in under a minute. Transfer immediately to a plate to cool. Repeat with the topping coconut in the same pan. Set both aside separately.
Make the date base. Add the rolled oats to a food processor and pulse 5–6 times until roughly broken down — not a powder, but smaller than whole oats. Add the pitted Medjool dates, toasted coconut (for the base), melted coconut oil, salt, and vanilla extract. Process for 60–90 seconds until the mixture clumps together when pressed between your fingers. If the mixture seems dry and won’t clump, add the dates are not soft enough — microwave them for 20 seconds to soften, then process again. The mixture should hold its shape when squeezed.
Press the base. Line a 20 × 20cm (8 × 8 inch) square baking pan with parchment paper, leaving overhang on two sides for easy lifting. Transfer the date mixture to the pan and press firmly and evenly into the base using the back of a spoon or the bottom of a flat glass. The base should be compact, uniform, and about 1cm thick. Press firmly — a loosely pressed base will crumble when the bars are cut. Place in the freezer for 15 minutes to firm while you make the chia pudding.
Bloom the chia pudding. In a large bowl, whisk together the full-fat coconut milk, coconut cream, maple syrup, lime zest, lime juice, vanilla extract, and salt until well combined. Add the chia seeds and whisk immediately and vigorously to distribute them evenly before they begin to gel and clump. Set a timer for 5 minutes.
Stir and bloom. After 5 minutes, whisk the chia mixture again — the seeds will have begun to swell and the mixture will be slightly thicker. Repeat at 5-minute intervals for a total of 20 minutes (4 stirs), whisking each time to break up any clumps and redistribute the seeds. After 20 minutes the pudding should be noticeably thickened — it should coat the back of a spoon and hold a slight shape when dropped from a height. If it is still very thin, give it 5 more minutes.
Pour and press. Remove the base from the freezer. Pour the thickened chia pudding over the base and spread evenly with a spatula. Tap the pan gently on the counter 3–4 times to release any air bubbles. Press the surface smooth with the back of a wet spoon — the “press” in this step is light, just enough to create a flat, even surface and ensure the pudding is in full contact with the base below. Scatter the toasted topping coconut over the surface and press it very gently into the pudding so it adheres.
Set overnight. Cover the pan tightly with plastic wrap and refrigerate for a minimum of 6 hours — overnight is ideal and strongly preferred. The chia seeds continue to absorb liquid and swell during the refrigerator rest, and the pudding layer firms from a pourable gel into a dense, sliceable slab. Do not attempt to cut before the full setting time.
Cut and serve. Lift the slab from the pan using the parchment overhang. Place on a cutting board and cut into 9 bars (3 × 3 grid) using a sharp knife wiped clean between cuts for the cleanest edges. Garnish with extra lime zest and optional lime slices. Serve cold, directly from the refrigerator.
Pro Tips
Use Medjool dates, not regular dried dates — Medjool dates are large, soft, caramel-sweet, and sticky by nature, which makes them the ideal binding agent for a no-bake base. Regular dried dates are smaller, drier, and harder, and produce a base that is crumbly, dry, and difficult to press into a compact layer without adding significant extra liquid. If Medjool dates are not available, soak regular dried dates in boiling water for 15 minutes, drain thoroughly, and proceed.
Stir the chia pudding every 5 minutes — chia seeds gel unevenly when left undisturbed, forming a thick skin on top and clumps throughout the pudding that never fully break down, even with refrigeration. Regular stirring during the first 20 minutes distributes the swelling seeds evenly through the liquid and produces a smooth, uniform pudding with no lumps. This is the step that determines the texture of the finished bar.
Use full-fat coconut milk — light coconut milk does not have sufficient fat content to produce the rich, creamy pudding this bar needs. The fat in full-fat coconut milk is what gives the chia pudding its silky, almost mousse-like texture when set; a thin, low-fat pudding layer produces a watery, loosely set bar that does not slice cleanly. Full-fat coconut milk in a can (not a carton) is the correct ingredient.
Zest the limes before juicing — the zest is where the lime’s essential oils live, and lime zest carries a sharper, more aromatic lime flavor than lime juice, which is primarily acidic rather than aromatic. Two fully zested limes produce a chia pudding that tastes intensely and vividly of lime from the first spoonful. Zest before juicing — once a lime is juiced, the skin is too dry and collapsed to zest effectively.
Chia Seeds: From Aztec Superfood to Global Pantry Staple
Chia seeds — the seeds of Salvia hispanica, a flowering plant native to central Mexico and Guatemala — were a dietary staple of the Aztec and Maya civilizations, valued not only as a food source but as a trade currency and an offering in religious ceremonies. The word “chia” derives from the Nahuatl word chian, meaning oily, a reference to the seeds’ high fat content — primarily omega-3 fatty acids — that made them an extraordinarily dense source of energy for the long distances that Aztec warriors and messengers were required to travel. Spanish colonizers largely suppressed the cultivation of chia after the conquest of Mexico in the sixteenth century, associating the seed with pre-Christian religious practices, and it largely disappeared from mainstream food culture for several centuries. Its return to Western awareness came primarily through the novelty of the Chia Pet — the terracotta animal figurines coated with chia seeds and sold as gifts from the 1970s onward — but the seed’s food properties attracted serious nutritional interest in the 1990s and 2000s, and by the 2010s chia had become one of the most widely sold “superfood” ingredients in the world. Its hydrophilic property — the ability to absorb up to 12 times its own weight in liquid and form a stable gel — is the characteristic that makes it useful in plant-based cooking as an egg replacer, a thickener, and as the foundation of the chia pudding that has become one of the most popular plant-based breakfasts of the past decade.
Flavor Variations
Mango Coconut Chia Pudding Bars: Replace the lime zest and lime juice with the purée of 1 ripe mango blended smooth and folded into the coconut pudding before pouring over the base. Top with toasted coconut and small cubes of fresh mango for a tropical version that is sweeter, less tart, and deeply fragrant.
Passion Fruit Coconut Chia Bars: Replace the lime juice with the strained pulp and juice of 4 passion fruits for a version with a more exotic, floral acidity — the passion fruit’s tartness is sharper and more complex than lime and produces a pudding layer of extraordinary flavor.
Chocolate Coconut Chia Pudding Bars: Add 3 tablespoons of Dutch-process cocoa powder to the chia pudding mixture (whisk in with the coconut milk before adding the seeds) and reduce the lime zest to ½ lime or omit entirely for a chocolate coconut version topped with cacao nibs and shaved dark chocolate that is as suitable for dessert as for breakfast.
Nutritional Highlights (Per Bar)
Calories
Protein
Carbs
Fiber
Fat
~220 kcal
4g
26g
7g
12g
Storage
Refrigerator: Store bars in an airtight container in the refrigerator for up to 5 days. The bars firm slightly on day two and three and are at their best between day one and three, when the pudding is set but still silky and the base retains its slight chew. Separate layers of bars with parchment paper to prevent sticking.
Freezer: Freeze individually wrapped bars for up to 2 months. Thaw overnight in the refrigerator — do not thaw at room temperature as the pudding layer can become watery as it warms. The texture after thawing is slightly softer than fresh but still very good.
Serving: Serve cold, directly from the refrigerator. These bars are designed to be eaten cold; at room temperature the pudding layer softens and the bar loses its structure.
Frequently Asked Questions
Can I use black chia seeds instead of white?
Yes — black and white chia seeds are nutritionally identical and behave identically in recipes. White chia seeds produce a pudding layer that is pale and creamy in color, which shows off the coconut lime aesthetic of this bar beautifully. Black chia seeds produce a speckled grey pudding layer — still delicious, and many people prefer the appearance of black chia. The choice is entirely aesthetic.
My bars are crumbling when I cut them — what went wrong?
Two causes: the base was not pressed firmly enough before the pudding was added (it must be compacted firmly — use the bottom of a flat glass and real pressure); or the bars were cut before the pudding had fully set (overnight in the refrigerator is the minimum — 6 hours is the bare minimum and may still produce a softer set in the center). If crumbling persists, return the bars to the freezer for 30 minutes before cutting — the brief freeze firms everything just enough for clean cuts.
Can I make these without oats for a grain-free version?
Yes — replace the rolled oats in the base with an equal quantity of additional desiccated coconut or finely chopped raw almonds or cashews. The base will be slightly denser and less chewy but equally good. Ensure the replacement ingredient is dry and not too finely processed — a little texture in the base is what prevents it from being too compact and heavy.
Can I reduce the maple syrup for a less sweet bar?
Yes — reduce the maple syrup in the pudding to 2 tablespoons for a noticeably less sweet bar where the lime flavor is more dominant. The date base is fixed in sweetness (the dates provide the sweetness) but the pudding layer can be adjusted freely. Taste the pudding mixture before pouring over the base and adjust to your preference.
Tried this recipe? Leave a comment below and let us know how it turned out! Tag us on Instagram and Facebook — we love seeing your plant-powered creations. Looking for more addictive vegan snack and appetizer recipes? Browse all recipes on Easy Vegan Recipes — new recipes posted every single week!
There is a particular kind of satisfaction that comes from a dish that cooks in a single pot, feeds a crowd, and delivers more flavor than most meals that take twice as long and dirty every pan in the kitchen — and this Vegan Jambalaya is exactly that dish. It is a deep, smoke-spiced, boldly seasoned rice dish that is built around a holy trinity of caramelized onion, celery, and green bell pepper, layered with garlic, smoked paprika, dried thyme, oregano, cayenne, and a long-cooked tomato base, simmered with vegetable stock until every grain of rice has absorbed the full depth of the pot’s flavors, and finished with vegan andouille-style sausage, red kidney beans, okra, and a scatter of spring onion and fresh parsley that cuts through the richness like a knife. It is the kind of dish where the aroma fills the kitchen before it is halfway finished, and where the first spoonful delivers an immediate, deep satisfaction — smoky and savory and spiced and warming, with the rice soft and yielding and stained a deep brick-red from the tomatoes and paprika, and the sausage and beans providing the textural contrast that makes every bite different from the last. This is a bowl that is fundamentally, unreservedly satisfying in the way that only a dish built from this much seasoning and this much time in a single pot can be.
The secret is the fond-building technique. Most one-pot rice dishes sacrifice depth of flavor for convenience — everything goes in at once, the liquid is added, and the result is cooked but not layered, seasoned but not built. Jambalaya at its best is different: it is a dish where the flavor is constructed in stages, each stage adding a new layer that the next stage builds on, and the key to that construction is the fond — the caramelized, browned residue that accumulates on the bottom of the pot as the vegetables are cooked, as the sausage is seared, as the tomato paste is caramelized, and as the spices are bloomed in the fat. The fond-building technique used in this recipe involves three distinct browning stages before the stock and rice are added: first, the onion, celery, and green bell pepper are cooked over medium-high heat for 8–10 minutes, stirring only occasionally (not constantly, which prevents browning), until they are deeply caramelized and beginning to stick to the pot; second, the vegan sausage is seared directly in the same pot until it has a caramelized, slightly crispy exterior that will hold up in the long simmer; third, the tomato paste is added and cooked for 2 full minutes over medium-high heat, stirring constantly, until it darkens from a bright red to a deep brick-brown and smells nutty and caramelized rather than raw and sharp. Each of these stages deposits flavor onto the bottom of the pot — flavor that is lifted and incorporated into the dish the moment the stock is added, deglazing the pot and dissolving all that concentrated, caramelized depth into the liquid that will cook the rice. The result is a rice dish where the flavor feels as though it has been building for hours, because in a sense it has: the fond represents the Maillard reaction products of every ingredient that touched the hot pot, concentrated and preserved and then released into the broth in a single deglaze.
What makes this recipe so outstanding is the balance of the spice blend — not fiery, not timid, but deeply spiced in the New Orleans tradition where smoked paprika, cayenne, dried thyme, dried oregano, garlic powder, onion powder, and black pepper work together as a unified flavor system rather than as individual notes competing for attention. The smoked paprika is the foundation (2 full teaspoons for a full pot) and provides both color and that distinctive sweet smoke that defines the dish’s aroma; the cayenne is the accent (¼–½ teaspoon, adjustable) that adds a back-of-throat warmth without turning the dish into something that overwhelms the other flavors; the dried herbs add a Mediterranean-Creole depth that reflects jambalaya’s complex cultural heritage; and the garlic — 6 cloves, added both as part of the holy trinity and again as fresh garlic minced into the tomato paste — provides the aromatic backbone that ties everything together. The vegan andouille-style sausage (any good-quality smoky vegan sausage works — look for ones with a firm texture and pronounced smoke seasoning) carries through and amplifies the smoky register that the paprika establishes, and the red kidney beans add both protein and a creamy, earthy counterpoint to the rice that prevents the dish from feeling one-dimensional.
This recipe is 100% vegan, naturally gluten-free (verify the sausage label), and produces a pot that serves 6–8 generously — one of those rare recipes that is genuinely better on the second day, making it ideal for batch cooking, meal prep, and feeding a crowd.
Recipe Information
Prep Time
Cook Time
Total Time
Servings
Calories
15 mins
45 mins
60 mins
6–8 servings
~480 kcal
Ingredients
For the Holy Trinity Base
2 tbsp neutral oil or vegan butter
1 large yellow onion, diced (approximately 200g)
3 stalks celery, diced (approximately 150g)
1 large green bell pepper, diced (approximately 150g)
1 large red bell pepper, diced (approximately 150g — adds color and sweetness; traditional recipes omit this but it is a worthwhile addition)
6 cloves garlic, finely minced
For the Sausage and Aromatics
300g (10oz) vegan andouille-style sausage or any firm, smoky vegan sausage, sliced into ½cm (¼ inch) rounds (look for sausages with a firm texture that will hold their shape through the simmer; softer sausages will break down too much)
2 tbsp tomato paste
For the Spice Blend
2 tsp smoked paprika
1 tsp sweet paprika
1 tsp dried thyme
1 tsp dried oregano
½ tsp garlic powder
½ tsp onion powder
½ tsp ground black pepper
¼–½ tsp cayenne pepper (use ¼ tsp for mild heat, ½ tsp for moderate; the dish should be warming without being fiery)
1 tsp fine salt (plus more to taste at the end)
For the Jambalaya
1½ cups (300g) long-grain white rice, rinsed under cold water until the water runs nearly clear (rinsing removes surface starch and prevents the finished jambalaya from becoming gummy — do not skip this step)
1 can (400g / 14oz) diced tomatoes
3 cups (720ml) good-quality vegetable stock
1 can (400g / 14oz) red kidney beans, drained and rinsed
150g (5oz) okra, cut into 1cm (½ inch) rounds (fresh or frozen; okra releases a natural thickener as it cooks that adds body to the jambalaya — if okra is unavailable, substitute sliced courgette / zucchini, though the thickening effect will be absent)
2 bay leaves
1 tsp hot sauce (Tabasco, Crystal, or any vinegar-based hot sauce) — add more at the table
For Finishing and Serving
4 spring onions (scallions), finely sliced
Large handful fresh flat-leaf parsley, roughly chopped
Lemon or lime wedges, for squeezing at the table
Hot sauce, for the table
Instructions
Sear the sausage. Heat the oil in a large, heavy-bottomed pot or Dutch oven (at least 5-litre / 5-quart capacity) over medium-high heat until shimmering. Add the sliced sausage in a single layer and cook for 2–3 minutes per side without moving until deeply golden and caramelized on each cut surface. Remove the sausage from the pot with a slotted spoon and set aside — it will finish cooking in the pot with the rice. Do not wipe the pot.
Build the holy trinity. In the same pot (with the sausage’s cooking oil still in it), add the diced onion, celery, and green and red bell peppers. Cook over medium-high heat for 8–10 minutes, stirring occasionally but not constantly — the vegetables need contact time with the hot pot surface to caramelize and begin to stick, which is precisely what you want. They are ready when they are deeply softened, golden at the edges, and beginning to leave brown bits on the bottom of the pot. Add the minced garlic and cook for 1 further minute, stirring, until fragrant.
Add the spice blend and tomato paste. Add all the spices (smoked paprika, sweet paprika, thyme, oregano, garlic powder, onion powder, black pepper, cayenne, and salt) and the tomato paste to the pot. Stir vigorously for 2 full minutes over medium-high heat, coating the vegetables evenly and cooking the tomato paste until it has darkened from bright red to a deep brick color and smells sweet and nutty rather than raw. This step is not optional — the 2 minutes of caramelizing the tomato paste with the spices creates a concentrated flavor base that cannot be replicated by simply adding the paste to the stock.
Deglaze and add the rice. Pour in the diced tomatoes (with their juices) and stir, scraping the bottom of the pot thoroughly to lift all the caramelized bits (the fond) into the liquid — this is the moment when all the flavor built in steps 1–3 is incorporated into the dish. Add the vegetable stock, rinsed rice, and bay leaves. Stir to combine and bring to a boil over high heat.
Simmer the jambalaya. Once boiling, reduce the heat to low, add the drained kidney beans, okra, hot sauce, and the reserved sausage. Stir once to distribute everything evenly. Cover the pot with a tight-fitting lid and cook over low heat for 20–22 minutes without lifting the lid — steam is building inside the pot and lifting the lid releases it, which can result in undercooked rice. The jambalaya is ready when the rice has absorbed all the liquid and is tender. If the rice is still slightly firm after 22 minutes, replace the lid and cook for a further 3–4 minutes, then check again.
Rest and finish. Remove the pot from the heat, uncover, and fluff the rice gently with a fork, folding the vegetables and sausage up from the bottom. Remove and discard the bay leaves. Taste and adjust seasoning — the jambalaya may need more salt, more hot sauce, or a squeeze of lemon juice to brighten the flavors. Rest uncovered for 5 minutes before serving; the rice will continue to absorb any remaining liquid and the surface will dry slightly, producing a better texture.
Serve. Ladle into deep bowls. Scatter generously with sliced spring onions and chopped fresh parsley. Serve with lemon wedges and additional hot sauce alongside.
Pro Tips
Use a heavy-bottomed pot — thin pots have hot spots that will burn the rice on the bottom before it is cooked through. A Dutch oven is ideal; a heavy stainless-steel pot with a tight-fitting lid is the second choice. The weight and the tight lid are both important: the weight distributes heat evenly and the tight lid traps steam.
Do not stir once the lid goes on — stirring the rice mid-cook breaks the steam seal, releases steam, and disturbs the starch network that is forming in the rice grains, producing gummy, clumped rice rather than the separate, fluffy grains that jambalaya should have. Add everything, stir once, put the lid on, and leave it alone until the timer goes off.
If the bottom is catching before the rice is cooked, place a heat diffuser under the pot or slide a piece of foil between the pot and the burner to reduce the direct heat; alternatively, transfer the pot to the oven at 175°C (350°F) for the simmering stage, which provides even, ambient heat and eliminates the bottom-catching risk entirely.
The jambalaya will thicken considerably as it cools — when reheating leftover jambalaya, add 2–3 tablespoons of water or vegetable stock per serving and heat gently, stirring, until the rice has loosened and is piping hot throughout.
Jambalaya: The Dish That America Made from Three Continents
Jambalaya is one of the most historically layered dishes in American cooking — a dish that carries the culinary traditions of West Africa, Spain, and France in every spoonful and that was forged in the specific crucible of New Orleans, a city whose food culture is so distinct from the rest of the United States that it functions almost as a separate culinary civilization. The dish’s ancestry is contested in the way that the origins of most creolized foods are contested, but the most widely accepted narrative traces it to the convergence of three culinary traditions in colonial Louisiana: the Spanish paella (rice cooked with saffron, vegetables, and meat in a single pan — a technique brought by Spanish colonial administrators who governed Louisiana from 1762 to 1803), the French influence of Creole cooking (the long-cooked roux and vegetable base that underpins so much Louisiana cuisine, including the holy trinity of onion, celery, and bell pepper that is the direct French mirepoix adapted to Louisiana’s available produce), and the West African tradition of rice cookery brought by enslaved Africans who were the primary cooks in Louisiana’s plantation and domestic kitchens and who contributed both the central role of rice and the bold, complex spicing that distinguishes jambalaya from the milder Creole and French dishes it otherwise resembles. The word itself is also contested: some linguists derive it from the Provençal jambalaia (a mixture or mish-mash); others from the Spanish jamón (ham) plus the West African ya (rice); others from the Creole jamba (to beat down or to mix). What is not contested is that jambalaya emerged as a distinct dish in the nineteenth century as a way to stretch expensive ingredients (particularly meat and sausage) across a large pot of rice for a large number of people — and that the dish’s defining characteristic, the layering of smoky, spiced, long-cooked flavor into every grain of rice rather than served alongside it, was the culinary innovation that made it irreplaceable.
Flavor Variations
Vegan Jambalaya with Jackfruit: Replace the vegan sausage with 1 can (400g) of young green jackfruit in brine, drained, rinsed, and shredded — jackfruit’s fibrous texture mimics pulled pork and absorbs the jambalaya’s spice blend beautifully. Add ½ teaspoon of liquid smoke to the pot with the stock for extra smokiness to compensate for the sausage’s absence.
Cajun-Style Vegan Jambalaya: Increase the cayenne to 1 full teaspoon, add 1 teaspoon of ground white pepper, and omit the diced tomatoes (Cajun jambalaya is “brown jambalaya” — no tomatoes, darker, smokier, and drier than Creole-style). Use 3¼ cups of stock instead of 3 cups to compensate for the absent tomato liquid, and expect a richer, more intensely smoky and spiced result.
Vegan Seafood Jambalaya: Add 200g of hearts of palm (drained and cut into chunks — their texture and mild ocean flavor make them a credible vegan seafood substitute), 150g of king oyster mushrooms (sliced into coin-shaped rounds and seared briefly before adding), and 1 teaspoon of Old Bay seasoning to the spice blend. The result is a vegan version of the classic seafood jambalaya that is genuinely surprising in how convincingly it evokes the original.
Nutritional Highlights (Per Serving — Based on 6 Servings)
Calories
Protein
Carbs
Fiber
Fat
~480 kcal
18g
68g
10g
14g
Storage
Refrigerator: Jambalaya keeps exceptionally well in the refrigerator for up to 5 days in a sealed container. The flavor improves significantly after 24 hours as the spices continue to develop and the rice absorbs more of the broth. It is genuinely one of the best meal-prep dishes in this format.
Freezer: Cool completely, then freeze in portioned containers for up to 3 months. Thaw overnight in the refrigerator. The rice texture changes slightly on freezing and thawing (it becomes slightly more dense) but remains completely enjoyable.
Reheating: Add 2–3 tablespoons of water or stock per portion before reheating. Reheat covered in the microwave at medium power (to heat through without drying the surface), stirring halfway, or in a covered saucepan over low heat with a splash of water, stirring occasionally, until piping hot throughout — at least 75°C (165°F).
Do not store with fresh garnishes: Add the spring onion, parsley, and lemon fresh when serving each reheated portion; stored garnishes wilt and discolor.
Make-ahead for a gathering: Jambalaya can be made up to 2 days ahead, refrigerated, and reheated gently in the pot with ¼ cup of added stock over low heat, covered, for 15–20 minutes, stirring occasionally, until hot throughout. It reheats beautifully at scale and is arguably even better made ahead.
Frequently Asked Questions
Why is my jambalaya mushy?
Mushy jambalaya is almost always caused by one of three things: using short-grain or medium-grain rice instead of long-grain (short and medium-grain rice have more surface starch and cook much faster, becoming gummy in the time it takes the long-grain rice the recipe is calibrated for to cook through); lifting the lid during the simmer (releasing steam reduces the pot’s temperature and extends the cooking time while the rice continues to absorb liquid, resulting in overcooked, mushy grains by the time the liquid is gone); or using too much liquid. Stick to long-grain white rice, keep the lid on for the full 20–22 minutes, and measure the liquid carefully.
Can I use brown rice instead of white rice?
Yes, but the recipe requires adjustment: brown rice needs approximately 45–50 minutes of simmering time (versus 20–22 for white) and approximately ½ cup more liquid. Use 3½ cups of vegetable stock instead of 3 cups, and extend the simmering time to 45 minutes before checking. The result has a nuttier flavor and more robust texture that works well with the bold jambalaya seasoning, and the additional fiber and nutrients make it a more nutritionally complete meal.
My jambalaya is too spicy — how do I tone it down?
Serve with a larger portion of rice (which dilutes the heat per bite), a squeeze of lemon or lime juice (acidity reduces the perception of heat), or a spoonful of vegan sour cream or coconut yogurt alongside (the fat in dairy and fat-based alternatives coats the capsaicin receptors that register heat). For future batches, reduce the cayenne to ⅛ teaspoon and omit the hot sauce from the pot, adding it only at the table for those who want it.
Is this dish traditionally vegan?
No — traditional jambalaya is built around smoked andouille sausage (which is pork-based), and many versions also include chicken, shrimp, or crawfish. This recipe replaces those animal-based components with vegan sausage and beans while maintaining the spice blend, the cooking technique, the holy trinity base, and the fundamental structure of the dish. The fond-building technique, the holy trinity, the spice profile, and the single-pot rice cookery method are all authentic — only the protein components have been substituted.
Tried this recipe? Leave a comment below and let us know how it turned out! Tag us on Instagram and Facebook — we love seeing your plant-powered creations. Looking for more addictive vegan snack and appetizer recipes? Browse all recipes on Easy Vegan Recipes — new recipes posted every single week!
We use cookies on our website to give you the most relevant experience by remembering your preferences and repeat visits. By clicking “Accept”, you consent to the use of ALL the cookies.
This website uses cookies to improve your experience while you navigate through the website. Out of these, the cookies that are categorized as necessary are stored on your browser as they are essential for the working of basic functionalities of the website. We also use third-party cookies that help us analyze and understand how you use this website. These cookies will be stored in your browser only with your consent. You also have the option to opt-out of these cookies. But opting out of some of these cookies may affect your browsing experience.
Necessary cookies are absolutely essential for the website to function properly. These cookies ensure basic functionalities and security features of the website, anonymously.
Cookie
Duration
Description
cookielawinfo-checkbox-analytics
11 months
This cookie is set by GDPR Cookie Consent plugin. The cookie is used to store the user consent for the cookies in the category "Analytics".
cookielawinfo-checkbox-functional
11 months
The cookie is set by GDPR cookie consent to record the user consent for the cookies in the category "Functional".
cookielawinfo-checkbox-necessary
11 months
This cookie is set by GDPR Cookie Consent plugin. The cookies is used to store the user consent for the cookies in the category "Necessary".
cookielawinfo-checkbox-others
11 months
This cookie is set by GDPR Cookie Consent plugin. The cookie is used to store the user consent for the cookies in the category "Other.
cookielawinfo-checkbox-performance
11 months
This cookie is set by GDPR Cookie Consent plugin. The cookie is used to store the user consent for the cookies in the category "Performance".
viewed_cookie_policy
11 months
The cookie is set by the GDPR Cookie Consent plugin and is used to store whether or not user has consented to the use of cookies. It does not store any personal data.
Functional cookies help to perform certain functionalities like sharing the content of the website on social media platforms, collect feedbacks, and other third-party features.
Performance cookies are used to understand and analyze the key performance indexes of the website which helps in delivering a better user experience for the visitors.
Analytical cookies are used to understand how visitors interact with the website. These cookies help provide information on metrics the number of visitors, bounce rate, traffic source, etc.
Advertisement cookies are used to provide visitors with relevant ads and marketing campaigns. These cookies track visitors across websites and collect information to provide customized ads.