There are side dishes you make because something needs to round out the plate. And then there are dishes like this Vegan Cheesy Zucchini Gratin — the kind that comes out of the oven bubbling and golden, layers of tender zucchini bound together in a rich, cheesy cashew cream sauce, topped with a crisp, golden breadcrumb crust. This is that gratin. The one that makes zucchini genuinely exciting. The one that disappears from the dish before anyone has had the chance to ask for seconds.
This recipe layers thinly sliced zucchini in a silky cashew-based cheese sauce seasoned with garlic, nutritional yeast, and a touch of nutmeg, finished with a golden, slightly crisp breadcrumb topping. It is a classic French-inspired technique reimagined entirely with plant-based ingredients, delivering all the comfort of a traditional gratin.
What makes this gratin so outstanding is how it manages the natural water content of zucchini — salting and draining the slices beforehand ensures the finished dish bakes to a properly set, sliceable texture rather than turning watery, a step that makes all the difference between a great zucchini gratin and a disappointing one.
This recipe is naturally gluten-free when made with gluten-free breadcrumbs, ready in about an hour, and absolutely wonderful served as a side dish alongside any main, or as a light vegetarian main course on its own.
Recipe Information
Prep Time
Cook Time
Total Time
Servings
Calories
20 mins
40 mins
60 mins
6
~240 kcal
Ingredients
For the Zucchini
4 medium zucchini, thinly sliced into rounds
1 tsp salt, for drawing out moisture
For the Cashew Cheese Sauce
1 cup (130g) raw cashews, soaked in boiling water for 20 minutes then drained
1 cup (240ml) vegetable broth
½ cup (120ml) plant milk
4 tbsp nutritional yeast
3 cloves garlic
1 tbsp lemon juice
¼ tsp nutmeg
½ tsp salt
¼ tsp black pepper
For the Topping
½ cup (50g) breadcrumbs
2 tbsp nutritional yeast
1 tbsp olive oil
¼ tsp smoked paprika
Optional Add-ins
½ cup (60g) shredded vegan mozzarella mixed into the sauce
¼ tsp chili flakes
A sliced onion layered between the zucchini
To Serve
Fresh parsley or thyme, chopped
Alongside roasted vegetables or a vegan roast
Instructions
Salt and drain the zucchini. Arrange the sliced zucchini in a colander, sprinkle with the salt, and let sit for 20 minutes to draw out excess moisture. Pat very dry with kitchen towels.
Preheat the oven and prepare the dish. Preheat the oven to 375°F (190°C). Grease a baking dish.
Make the cashew cheese sauce. Blend the drained cashews, vegetable broth, plant milk, nutritional yeast, garlic, lemon juice, nutmeg, salt, and pepper until completely smooth.
Layer the gratin. Arrange the dried zucchini slices in slightly overlapping layers in the prepared dish. Pour the cashew sauce evenly over the top, making sure it settles between the layers.
Make the topping. Combine the breadcrumbs, nutritional yeast, olive oil, and smoked paprika in a small bowl, then scatter evenly over the gratin.
Bake. Bake for 35–40 minutes until bubbling, golden on top, and the zucchini is tender throughout.
Rest and serve. Let rest for 5–10 minutes before serving to allow the sauce to set slightly for cleaner slices.
Pro Tips
Do not skip salting and draining the zucchini — this single step prevents the finished gratin from becoming watery.
Slice the zucchini evenly for consistent cooking and an attractive, layered presentation.
Blend the cashew sauce thoroughly for the smoothest, most convincing cheese-like texture.
Let the gratin rest before slicing to allow the sauce to firm up slightly.
Why Salting the Zucchini Matters
Zucchini contains a significant amount of water, and baking it directly without removing some of that moisture results in a watery, loose gratin that never sets properly. Salting draws out excess liquid through osmosis, allowing the zucchini to bake into a properly textured, sliceable gratin once combined with the cheese sauce.
Flavor Variations
Garlic Herb Gratin: Add extra garlic and fresh thyme or rosemary to the sauce for a more herbaceous version.
Cheesy Mushroom Gratin: Layer sautéed mushrooms between the zucchini for added umami depth.
Spicy Gratin: Add chili flakes to the sauce for gentle background heat.
Nutritional Highlights (Per Serving)
Calories
Protein
Carbs
Fiber
Fat
~240 kcal
8g
18g
3g
14g
Storage
Refrigerator: Store in an airtight container for up to 4 days. Reheat covered in the oven to avoid drying out the topping.
Freezer: Freezes reasonably well for up to 2 months, though the texture softens slightly after thawing.
Make ahead: Assemble without the breadcrumb topping a day ahead and refrigerate, adding the topping just before baking.
Frequently Asked Questions
Can I use yellow squash instead of zucchini?
Yes — yellow squash works in the same way and can be used interchangeably or combined with zucchini.
Can I make this without a blender?
Yes — use store-bought vegan cream cheese thinned with broth and seasoned with the same garlic and nutritional yeast as an alternative base.
Why is my gratin watery despite salting the zucchini?
This usually means the zucchini was not patted dry thoroughly enough after draining. Press firmly with kitchen towels to remove as much surface moisture as possible before layering.
Tried this recipe? Leave a comment below and let us know how it turned out! Tag us on Instagram and Facebook — we love seeing your plant-powered creations. Looking for more comforting vegan side dish recipes? Browse all recipes on Easy Vegan Recipes — new recipes posted every single week!
There are vegetables that surprise you. And then there are vegetables like roasted radishes — the kind that you put in the oven as sharp, peppery, almost aggressive little roots and pull out twenty minutes later as something so completely and utterly transformed that the first time you taste one you stop, genuinely surprised, and eat another immediately. If you have only ever eaten radishes raw — sliced thin on a salad, served alongside hummus, used as a garnish — you have only met one version of this vegetable. The roasted version is something else: mellow and sweet where it was sharp, tender and almost buttery where it was crisp and peppery, with caramelized edges that taste faintly of something between a turnip and a roasted beet. It is one of the most remarkable transformations in vegetable cooking, and one of the most underrated side dishes in plant-based eating.
This recipe roasts radishes at high heat with olive oil, garlic, and a touch of maple syrup until they are tender at the center, caramelized at the edges, and deeply savory — then finishes them with fresh herbs, a squeeze of lemon, and flaky sea salt that brings the whole dish into focus. It is a side dish that works alongside almost anything, takes twenty-five minutes from start to finish, costs almost nothing, and consistently generates the kind of genuinely surprised appreciation that happens when something familiar turns out to be completely different from what you expected.
What makes this recipe so outstanding is the combination of high heat and the maple syrup glaze — the heat drives out the radishes’ harsh peppery compounds and concentrates their natural sweetness, while the maple syrup caramelizes against the cut surfaces to create a sticky, slightly sweet glaze that makes each radish deeply savory and impossible to stop eating. Halving the radishes cut-side-down on the tray maximizes contact with the hot pan and produces dramatically better caramelization than roasting them whole.
This recipe is 100% vegan, naturally gluten-free, ready in under 30 minutes, works with any variety of radish from standard red globe to French breakfast to watermelon radish, and is the side dish that converts radish skeptics with a single bite.
Recipe Information
Prep Time
Cook Time
Total Time
Servings
Calories
5 mins
20 mins
25 mins
4
~95 kcal
Ingredients
For the Roasted Radishes
500g (about 1 lb) radishes, trimmed and halved lengthways
1 tsp white miso paste stirred into the olive oil before tossing — adds umami depth
1 tsp Dijon mustard stirred into the olive oil — adds a gentle sharpness
1 tbsp balsamic vinegar added in the final 5 minutes — adds sweetness and acidity
Instructions
Preheat and prepare. Preheat the oven to 425°F (220°C). Line a large baking sheet with parchment paper or leave it bare for better caramelization — a bare sheet conducts heat more directly to the radishes.
Toss the radishes. In a large bowl, combine the halved radishes with olive oil, maple syrup, sliced garlic, salt, pepper, and chilli flakes if using. Toss well to coat every cut surface.
Roast cut-side down. Spread the radishes in a single layer on the baking sheet, cut-side down. This is important — the flat cut surface against the hot pan is what creates caramelization. Do not crowd the pan; use two baking sheets if needed. Roast for 18–22 minutes until the cut sides are deeply golden and caramelized and the radishes are tender when pierced with a knife. They should have shrunk considerably and the garlic should be golden at the edges.
Finish and serve. Transfer to a serving plate. Squeeze lemon juice over the top, scatter the fresh herbs, and finish with a pinch of flaky sea salt. Serve immediately while hot — these are at their best straight from the oven.
Pro Tips
Cut-side down is non-negotiable — the caramelization happens on the flat surface in direct contact with the hot pan. Radishes roasted cut-side up steam rather than caramelize and are significantly less interesting.
Don’t crowd the pan — overcrowded radishes steam in each other’s moisture instead of roasting. Use a large pan or split between two; the difference in the result is dramatic.
Use the maple syrup — it does two things: it draws moisture out of the radishes during roasting, helping them caramelize faster, and it adds a faint sweetness that balances the residual peppery notes beautifully.
Add the fresh herbs and lemon at the end — heat destroys the brightness of fresh herbs and the acidity of lemon. Add both only after the radishes come out of the oven.
The Transformation of the Radish
The radish — Raphanus sativus — is one of the oldest cultivated vegetables in human history, grown in ancient Egypt, Greece, and Rome thousands of years before the common era and recorded in Chinese agriculture as far back as 500 BCE. For most of this history, radishes were eaten cooked as often as raw — roasted, braised, or added to soups and stews — because their peppery bite, caused by glucosinolates that break down rapidly under heat, was considered too sharp for everyday raw consumption. The modern Western habit of eating radishes exclusively raw is a relatively recent and, many would argue, limiting convention. Cooking radishes — whether roasting, braising, or sautéing — triggers a chemical transformation that breaks down the glucosinolates responsible for the sharp flavor and releases natural sugars that were always present but masked, revealing a completely different vegetable: mild, slightly sweet, and deeply savory. Roasting at high heat accelerates this transformation while simultaneously caramelizing the natural sugars, producing something that the raw radish gives no hint of.
Flavor Variations
Miso Butter Roasted Radishes: Whisk 1 tsp white miso paste into the olive oil before tossing for an umami-rich glaze that gives the radishes a deeply savory, almost meaty quality.
Herb and Lemon Roasted Radishes: Toss with 1 tsp dried thyme and 1 tsp dried oregano before roasting and finish with extra lemon zest for a Mediterranean-inspired version.
Balsamic Glazed Radishes: Add 1 tbsp balsamic vinegar to the pan in the final 5 minutes of roasting for a sticky, tangy glaze that is spectacular alongside roasted grains or lentils.
Nutritional Highlights (Per Serving)
Calories
Protein
Carbs
Fiber
Fat
~95 kcal
1g
8g
2g
7g
Storage
Refrigerator: Store leftovers in an airtight container for up to 3 days. Reheat in a 375°F (190°C) oven for 5–8 minutes to restore some crispness, or eat cold — roasted radishes are excellent cold, tossed into a grain bowl or salad where their concentrated flavor adds real depth.
These do not freeze well — the texture becomes soft and watery after freezing and thawing.
Make ahead: The radishes can be trimmed and halved up to 2 days ahead and stored in water in the refrigerator, ready to toss and roast when needed.
Frequently Asked Questions
Can I use any type of radish?
Yes — standard red globe radishes are the most common choice, but French breakfast radishes (elongated and milder), watermelon radishes (stunning with their pink interior), and daikon cut into chunks all work beautifully with this roasting method. Larger radishes may need an extra 5 minutes in the oven.
Do roasted radishes really lose their peppery flavor?
Yes, almost completely. The heat breaks down the glucosinolates responsible for the peppery bite, leaving a mild, slightly sweet, buttery flavor that is genuinely surprising if you are used to raw radishes. A faint peppery undertone remains, but it is subtle and pleasant rather than sharp.
What do I serve roasted radishes with?
They work alongside almost anything — roasted chicken-style tofu, grain bowls, lentil dishes, or simply on toast with hummus. They are particularly good alongside other roasted vegetables, added to a warm salad with farro or freekeh, or served as part of a mezze spread.
Tried this recipe? Leave a comment below and let us know how it turned out! Tag us on Instagram and Facebook — we love seeing your plant-powered creations. Looking for more addictive vegan snack and appetizer recipes? Browse all recipes on Easy Vegan Recipes — new recipes posted every single week!
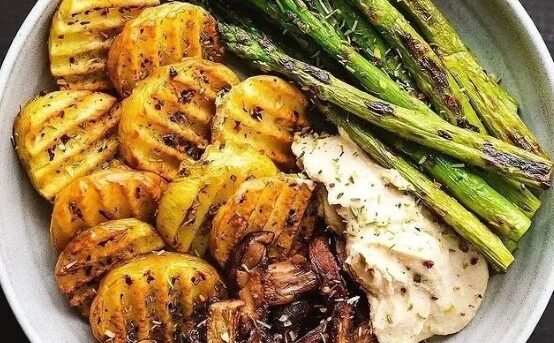
There are roasted potatoes and then there are roasted potatoes like these Vegan Garlic Parmesan Roasted Potatoes — the kind that come out of the oven so impossibly crispy and so golden and so deeply fragrant with roasted garlic and nutty vegan parmesan and fresh herbs that you eat four of them off the pan before they have made it to the table, and then you put the pan on the table and everyone takes four more, and then you look at each other across an empty pan and someone says out loud what everyone is already thinking: we need to make another batch. This is that recipe. The one that turns a humble potato into something that absolutely commands the table. The one that gets requested every single time. The one that, once made, becomes the permanent answer to the question of what to do with potatoes.
The secret is the cut. Baby potatoes halved and roasted cut-side down on a very hot, very lightly oiled sheet pan develop a crust on their flat face that is genuinely, remarkably crispy — a thin, golden, slightly lacquered exterior that gives way immediately to a fluffy, steaming, tender interior. This is the potato at its best: maximum contrast, maximum texture, maximum flavor. The vegan parmesan — made from nutritional yeast, cashews, and garlic — coats every potato in a savory, nutty, umami-rich layer that caramelizes against the hot pan into something almost cheesy in the best possible way. The roasted garlic, cooked alongside the potatoes until it is soft and sweet and golden, melts into the oil and coats everything around it in a fragrance that is one of the most deeply satisfying smells in all of cooking.
What makes this recipe so outstanding is the parboiling step — simmering the potatoes for just 8 minutes before roasting roughens their surface, creating a texture that absorbs oil and seasoning more effectively and produces a crispier, more evenly golden crust than raw potatoes can ever achieve in the same amount of time.
This recipe is 100% vegan, naturally gluten-free, ready in about 45 minutes, and the kind of side dish that instantly becomes the most popular thing on the table.
6 cloves garlic, minced (or left whole for a milder flavor)
1 tsp garlic powder
1 tsp onion powder
½ tsp smoked paprika
½ tsp dried oregano
½ tsp dried thyme
½ tsp black pepper
1 tsp salt (plus more for the parboiling water)
For the Vegan Parmesan
⅓ cup (45g) raw cashews
3 tbsp nutritional yeast
½ tsp garlic powder
¼ tsp salt
1 tbsp olive oil (to help the parmesan adhere)
For Finishing
2 tbsp fresh flat-leaf parsley, finely chopped
1 tbsp fresh chives, sliced (optional)
Zest of ½ lemon
Extra nutritional yeast for serving
Flaky sea salt
Instructions
Parboil the potatoes. Bring a large pot of heavily salted water to a boil. Add the halved potatoes and cook for 8 minutes — they should be just beginning to soften at the edges but still firm at the center; a skewer should meet some resistance. Drain and shake in the colander vigorously for 30 seconds — this bashing and shaking roughens the surface of the potato, creating the textured exterior that becomes irresistibly crispy in the oven. Leave to steam dry in the colander for 5 minutes.
Preheat the oven and pan. While the potatoes parboil, preheat the oven to 425°F (220°C) with a large rimmed baking sheet inside. The hot pan is essential — placing the potatoes on a cold pan and then putting it in the oven produces a steamed result; placing them on a screaming-hot pan produces an immediate sear on the cut face that is the foundation of the crispy crust.
Make the vegan parmesan. Add the raw cashews, nutritional yeast, garlic powder, and salt to a small food processor and pulse 8–10 times until the mixture resembles fine, dry crumbs — the texture of grated parmesan. Do not over-process into a paste. If you do not have a food processor, finely chop the cashews by hand and combine with the other ingredients. Set aside.
Season the potatoes. In a large bowl, combine the parboiled, dried potatoes with the olive oil, minced garlic, garlic powder, onion powder, smoked paprika, dried oregano, thyme, black pepper, and salt. Toss vigorously to coat every potato evenly. Add the tablespoon of olive oil from the finishing ingredients and the vegan parmesan and toss again until the parmesan coats every potato.
Roast. Carefully remove the hot baking sheet from the oven. Working quickly, arrange the potatoes cut-side down in a single layer on the hot pan — do not crowd them, as overlapping potatoes steam rather than roast. If needed, use two baking sheets. Scatter any remaining parmesan and garlic from the bowl over the top. Slide into the oven and roast for 20 minutes without opening the door or moving the potatoes.
Flip and finish. After 20 minutes, check the cut face — it should be deeply golden and lifting easily from the pan. If it is sticking, give it another 3–4 minutes. Flip each potato cut-side up and return to the oven for a further 10–12 minutes until the skin side is golden and the parmesan coating is browned and fragrant.
Finish and serve. Transfer the potatoes to a serving platter. Immediately scatter the fresh parsley, chives, and lemon zest over the top — the heat of the potatoes will briefly cook the fresh herbs, deepening their color and fragrance. Finish with flaky sea salt and an extra dusting of nutritional yeast. Serve immediately.
Pro Tips
Parboil before roasting — this is the technique professional kitchens use for perfect roast potatoes and it makes an enormous difference. The brief parboil softens the interior slightly and roughens the exterior, and the vigorous shake in the colander creates a fluffy, textured surface that crisps magnificently in the oven. Raw potatoes roasted from scratch require much longer cooking and never achieve the same crust.
Heat the pan before adding the potatoes — this is non-negotiable. The hot pan creates an instant sear on the cut face of the potato, producing a crust that begins forming in the first seconds of contact rather than developing slowly from a cold start. A cold pan means steaming; a hot pan means roasting.
Do not crowd the pan — potatoes placed too close together create steam rather than a dry, circulating heat, and they stew rather than roast. Every potato needs space for hot air to circulate around it. Use two pans if necessary and switch their rack positions halfway through.
Season aggressively — potatoes absorb seasoning deeply during roasting, and what tastes over-salted on the raw potato will taste perfectly seasoned in the finished dish. Taste the seasoning mixture before coating and make sure it is boldly flavored.
Why Parboiling Makes the Crispiest Potatoes
The science of the perfect roast potato is, at its core, the science of the crust — and the crust is the product of two things: surface texture and moisture removal. A potato straight from the bag has a smooth, moist surface that lies flat against the pan and produces even contact but limited surface area for crisping. A parboiled, shaken potato has a roughened, slightly ragged surface — the outer layer of starch has gelatinized and then begun to break down under the vigorous shake — with dramatically more surface area, more nooks and ridges for the oil to coat and the heat to act on, and a drier exterior from the steam-drying in the colander. When this roughened, dry surface hits a very hot, lightly oiled pan, the starch on the exterior begins to dehydrate and caramelize almost immediately, forming a crust in the first ten minutes that a raw potato would take forty minutes to achieve and would never achieve with the same evenness. The parboil is not a convenience step. It is the technique that separates average roast potatoes from exceptional ones.
Flavor Variations
Lemon Herb Garlic Potatoes: Replace the smoked paprika with extra lemon zest and add 1 teaspoon of dried rosemary to the seasoning for a bright, herby version where lemon and rosemary are the primary flavors.
Spicy Calabrian Chilli Potatoes: Add 1 tablespoon of Calabrian chilli paste or ½ teaspoon of crushed red pepper flakes to the oil coating for a fiery, Italian-inspired version with a slow-building heat.
Truffle Parmesan Potatoes: Replace 1 tablespoon of the olive oil with truffle oil and add an extra tablespoon of nutritional yeast to the parmesan mixture for an indulgent, deeply earthy version that tastes genuinely luxurious.
Nutritional Highlights (Per Serving)
Calories
Protein
Carbs
Fiber
Fat
~290 kcal
8g
40g
5g
11g
Storage
Refrigerator: Store leftover roasted potatoes in an airtight container for up to 4 days. Reheat in a 400°F (200°C) oven or air fryer for 8–10 minutes to restore crispness — microwaving makes them soft and slightly rubbery.
Air fryer reheating: The air fryer is the best method for reheating roasted potatoes. 375°F (190°C) for 5–6 minutes produces a result almost identical to freshly roasted.
Freezing: Not recommended — roasted potatoes lose their crust texture on thawing and become watery. Make fresh for the best result.
Frequently Asked Questions
Can I use larger potatoes instead of baby potatoes?
Yes — larger Yukon Gold or russet potatoes cut into 3–4cm chunks work well. Increase the parboiling time to 12 minutes and the roasting time by 5–10 minutes. Baby potatoes are preferred because their ratio of skin to interior is higher, producing more crispy surface area per bite.
Can I make these in an air fryer?
Yes — air fryers produce excellent roasted potatoes with less oil. Parboil and season as directed, then cook in the air fryer basket at 400°F (200°C) for 18–20 minutes, shaking halfway through. The parmesan coating may not adhere quite as evenly in the air fryer but the crust is outstanding.
What is vegan parmesan made of?
The vegan parmesan in this recipe is made from raw cashews, nutritional yeast, garlic powder, and salt — blended to the texture of grated parmesan. Nutritional yeast provides the savory, cheesy, umami depth; cashews provide the fat and body; together they coat the potatoes in a layer that caramelizes into a genuinely parmesan-like crust. Store-bought vegan parmesan can also be used.
Can I make these ahead for a dinner party?
Yes — parboil the potatoes, season, and store covered in the refrigerator for up to 24 hours. When ready to serve, roast on a hot sheet pan as directed, adding 5 minutes to account for the cold start. Do not add the fresh herbs until just before serving.
Tried this recipe? Leave a comment below and let us know how it turned out! Tag us on Instagram and Facebook — we love seeing your plant-powered creations. Looking for more addictive vegan snack and appetizer recipes? Browse all recipes on Easy Vegan Recipes — new recipes posted every single week!
There are side dishes you make because something needs to round out the plate. And then there are dishes like these Vegan Garlic Butter Mushrooms — the kind that fill the kitchen with the most extraordinary aroma of sizzling garlic and herbs the moment they hit the pan, that come out deeply golden and glossy, coated in a rich, buttery sauce that pools at the bottom of the plate begging to be soaked up with bread. This is that dish. The one that turns simple mushrooms into something people genuinely fight over. The one that takes fifteen minutes and tastes like considerably more effort went into it.
This recipe sears mushrooms until deeply golden and caramelized at the edges, then finishes them in a quick, glossy sauce of vegan butter, garlic, fresh thyme, and a splash of vegetable broth and lemon juice that coats every piece beautifully. It is one of the simplest recipes in the entire plant-based repertoire and consistently one of the most requested.
What makes these mushrooms so outstanding is the searing technique — giving the mushrooms enough space and high enough heat in the pan to properly brown rather than steam, which is what produces that deep, savory, almost meaty flavor that makes garlic butter mushrooms so universally loved.
This recipe is 100% vegan, naturally gluten-free, ready in just 20 minutes, and absolutely wonderful served alongside steak-style seitan, over toast, tossed with pasta, or simply eaten straight from the pan with a piece of crusty bread.
Recipe Information
Prep Time
Cook Time
Total Time
Servings
Calories
5 mins
15 mins
20 mins
4
~140 kcal
Ingredients
For the Mushrooms
600g mixed mushrooms (cremini, button, or a mix), halved or quartered depending on size
3 tbsp vegan butter
1 tbsp olive oil
5 cloves garlic, minced
1 tbsp fresh thyme leaves (or 1 tsp dried)
2 tbsp vegetable broth
1 tbsp lemon juice
Salt and black pepper to taste
Fresh parsley, chopped, for garnish
Optional Add-ins
1 tsp soy sauce, for added umami depth
¼ tsp chili flakes
2 tbsp dry white wine, added with the broth
To Serve
Crusty bread for soaking up the sauce
Over toast as a starter
Alongside vegan steak or roast
Tossed through pasta with extra olive oil
Instructions
Heat the pan. Heat the olive oil in a large skillet over medium-high heat until shimmering. The pan must be properly hot before the mushrooms go in, and the mushrooms must have enough space — use two pans or work in batches if needed.
Sear the mushrooms. Add the mushrooms in a single layer, cut side down where possible, and let them sit undisturbed for 2–3 minutes until deeply golden on the bottom before stirring. Continue cooking for a further 4–5 minutes, stirring occasionally, until deeply golden all over and any released liquid has evaporated.
Add the butter and garlic. Reduce heat to medium and add the vegan butter and minced garlic to the pan. Cook for 60–90 seconds, stirring, until the garlic is fragrant and the butter has melted into a glossy coating.
Add the remaining flavorings. Add the fresh thyme, vegetable broth, and lemon juice, stirring to combine. Cook for 1–2 minutes until the sauce has reduced slightly and coats the mushrooms in a glossy, fragrant glaze. Season generously with salt and black pepper.
Serve immediately. Garnish with fresh parsley and serve hot, with crusty bread alongside to soak up every bit of the sauce.
Pro Tips
Do not crowd the pan. Mushrooms release a significant amount of water as they cook, and a crowded pan traps steam rather than allowing browning — use a wide pan or work in batches.
Let the mushrooms sit undisturbed for the first few minutes to develop a proper golden crust before stirring.
Add the butter after the initial sear, not before, to avoid burning it at high heat while the mushrooms are browning.
Finish with lemon juice off the heat for the brightest flavor — added too early it can lose some of its fresh acidity.
Why Properly Browned Mushrooms Taste So Good
Mushrooms are rich in glutamates and other umami compounds that intensify dramatically when properly browned through the Maillard reaction. Giving them enough heat and space to sear, rather than steaming them in a crowded pan, is what transforms mushrooms from a watery vegetable into something with a deeply savory, almost meaty character — which is exactly what makes a dish like this so satisfying.
Flavor Variations
Creamy Garlic Mushrooms: Stir in a splash of vegan cream or cashew cream at the end for a richer, creamier sauce.
Mushroom and Spinach: Add a couple of handfuls of fresh spinach in the final minute of cooking, stirring until just wilted.
Smoky Paprika Mushrooms: Add ½ teaspoon of smoked paprika with the garlic for a deeper, smokier flavor.
Nutritional Highlights (Per Serving)
Calories
Protein
Carbs
Fiber
Fat
~140 kcal
4g
8g
2g
11g
Storage
Refrigerator: Store in an airtight container for up to 3 days. Reheat gently in a pan to avoid making them rubbery.
Freezer: Mushrooms can be frozen, though their texture softens noticeably after thawing; best enjoyed fresh.
Frequently Asked Questions
What mushrooms work best for this recipe?
Cremini mushrooms offer the deepest flavor, but button mushrooms work well too. A mix of varieties, including shiitake or oyster mushrooms, adds extra depth and texture.
Can I make this oil-free?
Yes — use a splash of vegetable broth in place of the olive oil for searing, though browning will be slightly less pronounced.
Can I add this to pasta directly?
Yes — toss the finished mushrooms with cooked pasta and a splash of the pasta cooking water for a quick, satisfying meal.
Tried this recipe? Leave a comment below and let us know how it turned out! Tag us on Instagram and Facebook — we love seeing your plant-powered creations. Looking for more simple, satisfying vegan side dish recipes? Browse all recipes on Easy Vegan Recipes — new recipes posted every single week!
There are vegetables that surprise you. And then there are vegetables like this Crispy Vegan Roasted Cauliflower — the kind that comes out of the oven so deeply golden, so shatteringly crispy at the edges, so intensely caramelized and nutty and complex in flavor that people who claim to dislike cauliflower eat three portions before they realize what has happened. This is that cauliflower. The one that converts skeptics. The one that makes people understand — perhaps for the first time — what cauliflower is actually capable of when it is treated not as a pale, watery substitute for something more exciting but as the genuinely extraordinary vegetable it is in its own right, roasted at high heat with proper seasoning until it becomes something that borders on magnificent.
This is roasted cauliflower taken to its absolute furthest possible expression — florets cut to maximize surface area, dried thoroughly to eliminate the surface moisture that is the enemy of crispiness, tossed in a coating of olive oil, nutritional yeast, smoked paprika, garlic, and turmeric that caramelizes in a screaming hot oven into a crust of extraordinary flavor and texture, and roasted with sufficient space on the pan that every single floret develops that specific combination of crispy, golden exterior and tender, yielding interior that makes roasted cauliflower so deeply satisfying to eat.
What makes this recipe so genuinely outstanding is the nutritional yeast coating. Two tablespoons of nutritional yeast added to the seasoning blend does three remarkable things simultaneously — it adds a deep, savory, genuinely cheesy flavor that amplifies every other spice in the blend, it creates a coating that sets to an extraordinary golden crust in the hot oven, and it contributes a concentration of B vitamins and protein that makes these florets nutritionally significant as well as completely delicious. Combined with smoked paprika for depth, garlic for pungency, turmeric for its extraordinary golden color and anti-inflammatory properties, and a touch of cayenne for building warmth — this coating transforms ordinary cauliflower into something genuinely spectacular.
This recipe is 100% vegan, naturally gluten-free, ready in just 30 minutes, and absolutely spectacular served as a side dish, piled into grain bowls, tucked into tacos, scattered over salads, or eaten directly from the baking sheet standing at the kitchen counter because the smell made waiting for anything else completely impossible.
Recipe Information
Prep Time
Cook Time
Total Time
Servings
Calories
10 mins
22 mins
32 mins
4
~160 kcal
Ingredients
For the Cauliflower
1 large head cauliflower (approximately 900g), cut into florets
3 tbsp olive oil
2 tbsp nutritional yeast
1 tsp smoked paprika
1 tsp garlic powder
½ tsp turmeric
½ tsp onion powder
¼ tsp cayenne pepper
1 tsp fine salt
½ tsp black pepper
1 tbsp cornstarch (the secret to extra crispiness)
Optional Seasonings
1 tsp cumin (adds beautiful earthiness)
1 tsp dried oregano
½ tsp chili flakes
1 tbsp lemon zest (add after roasting)
1 tsp curry powder (for an Indian inspired version)
2 tbsp tahini drizzled over after roasting
For the Lemon Herb Finishing Sauce
3 tbsp tahini
2 tbsp lemon juice
1 clove garlic, grated
2–3 tbsp water (to thin)
Salt to taste
Fresh parsley, roughly chopped
Optional Toppings After Roasting
Flaky sea salt
Fresh lemon juice squeezed over
Fresh parsley or cilantro
Pomegranate seeds for color and sweetness
Toasted pine nuts or almonds
Chili flakes for heat
Drizzle of balsamic glaze
To Serve
Over rice or quinoa as a grain bowl base
Tucked into warm tacos with salsa and avocado
Alongside curries and stews
On top of hummus with pita bread
In a Buddha bowl with roasted vegetables
As a side dish for any plant-based main
Scattered over green salads
Instructions
Preheat oven and prepare baking sheets. Preheat your oven to 425°F (220°C) — this high temperature is essential for genuine crispiness. Place two large baking sheets in the oven to preheat simultaneously. Hot baking sheets produce immediate contact heat that begins crisping the cauliflower from the bottom the moment it touches the surface — producing a crispier result than cold sheets.
Prepare the cauliflower. Remove the outer leaves and cut the cauliflower into florets of approximately equal size — roughly 4–5cm across. Cut larger florets in half through the stem to create flat surfaces that sit flush against the pan and caramelize evenly. Smaller florets can be left whole. The flat cut surface is where the most dramatic caramelization happens — maximize it.
Dry the florets thoroughly. Spread the florets on a clean kitchen towel and pat completely dry. This step is absolutely critical — cauliflower contains significant water that must be removed before roasting or it will steam in the oven rather than roast, producing pale, soft florets rather than the golden, crispy result this recipe achieves.
Season the cauliflower. Place the dried florets in a large bowl. Add the olive oil and toss to coat every surface. Add the cornstarch and toss again until evenly coated with no white clumps visible. Add the nutritional yeast, smoked paprika, garlic powder, turmeric, onion powder, cayenne, salt, and pepper. Toss thoroughly until every floret is evenly, generously coated in the golden spice mixture.
Arrange on preheated baking sheets. Remove the hot baking sheets from the oven carefully. Arrange the seasoned florets in a single layer across both sheets — cut side down where possible to maximize the caramelized flat surface. Ensure generous space between each floret — no touching, no overlapping. A crowded pan steams rather than roasts.
Roast to golden perfection. Roast for 15 minutes without opening the oven door. Remove and flip each floret with tongs. Return to the oven for a further 7–10 minutes until deeply golden, crispy at the edges with slightly charred tips, and caramelized and nutty smelling throughout. The tips should be almost dark — this char is desirable and contributes significantly to the flavor.
Make the tahini sauce. While the cauliflower roasts whisk together the tahini, lemon juice, grated garlic, and salt in a small bowl. Add water one tablespoon at a time until the sauce reaches a smooth, drizzleable consistency. Taste and adjust with additional lemon or salt. Add the fresh parsley and stir through.
Serve immediately. Transfer the roasted cauliflower to a serving platter or bowl. Drizzle the tahini sauce generously over the top. Add any desired toppings — pomegranate seeds, toasted pine nuts, fresh herbs, a squeeze of lemon. Serve immediately while the cauliflower is at its crispiest and most fragrant.
Pro Tips for the Crispiest Vegan Roasted Cauliflower
Cut florets with flat surfaces. When cutting the cauliflower aim to create florets with at least one flat, cut surface — this is the side that sits against the hot pan and caramelizes most dramatically. A floret with a large flat base produces significantly more caramelization and crispiness than a small, rounded one.
Dry the cauliflower obsessively. Cauliflower is approximately 92% water by weight — more water per gram than almost any other common vegetable. This extraordinary water content means thorough drying is more critical for cauliflower than for almost any other roasted vegetable. Pat dry with kitchen towels and if time allows spread on a tray and refrigerate uncovered for 30 minutes before roasting — the refrigerator air dries the surface further and produces even crispier results.
Use nutritional yeast in the coating always. The nutritional yeast performs multiple functions that make it irreplaceable in this coating — it adds savory depth, it creates a crust through its protein content, and it provides that barely-there cheesy quality that makes people reach for more without being able to identify exactly why. Do not substitute or omit.
Add the cornstarch. One tablespoon of cornstarch in the coating absorbs residual surface moisture from the florets and sets to a light, crispy film in the oven. It is the difference between good roasted cauliflower and extraordinary roasted cauliflower.
Roast at 425°F minimum. High heat is non-negotiable for crispy cauliflower. At lower temperatures the water in the cauliflower steams out gradually, preventing the surface from ever achieving the dryness needed for crisping. At 425°F the surface water evaporates rapidly, the natural sugars caramelize, and the coating sets to a crispy crust — all in under 25 minutes.
Do not stir during roasting — flip once. Stirring the cauliflower during roasting disrupts the crust formation on the bottom surface. Leave completely undisturbed for the first 15 minutes then flip once to crisp the second side. The bottom surface — in contact with the hot pan throughout — will be the most dramatically caramelized and is the most spectacular side to serve face up.
The Extraordinary Versatility of Roasted Cauliflower
Cauliflower is one of the most versatile and most nutritionally impressive vegetables available in the plant-based kitchen — and understanding why roasting transforms it so dramatically helps explain why this recipe produces results so far beyond what most people expect from this vegetable.
Raw cauliflower is mild, slightly bitter, and characterised primarily by its crunch and its watery texture. At this stage its flavor compounds are largely inactive — locked away in cellular structures that mute and contain them. The roasting process at high heat does several things simultaneously that transform cauliflower from merely edible to genuinely extraordinary.
The Maillard reaction — the same chemical process that creates the complex flavors and aromas of roasted coffee, bread crust, and seared vegetables — activates on the surface of the cauliflower when it reaches approximately 300°F (150°C), creating hundreds of new flavor compounds that were simply not present in the raw vegetable. These compounds produce the characteristic nutty, deeply savory, complex flavor of properly roasted cauliflower that is one of the most satisfying flavor experiences in all of plant-based cooking.
Simultaneously the natural sugars in the cauliflower — present in relatively small amounts compared to sweeter vegetables — caramelize on the cut surfaces in contact with the hot pan, adding a subtle sweetness and complexity that contrasts beautifully with the savory spice coating and the slight bitterness of the slightly charred tips.
The glucosinolates — the sulfur compounds responsible for cauliflower’s characteristic mild bitterness and pungency when raw — break down during roasting into indoles and isothiocyanates that have been extensively studied for their anti-cancer properties. Roasting cauliflower does not diminish its nutritional value — it transforms its phytochemical profile into a form that is more bioavailable and more medicinally active than the raw vegetable.
Nutritionally cauliflower provides Vitamins C, K, B6, and folate alongside choline — an essential nutrient particularly important for brain health and liver function — and meaningful amounts of fiber, potassium, and manganese. The turmeric in the coating contributes curcumin with powerful anti-inflammatory properties. The nutritional yeast contributes B vitamins including B12 in fortified varieties.
Flavor Variations
Buffalo Roasted Cauliflower: After roasting toss the hot florets in buffalo sauce — vegan butter mixed with hot sauce — and return to the oven for 5 minutes for a fiery, sticky version that is spectacular in tacos with cool vegan ranch dressing and sliced celery.
Indian Spiced Cauliflower: Replace the spice blend with 2 teaspoons of curry powder, 1 teaspoon of garam masala, and half a teaspoon of ground ginger for a fragrant, warmly spiced version that is outstanding alongside dal, basmati rice, and cooling coconut yogurt.
Lemon and Herb Cauliflower: Add the zest of two lemons to the spice blend and finish with a generous handful of fresh herbs — parsley, dill, and mint — tossed through the hot florets immediately before serving for a bright, fresh, Mediterranean-inspired version.
Sticky Teriyaki Cauliflower: Toss the roasted florets in a teriyaki glaze — soy sauce, maple syrup, ginger, and garlic — in the final 5 minutes of roasting for a sticky, sweet-savory Asian-inspired version that is spectacular over steamed rice with sliced scallions and sesame seeds.
Nutritional Highlights (Per Serving)
Calories
Protein
Carbs
Fiber
Fat
~160 kcal
7g
16g
5g
9g
At just 160 calories per serving this roasted cauliflower delivers an outstanding nutritional profile — 7 grams of plant-based protein from the cauliflower and nutritional yeast combined, 5 grams of dietary fiber, and an exceptional concentration of Vitamins C, K, and B6 alongside choline, potassium, and manganese. The turmeric contributes curcumin with extensively studied anti-inflammatory properties. The nutritional yeast contributes B vitamins including B12 in fortified varieties alongside all nine essential amino acids. The olive oil contributes heart-healthy monounsaturated fats and supports the absorption of the fat-soluble vitamins present in the cauliflower and spice blend.
Storage
Best fresh: Roasted cauliflower is at its crispiest and most spectacular within 15 minutes of coming out of the oven. It softens as it cools and stored cauliflower never quite achieves the crispiness of freshly roasted — make it fresh whenever possible.
Refrigerator: Store in an airtight container in the refrigerator for up to 4 days. Reheat in a hot oven at 400°F (200°C) for 8–10 minutes or in an air fryer at 375°F (190°C) for 4–5 minutes to restore crispiness. Do not microwave.
Freezer: Freeze roasted florets in a single layer until solid then transfer to a freezer bag for up to 2 months. Reheat from frozen in a 400°F (200°C) oven for 15 minutes until heated through and re-crisped.
Meal prep: Roast a large batch and store in the refrigerator for adding to grain bowls, salads, tacos, and wraps throughout the week. Roasted cauliflower is one of the most versatile meal prep ingredients available — it improves virtually any plant-based meal it is added to.
Frequently Asked Questions
Why is my roasted cauliflower soft instead of crispy?
Soft cauliflower is caused by insufficient drying, a crowded baking sheet, oven temperature too low, or skipping the cornstarch. Ensure florets are completely dry before seasoning, use two baking sheets with generous space, roast at the full 425°F, and include the cornstarch in the coating.
Can I use frozen cauliflower?
Yes — thaw completely and dry as thoroughly as possible before seasoning. Frozen cauliflower contains significantly more moisture than fresh and must be dried extremely well to achieve any crispiness. Fresh cauliflower always produces a superior result but frozen is a perfectly viable alternative.
Can I make this in an air fryer?
Yes — air fryer roasted cauliflower is outstanding. Season as directed and air fry in a single layer at 400°F (200°C) for 12–15 minutes, shaking the basket every 5 minutes. The circulating hot air produces extremely even crispiness on all surfaces and is arguably the best method for small batches.
What size should the florets be?
Approximately 4–5cm across is ideal — large enough to have substance and develop both a crispy exterior and tender interior, small enough to cook through completely in 22 minutes. Very large florets should be cut in half through the stem. Very small florets can burn before the interior cooks — remove them early if needed.
Is roasted cauliflower good for meal prep?
Yes — roasted cauliflower stores well in the refrigerator for 4 days and reheats beautifully in a hot oven or air fryer. It pairs with virtually every plant-based meal making it one of the most versatile meal prep vegetables available. Roast a full head at the beginning of the week for effortless additions to every meal.
Can I roast the whole cauliflower as a head?
Yes — a whole roasted cauliflower head is a spectacular presentation piece. Coat the entire head in the seasoning mixture and roast at 400°F (200°C) for 45–60 minutes until deeply golden all over and a knife inserted in the center meets no resistance. Serve whole at the table for dramatic effect.
Tried this recipe? Leave a comment below and let us know how it turned out! Tag us on Instagram and Facebook — we love seeing your plant-powered creations. Looking for more crispy, flavorful vegan side dish and vegetable recipes? Browse all recipes on Easy Vegan Recipes — new recipes posted every single week!
There are side dishes you make because something needs to accompany the main. And then there are side dishes like these Vegan Sweet Potato Wedges — the kind that upstage everything else on the table, that get eaten directly from the baking sheet before they even make it to the serving bowl, that combine the most extraordinary caramelized sweetness with a crispy, spiced exterior that shatters when bitten into and gives way to the softest, most yielding, most intensely sweet interior imaginable. These are those wedges. The ones that become the reason people come back for seconds when they thought they were already full. The ones that make sweet potato converts out of everyone who tries them. The ones that prove definitively and irrevocably that the humble sweet potato — treated with respect, seasoned with intention, and roasted at the correct temperature — is one of the most spectacular ingredients in the entire plant-based kitchen.
These wedges are everything a great roasted sweet potato should be and then considerably more. The exterior is genuinely, authentically crispy — a result of the specific combination of cornstarch coating, high oven temperature, and sufficient space on the baking sheet that allows the hot oven air to circulate completely around every wedge simultaneously. The interior is soft, yielding, and so intensely sweet that it tastes almost caramelized from the inside — a result of the natural sugars in the sweet potato concentrating during the long, hot roasting process into something that borders on confectionery. And the spice blend — smoked paprika, garlic powder, cumin, and a touch of cayenne — provides a warmth and depth that transforms the natural sweetness of the potato into something genuinely complex and sophisticated.
What makes these wedges so genuinely outstanding is the cornstarch coating. A thin dusting of cornstarch applied to the oiled wedges before roasting creates a barrier that sets to a crispy crust in the hot oven — drawing moisture away from the surface of the potato and creating the golden, crunchy exterior that distinguishes extraordinary roasted sweet potato wedges from the soft, pale, disappointing ones that give roasted sweet potato an undeserved reputation for sogginess.
This recipe is 100% vegan, naturally gluten-free, ready in just 35 minutes, and absolutely spectacular served with virtually anything — as a side dish for burgers and sandwiches, alongside curries and stews, as a snack with dipping sauce, or simply eaten straight from the pan standing at the kitchen counter because the smell made waiting impossible.
Recipe Information
Prep Time
Cook Time
Total Time
Servings
Calories
10 mins
25 mins
35 mins
4
~220 kcal
Ingredients
For the Wedges
4 medium sweet potatoes (approximately 800g total), scrubbed clean
3 tbsp olive oil or avocado oil
2 tbsp cornstarch
1 tsp smoked paprika
1 tsp garlic powder
½ tsp ground cumin
½ tsp onion powder
¼ tsp cayenne pepper (adjust to heat preference)
1 tsp fine salt
½ tsp black pepper
Optional Seasonings
1 tsp dried rosemary, finely chopped
1 tsp dried thyme
½ tsp cinnamon (adds beautiful warmth)
1 tsp nutritional yeast (adds savory depth)
½ tsp chili flakes
For the Dipping Sauce
½ cup (120g) vegan mayonnaise
1 tbsp sriracha or hot sauce
1 tbsp lime juice
1 tsp garlic powder
½ tsp smoked paprika
Salt to taste
Optional Toppings After Roasting
Fresh parsley or cilantro, finely chopped
Flaky sea salt scattered over
Drizzle of tahini and lemon
Vegan parmesan or nutritional yeast
Chili flakes for heat and color
Fresh lime wedges for squeezing
To Serve
Alongside vegan burgers and sandwiches
With vegan aioli or chipotle mayo
Next to curries and grain bowls
As a snack with multiple dipping sauces
In a Buddha bowl with roasted vegetables
Alongside vegan BBQ dishes
Instructions
Preheat the oven properly. Preheat your oven to 425°F (220°C) and place two large baking sheets inside to heat while the oven comes to temperature. Preheating the baking sheets is critical — placing cold wedges onto a hot pan creates immediate contact heat that starts the crisping process from the bottom the moment they touch the surface.
Cut the wedges. Scrub the sweet potatoes clean — there is no need to peel them as the skin becomes deliciously crispy during roasting and adds both texture and nutrition. Cut each potato in half lengthwise then cut each half into 3–4 wedges depending on the size of the potato. Aim for wedges approximately 2–3cm thick at the widest point — thinner wedges crisp more but risk burning, thicker wedges stay softer inside which is also delicious but different.
Dry the wedges. Place the cut wedges on a clean kitchen towel and pat completely dry — removing as much surface moisture as possible. Dry wedges roast and crisp dramatically better than wet ones. Surface moisture creates steam in the oven which prevents crisping and produces the pale, soft wedges that give roasted sweet potato a bad reputation.
Season the wedges. Place the dried wedges in a large bowl. Drizzle with the olive oil and toss to coat every surface evenly in a thin layer of oil. Sprinkle the cornstarch over the oiled wedges and toss again until every wedge has a thin, even coating of cornstarch — no white clumps should remain visible. Add the smoked paprika, garlic powder, cumin, onion powder, cayenne, salt, and pepper and toss one final time until the spices are evenly distributed across all surfaces.
Arrange on the hot baking sheets. Carefully remove the preheated baking sheets from the oven using oven mitts. Arrange the seasoned wedges in a single layer across both sheets — skin side down where possible — ensuring no wedges are touching or overlapping. Spacing is non-negotiable for crispy wedges — wedges that touch each other steam rather than roast and produce soft rather than crispy results. Use two baking sheets rather than one crowded sheet.
Roast to crispy golden perfection. Place the baking sheets in the preheated oven and roast for 15 minutes. Remove from the oven and flip each wedge carefully with tongs or a thin spatula — they should release easily from the pan if properly crisped on the bottom. If they stick wait another 2 minutes — they will release when ready. Return to the oven and roast for a further 8–12 minutes until deeply golden, caramelized at the edges, and crispy on all surfaces. The edges should be beginning to char very slightly — this charring is desirable and contributes significantly to the extraordinary caramelized flavor.
Make the dipping sauce. While the wedges roast whisk together the vegan mayonnaise, sriracha, lime juice, garlic powder, smoked paprika, and salt until completely combined and smooth. Taste and adjust — more sriracha for heat, more lime for brightness. Transfer to a small serving bowl.
Serve immediately. Transfer the roasted wedges directly from the baking sheet to a serving platter or bowl. Scatter flaky sea salt and fresh herbs over the surface immediately — the salt adheres best to the hot surface. Add a squeeze of fresh lime and serve immediately with the dipping sauce alongside. Sweet potato wedges lose their crispiness relatively quickly as they cool — serve within 5 minutes of removing from the oven for the best texture.
Pro Tips for the Crispiest Vegan Sweet Potato Wedges
Preheat the baking sheets in the oven. This single technique — borrowed from professional restaurant kitchens — makes a more significant difference to the crispiness of roasted vegetables than almost any other factor. The immediate contact heat from the preheated pan starts the crisping process from the bottom the moment the wedge touches it, producing a crispier bottom surface than a cold pan can ever achieve.
Use cornstarch without exception. The cornstarch coating is what separates crispy sweet potato wedges from soft ones. Cornstarch absorbs surface moisture from the potato and sets to a light, crispy coating in the hot oven that oil alone cannot produce. Do not substitute flour which produces a thicker, doughier coating rather than the light, crispy result cornstarch achieves.
Never crowd the pan. This is the most repeated advice in roasted vegetable cooking because it is the most important and most frequently ignored. Every wedge must have clear space around it — hot air must circulate freely around all surfaces simultaneously for the roasting rather than steaming effect that produces crispiness. Two baking sheets are better than one crowded sheet every time.
Roast at the highest temperature your oven allows. 425°F (220°C) is the minimum for genuinely crispy sweet potato wedges. A lower temperature produces soft, pale, steamed-style wedges regardless of how long they are cooked. The high heat is what caramelizes the natural sugars and creates the golden, slightly charred edges that make these wedges so extraordinarily flavorful.
Flip once and only once. Flipping the wedges once during cooking — at the halfway point — allows both surfaces to develop a crispy crust while the interior cooks through gently. Flipping more frequently disrupts the crust formation and produces less evenly crisped wedges.
Do not peel the sweet potatoes. The skin becomes wonderfully crispy during roasting and adds both textural interest and nutritional value — sweet potato skin is rich in fiber, potassium, and antioxidants. Scrub thoroughly rather than peeling for the best result.
The Extraordinary Nutritional Power of Sweet Potato
Sweet potato is one of the most nutritionally impressive vegetables available anywhere in the plant kingdom — and understanding what makes it so remarkable helps explain why these wedges are so much more than simply a delicious side dish.
The beta-carotene content of sweet potato is one of its most extraordinary qualities. A single medium sweet potato provides over 400% of the daily recommended Vitamin A intake in the form of beta-carotene — the orange pigment compound that the body converts to Vitamin A as needed. Beta-carotene is a powerful antioxidant that supports immune function, vision health, skin integrity, and cellular protection from oxidative damage. The fat in the olive oil used to roast the wedges actually increases the absorption of beta-carotene significantly — fat-soluble vitamins require dietary fat to be absorbed from the digestive tract.
Sweet potatoes are also an exceptional source of Vitamin C — providing approximately 35% of the daily recommended intake per serving — alongside meaningful amounts of potassium, manganese, Vitamin B6, and dietary fiber. The fiber content — approximately 4 grams per serving — supports healthy digestion, feeds beneficial gut bacteria, and promotes the gradual release of the sweet potato’s natural sugars into the bloodstream rather than the rapid spike that refined carbohydrates produce.
The natural sugars in sweet potato — primarily sucrose, fructose, and glucose — are accompanied by fiber, vitamins, and minerals that fundamentally change how the body processes them compared to the isolated sugars in refined sweet foods. This combination of natural sweetness and nutritional substance is what makes sweet potato such a valuable ingredient in plant-based cooking — it provides the satisfaction of sweetness with the nutritional profile of a genuinely nourishing whole food.
Smoked paprika contributes capsaicin compounds with anti-inflammatory properties alongside Vitamins A and E. Garlic powder provides allicin precursors with antimicrobial and cardiovascular protective properties. Cumin contributes thymoquinone with antioxidant properties and enhanced iron absorption.
Flavor Variations
Honey Garlic Sweet Potato Wedges: Toss the roasted wedges in a glaze of vegan honey or maple syrup, minced garlic, soy sauce, and sesame oil in the final 5 minutes of roasting for a sticky, sweet-savory version that is particularly spectacular with sesame seeds and sliced scallions scattered over.
Za’atar Sweet Potato Wedges: Replace the spice blend with za’atar seasoning and finish with a drizzle of tahini, a squeeze of lemon, and fresh chopped parsley for a Middle Eastern-inspired version that is outstanding alongside hummus and warm pita.
Tandoori Sweet Potato Wedges: Replace the spice blend with tandoori masala and serve with a cooling coconut yogurt mint dip for an Indian-inspired version with a beautiful deep red color and a warmly spiced character.
Parmesan Sweet Potato Wedges: Toss the seasoned wedges in 3 tablespoons of nutritional yeast before roasting for a savory, umami-rich version with a beautiful golden crust that pairs magnificently with marinara sauce for dipping.
Nutritional Highlights (Per Serving)
Calories
Protein
Carbs
Fiber
Fat
~220 kcal
3g
38g
5g
8g
At just 220 calories per serving these wedges deliver extraordinary nutritional value — over 400% of the daily Vitamin A requirement, 35% of Vitamin C, meaningful amounts of potassium, manganese, and B6, and 5 grams of dietary fiber alongside their extraordinary flavor. The olive oil contributes heart-healthy monounsaturated fats that support the absorption of the fat-soluble beta-carotene. The spice blend contributes anti-inflammatory capsaicin, cardiovascular-protective allicin precursors, and antioxidant compounds. This is a side dish that nourishes as deeply as it satisfies.
Storage
Best fresh: Sweet potato wedges are at their crispiest within 10 minutes of coming out of the oven. They soften as they cool — serve immediately for the best texture experience.
Refrigerator: Store cooled wedges in an airtight container in the refrigerator for up to 4 days. Reheat in a hot oven at 400°F (200°C) for 8–10 minutes or in an air fryer at 375°F (190°C) for 4–5 minutes to restore crispiness. Do not microwave which makes them irreversibly soft.
Freezer: Freeze roasted wedges in a single layer until solid then transfer to a freezer bag for up to 2 months. Reheat from frozen in a 400°F (200°C) oven for 15–18 minutes until heated through and re-crisped.
Meal prep: Roast a large batch at the beginning of the week and store in the refrigerator for quick reheating throughout the week. They pair with virtually every plant-based meal — curry, grain bowls, sandwiches, salads — making them one of the most versatile meal prep items available.
Frequently Asked Questions
Why are my sweet potato wedges soft instead of crispy?
Soft wedges are caused by one of four things — insufficient drying before seasoning, no cornstarch coating, a crowded baking sheet, or oven temperature too low. Ensure the wedges are completely dry before oiling, coat thoroughly in cornstarch, spread with generous space between each wedge on two baking sheets, and roast at the full 425°F (220°C).
Do I need to peel the sweet potatoes?
No — the skin of sweet potato is completely edible, nutritious, and becomes deliciously crispy during roasting. Scrub the potatoes thoroughly under running water to remove any dirt. If you prefer peeled wedges the recipe works equally well — the exterior will be slightly less textured without the skin.
Can I make these in an air fryer?
Yes — air fryer sweet potato wedges are outstanding. Season as directed and air fry in a single layer at 400°F (200°C) for 15–18 minutes, shaking the basket every 5 minutes for even crisping. The air fryer produces wedges that are arguably crispier than oven-roasted ones and cooks them in significantly less time.
What sweet potatoes work best for wedges?
Medium-sized sweet potatoes with a uniform shape produce the most evenly sized wedges and the most consistent cooking results. The orange-fleshed variety — Beauregard or Jewel cultivars — produce the sweetest, most vibrantly colored wedges. Purple sweet potatoes produce a dramatically beautiful wedge with a slightly drier, nuttier flavor.
Can I prepare the wedges in advance?
Yes — cut, dry, and season the wedges up to 4 hours in advance and store in a single layer on parchment-lined baking sheets in the refrigerator. Roast directly from the refrigerator — the cold wedges may need an additional 3–5 minutes of roasting time. Do not oil and season more than 4 hours in advance as the salt draws moisture from the potato and can make the exterior less crispy.
What dipping sauces work best with sweet potato wedges?
The sriracha mayo in this recipe is the ideal pairing — its creamy richness and gentle heat complement the sweet, caramelized wedges perfectly. Other outstanding options include chipotle vegan aioli, tahini with lemon and garlic, vegan ranch dressing, hummus, mango chutney, and vegan sour cream with chives.
Tried this recipe? Leave a comment below and let us know how it turned out! Tag us on Instagram and Facebook — we love seeing your plant-powered creations. Looking for more crispy, vibrant vegan side dish recipes? Browse all recipes on Easy Vegan Recipes — new recipes posted every single week!
There are bakes you make because something needs to fill the table. And then there are bakes like this Vegan Broccoli Potato Bake — the kind that comes out of the oven bubbling and golden, layers of tender potato and bright green broccoli bound together in a creamy, cheesy sauce that pulls into long, satisfying strands when served. This is that bake. The one that turns two humble vegetables into a genuinely comforting main course or side dish. The one that gets requested again the very same week.
This recipe layers thinly sliced potatoes and broccoli florets in a creamy cashew-based cheese sauce seasoned with garlic, nutritional yeast, and a touch of mustard for depth, topped with breadcrumbs for a golden, slightly crisp finish. It bakes into a dish that is rich, satisfying, and substantial enough to serve as a main course on its own.
What makes this bake so outstanding is the sauce — a silky cashew cream enriched with nutritional yeast and a touch of mustard that thickens beautifully in the oven, coating every piece of potato and broccoli in a rich, savory layer that tastes remarkably close to a classic cheese sauce.
This recipe is naturally gluten-free when made with gluten-free breadcrumbs, ready in about an hour, and absolutely wonderful served on its own or alongside a simple green salad.
Recipe Information
Prep Time
Cook Time
Total Time
Servings
Calories
20 mins
50 mins
70 mins
6
~310 kcal
Ingredients
For the Cashew Cheese Sauce
1 cup (130g) raw cashews, soaked in boiling water for 20 minutes then drained
1½ cups (360ml) vegetable broth
½ cup (120ml) plant milk
4 tbsp nutritional yeast
2 cloves garlic
1 tsp Dijon mustard
1 tbsp lemon juice
½ tsp onion powder
½ tsp salt
¼ tsp black pepper
For the Bake
800g potatoes, peeled and thinly sliced
1 large head broccoli, cut into small florets
1 small onion, thinly sliced
For the Topping
½ cup (50g) breadcrumbs
1 tbsp olive oil
2 tbsp nutritional yeast
¼ tsp smoked paprika
Optional Add-ins
½ cup (60g) shredded vegan cheese mixed into the sauce
¼ tsp chili flakes for a gentle heat
Fresh thyme between the layers
Instructions
Preheat the oven and prepare the dish. Preheat the oven to 375°F (190°C). Grease a deep baking dish.
Parboil the potatoes. Place the sliced potatoes in a pot, cover with cold water, add a pinch of salt, and boil for 5–6 minutes until just tender but not falling apart. Drain.
Blanch the broccoli. Blanch the broccoli florets in boiling water for 2 minutes, then drain and set aside.
Make the cashew cheese sauce. Blend the drained cashews, vegetable broth, plant milk, nutritional yeast, garlic, Dijon mustard, lemon juice, onion powder, salt, and pepper until completely smooth.
Layer the bake. Layer half the parboiled potatoes in the prepared dish, followed by half the onion and half the broccoli. Pour half the sauce over evenly. Repeat with the remaining potatoes, onion, broccoli, and sauce.
Make the topping. Combine the breadcrumbs, olive oil, nutritional yeast, and smoked paprika in a small bowl, then scatter evenly over the top of the bake.
Bake. Bake for 35–40 minutes until bubbling, golden on top, and the potatoes are fully tender.
Rest and serve. Let rest for 5 minutes before serving to allow the sauce to set slightly.
Pro Tips
Slice the potatoes evenly for consistent cooking throughout the bake.
Parboil the potatoes before baking to ensure they cook through fully in the time it takes the topping to brown.
Blend the cashew sauce thoroughly for a completely smooth, lump-free result.
Do not skip the breadcrumb topping — it provides essential textural contrast against the creamy layers beneath.
Why This Combination Works
Potatoes provide hearty substance while broccoli adds freshness, color, and nutrition, and together they soak up the rich cashew cheese sauce beautifully during baking. The combination creates a dish that feels both comforting and balanced, satisfying as a side dish or filling enough to serve as a complete meal.
Flavor Variations
Cheesy Broccoli Potato Bake: Stir shredded vegan cheese into the sauce for extra richness and a more pronounced cheesy flavor.
Garlic Herb Bake: Add extra garlic and fresh thyme or rosemary between the layers for a more herbaceous version.
Spicy Version: Add chili flakes to the sauce for gentle background heat throughout the bake.
Nutritional Highlights (Per Serving)
Calories
Protein
Carbs
Fiber
Fat
~310 kcal
10g
38g
6g
13g
Storage
Refrigerator: Store in an airtight container for up to 4 days. Reheat covered in the oven to avoid drying out.
Freezer: Freeze well for up to 2 months. Thaw overnight in the refrigerator and reheat covered in the oven.
Make ahead: Assemble the bake a day ahead and refrigerate unbaked, adding a few extra minutes to the baking time when cooking from cold.
Frequently Asked Questions
Can I use frozen broccoli?
Yes — thaw and drain thoroughly before adding to avoid excess moisture in the finished bake.
Can I make this without a blender?
Yes — use store-bought vegan cream cheese thinned with broth and seasoned with the same garlic, mustard, and nutritional yeast as an alternative base.
Can I add a different vegetable?
Yes — cauliflower, carrots, or green beans all work well in place of or alongside the broccoli.
Tried this recipe? Leave a comment below and let us know how it turned out! Tag us on Instagram and Facebook — we love seeing your plant-powered creations. Looking for more comforting vegan side dish and bake recipes? Browse all recipes on Easy Vegan Recipes — new recipes posted every single week!
There are side dishes you make because something needs to accompany the pasta. And then there are side dishes like these Vegan Cheesy Garlic Breadsticks — the kind that come out of the oven golden and pulling apart, drenched in garlic butter and bubbling with melted vegan cheese, so deeply savory and so completely irresistible that they upstage whatever they are supposed to be accompanying. This is that breadstick. The one that disappears before the main dish has even been plated. The one that makes people reach across the table without waiting to be offered one.
These breadsticks start with a simple yeasted dough that bakes into a soft, pillowy base, brushed generously with garlicky vegan butter and topped with a generous layer of shredded vegan mozzarella that melts into long, glossy strands, then scattered with fresh parsley and a pinch of chili flakes for color and warmth. They are simultaneously one of the simplest and most crowd-pleasing things you can pull out of an oven.
What makes these breadsticks so outstanding is the garlic butter — made with real minced garlic, vegan butter, fresh parsley, and a pinch of salt, brushed both under and over the cheese layer so that the garlic flavor permeates every component of the finished stick rather than sitting only on the surface.
This recipe is 100% vegan, ready in about 90 minutes including rising time, and absolutely wonderful served immediately from the oven, pulled apart by hand, alongside pasta, soup, or a simple salad.
Recipe Information
Prep Time
Rise Time
Cook Time
Total Time
Servings
Calories
20 mins
60 mins
15 mins
95 mins
8
~280 kcal
Ingredients
For the Dough
2½ cups (300g) all-purpose flour
2¼ tsp (7g) active dry yeast
1 tsp sugar
¾ tsp salt
¾ cup (180ml) warm water (110°F / 43°C)
2 tbsp olive oil
For the Garlic Butter
5 tbsp vegan butter, softened
4 cloves garlic, very finely minced
2 tbsp fresh parsley, finely chopped
Pinch of salt
¼ tsp chili flakes (optional)
For the Topping
1½ cups (180g) vegan mozzarella, shredded
Extra fresh parsley for garnish
Flaky sea salt for finishing
Optional Add-ins
2 tbsp nutritional yeast mixed into the garlic butter for extra savory depth
A light dusting of smoked paprika before baking
Vegan parmesan scattered over alongside the mozzarella
Instructions
Activate the yeast. Combine the warm water, sugar, and yeast in a small bowl. Stir gently and let sit for 5–10 minutes until foamy.
Make the dough. In a large bowl combine the flour and salt. Add the activated yeast mixture and olive oil. Mix until a shaggy dough forms, then knead for 7–8 minutes until smooth and elastic.
First rise. Place the dough in a lightly oiled bowl, cover, and let rise in a warm place for 45–60 minutes until doubled.
Make the garlic butter. Mix together the softened vegan butter, minced garlic, fresh parsley, salt, and chili flakes if using until well combined.
Shape the breadsticks. Punch down the risen dough and roll or press into a rectangle approximately 25 x 30cm on a lined baking sheet. Spread half the garlic butter evenly over the surface.
Top with cheese. Scatter the shredded vegan mozzarella evenly over the garlic butter surface. Spread the remaining garlic butter over the cheese.
Rest briefly. Cover loosely and let rest for 15 minutes while preheating the oven to 425°F (220°C).
Bake. Bake for 12–15 minutes until the dough is golden at the edges and the cheese is melted and bubbling with golden patches.
Cut and serve. Remove from the oven and immediately scatter with extra fresh parsley and a pinch of flaky sea salt. Cut into sticks and serve immediately while the cheese is still melted and the garlic butter is fragrant.
Pro Tips
Use plenty of garlic butter — these breadsticks are not the place for restraint. A generous, even coating under and over the cheese is what makes them so deeply flavored and satisfying.
Shred the vegan mozzarella yourself from a block if possible, as pre-shredded vegan cheese often contains anti-caking agents that prevent it from melting as smoothly.
Bake at a high temperature for the best melt and golden color — a lower temperature produces paler, less appealing cheese.
Serve immediately while the cheese is still in its best melted state — vegan cheese firms up more quickly than dairy cheese as it cools.
Why These Breadsticks Are Universally Irresistible
Garlic bread in any form occupies a specific category of food that combines three of the most universally appealing flavors — butter, garlic, and bread — in a single preparation. Adding melted cheese introduces a fourth deeply satisfying element (the specific umami and textural satisfaction of molten cheese), and the combination of all four becomes almost impossible to resist for most people regardless of dietary preference.
Flavor Variations
Pesto Cheesy Breadsticks: Replace the garlic butter with a generous layer of vegan pesto under the cheese for a herby, nutty version.
Marinara Dipping Breadsticks: Serve with a bowl of warm marinara sauce alongside for dipping for a classic Italian-American combination.
Everything Bagel Breadsticks: Replace the chili flakes with everything bagel seasoning scattered over the cheese before baking.
Best fresh: Cheesy garlic breadsticks are at their absolute peak straight from the oven while the cheese is still melted. Serve immediately whenever possible.
Refrigerator: Store in an airtight container for up to 2 days. Reheat in a hot oven or air fryer for 4–5 minutes to restore some of the original texture.
Freezer: Freeze baked, cooled breadsticks for up to 1 month. Reheat from frozen in a 375°F (190°C) oven for 10–12 minutes.
Frequently Asked Questions
Can I make these without yeast using store-bought dough?
Yes — store-bought vegan pizza dough works beautifully as the base for these breadsticks and reduces the total time to under 30 minutes.
What vegan mozzarella melts best?
Brands specifically marketed as melting or stretchy vegan mozzarella perform best — check the packaging for melting claims. Block-style vegan mozzarella shredded fresh generally outperforms pre-shredded varieties.
Can I make these gluten-free?
Yes — use a gluten-free pizza dough or a gluten-free flour blend for the yeasted dough. The texture will be slightly different but still delicious when topped generously with garlic butter and cheese.
Tried this recipe? Leave a comment below and let us know how it turned out! Tag us on Instagram and Facebook — we love seeing your plant-powered creations. Looking for more irresistible vegan bread and side dish recipes? Browse all recipes on Easy Vegan Recipes — new recipes posted every single week!
There are side dishes that complete a meal. And then there are side dishes like these Vegan Scalloped Potatoes — the kind that become the meal, that make everything else on the table a pleasant supporting act to the real event happening in the baking dish, that come out of the oven bubbling and golden and smelling so extraordinarily of caramelized cream and garlic and herbs that people are already seated and ready before you have even called them to the table. This is that dish. The one that makes holiday tables feel genuinely special. The one that gets requested at every family gathering from the moment it first appears. The one that is so deeply, warmly, extravagantly comforting that eating it feels like being taken care of in the most fundamental and delicious way possible.
These are scalloped potatoes of extraordinary luxury and extraordinary deliciousness — thin, even slices of tender potato layered in a deep baking dish with a cashew cream sauce of such silky, garlic-scented richness that it is completely and utterly indistinguishable from the finest dairy cream, seasoned generously with fresh thyme, garlic, nutmeg, and an extraordinary amount of nutritional yeast that creates a deep, savory, almost cheesy depth throughout every layer, and baked until the top is deeply golden and slightly crisped while the layers beneath are completely yielding, perfectly tender, and bathed in a sauce that has thickened around them into something that is simultaneously sauce and custard and pure comfort.
What makes this recipe so genuinely outstanding is the cashew cream sauce. Raw cashews soaked briefly in boiling water and blended with garlic, nutritional yeast, lemon, and vegetable broth into the most velvety, dairy-free cream imaginable — a cream so rich, so silky, and so deeply flavored that it performs every function that dairy cream performs in scalloped potatoes, including the slow thickening during baking as its proteins and starches concentrate around the potato layers into a sauce of extraordinary body and richness. There is no compromise here. No thinness. No absence. Just a different and in many ways more interesting path to the same extraordinary result.
This recipe is 100% vegan, naturally gluten-free, ready in 75 minutes of largely unattended baking, and absolutely magnificent served as a holiday side dish, a weeknight comfort dinner, or the centrepiece of any gathering where you want to demonstrate beyond any possible doubt that plant-based cooking is not about deprivation but about genuine, luxurious abundance.
Recipe Information
Prep Time
Cook Time
Total Time
Servings
Calories
20 mins
55 mins
75 mins
6
~380 kcal
Ingredients
For the Cashew Cream Sauce
1½ cups (200g) raw cashews, soaked in boiling water for 20 minutes then drained
2 cups (480ml) vegetable broth
1 cup (240ml) unsweetened oat milk
6 tbsp nutritional yeast
4 cloves garlic, minced
2 tbsp lemon juice
1 tbsp white miso paste
1 tsp onion powder
½ tsp nutmeg
½ tsp salt
¼ tsp white pepper
For the Potato Layers
1.2kg (about 6 medium) Yukon Gold or Russet potatoes, peeled and very thinly sliced
1 medium white onion, very thinly sliced
4 cloves garlic, very thinly sliced
2 tbsp fresh thyme leaves (or 1 tsp dried thyme)
1 tbsp fresh rosemary, very finely chopped
Salt and black pepper for seasoning between layers
For the Top
½ cup (60g) vegan cheese, shredded (optional but spectacular)
1 tbsp vegan butter, cut into small pieces
Extra fresh thyme for garnish
Smoked paprika for color
Optional Add-ins Between Layers
1 cup (150g) frozen spinach, thawed and squeezed dry
1 cup (100g) mushrooms, thinly sliced and sautéed
½ cup (60g) sun-dried tomatoes, roughly chopped
1 medium leek, thinly sliced and softened in olive oil
To Serve
As a holiday side dish alongside roasted vegetables
With a simple green salad
As a main course with crusty bread
Alongside vegan roasts and mains
With steamed green beans or asparagus
At any gathering as the star side dish
Instructions
Preheat the oven and soak the cashews. Preheat your oven to 375°F (190°C) and grease a deep 23 x 33cm (9 x 13 inch) baking dish generously with vegan butter or olive oil. Place the cashews in a bowl, cover with boiling water, and soak for 20 minutes. This soaking time is essential — properly soaked cashews blend to a completely smooth, silky cream. Under-soaked cashews produce a grainy sauce.
Slice the potatoes. While the cashews soak slice the potatoes into very thin, even rounds — approximately 3mm (⅛ inch) thick. A mandoline produces the most consistently thin, even slices and is strongly recommended for this recipe. Consistent slice thickness is critical — uneven slices produce unevenly cooked layers with some pieces perfectly tender while others are still firm. Place the sliced potatoes in a bowl of cold water to prevent browning while you prepare the sauce.
Make the cashew cream sauce. Drain the soaked cashews and place in a high-speed blender with the vegetable broth, oat milk, nutritional yeast, minced garlic, lemon juice, white miso paste, onion powder, nutmeg, salt, and white pepper. Blend on the highest speed for 90 seconds until completely smooth, silky, and flowing with absolutely no graininess or texture remaining. Taste the sauce — it should be deeply savory, slightly tangy, richly flavored, and with a pronounced cheesy depth from the nutritional yeast. Adjust seasoning confidently — this sauce needs to season the entire dish.
Sauté the aromatics. Heat a small amount of olive oil in a skillet over medium heat. Add the thinly sliced onion and cook for 4–5 minutes until softened. Add the sliced garlic and cook for 60 seconds until fragrant. Set aside.
Begin layering. Drain the potato slices and pat dry with kitchen towels — removing surface moisture produces more even cooking and better absorption of the cream sauce. Begin building the layers in the prepared baking dish. Start with a thin layer of cashew cream sauce spread across the base of the dish. Add a single layer of overlapping potato slices — arrange them like overlapping scales, each slice covering approximately half of the previous one for the most even, beautiful presentation. Scatter some of the softened onion and garlic mixture over the potatoes. Season generously with salt and pepper. Scatter fresh thyme and rosemary. Pour a generous ladle of cashew cream sauce over the layer — enough to just cover the potatoes.
Continue layering. Repeat the layering process — potatoes, onion, herbs, seasoning, cream sauce — until all ingredients are used, finishing with a layer of potatoes on top. Pour the remaining cashew cream sauce over the final potato layer — it should come just to the top of the potatoes but not overflow. Press the top layer of potatoes gently into the sauce with the back of a spoon.
Top and cover. If using vegan cheese scatter it evenly over the top potato layer. Dot with the small pieces of vegan butter. Scatter extra thyme leaves and a light dusting of smoked paprika over the surface. Cover the baking dish tightly with aluminum foil — the steam trapped under the foil during the first stage of baking is what cooks the potatoes through to complete tenderness before the top is allowed to brown.
Bake covered then uncovered. Bake covered for 40 minutes until the potatoes are just tender when pierced through the foil with a thin knife — the knife should meet only slight resistance. Remove the foil and bake uncovered for a further 15–20 minutes until the top is deeply golden, slightly crisped at the edges, and the sauce is bubbling vigorously around the sides of the dish.
Rest before serving. Remove from the oven and allow to rest for 10 minutes before serving — this resting time allows the sauce to thicken and set slightly, producing cleaner, more beautiful servings rather than the flowing, loose result of a dish served immediately from the oven. Garnish with fresh thyme leaves and serve directly from the baking dish at the table.
Pro Tips for Perfect Vegan Scalloped Potatoes
Slice the potatoes on a mandoline. Consistent, paper-thin slices are the foundation of great scalloped potatoes — and consistent slices require a mandoline or extremely careful, skilled knife work. Uneven slices produce uneven cooking with some layers perfectly tender and others still firm when the dish is done. A mandoline set to 3mm produces the ideal slice for this recipe.
Season every layer generously. Scalloped potatoes require confident, layered seasoning — salt added only to the sauce will not penetrate every layer evenly. Season each potato layer with salt and pepper before adding the sauce for a dish that is uniformly, deeply seasoned throughout rather than well-seasoned on top and bland in the middle.
Use Yukon Gold potatoes. Yukon Gold potatoes have a naturally buttery flavor, a waxy texture that holds their shape during baking rather than dissolving, and a beautiful golden color that makes the finished dish look particularly appetizing. Russet potatoes also work well — they are starchier and produce a slightly softer result. Avoid red-skinned potatoes which stay too firm.
Blend the cashew sauce for the full 90 seconds. A perfectly smooth, completely lump-free cashew cream requires sustained high-speed blending. Any residual graininess in the sauce will be visible in the finished dish and will affect the texture of the cream as it thickens during baking. Blend until the sauce flows like thick dairy cream with absolutely no texture remaining.
Cover tightly for the first 40 minutes. The steam trapped under the foil during the first stage of baking is essential for cooking the potato layers through to complete tenderness. Uncovering too early produces undercooked potatoes beneath a beautifully browned top — a common and deeply frustrating mistake. Keep covered until the potatoes are just tender before removing the foil to brown the top.
Rest for 10 minutes before serving. The sauce in freshly baked scalloped potatoes is liquid and flowing — resting for 10 minutes allows it to thicken and set to the perfect consistency for serving. A dish served immediately from the oven produces servings that fall apart. A dish rested for 10 minutes produces beautiful, layered servings that hold their shape on the plate.
The History of Scalloped Potatoes
Scalloped potatoes — known in French culinary tradition as gratin dauphinois — is one of the most beloved and most enduringly popular potato preparations in the entire Western culinary canon. The dish originated in the Dauphiné region of southeastern France where it appears in cookbooks as early as the eighteenth century in a form that is essentially identical to the modern preparation — thinly sliced potatoes baked in cream and garlic until tender and golden.
The name scalloped derives from the old English culinary term to scallop — meaning to bake in a sauce in a shallow dish — which was applied to numerous preparations in nineteenth century American cooking. The French original uses nothing more than potatoes, cream, garlic, salt, and pepper — a preparation of such austere simplicity and such extraordinary result that it has remained largely unchanged for over two centuries.
What makes scalloped potatoes so enduringly beloved across cultures and generations is their extraordinary textural transformation during baking. Raw potato slices are firm, starchy, and relatively flavorless. After 55 minutes in a hot oven bathed in cream they become completely yielding, deeply flavored from the garlic and herbs that surround them, and coated in a sauce that has thickened around them during baking into something halfway between cream and custard — simultaneously rich and light, substantial and flowing, warming and luxurious.
This vegan version achieves exactly this transformation through the cashew cream sauce — which behaves during baking in a remarkably similar way to dairy cream, thickening slowly as its proteins concentrate and its starches absorb the moisture released by the potatoes, setting to the characteristic layered, custard-like consistency of the original.
Flavor Variations
Truffle Scalloped Potatoes: Add 2 tablespoons of truffle oil to the cashew cream sauce and finish with a drizzle of additional truffle oil before serving for an extraordinarily luxurious version that is particularly spectacular for holiday entertaining.
Spinach and Artichoke Scalloped Potatoes: Add layers of thawed frozen spinach and roughly chopped artichoke hearts between the potato layers for a version inspired by spinach artichoke dip that is extraordinarily rich and deeply satisfying.
Sweet Potato Scalloped Potatoes: Replace half the regular potatoes with thinly sliced sweet potato for a version with a beautiful orange-and-white layered appearance and a natural sweetness from the sweet potato that contrasts magnificently with the savory cream sauce.
Mushroom Scalloped Potatoes: Add layers of thinly sliced cremini mushrooms sautéed with garlic and thyme between the potato layers for a version with deep, earthy umami richness that makes the finished dish taste significantly more complex than the potato-only version.
Nutritional Highlights (Per Serving)
Calories
Protein
Carbs
Fiber
Fat
~380 kcal
12g
52g
5g
15g
At 380 calories per serving these scalloped potatoes deliver genuine indulgence alongside meaningful nutrition. Potatoes provide complex carbohydrates, Vitamin C, potassium, Vitamin B6, and resistant starch that supports gut microbiome health. The cashew cream sauce contributes 12 grams of plant-based protein per serving alongside heart-healthy monounsaturated fats, magnesium, phosphorus, and zinc. The nutritional yeast provides B vitamins including B12 in fortified varieties alongside all nine essential amino acids. Fresh thyme contributes thymol with potent antimicrobial and antioxidant properties. Garlic contributes allicin with cardiovascular protective and antimicrobial properties.
Storage
Refrigerator: Store cooled scalloped potatoes covered tightly in the baking dish or in an airtight container in the refrigerator for up to 4 days. The dish actually improves significantly on day 2 as the sauce continues to absorb into the potato layers and the flavors deepen and meld. Reheat covered with foil in a 350°F (175°C) oven for 20–25 minutes until heated through, removing the foil for the final 5 minutes to re-crisp the top.
Freezer: Scalloped potatoes freeze well for up to 2 months. Cool completely before covering tightly with plastic wrap and foil. Thaw overnight in the refrigerator and reheat covered in a 350°F (175°C) oven for 30–35 minutes. The texture of the potatoes changes slightly during freezing — they become slightly softer — but the flavor remains excellent.
Make ahead: This is an outstanding make-ahead dish for holidays and entertaining. Assemble completely, cover tightly, and refrigerate for up to 24 hours before baking. Add 10–15 minutes to the covered baking time when cooking from cold. The assembled unbaked dish can also be frozen for up to 1 month — thaw completely in the refrigerator before baking.
Individual portions: Reheat individual portions in a small oven-safe dish at 350°F (175°C) for 15 minutes or in the microwave for 2–3 minutes — adding a splash of plant milk if the sauce has become too thick during storage.
Frequently Asked Questions
What potatoes work best for scalloped potatoes?
Yukon Gold potatoes are the finest choice — their naturally buttery flavor, waxy texture, and beautiful golden color make them ideal for this preparation. They hold their shape during baking without dissolving and their inherent flavor complements the cashew cream sauce beautifully. Russet potatoes produce a slightly softer, starchier result that some people prefer. Avoid red-skinned potatoes which stay too firm even after extended baking.
Why are my scalloped potatoes still firm after baking?
Firm potatoes after the full baking time are caused by potato slices that are too thick, insufficient liquid in the sauce, or potatoes that were not covered tightly during the first stage of baking. Slice potatoes to a maximum of 3mm thickness, ensure the sauce comes just to the top of the final potato layer before baking, and keep the foil on tightly for the full first 40 minutes of baking.
Can I make this recipe without a blender?
Yes — use store-bought vegan cream cheese or vegan heavy cream as the base instead of the cashew cream. Combine 300g of vegan cream cheese with 2 cups of vegetable broth, the nutritional yeast, garlic, lemon juice, and seasonings and whisk vigorously until smooth. The result will be slightly different in flavor but still deeply creamy and delicious.
How thin should I slice the potatoes?
Approximately 3mm (⅛ inch) is the ideal thickness — thin enough to become completely tender during baking and to absorb the cream sauce fully, thick enough to retain some structure and integrity in the finished dish rather than dissolving into mush. A mandoline set to the thinnest setting and then backed up slightly produces the ideal slice consistently.
Can I add cheese to this recipe?
Yes — a generous layer of shredded vegan cheese on top before the final uncovered baking produces a beautiful golden, slightly crisped cheese topping that adds visual drama and additional savory depth. Vegan mozzarella, vegan cheddar, or vegan Gruyère style cheese all work beautifully. Add in the final 15–20 minutes of uncovered baking for the best melt and color.
Is this dish suitable for holiday entertaining?
This is one of the finest dishes available for holiday entertaining — it assembles in advance, bakes largely unattended, improves when made a day ahead, feeds a crowd generously from a single dish, and produces a presentation so beautiful and a flavor so extraordinary that it consistently becomes the most discussed dish at any gathering where it appears.
Tried this recipe? Leave a comment below and let us know how it turned out! Tag us on Instagram and Facebook — we love seeing your plant-powered creations. Looking for more indulgent vegan side dish and comfort food recipes? Browse all recipes on Easy Vegan Recipes — new recipes posted every single week!
There are side dishes that arrive on the table and are eaten politely alongside whatever else is being served. And then there are dishes like this Vegan Charred Asparagus — the kind that arrives on the table and becomes the thing everyone is reaching for first, scraping the last stalks from the plate before the main course is even finished, because the charring transforms asparagus from a pleasant vegetable into something deeply savory, smoky, and complex in a way that is genuinely extraordinary for how little effort it requires. This is that dish. The one that makes asparagus the star of the meal rather than the supporting act.
Charring asparagus — cooking it at very high heat until the exterior blackens and blisters while the interior remains tender and sweet — concentrates its natural sugars, develops deep Maillard browning that produces savory, nutty, almost smoky flavor compounds that raw or gently roasted asparagus simply cannot achieve. It is the same principle that makes charred corn and blistered tomatoes so irresistible — high heat and direct contact with a hot surface unlocking a dimension of flavor that lower-temperature cooking entirely misses.
This recipe chars the asparagus in a screaming-hot cast iron pan or grill pan, then finishes it with a bright, punchy dressing of lemon, garlic, capers, and fresh herbs that cuts through the char and adds the acidity and freshness that makes each bite completely balanced. The result is a side dish that is impressive enough to serve at a dinner party but honest enough to make on a Tuesday night alongside whatever else you are having.
This recipe is 100% vegan, naturally gluten-free, ready in under 20 minutes, and one of those rare dishes that delivers genuinely spectacular flavor for almost no work at all.
Prepare the asparagus. Snap off the woody ends of each asparagus spear by holding the stalk at both ends and bending — it will naturally snap at exactly the right point. Pat the spears completely dry with paper towels — any surface moisture will steam rather than char, preventing the deep browning you are looking for. Toss with olive oil, salt, and pepper.
Heat the pan. Place a cast iron skillet or heavy grill pan over the highest heat your stove can produce. Allow it to heat for at least 3 minutes until it is smoking hot — this is not optional. A pan that is not hot enough will steam the asparagus rather than char it.
Char the asparagus. Place the asparagus in a single layer in the dry, screaming-hot pan. Do not move them for 2–3 minutes — let them sit undisturbed against the hot surface to develop genuine char marks and deep browning. Turn and char the other side for another 2–3 minutes. Work in batches if necessary to avoid overcrowding, which causes steaming. The asparagus should be blistered and blackened in spots on the outside while still retaining a slight bite in the center.
Make the dressing. While the asparagus chars, whisk together the olive oil, lemon juice, lemon zest, minced garlic, chopped capers, parsley, and Dijon mustard. Season to taste with salt and pepper.
Dress and serve. Transfer the charred asparagus to a serving plate. Spoon the lemon caper dressing generously over the hot spears. Finish with flaky sea salt, toasted pine nuts, and chilli flakes if using. Serve immediately.
Pro Tips
Dry the asparagus thoroughly before charring — surface moisture is the enemy of good char. Pat each spear dry with paper towels and if time allows, lay them out for 10 minutes before cooking.
Use thick asparagus for charring — thin asparagus overcooks and becomes limp before the exterior can develop proper char. Choose spears that are at least pencil-thick.
Get the pan truly, genuinely hot — hotter than feels comfortable. The pan should be smoking before the asparagus goes in. This is the single most important step in the recipe.
Do not overcrowd the pan — charring requires direct contact between each spear and the hot surface. Work in batches if needed.
The Science of Charring Vegetables
Charring is controlled burning — the deliberate application of enough heat to cause the outermost layer of a vegetable to undergo Maillard browning and, at the blackened spots, actual carbonization. This sounds alarming but produces something remarkable: the Maillard reactions create hundreds of new flavor compounds that are savory, nutty, and deeply complex; the slight carbonization at the blackened spots adds genuine smokiness and a slight bitterness that, in small amounts, makes the overall flavor dramatically more interesting. Asparagus is particularly well suited to charring because its natural sugars caramelize beautifully under high heat while its firm texture means the interior remains tender and sweet — the contrast between the charred exterior and the sweet, green interior is what makes charred asparagus so compulsively delicious.
Flavor Variations
Charred Asparagus with Romesco: Serve alongside a smoky vegan romesco sauce instead of the lemon caper dressing for a Spanish-inspired version.
Charred Asparagus with Tahini: Drizzle with lemon tahini and sprinkle with za’atar and toasted sesame seeds for a Middle Eastern version.
Charred Asparagus with Miso Butter: Toss the hot charred spears with a mixture of white miso and vegan butter for an umami-rich Japanese-inspired finish.
Nutritional Highlights (Per Serving)
Calories
Protein
Carbs
Fiber
Fat
~95 kcal
3g
6g
3g
7g
Storage
Best eaten immediately while hot — charred asparagus loses its textural contrast as it cools and the char softens.
Leftovers keep in the refrigerator for up to 3 days and are excellent served cold or at room temperature the next day as part of a grain bowl or salad.
The lemon caper dressing keeps separately in a sealed jar for up to 5 days in the refrigerator — shake well before using.
Frequently Asked Questions
Can I char asparagus on a BBQ grill instead?
Yes — a hot charcoal or gas grill is actually ideal for charring asparagus and produces an even better smoky flavor. Grill directly over high heat for 3–4 minutes per side.
Can I use thin asparagus?
Thin asparagus will cook much faster and is harder to char without overcooking the interior. If using thin spears, reduce the cooking time significantly and watch carefully.
What can I serve this with?
Charred asparagus pairs beautifully with pasta, grain bowls, roasted tofu, vegan risotto, or as part of a mezze spread. It also works wonderfully over hummus as a light meal.
Tried this recipe? Leave a comment below and let us know how it turned out! Tag us on Instagram and Facebook — we love seeing your plant-powered creations. Looking for more addictive vegan snack and appetizer recipes? Browse all recipes on Easy Vegan Recipes — new recipes posted every single week!
We use cookies on our website to give you the most relevant experience by remembering your preferences and repeat visits. By clicking “Accept”, you consent to the use of ALL the cookies.
This website uses cookies to improve your experience while you navigate through the website. Out of these, the cookies that are categorized as necessary are stored on your browser as they are essential for the working of basic functionalities of the website. We also use third-party cookies that help us analyze and understand how you use this website. These cookies will be stored in your browser only with your consent. You also have the option to opt-out of these cookies. But opting out of some of these cookies may affect your browsing experience.
Necessary cookies are absolutely essential for the website to function properly. These cookies ensure basic functionalities and security features of the website, anonymously.
Cookie
Duration
Description
cookielawinfo-checkbox-analytics
11 months
This cookie is set by GDPR Cookie Consent plugin. The cookie is used to store the user consent for the cookies in the category "Analytics".
cookielawinfo-checkbox-functional
11 months
The cookie is set by GDPR cookie consent to record the user consent for the cookies in the category "Functional".
cookielawinfo-checkbox-necessary
11 months
This cookie is set by GDPR Cookie Consent plugin. The cookies is used to store the user consent for the cookies in the category "Necessary".
cookielawinfo-checkbox-others
11 months
This cookie is set by GDPR Cookie Consent plugin. The cookie is used to store the user consent for the cookies in the category "Other.
cookielawinfo-checkbox-performance
11 months
This cookie is set by GDPR Cookie Consent plugin. The cookie is used to store the user consent for the cookies in the category "Performance".
viewed_cookie_policy
11 months
The cookie is set by the GDPR Cookie Consent plugin and is used to store whether or not user has consented to the use of cookies. It does not store any personal data.
Functional cookies help to perform certain functionalities like sharing the content of the website on social media platforms, collect feedbacks, and other third-party features.
Performance cookies are used to understand and analyze the key performance indexes of the website which helps in delivering a better user experience for the visitors.
Analytical cookies are used to understand how visitors interact with the website. These cookies help provide information on metrics the number of visitors, bounce rate, traffic source, etc.
Advertisement cookies are used to provide visitors with relevant ads and marketing campaigns. These cookies track visitors across websites and collect information to provide customized ads.