
make ahead dinner

Vegan Garden Fresh Zucchini Casserole with Rice, Tomatoes and Melty Cheese — The Most Comforting Plant-Based Summer Bake You Will Make All Week

garden fresh zucchini casserole

Layers of tender zucchini, sweet tomatoes, bell pepper, and onion, folded into creamy white bean sauce and fluffy rice, then topped with overlapping zucchini and tomato slices and melted vegan cheese: this Vegan Garden Fresh Zucchini Casserole is summer in a baking dish. It is hearty enough to be a main dish, easy to make ahead, and a great way to use up an abundance of garden zucchini and tomatoes.

The casserole has three parts that come together in one dish. The base is a mix of cooked rice and sautéed vegetables, which makes it filling and gives it a soft, comforting texture. A quick sauce made from blended white beans, garlic, lemon, nutritional yeast, and plant milk binds everything, so the casserole is creamy and sliceable instead of dry or watery. And the top is a pretty layer of overlapping zucchini and tomato slices, covered with shredded vegan mozzarella that melts and browns in the oven, as you can see in the photo.

Using rice makes this different from most zucchini bakes. It soaks up the juices released by the vegetables, which helps prevent a watery casserole, and it turns the dish into a complete meal. Leftover rice works well, and it should be cooked and cooled. Brown rice, white rice, or a mix both work. For a gluten-free version, use rice and check the other ingredients.

The key to a good zucchini casserole is managing the water. Zucchini is about 95% water, and if you add it raw, the casserole turns soupy. This recipe uses three techniques. First, the grated zucchini is salted and squeezed dry. Second, the vegetables are sautéed until the liquid cooks off. Third, the topping slices are patted dry before they are arranged, and the casserole is baked uncovered so that steam can escape. Let it rest for 10–15 minutes after baking so the juices settle and the casserole sets for clean squares.

Herbs make it taste like the garden. Fresh basil and parsley are stirred in, and oregano and thyme give an Italian-style flavor. A pinch of smoked paprika adds depth. Serve with a simple green salad and crusty bread for a full dinner.

Allergen note: this recipe is dairy-free, egg-free, soy-free, and gluten-free as written. Vegan mozzarella varies, and many brands contain coconut oil, nuts, or soy, so check the label. It is nut-free only if your chosen cheese is.


Recipe Information

Prep TimeCook TimeRest TimeTotal TimeServingsCalories
25 mins45 mins15 mins1 hr 25 mins8 servings~280 kcal per serving

Ingredients

For the Vegetable Base

  • 3 medium zucchini (about 1½ lb / 680g): 2 grated, 1 sliced into thin rounds for the top
  • 1 tsp salt, for the grated zucchini
  • 2 tbsp olive oil
  • 1 medium onion, diced
  • 1 red bell pepper, diced
  • 4 garlic cloves, minced
  • 2 medium tomatoes: 1 diced and drained, 1 sliced for the top
  • 2 cups (about 330g) cooked rice, cooled
  • 1 tsp dried oregano
  • ½ tsp dried thyme
  • ½ tsp smoked paprika
  • ½ tsp salt
  • ¼ tsp black pepper
  • ¼ cup chopped fresh basil
  • ¼ cup chopped fresh parsley

For the White Bean Cream Sauce

  • 1 can (15 oz / 400g) white beans (cannellini or great northern), drained and rinsed
  • ¾ cup (180ml) unsweetened plant milk
  • 3 tbsp nutritional yeast
  • 2 tbsp lemon juice
  • 2 tbsp olive oil
  • 1 garlic clove
  • ½ tsp salt

For the Topping

  • 1½ cups (170g) shredded vegan mozzarella, divided
  • Reserved zucchini and tomato slices
  • 1 tbsp olive oil
  • Black pepper
  • Fresh parsley or basil, to serve

Instructions

  1. Heat the oven. Heat the oven to 375°F (190°C). Grease a 9×13-inch (23x33cm) baking dish with olive oil.
  2. Salt the zucchini. Toss the grated zucchini with 1 teaspoon of salt in a colander, and let it sit for 10 minutes. Wrap in a clean towel and squeeze out as much liquid as possible.
  3. Sauté. Heat 2 tablespoons of oil in a large skillet over medium heat. Cook the onion and bell pepper for 5 minutes. Add the garlic and cook for 1 minute. Add the grated zucchini, diced tomato, oregano, thyme, paprika, salt, and pepper. Cook for 6–8 minutes, until the liquid has cooked off and the vegetables are soft. Remove from the heat and stir in the basil and parsley.
  4. Make the sauce. In a blender, blend the beans, plant milk, nutritional yeast, lemon juice, oil, garlic, and salt until completely smooth. It should be thick and pourable.
  5. Combine. In a large bowl, mix the cooked rice, vegetables, bean sauce, and ½ cup of the mozzarella. Taste and adjust the seasoning.
  6. Assemble. Spread the mixture into the baking dish and press down firmly. Pat the sliced zucchini and tomato with paper towels. Arrange them in overlapping rows on top, alternating zucchini and tomato. Brush with olive oil, and season with salt and pepper.
  7. Bake. Bake uncovered for 30 minutes. Sprinkle with the remaining 1 cup of mozzarella and bake for 12–15 minutes more, until the cheese is melted and golden, and the edges are bubbling.
  8. Broil. Broil for 1–2 minutes for extra color. Watch closely.
  9. Rest. Let the casserole rest for 15 minutes before cutting. Be careful, since it is very hot.
  10. Serve. Sprinkle with fresh herbs. Cut into squares and serve warm.

Pro Tips for the Best Zucchini Casserole

  • Salt and squeeze the grated zucchini. This is the most important step for a casserole that is not watery.
  • Cook the vegetables until the liquid has evaporated before assembling.
  • Use cooled, cooked rice, which absorbs moisture better than hot rice.
  • Drain the diced tomatoes, and pat the sliced tomatoes and zucchini dry.
  • Press the mixture firmly into the dish so it holds together.
  • Bake uncovered so steam can escape.
  • Add the cheese in the second half of baking so it melts without burning.
  • Let the casserole rest for 15 minutes before cutting.
  • Taste the mixture before baking. It should taste a little strong, since the rice mellows it.

A Few Notes on Ingredients

Medium zucchini are best, since large ones are seedy and watery. Cooked rice makes the dish hearty, and leftover rice works well. White beans create a creamy sauce without nuts or cream. Nutritional yeast adds a savory, cheesy taste. Fresh tomatoes add sweetness and acidity, and canned diced tomatoes (drained) work in the base when tomatoes are not in season. Fresh herbs make a big difference.


Flavor Variations

  • Cheese-Free: Top with breadcrumbs mixed with olive oil and garlic powder.
  • Spicy: Add chili flakes or a diced jalapeño.
  • Protein: Stir in a can of drained chickpeas or crumbled firm tofu.
  • Mushroom: Add sautéed mushrooms to the base.
  • Quinoa: Use cooked quinoa in place of rice.
  • Greens: Fold in spinach or kale.
  • Mediterranean: Add olives, sun-dried tomatoes, and oregano.
  • Individual Servings: Bake in ramekins for 25–30 minutes.

Nutritional Highlights (Per Serving)

CaloriesProteinCarbsFiberFat
~280 kcal10g35g6g11g

Values are estimates and vary by rice, cheese, and vegetable size.


Storage

  • Refrigerator: Store in an airtight container for up to 4 days.
  • Reheating: Reheat in a 350°F (175°C) oven for 15–20 minutes, covered with foil, or in the microwave.
  • Freezer: Freeze baked squares individually wrapped for up to 2 months. Thaw in the fridge overnight, and reheat. The zucchini will be softer.
  • Make ahead: Assemble the base without the topping a day ahead. Add the topping and bake, adding 5–10 minutes.

Frequently Asked Questions

Why is my zucchini casserole watery?

The zucchini probably contained too much water. Salt and squeeze the grated zucchini, cook the vegetables until dry, and bake uncovered.

Can I use frozen zucchini?

It is not ideal, since it releases a lot of water. If you use it, thaw it and squeeze it very dry.

Can I use brown rice?

Yes. Cooked brown rice works well. Make sure it is cooked and cooled.

Can I make it ahead?

Yes. Assemble a day ahead and bake before serving, or bake and reheat.

Can I make it without cheese?

Yes. Use the breadcrumb topping, or leave the top plain with olive oil.

How is this different from your other zucchini bakes?

This is a rice-based casserole with a white bean cream, topped with zucchini and tomato slices. Our Vegan Cheesy Zucchini Bake is made with a chickpea flour batter, and our Vegan Cheesy Zucchini Gratin is made with a cashew cheese sauce.


Tried this recipe? Leave a comment below and let us know how it turned out! Tag us on Instagram and Facebook — we love seeing your plant-powered creations. Browse all recipes on Easy Vegan Recipes — new recipes posted every single week!


Vegan Stuffed Sweet Potatoes with Garlic Mushrooms, Spinach and Chive Yogurt Sauce — The Most Cozy Plant-Based Dinner You Will Make All Week

vegan stuffed sweet potatoes with spinach mushrooms

Crispy-skinned baked sweet potatoes, split open and loaded with garlicky thyme mushrooms, wilted spinach, and a cool chive yogurt sauce: these Vegan Stuffed Sweet Potatoes with Spinach and Mushrooms are cozy, filling, and full of savory flavor. They take about an hour, most of it hands-off baking, and they make an easy, satisfying dinner.

Sweet potatoes are the perfect base for a stuffed dinner. Baked whole, they turn soft, creamy, and naturally sweet inside, with a skin that crisps in a hot oven. That sweetness is balanced here by earthy, savory mushrooms, which are cooked until deeply browned with garlic, fresh thyme, and a splash of balsamic vinegar and soy sauce. The browning is what gives the mushrooms a meaty, rich flavor, so do not stir them too often, and give them room in the pan.

Fresh spinach goes in at the end and wilts in the heat of the pan in about a minute. The filling is spooned over the fluffed sweet potato flesh, and a simple sauce of plain vegan yogurt, lemon juice, garlic, and chives finishes each one with a cool, tangy contrast. Toasted pumpkin seeds on top add crunch, and keep the dish nut-free.

For the best sweet potatoes, choose medium ones of similar size, about 8 ounces each, so they cook evenly. Scrub them well, prick them all over with a fork, and rub the skins with a little oil and salt. Bake at 425°F (220°C) for 45–55 minutes, until a knife slides in easily. Slit them open, fluff the flesh with a fork, and add a pinch of salt before filling.

This is a good make-ahead dinner. You can bake the sweet potatoes and cook the filling a day ahead, then reheat and assemble. Leftover filling is also good over rice, pasta, or toast.

This recipe is different from our Vegan Stuffed Sweet Potatoes with Garlicky White Beans, Spinach and Sun-Dried Tomatoes, which uses beans and a lemon herb sauce. This one is built around browned garlic mushrooms and spinach, with a chive yogurt sauce.

This recipe is dairy-free, egg-free, and gluten-free if you use tamari. It contains soy (soy sauce). It is nut-free as written, but check your yogurt, since many vegan yogurts contain nuts, coconut or soy.


Recipe Information

Prep TimeCook TimeTotal TimeServingsCalories
15 mins55 mins1 hr 10 mins4 sweet potatoes~340 kcal each

Ingredients

For the Sweet Potatoes

  • 4 medium sweet potatoes (about 8 oz / 225g each)
  • 1 tbsp olive oil
  • ½ tsp salt

For the Garlic Mushroom and Spinach Filling

  • 2 tbsp olive oil
  • 16 oz (450g) cremini or button mushrooms, sliced
  • 4 garlic cloves, minced
  • 1 tbsp fresh thyme leaves (or 1 tsp dried)
  • 1 tbsp soy sauce or tamari
  • 1 tbsp balsamic vinegar
  • 5 oz (140g) fresh baby spinach
  • ½ tsp salt, to taste
  • ¼ tsp black pepper

For the Chive Yogurt Sauce

  • ½ cup (120g) plain unsweetened vegan yogurt
  • 1 tbsp lemon juice
  • 1 small garlic clove, grated
  • 2 tbsp chopped fresh chives
  • Pinch of salt

To Finish

  • 2 tbsp toasted pumpkin seeds
  • Extra chives
  • Black pepper

Instructions

  1. Bake the sweet potatoes. Heat the oven to 425°F (220°C). Scrub the sweet potatoes, prick all over with a fork, and rub with oil and salt. Place on a lined baking sheet and bake for 45–55 minutes, until very tender.
  2. Brown the mushrooms. While they bake, heat 2 tbsp olive oil in a large skillet over medium-high heat. Add the mushrooms in a single layer and cook without stirring for 3–4 minutes. Stir and cook for another 5–6 minutes, until deeply browned.
  3. Flavor the filling. Add the garlic and thyme and cook for 1 minute. Add the soy sauce and balsamic and cook for 1 minute, until absorbed.
  4. Wilt the spinach. Add the spinach in handfuls and cook for 1–2 minutes, until wilted. Season with salt and pepper.
  5. Make the sauce. Stir together the yogurt, lemon juice, garlic, chives, and salt.
  6. Stuff. Slice each sweet potato lengthwise and gently press the ends to open it. Fluff the flesh with a fork. Spoon the mushroom and spinach filling on top.
  7. Finish. Drizzle with the chive yogurt sauce, and sprinkle with pumpkin seeds, chives, and pepper. Serve hot.

Pro Tips for the Best Stuffed Sweet Potatoes

  • Choose sweet potatoes of a similar size so they bake evenly.
  • Prick the skins before baking so steam can escape.
  • Do not crowd the mushrooms. Crowded mushrooms steam instead of browning.
  • Do not salt the mushrooms until the end. Salt draws out water.
  • Add spinach last so it stays bright green.
  • Fluff the flesh with a fork before filling so it absorbs the flavor.
  • Season the sweet potato flesh with a little salt.
  • Bake on a lined sheet for easy cleanup.

A Few Notes on Ingredients

Cremini mushrooms have more flavor than white button mushrooms, but either works. Fresh thyme gives the best flavor, and dried thyme is a good substitute. Balsamic vinegar adds sweetness and depth to the mushrooms. Tamari makes the filling gluten-free. Fresh baby spinach wilts quickly, and thawed, squeezed frozen spinach also works. Check that your vegan yogurt is plain and unsweetened.


Flavor Variations

  • Smoky Version: Add smoked paprika to the mushrooms.
  • Protein Boost: Add white beans or chickpeas.
  • Creamy Version: Stir a spoonful of vegan cream cheese into the mushrooms.
  • Spicy Version: Add chili flakes.
  • Microwave Shortcut: Cook the sweet potatoes in the microwave for 8–10 minutes, then crisp the skin in the oven for 10 minutes.
  • Air Fryer Version: Cook at 400°F (200°C) for 35–40 minutes.

Nutritional Highlights (Per Stuffed Sweet Potato)

CaloriesProteinCarbsFiberFat
~340 kcal9g52g9g11g

Values are estimates and vary by size and brand.


Storage

  • Refrigerator: Store the sweet potatoes and filling separately for up to 4 days.
  • Reheating: Warm in the oven at 375°F (190°C) for 15 minutes, or in the microwave.
  • Freezer: Freeze baked sweet potatoes for up to 2 months. The filling is best fresh.
  • Make ahead: Bake the sweet potatoes and cook the filling a day ahead.

Frequently Asked Questions

How do I get crispy sweet potato skins?

Rub them with oil and salt, and bake directly on the rack or on a sheet at 425°F (220°C).

Can I make them ahead?

Yes. Bake the potatoes and cook the filling ahead, then reheat and assemble.

Can I make them gluten-free?

Yes. Use tamari.

Can I use frozen spinach?

Yes. Thaw it and squeeze out the water.

Is this a full meal?

Yes, and you can make it more filling with white beans or chickpeas.

How is this different from your other stuffed sweet potatoes?

These are filled with browned garlic mushrooms and spinach, with a chive yogurt sauce. Our Vegan Stuffed Sweet Potatoes with Garlicky White Beans use beans, sun-dried tomatoes and a lemon herb sauce, and our Spinach and Ricotta Stuffed Sweet Potatoes are a separate recipe with a different filling.


Tried this recipe? Leave a comment below and let us know how it turned out! Tag us on Instagram and Facebook — we love seeing your plant-powered creations. Browse all recipes on Easy Vegan Recipes — new recipes posted every single week!
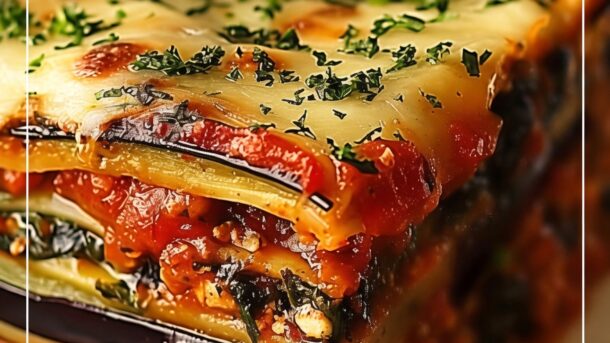
Vegan Mexican-Style Veggie Lasagna with Black Beans, Corn and Cashew Queso — The Most Crowd-Pleasing Plant-Based Bake You Will Make All Week

vegan mexican style veggie lasagna

Layers of tender noodles, spiced black beans, sweet corn, roasted peppers, and zesty enchilada sauce, all topped with creamy cashew queso and baked until bubbling. This Vegan Mexican-Style Veggie Lasagna is a fun, bold twist on the Italian classic, and it is a guaranteed hit at the dinner table.

Instead of ricotta and marinara, this lasagna uses a smoky enchilada-style tomato sauce, a cumin-spiced black bean and veggie filling, and a silky cashew queso for the creamy layers. Sautéed zucchini, bell pepper, and corn add sweetness and texture, while lime juice and cilantro bring everything to life. Every layer is full of flavor, and the result is hearty, cheesy-tasting, and completely dairy-free.

You can use regular lasagna noodles for a classic texture, or corn tortillas for a faster, gluten-free enchilada-style version. Either way, assembly is simple: sauce, noodles, filling, queso, and repeat. A final layer of queso and a sprinkle of vegan cheese turns golden and bubbling in the oven.

Serve each slice with avocado, fresh cilantro, a spoonful of vegan sour cream, and a squeeze of lime. It is perfect for feeding a crowd, meal prep, and make-ahead dinners, and it reheats beautifully.

This recipe is 100% vegan, dairy-free, egg-free, and easily made gluten-free.


Recipe Information

Prep TimeCook TimeTotal TimeServingsCalories
30 mins40 mins1 hr 10 mins8 slices~390 kcal

Ingredients

For the Black Bean and Veggie Filling

  • 1 tbsp olive oil
  • 1 medium yellow onion, diced
  • 1 red bell pepper, diced
  • 1 medium zucchini, diced
  • 3 cloves garlic, minced
  • 1 can (400g) black beans, drained and rinsed
  • 1½ cups (about 220g) corn kernels (fresh or frozen)
  • 2 tsp chili powder
  • 1½ tsp ground cumin
  • 1 tsp smoked paprika
  • ½ tsp dried oregano
  • ¾ tsp salt, to taste
  • 2 tbsp lime juice
  • ¼ cup (10g) chopped fresh cilantro

For the Enchilada-Style Sauce

  • 1 can (800g) crushed tomatoes
  • 2 tbsp tomato paste
  • 2 tbsp chili powder
  • 1 tsp ground cumin
  • 1 tsp garlic powder
  • 1 tsp smoked paprika
  • ½ tsp dried oregano
  • 1 tsp maple syrup
  • ½ cup (120ml) vegetable broth
  • 1 tsp salt, to taste

For the Cashew Queso

  • 1 cup (140g) raw cashews, soaked in hot water for 15 minutes and drained
  • 1 cup (240ml) water
  • ¼ cup (20g) nutritional yeast
  • 2 tbsp lime juice
  • 1 tsp garlic powder
  • 1 tsp smoked paprika
  • 1 tsp salt

For Assembly

  • 9 lasagna noodles, cooked al dente (or about 12 corn tortillas)
  • 1 cup vegan cheese shreds (optional)

To Serve

  • Sliced avocado
  • Fresh cilantro
  • Lime wedges
  • Vegan sour cream
  • Sliced jalapeños
  • Salsa

Optional Additions

  • Spinach layered into the filling
  • Chipotle in adobo in the sauce
  • Crumbled vegan chorizo
  • Roasted sweet potato cubes

Instructions

  1. Preheat and prep. Heat the oven to 375°F (190°C). Lightly oil a 9×13 inch baking dish. Cook the lasagna noodles according to the package directions, drain, and lay them flat on parchment so they do not stick.
  2. Make the sauce. In a saucepan, combine the crushed tomatoes, tomato paste, chili powder, cumin, garlic powder, paprika, oregano, maple syrup, broth, and salt. Simmer for 10 minutes until slightly thickened.
  3. Cook the filling. Heat the oil in a large skillet over medium heat. Add the onion, pepper, and zucchini and cook for 6–7 minutes. Add the garlic and cook for 1 minute. Stir in the black beans, corn, spices, and salt, and cook for 3–4 minutes. Remove from the heat and stir in the lime juice and cilantro.
  4. Make the queso. Blend the soaked cashews, water, nutritional yeast, lime juice, garlic powder, paprika, and salt until completely smooth.
  5. Layer. Spread a thin layer of sauce on the bottom of the dish. Add a layer of 3 noodles, then half of the filling, a third of the queso, and a third of the remaining sauce. Repeat. Top with a final layer of noodles, the remaining sauce, and the remaining queso.
  6. Add cheese. Sprinkle vegan cheese shreds over the top, if using.
  7. Bake. Cover with foil and bake for 25 minutes, then uncover and bake another 12–15 minutes until bubbly and lightly golden at the edges.
  8. Rest. Let the lasagna rest for 15 minutes before slicing so it holds together.
  9. Serve. Cut into squares and top with avocado, cilantro, sour cream, and lime.

Pro Tips for the Best Mexican Lasagna

  • Cook the noodles al dente. They finish cooking in the oven.
  • Simmer the sauce. A thicker sauce prevents a watery lasagna.
  • Drain the beans and corn well. Excess moisture makes the layers soggy.
  • Press the layers gently. This helps the lasagna hold together.
  • Cover for the first bake. This steams the noodles so they turn tender.
  • Rest before slicing. Fifteen minutes lets the layers set.
  • Use corn tortillas for a gluten-free version. Layer them like noodles.

Why This Lasagna Is Good for You

Black beans provide plant protein, fiber, folate, and iron, and corn adds energy-giving carbohydrates and antioxidants. Peppers and zucchini bring vitamin C and extra fiber, while the cashew queso adds healthy fats and magnesium.

A serving provides about 15 grams of plant protein and 10 grams of fiber, and the dish is cholesterol free. Making the queso from whole cashews replaces processed cheese with a more wholesome alternative.


Flavor Variations

  • Spicy Chipotle Lasagna: Add chipotle in adobo to the sauce and filling.
  • Spinach and Mushroom Version: Layer in sautéed spinach and mushrooms.
  • Tortilla Lasagna: Use corn tortillas in place of noodles for an enchilada-style bake.
  • Sweet Potato Lasagna: Add roasted sweet potato to the filling for extra sweetness.

Nutritional Highlights (Per Slice)

CaloriesProteinCarbsFiberFat
~390 kcal15g58g10g11g

Storage

  • Refrigerator: Store covered for up to 5 days.
  • Freezer: Freeze baked and cooled slices, wrapped individually, for up to 3 months. Thaw overnight before reheating.
  • Reheating: Warm in a 350°F (175°C) oven for 15–20 minutes.
  • Make ahead: Assemble the lasagna up to 1 day ahead, cover, and bake when ready, adding 10 extra minutes.

Frequently Asked Questions

Can I use no-boil noodles?

Yes. Use no-boil sheets and add ¼ cup extra sauce or broth so they have enough liquid to cook.

Can I make it gluten-free?

Use gluten-free noodles or corn tortillas, and check that your spices are gluten-free.

Can I make it nut-free?

Replace the cashew queso with a white bean and nutritional yeast sauce, or use store-bought vegan queso.

Why is my lasagna watery?

The sauce may be too thin or the vegetables too wet. Simmer the sauce longer and drain the beans and corn well.

Can I freeze it unbaked?

Yes. Assemble in a freezer-safe dish, wrap tightly, and freeze for up to 2 months. Thaw overnight, then bake.

Can I make it spicier?

Add chipotle, jalapeños, or cayenne to the sauce and filling.


Tried this recipe? Leave a comment below and let us know how it turned out! Tag us on Instagram and Facebook — we love seeing your plant-powered creations. Looking for more bold vegan dinners? Browse all recipes on Easy Vegan Recipes — new recipes posted every single week!

Vegan Eggplant Lasagna with Roasted Eggplant Layers, Tofu Ricotta and Rich Marinara — The Most Comforting Plant-Based Bake You Will Make All Week

vegan eggplant lasagna

Tender roasted eggplant, creamy tofu ricotta, rich marinara, and melty vegan cheese layered into a golden, bubbling bake. This Vegan Eggplant Lasagna has all the comfort of a classic Italian lasagna, with silky eggplant slices in place of some of the noodles for a lighter, extra-flavorful twist. It is hearty, cheesy-tasting, and completely dairy-free.

Eggplant is the secret here. Sliced lengthwise and roasted until golden, it becomes soft, sweet, and almost creamy, and it soaks up the marinara beautifully. Roasting first, instead of using raw slices, also removes excess moisture, so the lasagna stays firm and does not turn watery. For a heartier bake, you can layer in noodles as well, and the recipe works both ways.

The tofu ricotta is quick and easy: firm tofu is crumbled and mixed with nutritional yeast, lemon juice, garlic, basil, and a little olive oil, giving a lightly tangy, creamy filling that tastes remarkably like ricotta. A spinach layer adds color and nutrients, and a generous sauce of marinara ties everything together.

Serve it with a crisp green salad and garlic bread for a cozy family dinner or a dinner-party centerpiece. It reheats beautifully and tastes even better the next day.

This recipe is 100% vegan, dairy-free, egg-free, and easily made gluten-free.


Recipe Information

Prep TimeCook TimeTotal TimeServingsCalories
30 mins55 mins1 hr 25 mins8 slices~340 kcal

Ingredients

For the Roasted Eggplant

  • 3 large eggplants (about 1.2kg), sliced lengthwise into ¼ inch thick slices
  • 3 tbsp olive oil
  • 1 tsp salt
  • ½ tsp black pepper

For the Tofu Ricotta

  • 1 block (400g) firm tofu, pressed and crumbled
  • ¼ cup (20g) nutritional yeast
  • 2 tbsp lemon juice
  • 2 tbsp olive oil
  • 2 cloves garlic, minced
  • 1 tsp dried basil
  • 1 tsp dried oregano
  • ¾ tsp salt
  • ¼ tsp black pepper
  • 4 cups (about 120g) baby spinach, wilted and squeezed dry
  • 2 tbsp chopped fresh basil

For the Marinara Sauce

  • 1 tbsp olive oil
  • 1 small onion, diced
  • 4 cloves garlic, minced
  • 1 can (800g) crushed tomatoes
  • 2 tbsp tomato paste
  • 1 tsp dried basil
  • 1 tsp dried oregano
  • 1 tsp maple syrup
  • ¾ tsp salt, to taste
  • Pinch of chili flakes

For Assembly

  • 6 lasagna noodles, cooked al dente (optional, for a heartier version)
  • 1½ cups vegan mozzarella shreds
  • 2 tbsp vegan parmesan
  • Fresh basil for serving

To Serve

  • Garlic bread
  • Green salad
  • Extra marinara
  • Chili flakes

Optional Additions

  • Sautéed mushrooms in the filling
  • Sun-dried tomatoes
  • Roasted red peppers
  • Vegan sausage crumbles

Instructions

  1. Roast the eggplant. Heat the oven to 425°F (220°C). Arrange the eggplant slices on two lined baking sheets, brush both sides with oil, and sprinkle with salt and pepper. Roast for 20–25 minutes, flipping once, until golden and tender. Lower the oven temperature to 375°F (190°C).
  2. Make the marinara. Heat the oil in a saucepan over medium heat. Add the onion and cook for 5 minutes. Add the garlic and cook for 1 minute. Stir in the tomatoes, tomato paste, herbs, maple syrup, salt, and chili flakes. Simmer for 15 minutes until slightly thickened.
  3. Make the ricotta. Mix the crumbled tofu with the nutritional yeast, lemon juice, oil, garlic, herbs, salt, and pepper until it looks like ricotta. Fold in the spinach and fresh basil.
  4. Layer. Spread a thin layer of marinara in a 9×13 inch baking dish. Add a layer of eggplant slices (and noodles, if using), then half of the ricotta, a layer of sauce, and a sprinkle of vegan mozzarella. Repeat. Finish with eggplant, sauce, and the remaining mozzarella.
  5. Bake. Cover with foil and bake for 25 minutes. Uncover and bake for 15–20 minutes more, until bubbling and golden at the edges.
  6. Rest. Let the lasagna rest for 15 minutes before slicing so the layers set.
  7. Serve. Top with vegan parmesan and fresh basil, and serve with a green salad and garlic bread.

Pro Tips for the Best Eggplant Lasagna

  • Roast the eggplant first. This removes moisture and prevents a watery lasagna.
  • Slice evenly. ¼ inch slices cook at the same rate and layer neatly.
  • Season each layer. Eggplant needs salt to taste its best.
  • Press the tofu well. Dry tofu makes a thicker, more ricotta-like filling.
  • Squeeze the spinach dry. Excess water ruins the layers.
  • Simmer the sauce. A thicker marinara keeps the lasagna firm.
  • Rest before cutting. Fifteen minutes lets the layers set for clean slices.

Why This Lasagna Is a Smart Choice

Eggplant is low in calories and a good source of fiber, manganese, and antioxidants, especially in its skin. Tofu provides complete plant protein and calcium, and spinach adds iron, folate, and vitamin K.

Using eggplant in place of some noodles lowers the carbohydrate content while keeping the dish filling. A serving provides about 15 grams of plant protein and 7 grams of fiber, and the dish is cholesterol free.


Flavor Variations

  • Noodle-Free Eggplant Lasagna: Use only eggplant slices for a low-carb, gluten-free version.
  • Mushroom Eggplant Lasagna: Layer in sautéed mushrooms for extra umami.
  • Spicy Arrabbiata Version: Add extra chili flakes to the marinara.
  • Cashew Ricotta Version: Blend soaked cashews with lemon and garlic for a creamier ricotta.

Nutritional Highlights (Per Slice)

CaloriesProteinCarbsFiberFat
~340 kcal15g32g7g17g

Storage

  • Refrigerator: Store covered for up to 5 days.
  • Freezer: Freeze baked and cooled slices, wrapped individually, for up to 3 months. Thaw overnight before reheating.
  • Reheating: Warm in a 350°F (175°C) oven for 15–20 minutes.
  • Make ahead: Assemble up to 1 day ahead, cover, and bake when ready, adding 10 extra minutes.

Frequently Asked Questions

Do I need to salt the eggplant first?

Not when you roast it. Roasting removes moisture, so you can skip salting and draining.

Can I make it without noodles?

Yes. Use only eggplant slices for a naturally gluten-free, lower-carb version.

Can I make it nut-free?

Yes. The tofu ricotta is nut-free as written. Use a nut-free vegan mozzarella.

Why is my lasagna watery?

The eggplant, spinach, or sauce may have held too much water. Roast the eggplant, squeeze the spinach dry, and simmer the sauce.

Can I use store-bought marinara?

Yes. Use about 800g of a good store-bought marinara.

Can I freeze it unbaked?

Yes. Assemble in a freezer-safe dish, wrap tightly, and freeze for up to 2 months. Thaw overnight, then bake.


Tried this recipe? Leave a comment below and let us know how it turned out! Tag us on Instagram and Facebook — we love seeing your plant-powered creations. Looking for more cozy vegan dinners? Browse all recipes on Easy Vegan Recipes — new recipes posted every single week!

Vegan Crock-Pot Lasagna with Tofu Ricotta, Spinach and Rich Marinara — The Most Effortless Plant-Based Dinner You Will Make All Week

vegan crock pot lasagna

Layers of tender noodles, creamy tofu ricotta, spinach, and rich marinara, slow-cooked until bubbling and perfectly set, this Vegan Crock-Pot Lasagna is the easiest way to get a homemade Italian dinner on the table. You simply layer everything in the slow cooker, press start, and come back to a cozy, cheesy-tasting lasagna with no boiling noodles and no oven needed.

The slow cooker does all the work. Uncooked lasagna noodles soften gently in the sauce as they cook, so you skip the pre-boil entirely. The tofu ricotta, made from crumbled tofu, nutritional yeast, lemon, garlic, and basil, stays creamy and tangy, and a layer of wilted spinach adds color and nutrients. A hearty marinara with mushrooms ties it all together, and a topping of vegan mozzarella melts into a golden, stretchy blanket.

Because it cooks low and slow, the flavors meld beautifully, and the lasagna stays moist instead of drying out. It is perfect for busy weeknights, potlucks, holiday gatherings, and hot days when you do not want to turn on the oven.

Slice it into neat squares, top with fresh basil, and serve with a green salad and garlic bread.

This recipe is 100% vegan, dairy-free, egg-free, and easily made gluten-free.


Recipe Information

Prep TimeCook TimeTotal TimeServingsCalories
20 mins3 hrs (low: 4 hrs)3 hrs 20 mins8 slices~360 kcal

Ingredients

For the Marinara Sauce

  • 1 tbsp olive oil
  • 1 small onion, finely diced
  • 250g cremini mushrooms, finely chopped
  • 4 cloves garlic, minced
  • 1 can (800g) crushed tomatoes
  • 1 can (400g) tomato sauce
  • 2 tbsp tomato paste
  • 1 tsp dried basil
  • 1 tsp dried oregano
  • 1 tsp maple syrup
  • 1 tsp salt, to taste
  • ¼ tsp black pepper
  • Pinch of chili flakes

For the Tofu Ricotta

  • 1 block (400g) firm tofu, pressed and crumbled
  • ¼ cup (20g) nutritional yeast
  • 2 tbsp lemon juice
  • 2 tbsp olive oil
  • 2 cloves garlic, minced
  • 1 tsp dried basil
  • 1 tsp dried oregano
  • ¾ tsp salt
  • ¼ tsp black pepper
  • 5 cups (about 150g) fresh baby spinach, roughly chopped
  • 2 tbsp chopped fresh basil

For Assembly

  • 9–12 uncooked lasagna noodles (break to fit the slow cooker)
  • ½ cup (120ml) water or vegetable broth
  • 1½ cups vegan mozzarella shreds
  • Fresh basil for serving

To Serve

  • Garlic bread
  • Green salad
  • Vegan parmesan
  • Chili flakes

Optional Additions

  • Sautéed zucchini slices
  • Sun-dried tomatoes
  • Vegan sausage crumbles
  • Roasted red peppers

Instructions

  1. Make the sauce. Heat the oil in a skillet over medium heat. Add the onion and mushrooms and cook for 6–8 minutes until the moisture cooks off. Add the garlic and cook for 1 minute. Stir in the crushed tomatoes, tomato sauce, tomato paste, herbs, maple syrup, salt, pepper, and chili flakes. Simmer for 5 minutes.
  2. Make the ricotta. In a bowl mix the crumbled tofu with the nutritional yeast, lemon juice, oil, garlic, herbs, salt, and pepper until it looks like ricotta. Fold in the spinach and fresh basil.
  3. Prep the slow cooker. Lightly oil a 6-quart slow cooker, or line it with a slow cooker liner. Spread 1 cup of sauce on the bottom.
  4. Layer. Add a layer of broken, uncooked noodles to cover the sauce. Top with a third of the ricotta, then a third of the remaining sauce, and a sprinkle of vegan mozzarella. Repeat twice more, ending with noodles covered completely in sauce.
  5. Add the liquid. Pour the water or broth around the edges so the noodles have enough moisture to cook.
  6. Cook. Cover and cook on low for 4 hours or on high for 2½–3 hours, until the noodles are tender and the lasagna is bubbling at the edges. Do not lift the lid often.
  7. Add the cheese. Sprinkle the remaining vegan mozzarella on top, cover, and cook for 10–15 minutes until melted.
  8. Rest and serve. Turn off the slow cooker and let the lasagna rest for 15–20 minutes so it sets. Top with fresh basil and serve in squares.

Pro Tips for the Best Slow Cooker Lasagna

  • Use regular dry noodles. No-boil noodles can turn mushy in a long cook.
  • Cover the noodles completely with sauce. Exposed noodles stay hard.
  • Do not overfill the cooker. Leave room for the lasagna to bubble.
  • Add the water around the edges. It prevents the bottom from burning.
  • Do not peek. Lifting the lid lets heat out and extends the cooking time.
  • Rest before cutting. The layers set as they cool slightly.
  • Use a liner. It makes cleanup easy and helps you lift out neat slices.

Why This Lasagna Is a Smart Dinner

Tofu provides complete plant protein and calcium, and spinach adds iron, folate, and vitamin K. Mushrooms contribute B vitamins and selenium, and tomatoes provide lycopene, which is easier to absorb when cooked.

Compared with a traditional cheese lasagna, this version has no cholesterol and much less saturated fat. A serving provides about 16 grams of plant protein and 6 grams of fiber, and the slow cooker means almost no hands-on time.


Flavor Variations

  • Mushroom Spinach Lasagna: Add extra mushrooms and layer in sautéed spinach.
  • Spicy Arrabbiata Lasagna: Add more chili flakes and a splash of vinegar to the sauce.
  • Veggie-Loaded Lasagna: Add layers of zucchini, roasted peppers, or eggplant.
  • Cashew Ricotta Version: Blend soaked cashews with lemon and garlic for a richer ricotta.

Nutritional Highlights (Per Slice)

CaloriesProteinCarbsFiberFat
~360 kcal16g46g6g12g

Storage

  • Refrigerator: Store covered for up to 5 days.
  • Freezer: Freeze cooled slices, wrapped individually, for up to 3 months. Thaw overnight and reheat.
  • Reheating: Warm in a 350°F (175°C) oven for 15–20 minutes, or in the microwave.
  • Make ahead: Make the sauce and ricotta a day ahead, then assemble and cook.

Frequently Asked Questions

Do I need to boil the noodles first?

No. The uncooked noodles soften in the sauce as the lasagna cooks.

Can I use no-boil noodles?

Yes, but check them after 2 hours on low, since they can soften quickly.

Why is my lasagna watery?

The tofu or spinach may have released water. Press the tofu well and squeeze the spinach dry if using frozen.

Can I make it gluten-free?

Use gluten-free lasagna noodles, which cook faster, so check after about 2 hours.

What size slow cooker do I need?

A 6-quart oval slow cooker works best, though a 5-quart also works with fewer layers.

Can I make it in a smaller cooker?

Yes. Halve the recipe and use a 3–4 quart slow cooker, cooking for about the same time.


Tried this recipe? Leave a comment below and let us know how it turned out! Tag us on Instagram and Facebook — we love seeing your plant-powered creations. Looking for more easy vegan dinners? Browse all recipes on Easy Vegan Recipes — new recipes posted every single week!

Vegan Black Bean Brownies with Fudgy Centers and Crackly Tops — The Most Decadent Plant-Based Treat You Will Make All Week

vegan black bean brownies

Fudgy, rich, and intensely chocolatey with a shiny, crackly top, these Vegan Black Bean Brownies are made with a secret ingredient: black beans. Blended into the batter, they replace much of the flour and fat, giving the brownies a dense, moist, melt-in-your-mouth texture, plus extra fiber and protein. Nobody will guess they are made with beans, and they are ready in about 40 minutes.

Black beans are mild, soft, and naturally creamy when blended, so they disappear into the chocolate and create the fudgy crumb that makes a perfect brownie. Combined with cocoa powder, melted dark chocolate, and maple syrup, the result is deep, bittersweet, and lightly sweet. A ground flax “egg” binds the batter, and a splash of coffee or espresso powder intensifies the chocolate flavor.

The brownies bake in one pan, and the batter comes together in a food processor or blender in just a few minutes. Dark chocolate chips folded in create gooey pockets of melted chocolate, and a sprinkle of flaky salt on top balances the sweetness.

Serve them warm with vegan vanilla ice cream, or enjoy them cold and extra fudgy from the fridge. They are a great make-ahead dessert, a smart treat for sweet tooths, and an easy way to sneak in a serving of beans.

This recipe is 100% vegan, egg-free, dairy-free, and naturally gluten-free (with a gluten-free option for the oats or flour used).


Recipe Information

Prep TimeBake TimeTotal TimeServingsCalories
15 mins25 mins40 mins (plus cooling)12 brownies~180 kcal

Ingredients

For the Brownies

  • 1 can (400g) black beans, drained and very well rinsed
  • 2 tbsp ground flaxseed mixed with 5 tbsp water (flax egg)
  • ½ cup (120ml) pure maple syrup
  • ⅓ cup (80ml) melted coconut oil or neutral oil
  • 1 tsp vanilla extract
  • ½ cup (45g) unsweetened cocoa powder
  • ½ cup (50g) oat flour (or rolled oats blended into flour)
  • 1 tsp instant espresso powder (optional)
  • ½ tsp baking powder
  • ½ tsp salt
  • ¼ cup (60ml) unsweetened plant milk, as needed
  • ½ cup (90g) vegan dark chocolate chips, divided

To Top

  • Flaky sea salt
  • Extra chocolate chips
  • Chopped walnuts or pecans (optional)

To Serve

  • Vegan vanilla ice cream
  • Fresh raspberries
  • Chocolate sauce
  • A drizzle of peanut butter

Optional Additions

  • Peanut butter swirl
  • Chopped nuts
  • Orange zest
  • Pinch of cinnamon

Instructions

  1. Preheat and prep. Heat the oven to 350°F (175°C). Line an 8×8 inch baking pan with parchment paper, leaving overhang for easy lifting, and lightly oil the paper.
  2. Make the flax egg. Stir the ground flaxseed and water together and let it thicken for 5–10 minutes.
  3. Blend the base. In a food processor or high-speed blender combine the black beans, flax egg, maple syrup, oil, and vanilla. Blend until completely smooth with no visible bean pieces, scraping down the sides.
  4. Add the dry ingredients. Add the cocoa powder, oat flour, espresso powder, baking powder, and salt. Blend again until a thick, glossy batter forms. If it is too thick to blend, add 1–2 tablespoons of plant milk.
  5. Fold in the chocolate. Stir in half of the chocolate chips by hand.
  6. Fill the pan. Spread the batter evenly in the pan, smoothing the top. Sprinkle with the remaining chocolate chips and nuts, if using.
  7. Bake. Bake for 22–27 minutes, until the edges look set and a toothpick inserted into the center comes out with a few moist crumbs. Do not overbake.
  8. Cool. Let the brownies cool completely in the pan for at least 45 minutes, then lift out and chill for 30 minutes for the cleanest slices. Sprinkle with flaky salt.
  9. Slice and serve. Cut into 12 squares with a sharp knife, wiping the blade between cuts.

Pro Tips for the Fudgiest Brownies

  • Rinse the beans very well. This removes any canned flavor.
  • Blend until completely smooth. Any bean lumps will show in the texture.
  • Do not overbake. Pull them out when the center is still slightly soft, as they firm up while cooling.
  • Cool completely. Cooling is what sets the fudgy texture.
  • Chill before slicing. Cold brownies cut into clean squares.
  • Use quality cocoa. It makes a noticeable difference to the chocolate flavor.
  • Add a pinch of espresso powder. It deepens the chocolate without a coffee taste.

Why Black Bean Brownies Are a Smart Treat

Black beans provide plant protein, fiber, folate, and iron, and they replace some of the flour and fat in a classic brownie. Cocoa powder is rich in flavonoids and magnesium, and dark chocolate adds antioxidants.

A brownie provides about 4 grams of plant protein and 4 grams of fiber, so it is more filling than a traditional brownie. It is still a dessert, but it is a lighter, more nutrient-dense one that is free of eggs and dairy.


Flavor Variations

  • Peanut Butter Swirl Brownies: Swirl 2 tablespoons of peanut butter into the top before baking.
  • Mint Chocolate Brownies: Add ½ teaspoon of peppermint extract.
  • Double Chocolate Walnut: Add chopped walnuts and extra chocolate chips.
  • Orange Chocolate: Add 1 tablespoon of orange zest.

Nutritional Highlights (Per Brownie)

CaloriesProteinCarbsFiberFat
~180 kcal4g23g4g9g

Storage

  • Room temperature: Store in an airtight container for up to 2 days.
  • Refrigerator: Store for up to 7 days. They become even fudgier when cold.
  • Freezer: Freeze individually wrapped brownies for up to 3 months. Thaw at room temperature.
  • Make ahead: Bake a day ahead, since the texture improves overnight.

Frequently Asked Questions

Can you taste the black beans?

No. When blended until smooth, the beans taste like chocolate and add moisture and fudginess.

Can I use canned or cooked beans?

Both work. Drain and rinse canned beans very well, or use about 1½ cups of home-cooked beans.

Can I make them gluten-free?

Use certified gluten-free oat flour.

Why are my brownies gummy?

They may have been underbaked or sliced while warm. Bake until set and cool fully.

Can I make them nut-free?

Yes. The recipe is nut-free as written, so just skip the nut topping.

Can I use a different sweetener?

Yes. Coconut sugar or date syrup work, but the texture may change slightly.


Tried this recipe? Leave a comment below and let us know how it turned out! Tag us on Instagram and Facebook — we love seeing your plant-powered creations. Looking for more easy vegan desserts? Browse all recipes on Easy Vegan Recipes — new recipes posted every single week!

Vegan Black Bean Enchiladas with Homemade Red Enchilada Sauce — Easy Roll-and-Bake Mexican Dinner with Sweet Corn, Spinach and Melty Cheese

vegan black bean enchiladas

Soft corn tortillas rolled around a hearty filling of black beans, sweet corn, and spinach, smothered in a smoky homemade red enchilada sauce and baked until bubbling: these Vegan Black Bean Enchiladas are the kind of cozy Mexican-inspired dinner that disappears fast.

The sauce is what sets these apart. Instead of opening a can, you whisk together chili powder, cumin, garlic, tomato sauce, and vegetable broth in a saucepan for about 10 minutes. The result is a deep red, smoky, mildly spicy sauce that tastes far better than store-bought and uses ingredients you probably already have.

The filling is simple and satisfying. Black beans are lightly mashed so they hold together, then mixed with sautéed onion, sweet corn, spinach, and a little cumin and lime. It is a filling that is full of protein and fiber, with no special ingredients to hunt down.

Assembly is easy: warm the tortillas, fill, roll, and arrange in a baking dish seam side down. Pour over the rest of the sauce, top with vegan cheese if you like, and bake for 20 minutes. Finish with cilantro, avocado, and a drizzle of vegan sour cream.

This recipe is 100% vegan and dairy-free. It is gluten-free with corn tortillas, and nut-free if you choose a nut-free vegan cheese. Please check labels on your tortillas, chili powder, and cheese.


Recipe Information

Prep TimeCook TimeTotal TimeServingsCalories
20 mins30 mins50 mins6 (8 enchiladas)~380 kcal each

Ingredients

For the Homemade Red Enchilada Sauce

  • 2 tbsp olive oil
  • 3 garlic cloves, minced
  • 3 tbsp chili powder
  • 2 tbsp all-purpose flour or cornstarch
  • 1 tsp ground cumin
  • 1 tsp dried oregano
  • ½ tsp smoked paprika
  • 1 can (8 oz / 225g) tomato sauce
  • 1½ cups (360ml) vegetable broth
  • 1 tsp apple cider vinegar
  • ¾ tsp salt

For the Black Bean Filling

  • 1 tbsp olive oil
  • 1 small onion, diced
  • 1 red bell pepper, diced
  • 2 garlic cloves, minced
  • 2 cans (15 oz / 400g each) black beans, drained and rinsed
  • 1 cup (150g) sweet corn, fresh or frozen
  • 2 big handfuls fresh spinach
  • 1 tsp ground cumin
  • ½ tsp smoked paprika
  • ½ tsp salt
  • 1 tbsp lime juice

For Assembly

  • 8 corn or flour tortillas (6-inch)
  • 1 cup vegan cheese shreds (optional)

To Serve

  • Fresh cilantro
  • Diced avocado
  • Vegan sour cream
  • Sliced green onions
  • Lime wedges
  • Pickled jalapeños

Optional Additions

  • Diced roasted sweet potato
  • Sautéed mushrooms
  • Chipotle in adobo
  • Cooked rice

Instructions

  1. Preheat. Heat the oven to 375°F (190°C). Lightly oil a 9×13-inch (23x33cm) baking dish.
  2. Make the sauce. Heat the oil in a saucepan over medium heat. Add the garlic and cook for 30 seconds. Whisk in the chili powder, flour, cumin, oregano, and paprika and cook for 1 minute. Slowly whisk in the tomato sauce and broth. Simmer for 8–10 minutes until slightly thickened. Stir in the vinegar and salt. Set aside.
  3. Cook the filling. Heat the oil in a large pan. Cook the onion and pepper for 5 minutes until soft. Add the garlic and cook for 30 seconds.
  4. Add the beans. Stir in the beans, corn, cumin, paprika, and salt. Cook for 4–5 minutes, mashing about a third of the beans with a spoon.
  5. Add the spinach. Stir in the spinach until wilted, about 1 minute. Add the lime juice and a few spoonfuls of the sauce so the filling holds together. Taste and adjust.
  6. Warm the tortillas. Wrap in a damp towel and microwave for 30–45 seconds, or warm in a dry pan, so they do not crack when rolled.
  7. Assemble. Spread ½ cup of sauce on the bottom of the baking dish. Spoon about ⅓ cup of filling onto each tortilla, roll tightly, and place seam side down in the dish.
  8. Top and bake. Pour the remaining sauce over the enchiladas and sprinkle with cheese. Bake for 18–20 minutes until bubbling at the edges.
  9. Serve. Rest for 5 minutes, then top with cilantro, avocado, sour cream, green onions, and lime.

Pro Tips for the Best Enchiladas

  • Warm the tortillas first, or they will crack when rolled.
  • Mash some of the beans so the filling holds together.
  • Do not overfill the tortillas, or they will burst.
  • Spread sauce on the bottom of the dish to prevent sticking.
  • Cover the enchiladas fully with sauce so the edges do not dry out.
  • Let them rest for 5 minutes before serving so they set.
  • Cook the chili powder in oil briefly to bring out its flavor.
  • Add the cheese on top for the last 5 minutes if you like it melted but not browned.

A Few Notes on Ingredients

Black beans bring protein, fiber, and a mild, earthy flavor. Chili powder is the main flavor of the sauce, so use a fresh, good-quality one. Corn tortillas give classic flavor, while flour tortillas are softer and easier to roll.

If you prefer a store-bought sauce, use about 2 cups of red enchilada sauce.


Flavor Variations

  • Sweet Potato Black Bean: Add 1½ cups of roasted sweet potato to the filling.
  • Green Enchiladas: Use salsa verde in place of red sauce.
  • Spicy Enchiladas: Add chipotle in adobo to the sauce.
  • Mushroom Enchiladas: Add sautéed mushrooms to the filling.
  • Gluten-Free: Use corn tortillas and cornstarch in the sauce.
  • Make-Ahead: Assemble, cover, and refrigerate up to a day before baking.

Nutritional Highlights (Per Serving)

CaloriesProteinCarbsFiberFat
~380 kcal14g62g16g9g

Storage

  • Refrigerator: Store covered for up to 4 days.
  • Freezer: Freeze baked enchiladas for up to 3 months. Thaw overnight.
  • Reheating: Warm at 350°F (175°C) for 15–20 minutes, covered.
  • Make ahead: Assemble a day ahead and bake when ready.

Frequently Asked Questions

How do I keep corn tortillas from cracking?

Warm them first in a damp towel in the microwave or in a dry pan until pliable.

Can I use store-bought enchilada sauce?

Yes. Use about 2 cups of red enchilada sauce.

Can I make them ahead?

Yes. Assemble, cover, and refrigerate for up to a day, then bake a few minutes longer.

Can I freeze them?

Yes. Freeze baked enchiladas, then thaw and reheat.

Can I make them without cheese?

Yes. They are delicious with just the sauce, avocado, and sour cream.

How is this different from your other Mexican recipes?

These are rolled, baked enchiladas with a homemade red sauce. Our Vegan Mexican-Style Veggie Lasagna layers noodles with black beans and cashew queso, our Vegan Enchilada Soup uses an enchilada-style broth, and our Vegan Burritos are wrapped and not baked in sauce.


Tried this recipe? Leave a comment below and let us know how it turned out! Tag us on Instagram and Facebook — we love seeing your plant-powered creations. POST TITLE:
Vegan Black Bean Enchiladas with Homemade Red Enchilada Sauce — Easy Roll-and-Bake Mexican Dinner with Sweet Corn, Spinach and Melty Cheese

CATEGORY: All Recipes + Dinner

URL SLUG: vegan-black-bean-enchiladas


Soft corn tortillas rolled around a hearty filling of black beans, sweet corn, and spinach, smothered in a smoky homemade red enchilada sauce and baked until bubbling: these Vegan Black Bean Enchiladas are the kind of cozy Mexican-inspired dinner that disappears fast.

The sauce is what sets these apart. Instead of opening a can, you whisk together chili powder, cumin, garlic, tomato sauce, and vegetable broth in a saucepan for about 10 minutes. The result is a deep red, smoky, mildly spicy sauce that tastes far better than store-bought and uses ingredients you probably already have.

The filling is simple and satisfying. Black beans are lightly mashed so they hold together, then mixed with sautéed onion, sweet corn, spinach, and a little cumin and lime. It is a filling that is full of protein and fiber, with no special ingredients to hunt down.

Assembly is easy: warm the tortillas, fill, roll, and arrange in a baking dish seam side down. Pour over the rest of the sauce, top with vegan cheese if you like, and bake for 20 minutes. Finish with cilantro, avocado, and a drizzle of vegan sour cream.

This recipe is 100% vegan and dairy-free. It is gluten-free with corn tortillas, and nut-free if you choose a nut-free vegan cheese. Please check labels on your tortillas, chili powder, and cheese.


Recipe Information

Prep TimeCook TimeTotal TimeServingsCalories
20 mins30 mins50 mins6 (8 enchiladas)~380 kcal each

Ingredients

For the Homemade Red Enchilada Sauce

  • 2 tbsp olive oil
  • 3 garlic cloves, minced
  • 3 tbsp chili powder
  • 2 tbsp all-purpose flour or cornstarch
  • 1 tsp ground cumin
  • 1 tsp dried oregano
  • ½ tsp smoked paprika
  • 1 can (8 oz / 225g) tomato sauce
  • 1½ cups (360ml) vegetable broth
  • 1 tsp apple cider vinegar
  • ¾ tsp salt

For the Black Bean Filling

  • 1 tbsp olive oil
  • 1 small onion, diced
  • 1 red bell pepper, diced
  • 2 garlic cloves, minced
  • 2 cans (15 oz / 400g each) black beans, drained and rinsed
  • 1 cup (150g) sweet corn, fresh or frozen
  • 2 big handfuls fresh spinach
  • 1 tsp ground cumin
  • ½ tsp smoked paprika
  • ½ tsp salt
  • 1 tbsp lime juice

For Assembly

  • 8 corn or flour tortillas (6-inch)
  • 1 cup vegan cheese shreds (optional)

To Serve

  • Fresh cilantro
  • Diced avocado
  • Vegan sour cream
  • Sliced green onions
  • Lime wedges
  • Pickled jalapeños

Optional Additions

  • Diced roasted sweet potato
  • Sautéed mushrooms
  • Chipotle in adobo
  • Cooked rice

Instructions

  1. Preheat. Heat the oven to 375°F (190°C). Lightly oil a 9×13-inch (23x33cm) baking dish.
  2. Make the sauce. Heat the oil in a saucepan over medium heat. Add the garlic and cook for 30 seconds. Whisk in the chili powder, flour, cumin, oregano, and paprika and cook for 1 minute. Slowly whisk in the tomato sauce and broth. Simmer for 8–10 minutes until slightly thickened. Stir in the vinegar and salt. Set aside.
  3. Cook the filling. Heat the oil in a large pan. Cook the onion and pepper for 5 minutes until soft. Add the garlic and cook for 30 seconds.
  4. Add the beans. Stir in the beans, corn, cumin, paprika, and salt. Cook for 4–5 minutes, mashing about a third of the beans with a spoon.
  5. Add the spinach. Stir in the spinach until wilted, about 1 minute. Add the lime juice and a few spoonfuls of the sauce so the filling holds together. Taste and adjust.
  6. Warm the tortillas. Wrap in a damp towel and microwave for 30–45 seconds, or warm in a dry pan, so they do not crack when rolled.
  7. Assemble. Spread ½ cup of sauce on the bottom of the baking dish. Spoon about ⅓ cup of filling onto each tortilla, roll tightly, and place seam side down in the dish.
  8. Top and bake. Pour the remaining sauce over the enchiladas and sprinkle with cheese. Bake for 18–20 minutes until bubbling at the edges.
  9. Serve. Rest for 5 minutes, then top with cilantro, avocado, sour cream, green onions, and lime.

Pro Tips for the Best Enchiladas

  • Warm the tortillas first, or they will crack when rolled.
  • Mash some of the beans so the filling holds together.
  • Do not overfill the tortillas, or they will burst.
  • Spread sauce on the bottom of the dish to prevent sticking.
  • Cover the enchiladas fully with sauce so the edges do not dry out.
  • Let them rest for 5 minutes before serving so they set.
  • Cook the chili powder in oil briefly to bring out its flavor.
  • Add the cheese on top for the last 5 minutes if you like it melted but not browned.

A Few Notes on Ingredients

Black beans bring protein, fiber, and a mild, earthy flavor. Chili powder is the main flavor of the sauce, so use a fresh, good-quality one. Corn tortillas give classic flavor, while flour tortillas are softer and easier to roll.

If you prefer a store-bought sauce, use about 2 cups of red enchilada sauce.


Flavor Variations

  • Sweet Potato Black Bean: Add 1½ cups of roasted sweet potato to the filling.
  • Green Enchiladas: Use salsa verde in place of red sauce.
  • Spicy Enchiladas: Add chipotle in adobo to the sauce.
  • Mushroom Enchiladas: Add sautéed mushrooms to the filling.
  • Gluten-Free: Use corn tortillas and cornstarch in the sauce.
  • Make-Ahead: Assemble, cover, and refrigerate up to a day before baking.

Nutritional Highlights (Per Serving)

CaloriesProteinCarbsFiberFat
~380 kcal14g62g16g9g

Storage

  • Refrigerator: Store covered for up to 4 days.
  • Freezer: Freeze baked enchiladas for up to 3 months. Thaw overnight.
  • Reheating: Warm at 350°F (175°C) for 15–20 minutes, covered.
  • Make ahead: Assemble a day ahead and bake when ready.

Frequently Asked Questions

How do I keep corn tortillas from cracking?

Warm them first in a damp towel in the microwave or in a dry pan until pliable.

Can I use store-bought enchilada sauce?

Yes. Use about 2 cups of red enchilada sauce.

Can I make them ahead?

Yes. Assemble, cover, and refrigerate for up to a day, then bake a few minutes longer.

Can I freeze them?

Yes. Freeze baked enchiladas, then thaw and reheat.

Can I make them without cheese?

Yes. They are delicious with just the sauce, avocado, and sour cream.

How is this different from your other Mexican recipes?

These are rolled, baked enchiladas with a homemade red sauce. Our Vegan Mexican-Style Veggie Lasagna layers noodles with black beans and cashew queso, our Vegan Enchilada Soup uses an enchilada-style broth, and our Vegan Burritos are wrapped and not baked in sauce.


Tried this recipe? Leave a comment below and let us know how it turned out! Tag us on Instagram and Facebook — we love seeing your plant-powered creations. Browse all recipes on Easy Vegan Recipes — new recipes posted every single week!
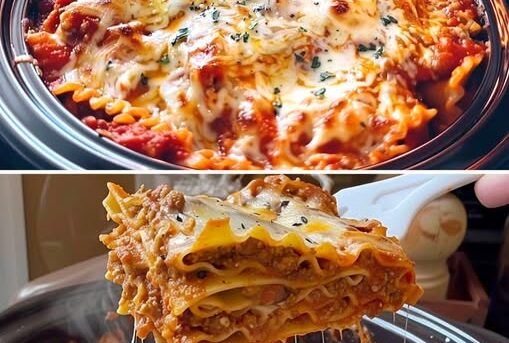
Vegan Tater Tot Casserole (Hotdish) with Lentil Mushroom Filling, Creamy Gravy and Crispy Golden Tots

vegan tater tot casserole

A hearty lentil and mushroom filling with green beans in a rich, creamy savory sauce, topped with rows of crispy golden tater tots and baked until bubbling: this Vegan Tater Tot Casserole is classic Midwestern comfort food, the famous “hotdish,” made entirely from plants.

The traditional version is made with ground beef and canned cream-of-mushroom soup. This plant-based version keeps everything people love and swaps in better ingredients. Brown or green lentils and finely chopped mushrooms give the filling a meaty, savory texture, and a homemade creamy sauce takes the place of the canned soup. It is made with plant milk, vegetable broth, flour, nutritional yeast, and a splash of soy sauce for depth, and it is much more flavorful than anything from a can.

Green beans and carrots add color and a little sweetness, and onion, garlic, and thyme season the whole dish. The filling is spooned into a baking dish, and frozen tater tots are arranged in neat rows over the top. As it bakes, the filling bubbles up around the tots, and the tops turn crisp and golden.

It is a family-friendly, make-ahead dinner that uses simple ingredients, most from the pantry and freezer. Serve it with a green salad or steamed vegetables for a complete meal, and it will become a regular on busy weeknights.

This recipe is 100% vegan and dairy-free when you choose vegan tater tots (check the labels). It contains gluten and soy, and can be adapted with gluten-free flour, tamari, and gluten-free tots.


Recipe Information

Prep TimeCook TimeTotal TimeServingsCalories
20 mins50 mins1 hr 10 mins6~410 kcal each

Ingredients

For the Lentil Mushroom Filling

  • 2 tbsp olive oil
  • 1 large yellow onion, diced
  • 2 carrots, diced
  • 8 oz (225g) cremini mushrooms, finely chopped
  • 3 garlic cloves, minced
  • 1 tsp dried thyme
  • 1 tsp smoked paprika
  • 1½ cups (300g) cooked brown or green lentils (or 1 can, drained)
  • 1½ cups (200g) green beans, trimmed and cut into 1-inch pieces (or frozen)

For the Creamy Sauce

  • 3 tbsp vegan butter or olive oil
  • 3 tbsp all-purpose flour
  • 1½ cups (360ml) vegetable broth
  • 1 cup (240ml) unsweetened plant milk
  • 2 tbsp nutritional yeast
  • 1 tbsp soy sauce or tamari
  • 1 tsp Dijon mustard
  • ¾ tsp salt
  • ¼ tsp black pepper

For the Topping

  • About 28 oz (800g) frozen vegan tater tots
  • 1 cup vegan cheese shreds (optional)

To Serve

  • Fresh parsley
  • Green onions
  • Hot sauce or ketchup

Optional Additions

  • Frozen corn or peas
  • Spinach
  • Vegan cheddar
  • Crispy fried onions

Instructions

  1. Preheat. Heat the oven to 400°F (200°C). Lightly grease a 9×13-inch (23x33cm) baking dish.
  2. Cook the vegetables. Heat the oil in a large skillet over medium heat. Cook the onion and carrots for 5 minutes. Add the mushrooms and cook for 6–8 minutes until browned and dry.
  3. Add the aromatics. Stir in the garlic, thyme, and paprika and cook for 1 minute.
  4. Make the sauce. In a saucepan, melt the butter and whisk in the flour for 1 minute. Slowly whisk in the broth and plant milk. Simmer for 4–5 minutes until thick. Stir in the nutritional yeast, soy sauce, mustard, salt, and pepper.
  5. Combine. Stir the lentils, green beans, and the sauce into the vegetable mixture. Taste and adjust the seasoning. The mixture should be thick and creamy.
  6. Fill the dish. Spread the filling evenly in the baking dish. Sprinkle with vegan cheese, if using.
  7. Add the tots. Arrange the frozen tater tots in tight rows on top, covering the filling completely.
  8. Bake. Bake uncovered for 40–45 minutes, until the filling is bubbling and the tots are deep golden and crisp.
  9. Rest. Let the casserole rest for 10 minutes.
  10. Serve. Sprinkle with parsley and green onions and serve hot.

Pro Tips for the Best Tater Tot Casserole

  • Cook the mushrooms until dry for a deeper, meatier flavor.
  • Make the sauce thick, since the filling thins as it bakes.
  • Use frozen tots straight from the freezer for the crispest tops.
  • Arrange the tots tightly in rows for even coverage.
  • Bake until the tots are deeply golden, not pale.
  • Let the casserole rest for 10 minutes before serving.
  • Check the tater tot label for vegan ingredients, since some contain milk or natural flavors.
  • Broil for 2 minutes at the end for extra crisp.

A Few Notes on Ingredients

Lentils and mushrooms replace the ground beef. Brown or green lentils hold their shape best. Nutritional yeast, soy sauce, and mustard give the sauce depth and a savory edge. Most tater tots are vegan, but check the ingredient list.

Frozen vegetables work well and save prep time.


Flavor Variations

  • Cheesy Tater Tot Casserole: Add vegan cheddar between the filling and the tots.
  • Plant-Based Ground Version: Use vegan ground crumbles instead of lentils.
  • Corn and Pea Version: Replace the green beans with corn and peas.
  • Spicy Version: Add chili flakes and hot sauce.
  • Make-Ahead: Assemble without the tots and chill, then add the tots and bake.
  • Gluten-Free: Use gluten-free flour, tamari, and gluten-free tots.

Nutritional Highlights (Per Serving)

CaloriesProteinCarbsFiberFat
~410 kcal13g54g9g16g

Storage

  • Refrigerator: Store covered for up to 4 days.
  • Freezer: Freeze the baked casserole, wrapped, for up to 2 months.
  • Reheating: Warm at 375°F (190°C) for 20 minutes, uncovered, to re-crisp the tots.
  • Make ahead: Prepare the filling up to 2 days ahead.

Frequently Asked Questions

Are tater tots vegan?

Many are, but not all. Check the ingredient list for milk or animal-derived flavorings.

Can I use canned lentils?

Yes. Use 1 can, drained and rinsed.

Can I make it ahead?

Yes. Make the filling ahead and add the tots when baking.

Can I freeze it?

Yes. Freeze the baked casserole, then reheat in the oven.

How do I keep the tots crispy?

Use them frozen, in a single layer, and bake uncovered until deeply golden.

How is this different from your other casseroles?

This is a hotdish with a lentil mushroom filling topped with tater tots. Our Vegan Pot Pie Casserole is a vegetable pot pie with a different topping, and our Vegan Broccoli Potato Bake is a potato-based side dish.


Tried this recipe? Leave a comment below and let us know how it turned out! Tag us on Instagram and Facebook — we love seeing your plant-powered creations. Browse all recipes on Easy Vegan Recipes — new recipes posted every single week!

Layered Vegan Vegetable Casserole with Potatoes, Zucchini, Tomatoes, White Beans and Crispy Herb Crumb — The Most Comforting Plant-Based Bake You Will Make All Week

vegetable casserole

Thin layers of tender potato, zucchini, eggplant, and juicy tomato, baked over a bed of garlicky white beans and tomato sauce and topped with a crisp, golden herb crumb: this Layered Vegan Vegetable Casserole is a colorful, satisfying one-dish dinner that is easy to assemble and looks beautiful when it comes out of the oven.

Most vegetable casseroles are creamy and heavy. This one is different. It is built like a rustic French tian, with the vegetables sliced thin and arranged in overlapping rows, then baked in olive oil, garlic, and thyme until they are soft, sweet, and lightly caramelized. A layer of creamy white beans and tomato sauce on the bottom adds protein and keeps the vegetables moist, and a crunchy topping of panko, nutritional yeast, and parsley adds the crisp finish that every casserole needs.

There is no cream sauce and no cheese, so the casserole is light and fresh, but it still tastes rich, because the vegetables roast in their own juices and the olive oil. It is naturally dairy-free and egg-free, and it is a great way to use up summer vegetables or the produce in your fridge.

Slicing is the main task. Use a mandoline or a sharp knife to cut the vegetables to an even thickness of about ⅛ inch (3 mm), so they cook at the same speed. Cover the dish with foil for the first part of baking so that the vegetables steam and soften, then uncover to brown the top.

Serve it hot as a main dish with a green salad and crusty bread, or as a side for a holiday meal. Leftovers are excellent the next day.

This recipe is dairy-free, egg-free, and nut-free. It contains wheat (panko). Use gluten-free breadcrumbs for a gluten-free version. Please check labels on your canned beans, tomatoes, and breadcrumbs.


Recipe Information

Prep TimeCook TimeTotal TimeServingsCalories
30 mins1 hr1 hr 30 mins6~310 kcal each

Ingredients

For the Bean and Tomato Base

  • 2 tbsp olive oil
  • 1 large yellow onion, finely diced
  • 4 garlic cloves, minced
  • 1 can (400g) cannellini or white beans, drained and rinsed
  • 1½ cups (360ml) crushed tomatoes or passata
  • 1 tsp dried oregano
  • ½ tsp salt
  • ¼ tsp black pepper
  • Pinch of red pepper flakes, optional

For the Vegetable Layers

  • 400g (14 oz) Yukon gold potatoes, scrubbed and sliced ⅛-inch thick
  • 2 medium zucchini, sliced ⅛-inch thick
  • 1 small eggplant, sliced ⅛-inch thick
  • 3 ripe tomatoes, sliced ¼-inch thick
  • 3 tbsp olive oil
  • 2 tsp fresh thyme leaves (or ¾ tsp dried)
  • 1 tsp garlic powder
  • 1 tsp salt
  • ½ tsp black pepper

For the Crispy Herb Crumb

  • ¾ cup (45g) panko breadcrumbs
  • 3 tbsp nutritional yeast
  • 2 tbsp olive oil
  • 2 tbsp fresh parsley, chopped
  • ¼ tsp garlic powder
  • Pinch of salt

Instructions

  1. Preheat and prep. Heat the oven to 400°F (200°C). Lightly oil a 9×13 inch baking dish.
  2. Make the base. Heat the olive oil in a skillet over medium heat. Cook the onion for 6–8 minutes until soft. Add the garlic and cook for 1 minute. Stir in the beans, crushed tomatoes, oregano, salt, pepper, and pepper flakes. Simmer for 5 minutes, lightly mashing some of the beans. Spread evenly in the baking dish.
  3. Prep the vegetables. In a large bowl, gently toss the potato, zucchini, and eggplant slices with the olive oil, thyme, garlic powder, salt, and pepper.
  4. Layer. Arrange the vegetables in overlapping rows on top of the bean mixture, alternating potato, zucchini, eggplant, and tomato slices. Stand them on their edges, like fallen dominoes, packing them closely.
  5. Bake covered. Cover the dish tightly with foil. Bake for 40 minutes, until the potatoes are nearly tender.
  6. Make the crumb. Mix the panko, nutritional yeast, olive oil, parsley, garlic powder, and salt.
  7. Bake uncovered. Remove the foil and sprinkle the crumb over the top. Bake uncovered for 20–25 minutes, until the vegetables are tender, the edges are browned, and the crumb is golden.
  8. Rest and serve. Rest for 10 minutes before serving, to let the juices settle. Garnish with fresh herbs.

Pro Tips for the Best Vegetable Casserole

  • Slice the vegetables to the same thickness so that they cook evenly. A mandoline helps.
  • Pat the zucchini, eggplant, and tomato slices dry if they look wet.
  • Pack the slices tightly for the best look and texture.
  • Cover with foil for the first bake so the vegetables steam.
  • Add the crumb only after uncovering so it stays crisp.
  • Season each layer, since the vegetables are mild.
  • Let the casserole rest before serving.
  • Check the potatoes with a knife to test doneness. Cook longer if needed.

A Few Notes on Ingredients

Yukon gold potatoes keep their shape and have a buttery texture. Other vegetables can be swapped. Yellow squash, sweet potato, butternut squash, or bell pepper all work, though thicker or denser vegetables need thinner slicing. Cannellini beans give a creamy base, and chickpeas also work. Panko gives the crispiest crumb. Use fresh herbs if you have them.


Flavor Variations

  • Pesto Version: Spread a layer of pesto over the beans.
  • Spicy Version: Add chili flakes or harissa to the sauce.
  • Cheesy Version: Top with vegan mozzarella for the last 10 minutes.
  • Protein Version: Add crumbled tofu or lentils to the base.
  • Mushroom Version: Add sliced mushrooms between the layers.
  • Gluten-Free Version: Use gluten-free breadcrumbs or crushed nuts.

Nutritional Highlights (Per Serving)

CaloriesProteinCarbsFiberFat
~310 kcal10g44g10g11g

Values are estimates.


Storage

  • Refrigerator: Store for up to 4 days.
  • Freezer: Freeze for up to 2 months. The vegetables soften after thawing.
  • Reheating: Reheat in the oven at 375°F (190°C) for 15–20 minutes to re-crisp the top.
  • Make ahead: Assemble up to a day ahead and add the crumb before baking.

Frequently Asked Questions

Can I make it ahead?

Yes. Assemble it a day ahead, cover, and refrigerate. Bake it with an extra 10 minutes.

Why are my vegetables watery?

Zucchini, eggplant, and tomatoes release liquid. Pat them dry, and bake uncovered at the end to evaporate the juices.

Can I use other vegetables?

Yes. Keep the slices thin and even.

Can I make it gluten-free?

Yes. Use gluten-free breadcrumbs.

Can I freeze it?

Yes, but the texture softens.

How is this different from your other casseroles?

This is a layered, sauce-free vegetable bake over a tomato and white bean base. Our Vegan Pot Pie Casserole has a creamy gravy and a puff pastry or biscuit topping, our Vegan Baked Broccoli and Cauliflower Casserole has a cashew cheese sauce, and our Vegan Italian Casserole is a pasta bake.


Tried this recipe? Leave a comment below and let us know how it turned out! Tag us on Instagram and Facebook — we love seeing your plant-powered creations. Browse all recipes on Easy Vegan Recipes — new recipes posted every single week!
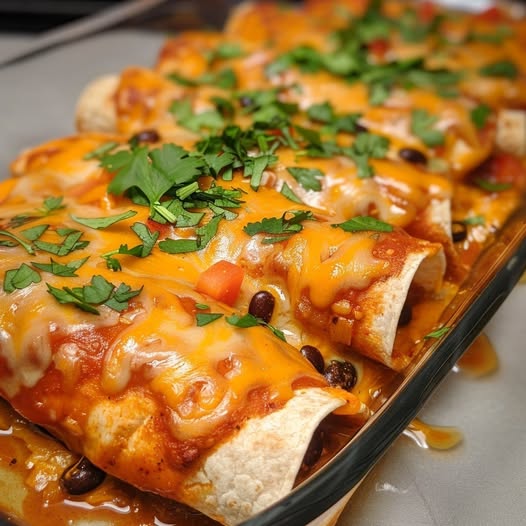
Vegan Cabbage Rolls with Lentil, Mushroom and Rice Filling in Sweet and Tangy Tomato Sauce — The Most Comforting Plant-Based Dinner You Will Make All Week

vegan cabbage rolls

Tender cabbage leaves wrapped around a hearty filling of lentils, mushrooms, and rice, then baked in a sweet and tangy tomato sauce: these Vegan Cabbage Rolls are old-world comfort food made without meat, and they are filling, budget-friendly, and perfect for feeding a family.

Stuffed cabbage rolls appear in kitchens across Eastern Europe and the Middle East, with many family versions. This plant-based take keeps the spirit of the classic, with soft cabbage, a savory filling, and a bright tomato sauce, but replaces the ground meat with green or brown lentils, finely chopped mushrooms, and rice. The lentils give body and protein, the mushrooms add a meaty depth, and the rice makes the filling tender.

The sauce is simple. Crushed tomatoes simmer with garlic, a splash of apple cider vinegar, and a little maple syrup for the sweet and sour balance traditional to cabbage rolls. The rolls bake gently in the sauce for about 45 minutes, until the cabbage is silky and the flavors meld together.

Preparing the cabbage leaves is the only fussy part, and it is easy: core the head, soften it in hot water, and peel off the leaves one by one. Shave down any thick center ribs so the leaves roll without tearing. Once you have made one or two, the rest go quickly.

These rolls reheat beautifully and taste even better the next day. Serve them with mashed potatoes, crusty bread, or a dollop of plant-based yogurt and fresh dill.

This recipe is dairy-free, egg-free, and nut-free. It is gluten-free if your soy sauce is replaced with tamari and checked. Please check labels on your vegetable broth, tomato products, and soy sauce.


Recipe Information

Prep TimeCook TimeTotal TimeServingsCalories
40 mins50 mins1 hr 30 mins6 (about 12 rolls)~290 kcal each

Ingredients

For the Cabbage

  • 1 large head green cabbage (about 1.5 kg)

For the Lentil Mushroom Filling

  • 2 tbsp olive oil
  • 1 large onion, finely diced
  • 250g (9 oz) cremini mushrooms, very finely chopped
  • 4 garlic cloves, minced
  • 2 tbsp tomato paste
  • 1½ cups (about 300g) cooked green or brown lentils, drained
  • 1½ cups (about 250g) cooked rice
  • 2 tbsp soy sauce or tamari
  • 2 tsp smoked paprika
  • 1 tsp dried thyme
  • ½ tsp black pepper
  • ½ tsp salt
  • ¼ cup fresh parsley, chopped
  • 2 tbsp fresh dill, chopped

For the Sweet and Tangy Tomato Sauce

  • 1 tbsp olive oil
  • 3 garlic cloves, minced
  • 1 can (800g) crushed tomatoes
  • 1 cup (240ml) vegetable broth
  • 2 tbsp apple cider vinegar
  • 1 tbsp maple syrup
  • 2 bay leaves
  • ½ tsp salt
  • ¼ tsp black pepper

To Serve

  • Fresh dill and parsley
  • Plant-based yogurt or sour cream, optional

Instructions

  1. Prepare the cabbage. Cut out the core of the cabbage with a small knife. Bring a large pot of water to a boil. Add the whole cabbage, cored side up, and simmer for 8–10 minutes. Remove with tongs and cool slightly. Peel off 12 whole leaves, returning the cabbage to the water to soften further if needed. Shave down the thick center rib of each leaf with a sharp knife. Chop any leftover cabbage and set aside.
  2. Cook the filling base. Heat the oil in a large skillet over medium-high heat. Add the onion and cook for 4 minutes. Add the mushrooms and cook for 6–8 minutes, until all the liquid has evaporated. Add the garlic and tomato paste and cook for 1 minute.
  3. Mix the filling. Remove from the heat. Stir in the lentils, rice, soy sauce, paprika, thyme, pepper, salt, parsley, and dill. Mash a few lentils to help bind. Taste and adjust the seasoning. Cool for 10 minutes.
  4. Make the sauce. Heat the oil in a saucepan over medium heat. Cook the garlic for 1 minute. Add the crushed tomatoes, broth, vinegar, maple syrup, bay leaves, salt, and pepper. Simmer for 10 minutes. Remove the bay leaves.
  5. Prep the dish. Heat the oven to 350°F (175°C). Spread 1 cup of sauce and the chopped leftover cabbage over the bottom of a 9×13 inch baking dish.
  6. Roll the cabbage. Place a leaf on a board with the rib end toward you. Add about ⅓ cup of filling near the base. Fold the bottom up over the filling, fold in the sides, and roll tightly. Place seam-side down in the dish. Repeat with the remaining leaves.
  7. Bake. Pour the rest of the sauce over the rolls. Cover tightly with foil. Bake for 45 minutes, until the cabbage is very tender and the sauce is bubbling.
  8. Rest and serve. Rest for 10 minutes. Spoon the sauce over the rolls. Top with fresh dill and parsley.

Pro Tips for the Best Cabbage Rolls

  • Core the cabbage and simmer it to soften the leaves.
  • Shave down thick ribs so the leaves roll without tearing.
  • Cook the mushrooms until dry for a firm filling.
  • Do not overfill. About ⅓ cup is enough.
  • Roll tightly and place seam-side down.
  • Cover tightly with foil to keep the sauce from drying out.
  • Add a layer of sauce and cabbage on the bottom to prevent sticking.
  • Make them a day ahead for better flavor.

A Few Notes on Ingredients

Green cabbage is the traditional and easiest choice, and savoy cabbage also works. Green or brown lentils hold their shape, and red lentils will turn mushy. Cooked rice can be white or brown. Apple cider vinegar and maple syrup balance the sauce. Taste the sauce and adjust the sweet and sour to your preference.


Flavor Variations

  • Spiced Version: Add cinnamon and allspice to the filling.
  • Nutty Version: Add chopped walnuts to the filling.
  • Smoky Version: Add extra smoked paprika.
  • Creamy Version: Serve with a cashew or yogurt drizzle.
  • Quinoa Version: Use cooked quinoa instead of rice.
  • Slow Cooker Version: Layer the rolls in a slow cooker and cook on low for 6–7 hours.

Nutritional Highlights (Per Serving of 2 Rolls)

CaloriesProteinCarbsFiberFat
~290 kcal12g50g11g6g

Storage

  • Refrigerator: Store in the sauce for up to 5 days.
  • Freezer: Freeze for up to 3 months.
  • Reheating: Warm in the oven or microwave.
  • Make ahead: Assemble the day before and bake when needed.

Frequently Asked Questions

How do I keep the cabbage leaves from tearing?

Soften the whole head in hot water, and shave the thick rib.

Can I freeze them?

Yes. Freeze the baked rolls in sauce.

Can I make them ahead?

Yes. Assemble the day before.

Can I use another grain?

Yes. Quinoa or bulgur work, though we have not tested them here.

Can I make them gluten-free?

Yes. Use tamari and check labels.

How is this different from your other cabbage and stuffed recipes?

These are baked cabbage leaves stuffed with lentils, mushrooms, and rice in a tomato sauce. Our Vegan Cabbage Soup is a brothy soup, our Cabbage Patties are fried, and our Vegan Stuffed Pepper Soup uses lentil and rice flavors in a soup.


Tried this recipe? Leave a comment below and let us know how it turned out! Tag us on Instagram and Facebook — we love seeing your plant-powered creations. Browse all recipes on Easy Vegan Recipes — new recipes posted every single week!