egg-free cookies

Vegan Chocolate Chip Cheesecake Cookies — The Most Indulgent Thick and Fudgy Plant-Based Cookies You Will Ever Bake

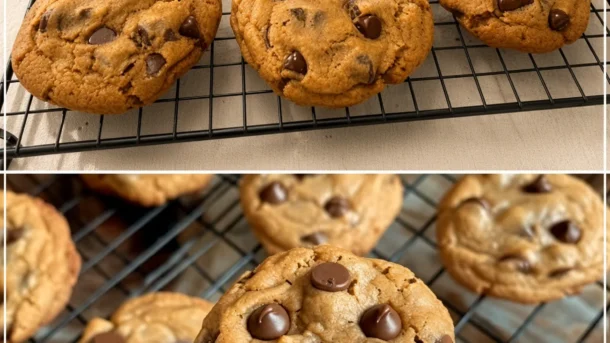
vegan chocolate chip cheesecake cookies

There are chocolate chip cookies and then there are cookies like these Vegan Chocolate Chip Cheesecake Cookies — the kind that come out of the oven thick and golden and slightly crackling at the edges, with a center that is so soft and so fudgy that it seems almost underdone, hiding a swirl of tangy, creamy vegan cream cheese that makes every bite taste like the best parts of a chocolate chip cookie and a cheesecake happened to meet in the middle and decided they never wanted to be separated again. These are those cookies. The ones that make people go quiet for a moment when they take the first bite because they are genuinely trying to figure out what is happening. The ones that disappear faster than any other cookie you have ever made. The ones that look impressive and taste extraordinary but are secretly quite simple, once you understand what the cream cheese is doing and why.

The cream cheese filling — cold vegan cream cheese sweetened with a touch of powdered sugar and vanilla — is spooned onto the cookie dough before enclosing, creating a core of tangy, creamy filling that softens in the oven’s heat but never fully melts, retaining a distinct, cheesecake-like richness in the center of every cookie that contrasts perfectly with the sweet, buttery cookie surrounding it. The tangy, slightly acidic quality of vegan cream cheese does something crucial here — it cuts through the richness of the cookie dough and the sweetness of the chocolate chips in a way that makes every bite feel balanced and complete rather than cloying, the same way a good cheesecake’s tang balances its sweetness.

What makes this recipe so outstanding is the cold cream cheese technique — keeping the cream cheese filling frozen before adding it to the dough prevents it from melting fully into the cookie during baking and ensures the finished cookie has a distinct, visible cream cheese center that you can taste clearly in every bite. Warm cream cheese melts away and disappears; frozen cream cheese stays and delivers.

This recipe is 100% vegan, naturally dairy-free and egg-free, produces gloriously thick bakery-style cookies, and is one of those recipes that makes people ask immediately for the recipe every single time.


Recipe Information

Prep TimeCook TimeTotal TimeServingsCalories
20 mins14 mins34 mins + chilling16 cookies~235 kcal

Ingredients

For the Cream Cheese Filling

  • 170g (6oz) vegan cream cheese, cold
  • 3 tbsp powdered sugar, sifted
  • ½ tsp vanilla extract

For the Cookie Dough

  • 280g (2¼ cups) all-purpose flour
  • 1 tsp baking soda
  • ½ tsp baking powder
  • ½ tsp salt
  • 170g (¾ cup) vegan butter, softened to room temperature
  • 150g (¾ cup) granulated sugar
  • 100g (½ cup) packed light brown sugar
  • 60g (¼ cup) vegan cream cheese, softened (in the dough)
  • 2 tsp vanilla extract
  • 3 tbsp unsweetened oat milk
  • 200g (1¼ cups) vegan chocolate chips, divided

Instructions

  1. Make the cream cheese filling. Beat the cold vegan cream cheese, powdered sugar, and vanilla extract together in a small bowl until smooth. Drop 16 small rounded teaspoons of the mixture onto a parchment-lined plate or small baking sheet. Freeze for at least 30 minutes until completely firm and solid.
  2. Make the cookie dough. In a medium bowl, whisk together the flour, baking soda, baking powder, and salt. In a large bowl, beat the softened vegan butter, granulated sugar, and brown sugar together with an electric mixer on medium-high speed for 3 minutes until very pale and fluffy. Add the softened vegan cream cheese and beat for another minute. Add the vanilla extract and oat milk and beat briefly to combine. Add the flour mixture and fold with a spatula until just combined. Fold in 150g of the chocolate chips, reserving 50g for pressing on top.
  3. Chill the dough. Cover the dough and refrigerate for 30 minutes.
  4. Assemble. Preheat the oven to 375°F (190°C). Line two baking sheets with parchment paper. Divide the chilled dough into 16 equal portions (about 60g each). Flatten each portion into a disc in your palm. Place one frozen cream cheese ball in the center. Fold the dough up and around the filling, pinching firmly to seal completely, and roll into a ball.
  5. Top and bake. Place dough balls on the prepared baking sheets, spacing at least 3 inches apart. Press a few reserved chocolate chips onto the top and sides of each ball. Bake for 12–15 minutes until the edges are set and golden and the tops look just barely done in the center.
  6. Shape while warm (optional). Immediately after baking, use a round cookie cutter or glass slightly larger than the cookie and swirl it in a circular motion around each cookie to push the edges inward into a perfect circle. Do this within 30 seconds of coming out of the oven.
  7. Cool. Allow the cookies to cool on the baking sheet for 10 minutes before transferring — they are very soft while hot and firm up significantly as they cool.

Pro Tips

  • Freeze the cream cheese filling completely before assembling — this is the single most important step. Frozen filling holds its shape during baking and ensures a distinct cheesecake center. Refrigerator-cold filling is too soft and melts into the dough, losing the layered effect entirely.
  • Use vegan cream cheese in the dough as well as the filling — cream cheese in the cookie dough adds a subtle tang that complements the filling, creates a particularly tender fudgy crumb, and helps the cookies stay soft for days after baking.
  • Underbake deliberately — these cookies should look slightly underdone in the center when they come out of the oven. The residual heat continues to cook them as they cool, and a cookie that looks perfect in the oven is overbaked by the time it cools.
  • Chill the dough before baking — cold dough spreads more slowly in the oven, producing thicker, more substantial cookies.

What Cream Cheese Does to Cookie Dough

Adding cream cheese directly to cookie dough — not as a filling but as an ingredient in the dough itself — is a technique borrowed from professional bakeries that produces a texturally superior cookie through two distinct mechanisms. First, the fat content of the cream cheese adds richness in a form that behaves differently to butter: cream cheese fat is bound in a protein matrix that releases slowly during baking rather than all at once, creating a more even, tender crumb throughout the cookie. Second, the lactic acid in the cream cheese tenderizes the gluten strands in the flour by interfering with their ability to form tight, cross-linked networks — the same mechanism by which buttermilk makes pancakes tender. The result is a cookie that is demonstrably softer, chewier, and more tender than a standard dough made without it, and one that stays soft significantly longer after baking because the protein-bound fat releases moisture gradually into the crumb over hours and days. The tang of the cream cheese is subtle in the baked cookie but is precisely what makes people describe these as tasting like something they cannot quite place — more complex than a standard chocolate chip cookie, but in a way they cannot easily identify.


Flavor Variations

  • Vegan Strawberry Cheesecake Cookies: Add 1 tablespoon of freeze-dried strawberry powder to the cream cheese filling and fold 60g of white chocolate chips into the dough alongside the chocolate chips.
  • Vegan Lemon Cheesecake Cookies: Add the zest of 1 lemon and 1 teaspoon of lemon juice to the cream cheese filling, and reduce the chocolate chips to 100g for a lighter, citrus-forward version.
  • Vegan Oreo Cheesecake Cookies: Crush 6 Oreo cookies and fold them into the cookie dough with the chocolate chips, and stir 2 crushed Oreos into the cream cheese filling for a cookies-and-cream cheesecake cookie.

Nutritional Highlights (Per Cookie)

CaloriesProteinCarbsFiberFat
~235 kcal3g30g1g12g

Storage

  • Room temperature: Store in an airtight container for up to 4 days. Do not leave out beyond 4 hours at warm room temperature (above 75°F / 24°C) due to the cream cheese filling.
  • Refrigerator: Store in an airtight container for up to 7 days. The cookies are excellent cold, straight from the refrigerator — the filling firms back up and the cookie has a pleasantly dense, fudgy texture.
  • Freezer: Freeze assembled, unbaked dough balls (with filling inside) on a baking sheet until solid, then transfer to a freezer bag for up to 2 months. Bake from frozen at 375°F for 16–18 minutes. Fully baked cookies can also be frozen for up to 2 months.

Frequently Asked Questions

Can I use any brand of vegan cream cheese?

Violife, Kite Hill, and Miyoko’s are the most widely available vegan cream cheeses and all produce excellent results in both the filling and the dough. Avoid very watery or loose cream cheeses — the filling needs to hold its shape when frozen and the dough cream cheese needs to be firm enough to cream with the butter.

My cream cheese filling melted into the cookie — what went wrong?

The filling was not frozen solid before assembling. Refrigerator-cold cream cheese is too soft and melts during baking. The frozen filling balls should feel completely solid — like small stones — before being enclosed in the dough. If they have softened during assembly, return them to the freezer for 15 minutes before continuing.

How do I know when the cookies are done?

The edges should be set and golden — firm to the touch and no longer shiny. The tops should look very slightly underdone — just barely set, with no wet sheen but not fully golden across the surface. The center will feel soft when pressed gently; that is correct. Remove when the edges are done and trust the cooling process to finish the center.

Can I make the dough ahead of time?

Yes — the assembled dough balls (with filling enclosed) can be refrigerated for up to 24 hours before baking, or frozen for up to 2 months. This also makes it easy to bake just a few cookies at a time while keeping the rest frozen for later.


Tried this recipe? Leave a comment below and let us know how it turned out! Tag us on Instagram and Facebook — we love seeing your plant-powered creations. Looking for more warming vegan curry and dinner recipes? Browse all recipes on Easy Vegan Recipes — new recipes posted every single week!

Vegan Blueberry Cookies — The Soft, Jammy, Bursting-with-Fruit Cookie That Tastes Like a Blueberry Muffin in Every Bite

vegan blueberry cookies

There is a version of the blueberry cookie that most people have encountered and been mildly disappointed by — the one where the blueberries are studded through a standard sugar cookie dough, where they turn vaguely purple and slightly shriveled during baking, and where the cookie itself is pleasantly sweet but the blueberry flavor is thin and almost decorative rather than genuinely present in every bite. And then there is this version: a thick, soft cookie with a dense, slightly fudgy interior — more muffin-top than crispy cookie — in which the blueberry flavor is concentrated, jammy, and present throughout, where the berries have partially burst during baking and created small pockets of intensely fruity, slightly caramelized jam within the dough, and where the whole cookie smells, straight from the oven, like a blueberry muffin that has been pushed in on itself until all the flavor is compressed into a single round of baked dough. Vegan Blueberry Cookies are made with a brown sugar and coconut oil base (the brown sugar provides moisture and a deep caramel undertone that pairs with blueberry far better than white sugar; the coconut oil provides richness without dairy), flax egg for binding, and a mixture of fresh or frozen blueberries — some stirred in whole, some lightly mashed into the dough before baking. They are thick, they are soft, they are jammy, they are genuinely blueberry-flavored rather than blueberry-colored, and they are the kind of cookie that gets eaten warm from the tray in a way that makes counting them unnecessary. They are 100% vegan, dairy-free, egg-free, and made in one bowl in under 30 minutes. The technique is what makes the blueberry flavor so present and so concentrated.

The technique is the crush-and-swirl method. The problem with blueberries in baked goods is a distribution problem: whole blueberries are approximately 84% water and, during baking, that water releases rapidly into the surrounding dough, creating wet pockets around each berry that can make the dough underbake in those areas and dilute the blueberry flavor into the broader dough rather than concentrating it. If the berries are small and whole, the moisture release is modest; if they are large and plentiful, the cookie can end up wet and sunken around each berry. The crush-and-swirl method solves both the flavor concentration problem and the moisture problem in one step. The blueberries are divided into two portions: two-thirds are kept whole and stirred in at the end as usual; one-third are lightly crushed in a small bowl with the back of a fork until they are broken and releasing their juice (not fully mashed — the goal is broken, juice-releasing berries rather than a smooth purée). The crushed portion is then swirled into the dough at the very end — three or four strokes of a spatula only, creating a ripple of intensely concentrated blueberry through the dough rather than an even distribution. The effect is twofold: the crushed berry juice partially infuses the surrounding dough with concentrated blueberry flavor (far more intense than any individual whole berry can provide), and the reduced water content of the crushed portion (the released juice coats the surface of the dough in a thin, concentrated layer rather than sitting as a large pocket of water inside a whole berry) creates a better moisture balance in the finished cookie — the crushed berries contribute flavor without waterlogging. The whole berries provide bursts of fresh fruit; the crushed swirl provides the jammy, concentrated blueberry backbone that makes these cookies taste genuinely of blueberry rather than merely containing them.

This recipe makes 12 cookies.


Recipe Information

Prep TimeCook TimeTotal TimeMakesCalories
15 mins12–14 mins30 mins12 cookies~195 kcal

Ingredients

  • 200g (1⅔ cups) all-purpose flour
  • 1 tsp baking powder
  • ½ tsp baking soda
  • ½ tsp fine salt
  • ½ tsp ground cinnamon (optional but very good — a small amount of cinnamon deepens the blueberry flavor without being identifiable in the finished cookie; omit for a cleaner, more purely blueberry result)
  • 100g (½ cup, packed) light brown sugar — brown sugar is important here; its molasses content contributes moisture, a slightly caramel depth, and a chewier texture than white sugar. Do not substitute with white sugar.
  • 50g (¼ cup) caster (fine white) sugar
  • 4 tbsp (60ml) refined coconut oil, melted and slightly cooled (refined coconut oil has a neutral flavor; virgin coconut oil works but gives a faint coconut taste that some people enjoy in a blueberry cookie — either is fine)
  • 3 tbsp (45ml) plant milk, unsweetened (oat milk or soy milk — used to adjust the dough consistency)
  • 1 flax egg (1 tablespoon ground flaxseed mixed with 3 tablespoons of water and left to gel for 10 minutes — the gel that forms is the binding agent that replaces an egg; do not skip the 10-minute resting time or the mixture will not have gelled sufficiently to bind the dough)
  • 1 tsp vanilla extract
  • 180g (1¼ cups) fresh or frozen blueberries — fresh blueberries produce the cleanest result; frozen blueberries work equally well and are available year-round, but they release more moisture during baking (the ice crystals in frozen berries rupture cell walls, making them wetter); if using frozen, do not thaw before using and expect the baking time to extend by 1–2 minutes

Instructions

  1. Make the flax egg. Combine 1 tablespoon of ground flaxseed with 3 tablespoons of water in a small bowl. Stir well and set aside for a minimum of 10 minutes — the mixture will become thick and gel-like. This is the binding agent for the cookies; it needs the full 10 minutes to develop.
  2. Preheat and prepare. Preheat the oven to 180°C (355°F). Line two baking sheets with parchment paper.
  3. Mix the dry ingredients. In a large mixing bowl, whisk together the flour, baking powder, baking soda, salt, and cinnamon until evenly combined.
  4. Mix the wet ingredients. In a medium bowl, whisk together the melted coconut oil, brown sugar, caster sugar, plant milk, flax egg, and vanilla extract until smooth and well combined — the sugars should be largely dissolved into the oil and milk mixture.
  5. Combine wet and dry. Pour the wet ingredients into the dry ingredients. Stir with a spatula until just combined — a soft, slightly sticky dough will form. If the dough seems very stiff, add 1 additional tablespoon of plant milk; if it seems very loose and wet, add 1 tablespoon of flour. The dough should hold its shape when scooped but not be dry or crumbly.
  6. Crush-and-swirl — the technique. Divide the blueberries: set aside approximately 120g (⅔ of the total quantity) as whole berries. Place the remaining 60g in a small bowl and crush lightly with the back of a fork — 4–5 presses, breaking the berries and releasing their juice without reducing them to a smooth purée. You want broken, juice-releasing fruit rather than a smooth sauce. Fold the whole blueberries gently into the dough, distributing them evenly. Add the crushed blueberries and their juice over the top of the dough. Using the spatula, swirl through the dough with 3–4 strokes only — enough to create visible streaks and ripples of intense blueberry through the dough but not enough to blend it homogenously. The dough should have visible purple-blue swirls running through it.
  7. Portion and bake. Using a cookie scoop or two spoons, portion the dough into 12 equal mounds on the prepared baking sheets, spacing them approximately 5cm (2 inches) apart. The cookies will spread slightly but not dramatically — the coconut oil base produces a thicker, more contained spread than butter. If desired, gently press a few additional whole blueberries on top of each cookie mound for a more dramatic appearance. Bake at 180°C (355°F) for 12–14 minutes until the edges are set and the tops look just barely done — the centers should still look very slightly underdone and soft. Do not wait for the tops to look fully baked; carryover heat from the tray will continue cooking them after they are removed from the oven.
  8. Cool on the tray. This is important: do not transfer the cookies to a rack immediately. Leave them on the hot baking sheet for 5 minutes — the carryover heat continues setting the cookies during this time, and cookies moved too soon will fall apart as the coconut oil (which sets firm at room temperature) has not had time to solidify back into the dough after melting in the oven. After 5 minutes, transfer carefully to a wire rack and allow to cool for at least 10 minutes before eating (if you can).

Pro Tips

  • Use room temperature coconut oil — melted coconut oil that is hot when added to the cold sugars and flax egg can slightly cook the flax egg and produce an uneven dough. Allow the melted coconut oil to cool to barely warm before using — it should be liquid but not hot to the touch.
  • Do not over-swirl the crushed blueberries — the swirl is what creates the jammy, concentrated pockets of blueberry flavor distributed through the cookie. Three to four strokes of the spatula is exactly right: you want visible purple streaks through the dough, not a uniformly purple dough. Over-swirling distributes the juice too evenly and the finished cookie will be uniformly blueberry-colored rather than having those distinct pockets of intense fruit.
  • Pull them from the oven when they look underdone — this is the instruction that goes against every instinct but is the most important one for soft, fudgy blueberry cookies. At 12–14 minutes, the edges will be just set and the centers will look very soft and slightly raw. This is correct. The cookies will continue cooking on the hot tray for 5 minutes, and a cookie that looks perfectly done when it leaves the oven will be dry and slightly crispy once it has finished cooling. Trust the underbake.
  • Freeze the dough balls for cookies on demand — portion the dough into balls, place on a tray, freeze until solid (approximately 2 hours), then transfer to a freezer bag. Frozen dough balls bake directly from frozen at 180°C for 14–16 minutes — add 2 minutes to the baking time and bake one tray at a time. This produces freshly baked cookies in under 20 minutes with no thawing or dough preparation.

The Blueberry’s American Origin and Its Journey to Global Berry

The blueberry (Vaccinium corymbosum and related species) is one of a very small number of major food crops that are genuinely North American in origin — cultivated from a wild plant indigenous to the forests and bogs of eastern North America, where the small, dark blue-black berry had been eaten by Indigenous peoples for thousands of years before European contact. The Algonquin peoples called it “star berry” — referring to the distinctive five-pointed star pattern formed by the calyx at the base of each berry — and incorporated it into pemmican (a concentrated mixture of dried meat, fat, and dried berries), teas, and various preparations that exploited both its flavor and its preservation qualities (blueberries contain natural preservative compounds including anthocyanins and organic acids). European settlers adopted the blueberry rapidly from Indigenous neighbors, and it became a staple of early American food culture, but its transformation from wild-foraged fruit to globally cultivated crop is almost entirely a 20th-century story. Until the early 20th century there was no commercially cultivated blueberry — all blueberries were wild-harvested, a labor-intensive process that limited availability and made blueberries a seasonal, regional specialty. The commercial blueberry industry was created largely through the work of Elizabeth Coleman White, a New Jersey cranberry farmer, and Frederick Coville, a USDA botanist, who collaborated between 1911 and 1916 to develop the first commercially viable cultivated blueberry — selecting wild plants for large berry size, productivity, and compatibility with cultivated soil conditions. White paid local woodspeople to bring her wild plants with unusually large berries, eventually identifying the parent plants of almost every modern commercial blueberry variety. The cultivated blueberry took decades to spread globally — it was largely unknown in Europe before the mid-20th century, and its current status as a year-round supermarket staple in countries where it does not grow natively is a very recent phenomenon. The cookie on this tray, made with blueberries that may have traveled thousands of miles from their growing region to a kitchen in any part of the world, represents the very end of a supply chain that Elizabeth Coleman White and Frederick Coville built in the bogs of New Jersey a little over a century ago.


Flavor Variations

  • Lemon Blueberry Cookies: Add the finely grated zest of 1 large lemon to the wet ingredients and replace the vanilla extract with ½ teaspoon of lemon extract (or 1 teaspoon of fresh lemon juice). After the cookies have cooled completely, drizzle with a simple lemon glaze: 3 tablespoons of icing sugar whisked with 1–2 teaspoons of fresh lemon juice until it forms a thick, pourable glaze. The lemon-blueberry combination is the most classic of the flavor variations and the one most likely to convert people who claim not to like blueberry desserts.
  • White Chocolate Blueberry Cookies: Add 80g (3oz) of roughly chopped vegan white chocolate to the dough along with the whole blueberries in Step 6. The white chocolate melts into small pools in the cookie and provides a creamy, sweet contrast to the tart, jammy blueberry. Use a good-quality vegan white chocolate (made with cocoa butter rather than vegetable fat) for the best result — cheap vegan white chocolate has an unpleasant waxy mouthfeel that stands out in a cookie.
  • Blueberry and Cardamom Cookies: Add ½ teaspoon of ground cardamom to the dry ingredients in place of (or alongside) the cinnamon. Cardamom and blueberry is a Scandinavian flavor pairing — the floral, slightly citrusy warmth of cardamom elevates the blueberry in the same way that lemon does, though in a warmer, spicier direction. These are particularly good served warm with a strong cup of black coffee. Finish with a very small pinch of flaky salt pressed into the top of each cookie before baking.

Nutritional Highlights (Per Cookie — Based on 12 Cookies)

CaloriesProteinCarbsFiberFat
~195 kcal2g30g1g8g

Storage

  • Room temperature: Store in an airtight container at room temperature for up to 3 days. A piece of bread stored in the container with the cookies (a classic baking trick) keeps them softer for longer — the bread provides moisture that the cookies absorb gradually, preventing them from drying out.
  • Refrigerator: The cookies keep in the refrigerator for up to 5 days. Coconut oil solidifies at refrigerator temperatures, so refrigerated cookies are firmer and slightly denser than room-temperature ones — allow them to come to room temperature for 15–20 minutes before eating for the best texture, or warm briefly in a 150°C (300°F) oven for 3–4 minutes.
  • Freezer (baked): Baked cookies freeze well for up to 2 months in a sealed bag. Defrost at room temperature for 1 hour or warm in a 150°C oven for 5–6 minutes directly from frozen.
  • Freezer (dough): Cookie dough balls freeze for up to 3 months (see Pro Tips). Bake from frozen at 180°C for 14–16 minutes — no thawing required.

Frequently Asked Questions

My cookies spread too much and are thin and crispy instead of thick and soft. What went wrong?

Over-spreading is almost always caused by coconut oil that was too hot when added to the dough (hot oil prevents the dough from forming structure, producing a very loose batter that spreads flat in the oven), or a dough that was baked immediately without any chilling. If your cookies are spreading too much, chill the portioned dough balls in the refrigerator for 30 minutes before baking — cold dough spreads more slowly in the oven’s heat, giving the structure time to set before the spread takes over.

Can I use frozen blueberries?

Yes — frozen blueberries work very well in this recipe (they are available year-round and often have more intense flavor than out-of-season fresh berries). Do not thaw before using — add them frozen directly from the freezer in Step 6. Frozen berries release slightly more moisture during baking than fresh, so the baking time may need to extend by 1–2 minutes. The crush-and-swirl method works equally well with frozen berries — crush while still partially frozen.

Can I replace the flax egg with something else?

Yes — a chia egg (1 tablespoon of chia seeds mixed with 3 tablespoons of water, rested for 10 minutes) works identically to a flax egg and produces the same binding effect. Alternatively, 3 tablespoons of unsweetened applesauce can replace the flax egg — it provides binding and adds a faint apple note that is entirely pleasant with blueberry. Aquafaba (3 tablespoons of chickpea brine) also works, producing a slightly lighter, less dense cookie.

The cookies are very soft and fall apart when I try to move them from the tray. What went wrong?

Cookies that fall apart immediately after baking have been moved too soon — coconut oil needs time to re-solidify after baking. Leave the cookies on the hot tray for the full 5 minutes before attempting to move them. If they still seem fragile after 5 minutes, give them another 2–3 minutes — the solidification time varies slightly with kitchen temperature (in a warm kitchen, coconut oil solidifies more slowly).


Tried this recipe? Leave a comment below and let us know how it turned out! Tag us on Instagram and Facebook — we love seeing your plant-powered creations. Looking for more addictive vegan snack and appetizer recipes? Browse all recipes on Easy Vegan Recipes — new recipes posted every single week!

Vegan Pumpkin Butter Cookies — Soft, Spiced, and Melt-in-Your-Mouth Autumn Baking at Its Best

vegan pumpkin butter cookies

There is a specific kind of cookie that autumn seems to demand — not the crisp, snapping kind made for dunking, and not the oversized, doughy kind that needs to be eaten warm from a tray, but the soft, tender, pillowy kind that yields gently under the slightest pressure and releases a warmth of spiced, caramelized flavor that is somehow both comforting and complex. Vegan Pumpkin Butter Cookies are exactly that cookie. They are thick and soft with a slightly domed top, warmly golden from a full tablespoon of pumpkin pie spice and a generous measure of brown sugar, and they have the distinctive tender, almost cake-like crumb that pumpkin brings to baked goods — a crumb that holds its moisture over days, that stays as soft on day three as it was on day one, and that comes from the pumpkin purée acting as both a flavoring and a moisture reservoir inside the dough. The butter in the recipe is vegan block butter — the kind that creams properly, holds air when beaten, and gives the cookies their slight lift and richness — and it is browned before use, a step that takes three minutes and produces a deeply nutty, toffee-like flavor that turns a good spiced cookie into an exceptional one. They are finished with a drizzle of vanilla glaze that sets to a soft shell over the cooled cookies, pooling in the slight dome of each surface and adding a sweetness that balances the warmth of the spice. They are 100% vegan, dairy-free, and egg-free. They make 18 cookies. The technique is the reason the cookies are soft and thick rather than flat and spread-thin.

The technique is the brown-butter-and-chill method. The structural challenge specific to pumpkin cookies is excess moisture. Pumpkin purée contains approximately 90% water by weight — far more moisture than most cookie mix-ins — and that moisture, when it enters a standard butter-sugar-flour dough, disrupts the gluten development and fat structure in ways that cause the cookies to spread flat, puff and then collapse, or bake to a wet, underbaked-feeling center even when the exterior looks done. The brown-butter-and-chill method addresses the moisture problem in two stages. Stage one — brown the butter: vegan block butter is melted in a light-colored saucepan over medium-high heat and cooked, whisking occasionally, for 4–5 minutes beyond the point of melting, until the milk proteins (present in vegan butter as added plant proteins) brown and the butter smells deeply nutty. Browned butter contains significantly less water than unbrowned butter — approximately 15–20% of the butter’s water content evaporates during the browning process — meaning that the dough starts with less total liquid. Additionally, browned butter does not cream to the same volume as softened butter, which means the dough is denser and more compact, which resists spreading during baking. Stage two — chill the dough: the assembled dough (after incorporating the pumpkin and all other ingredients) is chilled in the refrigerator for a minimum of 60 minutes, and ideally overnight. Chilling firms the fat in the dough (which has been liquefied by the browning process) back to a semi-solid state, and — crucially — allows the flour to fully hydrate by absorbing moisture from the pumpkin purée during the rest period. By the time the dough goes into the oven, the excess pumpkin moisture has been absorbed into the flour rather than sitting free in the dough; the chilled fat resists rapid spreading at the start of baking; and the cookies bake thick, soft, and domed rather than flat and wet.

This recipe makes 18 cookies.


Recipe Information

Prep TimeCook TimeTotal TimeServingsCalories
20 mins + 60 mins chill12 mins~90 mins18 cookies~195 kcal

Ingredients

For the Cookies

  • 225g (1 cup / 2 sticks) vegan block butter — use a block-style vegan butter (such as Miyoko’s, Violife, or Earth Balance Buttery Sticks); tub-style vegan spread contains too much water and too little fat to brown properly or provide sufficient structure; this distinction is important and should not be substituted
  • 200g (1 cup, packed) light brown sugar
  • 50g (¼ cup) granulated white sugar
  • 180g (¾ cup) pumpkin purée — use pure canned pumpkin purée (one ingredient: pumpkin), not pumpkin pie filling (which contains added sugars and spices and will make the cookies too sweet and over-spiced); blot the purée on a paper towel before measuring to remove surface moisture
  • 1 tsp vanilla extract
  • 1 tsp apple cider vinegar — acts as the egg replacer in combination with the pumpkin; the acidity reacts with the leavening to provide lift, and the vinegar flavor bakes out completely and is undetectable in the finished cookie
  • 280g (2¼ cups) all-purpose flour (plain flour), spooned and leveled — do not pack the flour; packed flour produces a dry, dense cookie
  • 1 tsp baking soda
  • ½ tsp baking powder
  • 1 tbsp pumpkin pie spice (or a blend of: 1½ tsp cinnamon + ¾ tsp ground ginger + ¼ tsp ground nutmeg + ¼ tsp ground allspice + ¼ tsp ground cloves)
  • ½ tsp fine salt

For the Vanilla Glaze

  • 120g (1 cup) powdered sugar (icing sugar), sifted
  • 2–3 tbsp unsweetened oat milk or soy milk
  • ½ tsp vanilla extract
  • A pinch of cinnamon (optional)

Instructions

  1. Brown the butter — Stage 1. Place the vegan block butter in a light-colored saucepan (light-colored is important — it allows you to see the color change of the browning milk proteins clearly; a dark pan makes it nearly impossible to judge doneness). Melt over medium heat, then increase to medium-high. Cook, whisking frequently, for 4–5 minutes after the butter has fully melted. The butter will foam, then the foam will subside, and the butter will begin to smell nutty and toasty — watch for small golden-brown specks forming on the bottom of the pan. As soon as the specks turn golden-brown and the butter smells deeply nutty (like toffee or toasted hazelnuts), remove immediately from the heat and pour into a large mixing bowl. The browning happens quickly once it starts and the butter can burn within 30 seconds of going too far — stay close and watch carefully.
  2. Cool the browned butter. Allow the browned butter to cool for 10 minutes until it is warm but no longer hot. It will be liquid at this stage; this is correct.
  3. Mix the sugars. Add the brown sugar and granulated sugar to the warm browned butter. Whisk vigorously for 1–2 minutes until well combined and slightly thickened. The sugars will partially dissolve in the warm butter.
  4. Add the wet ingredients. Add the pumpkin purée, vanilla extract, and apple cider vinegar to the butter-sugar mixture. Whisk until fully combined and smooth. The mixture will be a warm amber-orange color.
  5. Add the dry ingredients. In a separate bowl, whisk together the flour, baking soda, baking powder, pumpkin pie spice, and salt. Add the dry ingredients to the wet ingredients and fold with a spatula until just combined — do not overmix; stop as soon as no dry flour streaks remain. The dough will be soft and slightly sticky.
  6. Chill the dough — Stage 2. Cover the bowl tightly with cling film and refrigerate for a minimum of 60 minutes. For best results (thicker, more flavorful cookies with a deeper spice profile), chill overnight. Do not skip this step — unchilled dough will spread flat during baking.
  7. Preheat and prepare. When ready to bake, preheat the oven to 180°C (350°F). Line two baking trays with parchment paper.
  8. Portion the cookies. Remove the dough from the refrigerator — it will be firm and easy to handle. Using a medium cookie scoop (approximately 2 tablespoons of dough per cookie), portion the dough onto the prepared trays, spacing cookies at least 5cm (2 inches) apart. Roll each portion briefly in your hands to form a smooth ball, then place on the tray. Do not flatten — the cookies will spread slightly in the oven and the domed shape is desirable.
  9. Bake. Bake at 180°C for 11–13 minutes until the edges are set and the tops look just barely done — the centers should still look very slightly underdone and the cookies should feel soft when pressed gently. They will firm as they cool. Do not overbake — a pumpkin cookie baked until it looks fully done in the oven will be dry and crumbly when cool.
  10. Cool. Allow the cookies to cool on the tray for 5 minutes before transferring to a wire rack to cool completely. Do not glaze warm cookies — the glaze will melt and run off.
  11. Make the glaze. Whisk together the sifted powdered sugar, 2 tablespoons of oat milk, vanilla extract, and cinnamon if using. The glaze should be thick enough to coat the back of a spoon and drizzle in a slow, steady stream — add the third tablespoon of oat milk only if needed to reach this consistency. Drizzle over the fully cooled cookies using a fork or a piping bag. Allow the glaze to set for 15–20 minutes at room temperature before serving or storing.

Pro Tips

  • Blot the pumpkin purée on a paper towel before measuring — this step removes the surface moisture from the purée and takes 30 seconds; the difference is surprisingly significant. Open the can, spoon the purée onto 2–3 layers of paper towel, fold over and press gently, then measure the blotted purée. Combined with the brown-butter and overnight chill, this three-stage moisture reduction is what gives the cookies their consistently thick, domed profile rather than a flatter, wetter cookie.
  • The cookies are best on day 2 — on the day of baking the spice notes are bright and slightly sharp; after overnight rest in a sealed container, the brown sugar, pumpkin, and spices meld into a warmer, deeper, more rounded flavor. If making for a special occasion, bake the day before and glaze the day of serving.
  • For a crinkle-top cookie effect, remove the cookies from the oven after 10 minutes, tap the tray firmly on the countertop 2–3 times to deflate them slightly, return to the oven for 1–2 more minutes. The tapping creates the crinkled, wrinkled surface of a traditional crinkle cookie — purely aesthetic but very effective. This is optional and does not affect flavor.
  • These cookies freeze beautifully — freeze the unglazed baked cookies in a sealed container for up to 2 months. Thaw at room temperature for 1 hour and glaze fresh before serving. The unglazed cookies are also excellent frozen and eaten directly from the freezer as a cold treat.

Pumpkin in Baking: The Vegetable That Became an Autumn Icon

Pumpkin’s journey from a practical field crop to the defining flavor of a cultural season is one of the more unlikely transformations in the history of food. The genus Cucurbita — which includes pumpkins, squash, and gourds — was domesticated in Mesoamerica approximately 10,000 years ago, making it among the earliest cultivated plants in the Americas. For most of its agricultural history, pumpkin was grown primarily for its seeds and its flesh served as a reliable calorie source — dense, storable, and versatile — rather than as a flavoring agent. The Pilgrims who encountered pumpkin in 17th-century New England ate it as a staple vegetable: boiled, mashed, stuffed, and dried — practical winter food rather than seasonal indulgence. The transformation of pumpkin into a flavoring rather than a food happened gradually through the lens of pie. Pumpkin pie, made by cooking sweetened pumpkin purée in a spiced custard and baking it in a pastry shell, became associated with New England harvest celebrations through the 18th and 19th centuries, and its association with Thanksgiving — formalized as a national holiday in 1863 — gave pumpkin a fixed position in the American seasonal calendar that no other flavor possessed. The leap from pumpkin-as-pie to pumpkin-as-universal-baking-flavor accelerated in the 20th century as commercial canned pumpkin purée (introduced by Libby’s in the 1920s) made the ingredient accessible year-round, and as recipe magazines and food advertisers discovered that consumers responded with strong seasonal purchase behavior to products positioned around pumpkin spice. The specific spice blend associated with pumpkin — cinnamon, ginger, nutmeg, allspice, cloves — is itself a historically European combination applied to an American ingredient; the spices traveled to the New World via trade routes that pumpkin never used. In baking, pumpkin’s technological function is as important as its flavor: the purée’s high water content and the presence of natural emulsifying compounds in the flesh act as both a moisture reservoir and a fat-partial replacer, meaning that cookies and cakes made with pumpkin stay moist significantly longer than those made without it — a practical quality that its seasonal reputation has long overshadowed.


Flavor Variations

  • Brown Butter Maple Cookies: Replace the granulated white sugar entirely with an additional 50g of brown sugar, and add 2 tablespoons of pure maple syrup (not maple-flavored syrup) along with the pumpkin purée. Reduce the oat milk in the glaze to 1 tablespoon and add 1 tablespoon of maple syrup to the glaze instead. The result is a deeper, more caramelized cookie with a pronounced maple character that pairs beautifully with the browned butter notes.
  • Chocolate Chip Pumpkin Cookies: Fold 150g (¾ cup) of vegan dark chocolate chips into the finished dough before chilling. The combination of dark chocolate and pumpkin spice is unexpectedly harmonious — the bitterness of the chocolate provides contrast to the warm sweetness of the spiced pumpkin dough, and the chips add textural variation to the soft, uniform crumb. Omit the vanilla glaze or use a chocolate drizzle (melted vegan dark chocolate thinned with a small amount of coconut oil) instead.
  • Chai Spice Cookies: Replace the pumpkin pie spice blend with a chai-inspired blend: 1 tsp cinnamon + ½ tsp ground cardamom + ½ tsp ground ginger + ¼ tsp ground black pepper + ¼ tsp ground cloves. Add 1 teaspoon of finely ground black tea leaves (from a tea bag, emptied) to the dry ingredients. The chai spice version is more complex and slightly more assertive than the classic pumpkin spice blend, with cardamom’s floral brightness and the subtle heat of the black pepper creating a flavor profile reminiscent of a masala chai in cookie form.

Nutritional Highlights (Per Cookie — Based on 18 Cookies, Without Glaze)

CaloriesProteinCarbsFiberFat
~195 kcal2g28g1g9g

Storage

  • Room temperature: Store in a sealed airtight container at room temperature for up to 5 days. The cookies remain soft and moist throughout — the pumpkin purée acts as a natural humectant, retaining moisture in the crumb over time. Place a small piece of bread in the container if you want to extend softness even further (the cookies will draw moisture from the bread before losing it themselves, an old baker’s trick).
  • Glazed vs. unglazed storage: The cookies store better unglazed — the glaze softens slightly in a sealed container due to moisture from the cookies. For the best texture, store unglazed and glaze in small batches as needed. If storing glazed, allow the glaze to set fully (at least 1 hour) before layering in a container, and place parchment paper between layers to prevent sticking.
  • Freezer: Freeze unglazed baked cookies in a single layer until solid (about 2 hours), then transfer to a freezer bag for up to 2 months. Thaw at room temperature for 1 hour — the cookies return to their fresh-baked texture remarkably well. Glaze after thawing.
  • Dough: The unbaked, chilled dough keeps in the refrigerator for up to 3 days, or can be scooped into balls and frozen for up to 2 months (bake directly from frozen, adding 2–3 minutes to the baking time).

Frequently Asked Questions

My cookies spread flat instead of staying thick and domed. What went wrong?

Flat pumpkin cookies are almost always caused by either insufficient chilling time or using tub-style vegan spread instead of vegan block butter. Tub-style spreads have a higher water content and lower fat content than block butter, which means they cannot brown correctly and provide less structural fat in the dough. For the next batch, use vegan block butter and chill the dough for a full 60 minutes minimum — overnight is even better. Also check that the baking soda is fresh (a fresh pack fizzes immediately when a small amount is dropped in vinegar; old baking soda fizzes weakly or not at all).

Can I use fresh pumpkin purée instead of canned?

Yes — homemade pumpkin purée works well, with one important caveat: homemade purée is often significantly wetter than canned. After making the purée, strain it through a fine mesh sieve or cheesecloth for 30–60 minutes to remove excess water before measuring. The amount needed after straining is the same as the canned amount in the recipe. Canned pure pumpkin purée has a more consistent moisture content and tends to produce more reliable results in baking.

Can I make these gluten-free?

Yes — substitute a 1:1 gluten-free baking flour blend (one that includes xanthan gum) for the all-purpose flour in an equal amount. The chill time becomes even more important for gluten-free cookies: gluten-free flours absorb liquid more slowly than wheat flour, so an overnight chill (rather than just 60 minutes) gives the flour time to fully hydrate the pumpkin moisture. Gluten-free pumpkin cookies may spread slightly more than the wheat version; if this is an issue, chill the portioned dough balls on the baking tray for a further 15 minutes before baking.

The glaze is too thick/too thin. How do I fix it?

If the glaze is too thick to drizzle easily, add oat milk ½ teaspoon at a time until it reaches a slow, steady drizzling consistency. If the glaze is too thin and runs off the cookies, add sifted powdered sugar 1 tablespoon at a time. The correct consistency is thick enough to hold its shape briefly when drizzled but thin enough to settle into the domed surface of the cookie rather than sitting as a stiff line.


Tried this recipe? Leave a comment below and let us know how it turned out! Tag us on Instagram and Facebook — we love seeing your plant-powered creations. Looking for more addictive vegan snack and appetizer recipes? Browse all recipes on Easy Vegan Recipes — new recipes posted every single week!