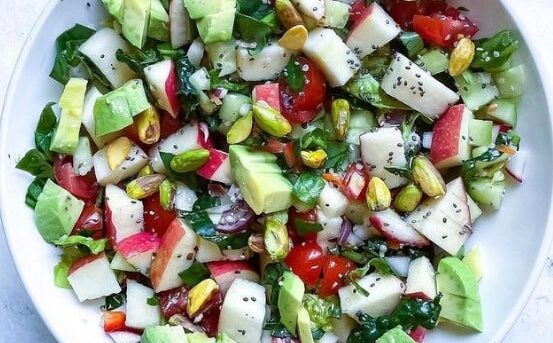
easy vegan lunch

Blueberry Broccoli Spinach Salad — The Most Nutritious, Vibrant Vegan Salad You Will Make All Summer

Blueberry Broccoli Spinach Salad

There are salads that are side dishes. And then there are salads that are genuinely the most exciting, most beautiful, most nourishing thing on the entire table — salads that make people stop mid-conversation to look at the bowl and immediately ask what is in it. This Blueberry Broccoli Spinach Salad is absolutely the latter — a spectacular combination of ingredients that on paper sounds surprising and in the bowl tastes extraordinary.

This is the salad that nutritionists dream about and food photographers obsess over. Deep green baby spinach and crisp broccoli florets studded with jewel-like blueberries, sweet dried cranberries, toasted walnuts, creamy sliced avocado, and a shower of toasted pumpkin seeds — all brought together with the most vibrant, bright, lemon-forward dressing that makes every single element sing. It is as visually stunning as it is deeply, genuinely nourishing.

What makes this salad so special beyond its extraordinary appearance is the way the flavors and textures interact with each other. The sweet-tart burst of fresh blueberries against the earthy crunch of raw broccoli. The creamy avocado against the firm, satisfying resistance of the pumpkin seeds. The slight bitterness of the spinach against the sweetness of the dried cranberries and the brightness of the lemon dressing. Every bite delivers something different and every bite is completely satisfying.

This recipe is 100% vegan, naturally gluten-free, requires absolutely zero cooking, and comes together in just 15 minutes. It is perfect as a stunning main course salad for lunch, a side dish at summer gatherings, a meal prep salad that holds up beautifully for days, or a vibrant and impressive starter at a dinner party. Make it once and it will immediately become one of the most regularly made salads in your entire plant-based repertoire.


Recipe Information

Prep TimeCook TimeTotal TimeServingsCalories
15 mins0 mins15 mins4~320 kcal

Ingredients

For the Salad

  • 4 large handfuls baby spinach (about 120g), washed and dried
  • 2 cups (200g) broccoli florets, cut into small bite-sized pieces (raw or blanched — see below)
  • 1½ cups (225g) fresh blueberries
  • ½ cup (60g) dried cranberries or dried cherries
  • 1 ripe avocado, peeled and sliced or diced
  • ½ cup (60g) walnuts, roughly chopped and toasted
  • ¼ cup (35g) toasted pumpkin seeds
  • ¼ small red onion, very finely sliced
  • 2 tbsp fresh chives, finely sliced (optional)
  • 2 tbsp fresh mint leaves, torn (optional — adds a beautiful freshness)

Optional Add-ins

  • ½ cup (90g) cooked quinoa or farro (adds protein and makes the salad even more filling)
  • ¼ cup (35g) toasted sunflower seeds
  • ¼ cup (40g) vegan feta, crumbled (adds creaminess and saltiness)
  • ¼ cup (35g) toasted sliced almonds
  • 1 tbsp hemp seeds (adds complete plant protein)
  • ½ cup (75g) cherry tomatoes, halved

For the Lemon Poppy Seed Dressing

  • 4 tbsp extra virgin olive oil
  • 3 tbsp fresh lemon juice (about 1 large lemon)
  • 1 tsp lemon zest
  • 1 tbsp maple syrup or agave
  • 1 tsp Dijon mustard
  • 1 small clove garlic, very finely grated
  • 1 tsp poppy seeds (optional — adds texture and visual beauty)
  • ½ tsp salt
  • ¼ tsp black pepper

Alternative Dressing — Blueberry Balsamic Vinaigrette

  • 3 tbsp extra virgin olive oil
  • 2 tbsp balsamic vinegar
  • 1 tbsp fresh blueberries, mashed
  • 1 tbsp maple syrup
  • 1 tsp Dijon mustard
  • ½ tsp salt
  • ¼ tsp black pepper

Instructions

  1. Prepare the broccoli. For this salad broccoli can be served two ways — raw for maximum crunch and nutritional value, or briefly blanched for a more tender, slightly more approachable texture. For raw broccoli simply cut into very small, bite-sized florets and use immediately. For blanched broccoli bring a small pot of salted water to a boil, add the florets for exactly 60 seconds, then immediately transfer to a bowl of ice water to stop the cooking and preserve the vibrant green color. Drain and pat completely dry before adding to the salad.
  2. Prepare the red onion. Place the very finely sliced red onion in a small bowl and cover with cold water and a pinch of salt. Allow to soak for 5 minutes then drain and pat dry. This removes the harsh raw bite while preserving the beautiful color and mild flavor.
  3. Toast the walnuts and pumpkin seeds. Place the roughly chopped walnuts in a dry skillet over medium heat. Toast for 3–4 minutes, stirring frequently, until golden and fragrant. Add the pumpkin seeds in the last 1–2 minutes of toasting. Remove from heat and allow to cool completely before adding to the salad — warm nuts wilt the delicate spinach and blueberries.
  4. Make the lemon poppy seed dressing. In a small bowl or jar whisk together the extra virgin olive oil, fresh lemon juice, lemon zest, maple syrup, Dijon mustard, grated garlic, poppy seeds, salt, and pepper until completely smooth and emulsified. Taste and adjust — add more lemon for brightness, more maple syrup for sweetness, or more mustard for depth. The dressing should be bright, slightly sweet, perfectly lemony, and beautifully balanced.
  5. Assemble the salad. Add the baby spinach to a large, wide salad bowl. Add the broccoli florets, fresh blueberries, dried cranberries, soaked and dried red onion, and any optional add-ins. Toss gently to distribute everything evenly.
  6. Add the delicate toppings. Arrange the sliced avocado over the salad. Scatter the toasted walnuts, toasted pumpkin seeds, fresh chives, and torn mint leaves over the top. Add the crumbled vegan feta if using.
  7. Dress the salad. Pour the lemon poppy seed dressing over the salad just before serving. Toss gently — using salad servers or two large spoons — until every leaf and every ingredient is lightly and evenly coated in the dressing. Do not overdress — the fresh blueberries and avocado are delicate and too much dressing overwhelms their natural flavors.
  8. Serve immediately. Transfer to individual plates or serve family-style directly from the bowl. This salad is most vibrant and most delicious the moment it is dressed — the spinach wilts slightly and the blueberries begin to release their juice after about 20 minutes of sitting dressed.

Pro Tips for the Most Beautiful Blueberry Broccoli Spinach Salad

  • Dry the spinach thoroughly. Wet spinach dilutes the dressing and produces a watery salad. Always wash spinach in advance and dry completely in a salad spinner or by patting with kitchen paper. Dry spinach stores beautifully in the fridge lined with paper towels for up to 3 days — always have it ready to go.
  • Cut the broccoli into very small florets. Large broccoli pieces are difficult to eat in a salad and distribute unevenly. Very small, bite-sized florets integrate beautifully with the spinach and blueberries and ensure every forkful contains a perfect balance of all the salad components.
  • Toast the nuts and seeds. Toasted walnuts and pumpkin seeds have a dramatically richer, deeper, more complex flavor than raw. Three to four minutes in a dry pan transforms them completely — never skip this step.
  • Use perfectly ripe avocado. An underripe avocado is hard, bitter, and adds nothing to the salad. A perfectly ripe avocado is creamy, buttery, and adds an extraordinary silky richness that perfectly balances the crisp broccoli and tart blueberries.
  • Dress at the last moment. This salad — particularly because of the fresh blueberries and delicate spinach — should be dressed immediately before serving. The dressing and the salt in it cause the spinach to wilt and the blueberries to release their juice over time.
  • Use the blueberry balsamic vinaigrette for a more dramatic flavor. The lemon poppy seed dressing is bright and refreshing. The blueberry balsamic vinaigrette is deeper, richer, and more dramatic — particularly beautiful for autumn and winter serving when you want something warmer and more complex.

Flavor Variations

  • Strawberry Broccoli Spinach Salad: Replace the blueberries with sliced fresh strawberries for a more traditionally summer-inspired salad with a beautiful rosy color that is equally vibrant and delicious.
  • Apple and Walnut Winter Version: Replace the fresh blueberries with thin apple slices and add dried cranberries and candied walnuts for a warmer, more autumnal version that is extraordinary as a Thanksgiving or Christmas salad.
  • Protein Packed Bowl: Add ½ cup of cooked quinoa, ½ cup of drained chickpeas, and 1 tablespoon of hemp seeds to transform this salad into a completely satisfying, protein-rich main course bowl that keeps you full for hours.
  • Asian Inspired: Replace the lemon poppy seed dressing with a sesame ginger dressing made from sesame oil, rice vinegar, soy sauce, ginger, and maple syrup. Replace the walnuts with toasted cashews and add sliced edamame and sesame seeds for a vibrant Asian-inspired version.

Nutritional Highlights (Per Serving)

CaloriesProteinCarbsFiberVitamin C
~320 kcal8g34g10g120% DV

This salad is genuinely one of the most nutritionally extraordinary recipes on the entire blog. Blueberries are one of the most antioxidant-dense foods on the planet — extraordinarily rich in anthocyanins that protect brain cells, support memory and cognitive function, reduce inflammation, and protect cardiovascular health. Broccoli is an outstanding source of Vitamin C — a single serving of this salad provides more than the complete daily recommended intake — along with Vitamin K, folate, and powerful glucosinolates that support cancer protection and liver health. Spinach delivers iron, Vitamin K, folate, and lutein for eye health. Walnuts provide omega-3 fatty acids and powerful polyphenol antioxidants. Avocado adds heart-healthy monounsaturated fats, potassium, and Vitamins E and K. Pumpkin seeds contribute zinc, iron, and magnesium. Together this salad delivers an extraordinary concentration of vitamins, minerals, antioxidants, and healthy fats in one of the most beautiful bowls available in plant-based cooking.


Storage and Meal Prep

  • Dressed salad: Best eaten immediately after dressing. Once dressed the spinach wilts and the blueberries begin releasing juice within 20–30 minutes.
  • Undressed components: Store all components separately in airtight containers in the fridge for the perfect meal prep salad. Spinach and broccoli keep for 3–4 days. Fresh blueberries keep for 4–5 days. Toasted nuts and seeds keep at room temperature for up to 1 week. Dressing keeps in a sealed jar in the fridge for up to 5 days. Avocado should be prepared fresh each day.
  • Meal prep tip: Prepare all components on Sunday — wash and dry the spinach, cut the broccoli, toast the nuts and seeds, make the dressing — and store separately. Each morning simply assemble a portion of salad and dress just before eating for a perfect grab-and-go lunch all week long.
  • Avocado storage: If you must prepare the avocado in advance toss the slices in fresh lemon juice and press plastic wrap directly onto the surface to minimize browning.

Frequently Asked Questions

Should I use raw or cooked broccoli in this salad?

Both work beautifully — it genuinely comes down to personal preference. Raw broccoli has maximum crunch, maximum nutritional value (heat destroys some of broccoli’s Vitamin C and enzymes), and a slightly more assertive, earthy flavor. Blanched broccoli is more tender, milder in flavor, and more accessible for people who find raw broccoli too firm. The 60-second blanch followed by ice water is the perfect middle ground — the broccoli is tender enough to eat comfortably but still has a satisfying bite and vibrant green color.

Can I use frozen blueberries?

Fresh blueberries are strongly recommended for this salad. Frozen blueberries thaw into a mushy, juice-releasing mess that will turn the entire salad a deep purple color. This is a case where fresh is non-negotiable for the best texture, color, and visual impact.

How do I make this salad more filling as a main course?

Add cooked quinoa, brown rice, or farro as a grain base. Increase the nuts and seeds significantly. Add a can of drained chickpeas or edamame for protein. Add sliced baked tofu or tempeh. Any combination of these additions transforms this salad from a vibrant side dish into a genuinely complete and deeply satisfying plant-based main course.

Can I make the dressing in advance?

Yes — the lemon poppy seed dressing stores beautifully in a sealed jar in the refrigerator for up to 5 days. Shake well before using as the oil and lemon juice will separate during storage. The blueberry balsamic vinaigrette also stores well for up to 5 days. Making the dressing in advance is one of the most practical meal prep strategies for getting this salad on the table quickly during busy weeks.

What makes poppy seeds special in the dressing?

Poppy seeds add a subtle, pleasantly nutty flavor, a beautiful visual texture to the dressing, and a satisfying tiny crunch that makes the dressing feel more complex and interesting than a plain lemon vinaigrette. They are particularly traditional in fruit-forward salad dressings and are worth including if you have them — but the dressing is equally delicious without them.

Is this salad suitable for children?

Yes — most children love this salad because of the sweet blueberries and mild broccoli. For children who find raw broccoli too firm use the blanched version which is significantly more tender and accessible. Omit the red onion and reduce the dressing quantity slightly for younger children. The sweetness of the blueberries, cranberries, and lemon maple dressing makes this one of the most child-friendly nutritious salads available.


Tried this recipe? Leave a comment below and let us know how it turned out! Browse all our vegan recipes to keep enjoying ultimate delicious and healthy lifestyle.

Vegan Crispy Cabbage Fritters with Herbed Yogurt Dip — The Crunchiest, Most Addictive Plant-Based Recipe You Will Make on Repeat

Vegan Crispy Cabbage Fritters with Herbed Yogurt Dip

Some recipes surprise you. You expect something simple and ordinary and instead you get something that stops you completely mid-bite — something so unexpectedly crispy, so deeply savory, so satisfying in its simplicity that you immediately know you will be making it again and again for years to come. These Vegan Crispy Cabbage Fritters with Herbed Yogurt Dip are exactly that recipe.

Humble cabbage — that endlessly affordable, endlessly nutritious, endlessly versatile vegetable — is transformed here into the most extraordinarily golden, crispy-edged, tender-centered fritters you have ever tasted. Finely shredded cabbage is folded into a simple, perfectly seasoned batter with fresh herbs, garlic, and spring onions, then pan-fried in a hot skillet until each fritter develops the most spectacular, crunchy golden crust that shatters satisfyingly with every bite while the inside remains soft, savory, and wonderfully fragrant.

But the real magic — the thing that elevates these fritters from delicious to genuinely unforgettable — is the herbed yogurt dip. Cool, creamy vegan yogurt loaded with fresh dill, mint, garlic, lemon, and cucumber creates a dipping sauce so refreshingly vibrant and so perfectly balanced against the warm, crispy fritters that every single bite is a complete, harmonious experience.

These fritters are 100% vegan, easily made gluten-free, ready in just 25 minutes, and one of the most crowd-pleasing, universally loved plant-based recipes available. Serve them as a starter, a main with a simple salad, a side dish, a party snack, a light lunch, or a casual weeknight dinner. Make them once and you will never look at cabbage the same way again.


Recipe Information

Prep TimeCook TimeTotal TimeServingsCalories
15 mins10 mins25 mins4 (12 fritters)~280 kcal

Ingredients

For the Cabbage Fritters

  • ½ medium head of green cabbage (about 400g), very finely shredded
  • 1 tsp salt (for drawing moisture from the cabbage)
  • 3 spring onions, thinly sliced
  • 3 cloves garlic, minced or finely grated
  • ¼ cup fresh parsley, finely chopped
  • 2 tbsp fresh dill, finely chopped
  • 2 tbsp fresh chives, finely sliced
  • 1 cup (120g) all-purpose flour (or chickpea flour for gluten-free)
  • 2 tbsp cornstarch (creates an extraordinary crispy crust)
  • 1 tsp baking powder
  • 1 tsp smoked paprika
  • 1 tsp garlic powder
  • ½ tsp cumin
  • ½ tsp onion powder
  • ½ tsp black pepper
  • ¼ tsp chili flakes (optional)
  • 2 tbsp nutritional yeast
  • ½ cup (120ml) plant-based milk or aquafaba
  • 2 tbsp ground flaxseed mixed with 6 tbsp water (flax egg — leave to gel for 5 minutes)
  • 2 tbsp olive oil (for the batter)
  • 1 tsp apple cider vinegar

For Frying

  • 3–4 tbsp olive oil or neutral oil (for pan frying)

For the Herbed Yogurt Dip

  • 1 cup (240g) plain unsweetened vegan yogurt (coconut or soy yogurt work best)
  • ½ small cucumber, very finely grated and squeezed completely dry
  • 2 tbsp fresh dill, finely chopped
  • 2 tbsp fresh mint leaves, finely chopped
  • 1 tbsp fresh parsley, finely chopped
  • 1 clove garlic, very finely grated
  • 2 tbsp fresh lemon juice
  • 1 tsp lemon zest
  • ½ tsp salt
  • ¼ tsp black pepper
  • 1 tbsp extra virgin olive oil (drizzled over the finished dip)

Optional Garnishes for Serving

  • Extra fresh dill and mint sprigs
  • A drizzle of extra virgin olive oil
  • Chili flakes or smoked paprika
  • Lemon wedges
  • Pomegranate seeds (adds stunning color and sweetness)
  • Toasted sesame seeds

Instructions

  1. Salt and drain the cabbage. Place the finely shredded cabbage in a large mixing bowl and toss with 1 teaspoon of salt. Massage the salt into the cabbage for 1–2 minutes then allow to sit for 10 minutes. The salt draws out an extraordinary amount of moisture from the cabbage — this step is absolutely critical for achieving crispy fritters. After 10 minutes squeeze the cabbage firmly in your hands over the sink or through a clean kitchen towel to remove as much liquid as possible. You will be amazed how much water comes out. The cabbage should feel significantly drier and slightly wilted — this is exactly what you want.
  2. Make the flax egg. Mix 2 tablespoons of ground flaxseed with 6 tablespoons of water. Stir and set aside for 5 minutes until thick and gel-like.
  3. Make the herbed yogurt dip. In a medium bowl combine the vegan yogurt, finely grated and thoroughly squeezed cucumber, fresh dill, fresh mint, fresh parsley, grated garlic, lemon juice, lemon zest, salt, and pepper. Stir well until completely combined. Taste and adjust — add more lemon for brightness, more garlic for depth, or more herbs for freshness. Transfer to a serving bowl, drizzle with extra virgin olive oil, and refrigerate until ready to serve. The dip actually improves in flavor after 15–20 minutes as the garlic and herbs infuse.
  4. Make the fritter batter. In a large mixing bowl whisk together the flour, cornstarch, baking powder, smoked paprika, garlic powder, cumin, onion powder, pepper, chili flakes, and nutritional yeast until evenly combined. Add the plant-based milk, flax egg, olive oil, and apple cider vinegar. Stir to form a thick, smooth batter.
  5. Combine cabbage and batter. Add the squeezed cabbage, sliced spring onions, minced garlic, fresh parsley, dill, and chives to the batter. Fold everything together thoroughly until the cabbage is completely coated and evenly distributed throughout the batter. The mixture should be thick — thicker than pancake batter — and hold together when pressed. If too thin add flour one tablespoon at a time.
  6. Heat the oil. Heat 3 tablespoons of olive oil in a large non-stick skillet over medium-high heat. The oil should be hot enough that a small drop of batter sizzles immediately on contact. Insufficient oil temperature is the most common cause of fritters that stick, absorb too much oil, and never develop a proper crust.
  7. Cook the fritters. Working in batches of 3–4 fritters to avoid crowding, scoop approximately ¼ cup of batter per fritter into the hot oil. Use the back of the spoon to gently flatten each fritter into a round disc approximately 1–1.5cm thick and 8–9cm in diameter. Cook for 3–4 minutes without moving until the underside is deeply golden and genuinely crispy — you should be able to see the golden crust forming around the edges. Flip carefully using a wide spatula and cook for a further 2–3 minutes until the second side is equally golden and crispy. Transfer to a plate lined with kitchen paper. Add more oil to the pan between batches as needed.
  8. Keep warm. Transfer cooked fritters to a warm oven at 100°C while you cook the remaining batter. Never stack hot fritters directly on top of each other — the steam trapped between them destroys the crispiness. A low oven keeps them warm, crispy, and perfect until ready to serve.
  9. Serve. Arrange the warm crispy cabbage fritters on a large platter. Remove the herbed yogurt dip from the refrigerator and give it a final stir. Garnish the dip with a drizzle of olive oil, a scattering of fresh dill, and a pinch of chili flakes. Serve the fritters immediately alongside the cool, herbed yogurt dip with lemon wedges on the side.

Pro Tips for the Crispiest Cabbage Fritters

  • Salt and squeeze the cabbage obsessively. This is the single most important step in the entire recipe. Cabbage contains an enormous amount of water that must be removed before adding to the batter. Salting and squeezing takes 10 minutes of patience but it is what makes the difference between crispy, golden fritters and soggy, pale, falling-apart ones.
  • Use cornstarch in the batter. Cornstarch is the secret weapon for fritter crispiness. It creates an ultra-thin coating on the outside of each fritter that crisps up magnificently in the hot oil — far crispier than flour alone. Never leave it out.
  • Do not crowd the pan. This is the second most important rule for crispy fritters. Crowded fritters steam each other instead of frying and never develop a proper crust. Cook in batches of 3–4 maximum with plenty of hot oil surrounding each fritter.
  • Use medium-high heat. Too low and the fritters absorb too much oil and become greasy. Too high and the outside burns before the inside cooks through. Medium-high heat gives you the perfect balance of deep golden crispiness and a fully cooked interior.
  • Do not move the fritters too early. Let each side cook for the full 3–4 minutes completely undisturbed to develop a proper golden crust before flipping. Moving them too early causes them to break apart and stick to the pan.
  • Squeeze the cucumber for the dip. The cucumber in the herbed yogurt dip must be squeezed as dry as possible before adding — exactly like the cabbage in the fritters. Wet cucumber dilutes the dip and makes it watery within minutes of assembling.

Flavor Variations

  • Asian Inspired Cabbage Fritters: Replace the Mediterranean herbs with fresh cilantro, grated ginger, and a tablespoon of soy sauce. Add sesame seeds to the batter. Serve with a dipping sauce of soy sauce, rice vinegar, sesame oil, and chili for a beautiful Asian-inspired version.
  • Spiced Indian Style: Replace the herbs with fresh cilantro, cumin seeds, and garam masala. Add finely diced green chili to the batter. Serve with vegan raita and mango chutney for a fragrant pakora-inspired fritter that is absolutely extraordinary.
  • Zucchini and Cabbage Fritters: Replace half the cabbage with finely grated zucchini — squeezed just as dry as the cabbage — for an even more tender, slightly sweeter fritter with a beautiful green speckle throughout.
  • Cheesy Cabbage Fritters: Add ½ cup of vegan shredded cheddar or mozzarella to the batter for a gloriously melty, rich, cheesy version that is particularly spectacular served with a smoky chipotle vegan mayo instead of the herbed yogurt.

Nutritional Highlights (Per Serving — 3 fritters with dip)

CaloriesProteinCarbsFiberVitamin C
~280 kcal8g38g6g70% DV

Cabbage is one of the most underrated nutritional powerhouses in the entire plant kingdom. It is extraordinarily rich in Vitamin C — a single serving of these fritters provides 70% of the daily recommended intake — along with Vitamin K, Vitamin B6, folate, and powerful glucosinolate antioxidants that have been extensively studied for their cancer-protective properties. Cabbage is also one of the most affordable and most widely available vegetables in the world making these fritters a genuinely budget-friendly nutritional powerhouse. The vegan yogurt dip adds probiotics for gut health, calcium, and additional plant protein. Fresh herbs contribute Vitamins K and A along with powerful anti-inflammatory and digestive compounds.


Storage and Reheating

  • Refrigerator: Store leftover fritters in an airtight container for up to 3 days. Store the herbed yogurt dip separately in a sealed jar for up to 3 days.
  • Reheat fritters: For the crispiest results reheat in a dry skillet over medium heat for 2 minutes per side, in the air fryer at 180°C for 4–5 minutes, or in the oven at 200°C for 8–10 minutes. Avoid the microwave which makes them soft and soggy.
  • Freezer: Cooked fritters freeze beautifully for up to 2 months. Freeze in a single layer on a tray first then transfer to a freezer bag. Reheat from frozen in the oven at 200°C for 15 minutes or in the air fryer for 8–10 minutes.
  • Batter storage: The fritter batter (without the cabbage already added) can be stored in the fridge for up to 24 hours. The salted and squeezed cabbage can be stored separately for up to 24 hours. Combine and cook fresh for the crispiest result.

Frequently Asked Questions

Why are my fritters falling apart?

The most common causes are too much moisture remaining in the cabbage, batter that is too thin, not enough binding agents, or flipping the fritters before a proper crust has formed. Salt and squeeze the cabbage very thoroughly, make sure the batter is thick enough to hold together when pressed, ensure the flax egg is fully gelled, and wait the full 3–4 minutes before attempting to flip.

Can I make these gluten-free?

Yes. Replace the all-purpose flour with chickpea flour (also known as gram flour or besan) for an equally crispy, naturally gluten-free fritter with a slightly nuttier, more savory flavor that is actually even better than the regular flour version in many people’s opinion. Chickpea flour also adds additional plant-based protein to every fritter.

Can I bake these instead of frying?

Yes but the result will be less crispy than the pan-fried version. Brush or spray the fritters generously with oil and bake on a parchment-lined tray at 200°C for 20–25 minutes, flipping halfway, until golden. The air fryer produces the crispiest baked result — air fry at 200°C for 12–15 minutes shaking halfway.

What cabbage works best?

Green cabbage is the classic and best choice for these fritters — it has the right moisture content, the right firmness, and a mild, slightly sweet flavor that works beautifully with the herb and spice seasoning. Savoy cabbage works equally well and has a slightly more delicate, ruffled texture. Red cabbage can be used and produces beautiful purple-flecked fritters but tends to make the batter slightly pink as it cooks. White cabbage is also excellent. Avoid Chinese cabbage or napa cabbage which has too high a water content.

Can I make a larger batch for a party?

Absolutely. This recipe doubles and triples beautifully. For a party of 12 simply triple all ingredients. Cook the fritters in batches and keep warm in the oven at 100°C until ready to serve. Make the herbed yogurt dip the day before — it actually tastes better after sitting overnight in the fridge. Arrange on a large platter with the dip in the center for a stunning party appetizer spread.

How do I serve these as a complete meal?

For a complete and deeply satisfying meal serve the fritters over a bed of dressed mixed greens with cherry tomatoes, sliced cucumber, and extra herbed yogurt drizzled over the top. Add a scoop of hummus and warm flatbread on the side. This combination creates a beautifully balanced, colorful, and nutritionally complete plant-based meal that is as satisfying as it is stunning to look at.


Tried this recipe? Leave a comment below and let us know how it turned out! Browse all our vegan recipes to keep enjoying ultimate delicious and healthy lifestyle.
Garlic Butter Zucchini Grilled Cheese

garlic butter zucchini grilled cheese

There are sandwiches you make because lunch needs to happen. And then there are sandwiches like this Garlic Butter Zucchini Grilled Cheese — the kind that comes off the pan deeply golden and shatteringly crisp on the outside, with melted vegan cheese pulling into long strands and tender, garlicky zucchini tucked between every layer. This is that sandwich. The one that turns a classic comfort food into something with genuine vegetable substance. The one that makes people ask for the recipe before they have even finished their first half.

This recipe takes the beloved combination of a crisp, buttery grilled cheese and elevates it with thin, garlic-butter sautéed zucchini layered alongside melted vegan cheese, all pressed between slices of bread that have been generously buttered with a garlicky vegan butter and toasted until deeply golden on a hot pan.

What makes this sandwich so outstanding is the garlic butter — used both to sauté the zucchini and to coat the bread before toasting, ensuring the garlic flavor is present throughout the entire sandwich rather than only in one component.

This recipe is 100% vegan, ready in just 20 minutes, and absolutely wonderful served hot off the pan, sliced in half so the melted cheese and tender zucchini are visible in every bite.


Recipe Information

Prep TimeCook TimeTotal TimeServingsCalories
10 mins10 mins20 mins2~480 kcal

Ingredients

For the Garlic Butter

  • 4 tbsp vegan butter, softened
  • 3 cloves garlic, minced
  • 1 tbsp fresh parsley, finely chopped
  • Pinch of salt

For the Sandwich

  • 1 medium zucchini, sliced into thin rounds
  • 4 slices sturdy sandwich bread (sourdough or similar)
  • 1 cup (120g) shredded vegan mozzarella or cheddar
  • Salt and black pepper to taste

Optional Add-ins

  • ¼ tsp chili flakes for gentle heat in the garlic butter
  • A handful of fresh basil leaves layered into the sandwich
  • A thin layer of vegan pesto spread inside

To Serve

  • A side of soup for dipping
  • Fresh tomato slices alongside
  • A simple side salad

Instructions

  1. Make the garlic butter. In a small bowl mix together the softened vegan butter, minced garlic, parsley, and a pinch of salt until evenly combined.
  2. Sauté the zucchini. Heat 1 tablespoon of the garlic butter in a skillet over medium heat. Add the zucchini slices in a single layer and cook for 2–3 minutes per side until golden and tender. Season with salt and pepper and set aside.
  3. Butter the bread. Spread the remaining garlic butter generously over one side of each slice of bread.
  4. Assemble the sandwiches. On the unbuttered side of two slices, layer half the shredded cheese, followed by the sautéed zucchini, then the remaining cheese. Top with the second slice of bread, buttered side facing out.
  5. Toast until golden. Heat a clean skillet over medium heat. Place the sandwiches in the pan and cook for 3–4 minutes per side, pressing gently with a spatula, until deeply golden and the cheese has melted throughout.
  6. Slice and serve. Remove from the pan, let rest for a minute, then slice in half and serve immediately while hot.

Pro Tips

  • Cook the zucchini until properly golden before assembling, rather than leaving it raw, to avoid excess moisture inside the finished sandwich.
  • Use a sturdy bread that can hold up to the filling without becoming soggy.
  • Cook over medium, not high, heat to allow the cheese time to melt fully before the bread burns.
  • Press gently with a spatula while cooking to help the sandwich hold together and toast evenly.

Why This Combination Works

Garlic butter provides rich, aromatic flavor that complements both the bread and the zucchini, while the zucchini itself adds a tender, slightly sweet bite that balances the richness of the melted cheese. Together they transform a simple grilled cheese into something more substantial and interesting without losing any of its essential comfort.


Flavor Variations

  • Caprese Style: Add fresh basil and sliced tomato alongside the zucchini for a caprese-inspired version.
  • Spicy Garlic Grilled Cheese: Add chili flakes to the garlic butter for gentle heat throughout.
  • Pesto Zucchini Grilled Cheese: Spread a thin layer of vegan pesto inside the sandwich alongside the cheese and zucchini.

Nutritional Highlights (Per Serving)

CaloriesProteinCarbsFiberFat
~480 kcal14g40g3g28g

Storage

  • Best fresh: This sandwich is best eaten immediately while the bread is crisp and the cheese is melted.
  • Components: The garlic butter keeps in the refrigerator for up to a week and the sautéed zucchini for up to 3 days, making quick assembly easy on busy days.

Frequently Asked Questions

Can I use a different vegetable instead of zucchini?

Yes — thinly sliced eggplant or yellow squash work well as substitutes using the same method.

Can I make this in a sandwich press instead of a skillet?

Yes — a sandwich press or panini maker works well and may produce an even more evenly toasted result.

What vegan cheese melts best for this sandwich?

A good quality vegan mozzarella or cheddar that is specifically formulated to melt works best; check the packaging for melting properties if unsure.


Tried this recipe? Leave a comment below and let us know how it turned out! Tag us on Instagram and Facebook — we love seeing your plant-powered creations. Looking for more satisfying vegan sandwich recipes? Browse all recipes on Easy Vegan Recipes — new recipes posted every single week!

Vegan Lentil and Delicata Squash Salad — The Most Satisfying Plant-Based Salad You Will Make All Autumn

lentil and delicata squash salad

There are salads you make because something light is needed. And then there are salads like this Vegan Lentil and Delicata Squash Salad — the kind that is warm, substantial, and deeply satisfying, with caramelized rings of roasted delicata squash, hearty green lentils, peppery arugula, and a tangy maple Dijon dressing that ties every component together into something that feels genuinely complete as a meal. This is that salad. The one that makes people reconsider what a salad can be. The one that is as satisfying as any warm dinner but as vibrant and fresh-tasting as the finest bowl you have ever made.

Delicata squash is one of the most underused and most rewarding vegetables in autumn cooking — its thin, edible skin means it requires no peeling, its natural sweetness intensifies dramatically when roasted into caramelized rings, and its creamy, slightly chestnut-flavored flesh pairs beautifully with the earthy depth of green lentils. Together with peppery arugula, toasted pepitas, and a warm maple Dijon dressing, they create a salad that is genuinely greater than the sum of its parts.

What makes this salad so outstanding is the contrast between warm and cool, tender and crunchy, sweet and tangy — all present in every single forkful.

This recipe is 100% vegan, naturally gluten-free, ready in about 45 minutes, and absolutely wonderful served as a main course lunch or a hearty dinner salad year-round.


Recipe Information

Prep TimeCook TimeTotal TimeServingsCalories
15 mins30 mins45 mins4~340 kcal

Ingredients

For the Salad

  • 2 medium delicata squash, halved lengthwise, seeded, and sliced into 1cm rings
  • 1½ cups (300g) green or French lentils, cooked and drained
  • 4 cups (80g) arugula or mixed greens
  • ¼ cup (35g) pepitas (pumpkin seeds), toasted
  • ¼ cup (30g) dried cranberries (optional)
  • 2 tbsp olive oil, for roasting squash
  • Salt and black pepper

For the Maple Dijon Dressing

  • 3 tbsp olive oil
  • 2 tbsp apple cider vinegar
  • 1 tbsp maple syrup
  • 1 tsp Dijon mustard
  • 1 small clove garlic, grated
  • Salt and black pepper to taste

Optional Add-ins

  • Crumbled vegan feta scattered over
  • Thinly sliced red onion, pickled or raw
  • Fresh thyme leaves scattered over the squash before roasting
  • Toasted walnuts instead of pepitas

Instructions

  1. Roast the delicata squash. Preheat the oven to 425°F (220°C). Toss the sliced delicata rings with olive oil, salt, and pepper. Arrange in a single layer on a lined baking sheet and roast for 20–25 minutes, flipping halfway, until deeply caramelized and golden on both sides.
  2. Cook the lentils. If not using pre-cooked lentils, rinse the dry lentils and cook in vegetable broth or salted water for 20–25 minutes until just tender but still holding their shape. Drain and season with salt while warm.
  3. Make the dressing. Whisk together the olive oil, apple cider vinegar, maple syrup, Dijon mustard, and grated garlic until completely combined and emulsified. Season with salt and pepper.
  4. Toast the pepitas. Toast the pepitas in a dry skillet over medium heat for 2–3 minutes until lightly golden and beginning to pop. Set aside.
  5. Assemble the salad. Spread the arugula across a large serving platter or bowl. Top with the warm lentils, roasted delicata squash rings, toasted pepitas, and dried cranberries if using. Add any optional extras.
  6. Dress and serve. Drizzle the maple Dijon dressing generously over the salad. Serve immediately while the squash and lentils are still warm.

Pro Tips

  • Do not peel the delicata squash — its thin skin becomes tender and slightly caramelized during roasting and is entirely edible, saving significant prep time.
  • Roast the squash at high heat for the most caramelized, golden result — lower heat produces pale, soft squash without the caramelization that makes it so delicious.
  • Season the lentils while warm so they absorb the seasoning fully rather than tasting bland in the finished salad.
  • Dress the salad just before serving to keep the arugula from wilting.

Why Delicata Squash Is the Best Salad Squash

Unlike butternut squash, which requires peeling and cubing before roasting, delicata squash has a thin, completely edible skin that needs only a quick scrub before slicing into rings — making it one of the most convenient autumn vegetables available. Its natural sweetness intensifies dramatically during roasting, and its creamy, slightly sweet flesh is far more interesting than the more commonly used butternut in a warm salad context.


Flavor Variations

  • Butternut Squash Version: Replace delicata with roasted butternut squash cubes if delicata is unavailable.
  • Warm Spiced Version: Add a pinch of cinnamon and cumin to the squash before roasting for a warmly spiced Middle Eastern-inspired character.
  • Pomegranate Version: Replace the dried cranberries with fresh pomegranate seeds for a more vibrant, jewel-like version.

Nutritional Highlights (Per Serving)

CaloriesProteinCarbsFiberFat
~340 kcal14g44g12g13g

Storage

  • Refrigerator: Store undressed components separately for up to 3 days. Assemble and dress fresh before serving for the best texture.
  • Lentils: Store cooked lentils in an airtight container for up to 5 days — they are excellent for adding to bowls and salads throughout the week.
  • Roasted squash: Keeps refrigerated for up to 4 days. Reheat briefly in the oven or air fryer before adding to the salad.

Frequently Asked Questions

Can I use a different type of lentil?

Yes — French green lentils (Puy lentils) hold their shape best and are ideal for salads. Regular green lentils also work well. Red lentils are not recommended as they become too soft and fall apart.

Can I serve this salad cold?

Yes — it is also delicious at room temperature or cold, though the warm version with the contrast between the warm squash, lentils, and cool arugula is particularly satisfying.

Is delicata squash available year-round?

Delicata squash is primarily an autumn and winter vegetable, typically available from late summer through early winter. Butternut squash is the most widely available year-round substitute.


Tried this recipe? Leave a comment below and let us know how it turned out! Tag us on Instagram and Facebook — we love seeing your plant-powered creations. Looking for more satisfying vegan salad and bowl recipes? Browse all recipes on Easy Vegan Recipes — new recipes posted every single week!

Asian-inspired Noodle Salad with Orange Miso Ginger Dressing

asian inspired noodle salad with orange miso ginger dressing

There are salads you make because something light is needed. And then there are salads like this Asian-Inspired Noodle Salad with Orange Miso Ginger Dressing — the kind that comes together in a single bowl of such extraordinary color and texture and flavor that it is simultaneously the most beautiful and the most delicious thing on the table. This is that salad. The one with ribbons of cool soba noodles, crunchy shredded cabbage, bright edamame, julienned carrot, and thinly sliced cucumber, all tossed in a dressing so deeply savory and so brightly citrusy and so perfectly balanced between sweet, salty, tangy, and umami that you will make a double batch of it immediately for use on everything else in the refrigerator.

This recipe combines soba noodles with a colorful array of crisp, fresh vegetables and a bold, complex dressing built on white miso paste, fresh orange juice and zest, grated ginger, sesame oil, rice vinegar, and a touch of maple syrup — a combination that produces a dressing of such extraordinary complexity from such simple ingredients that it tastes like something requiring considerably more effort than it actually demands.

What makes this salad so outstanding is the dressing — the orange miso ginger combination is one of the great underused flavor pairings in plant-based cooking, providing simultaneously the deep, savory, fermented character of miso, the bright, slightly sweet citrus of fresh orange, and the clean, warming punch of fresh ginger, all balanced into something that makes every ingredient it touches taste more vibrant and more interesting.

This recipe is 100% vegan, naturally gluten-free when made with gluten-free soba or rice noodles, ready in just 25 minutes, and absolutely spectacular served immediately or chilled, making it equally outstanding as a quick weeknight dinner and a make-ahead lunch.


Recipe Information

Prep TimeCook TimeTotal TimeServingsCalories
15 mins10 mins25 mins4~340 kcal

Ingredients

For the Noodle Salad

  • 300g soba noodles or rice noodles
  • 2 cups (160g) red or green cabbage, very thinly shredded
  • 2 medium carrots, julienned or grated
  • 1 medium cucumber, halved and thinly sliced
  • 1 cup (150g) frozen edamame, thawed
  • 3 spring onions, thinly sliced
  • ¼ cup (15g) fresh cilantro, roughly chopped
  • ¼ cup (35g) roasted peanuts or cashews, roughly chopped
  • 2 tbsp sesame seeds, toasted

For the Orange Miso Ginger Dressing

  • 3 tbsp white miso paste
  • 4 tbsp fresh orange juice
  • Zest of 1 large orange
  • 2 tbsp rice vinegar
  • 2 tbsp soy sauce or tamari
  • 1 tbsp sesame oil
  • 1 tbsp maple syrup
  • 1 tbsp fresh ginger, very finely grated
  • 1 clove garlic, finely grated
  • 2–3 tbsp water, to thin to desired consistency

Optional Add-ins

  • Thinly sliced red bell pepper for extra color
  • Sliced avocado added just before serving
  • Crispy tofu cubes for extra protein
  • Shredded purple cabbage alongside the green for a more dramatic color contrast

Instructions

  1. Cook the noodles. Cook the soba noodles according to package instructions — typically 4–6 minutes in boiling water. Drain and immediately rinse under cold running water to stop the cooking and prevent sticking. Toss with a small drizzle of sesame oil to keep separate. Set aside.
  2. Make the dressing. In a small bowl whisk together the white miso paste, orange juice, orange zest, rice vinegar, soy sauce, sesame oil, maple syrup, grated ginger, and grated garlic until completely smooth and emulsified. Add water one tablespoon at a time until the dressing reaches a pourable, drizzleable consistency. Taste and adjust — more orange juice for brightness, more soy sauce for saltiness, more maple syrup for sweetness.
  3. Prepare the vegetables. Shred the cabbage as thinly as possible, julienne or grate the carrots, slice the cucumber and spring onions, and thaw the edamame if needed.
  4. Assemble the salad. In a large bowl combine the cooked noodles, shredded cabbage, carrot, cucumber, edamame, and spring onions. Pour the dressing over and toss thoroughly until every component is evenly coated.
  5. Finish and serve. Transfer to a serving bowl or platter. Scatter the fresh cilantro, chopped peanuts or cashews, and toasted sesame seeds over the top. Serve immediately or refrigerate until ready to serve.

Pro Tips

  • Rinse the soba noodles in cold water immediately after cooking — this stops the cooking process, removes surface starch that would make them sticky and clumped, and cools them to the correct temperature for a cold noodle salad.
  • Make the dressing first and let it sit while preparing everything else — the flavors deepen and meld beautifully even in 10–15 minutes.
  • Taste the dressing before adding to the salad and adjust confidently — the dressing should taste noticeably bold as it will be diluted slightly by the noodles and vegetables.
  • Add the peanuts and sesame seeds just before serving to keep them crunchy rather than softening in the dressing.

Why This Dressing Is So Extraordinary

The orange miso ginger combination works at a deep flavor chemistry level because each ingredient contributes a distinct dimension that the others cannot provide. Miso provides fermented umami depth and saltiness. Orange provides natural sweetness, acidity, and aromatic citrus compounds. Ginger provides warming, slightly peppery pungency. Sesame oil provides richness and its characteristic nutty aroma. Rice vinegar provides sharpness and brightness. Together these five elements create a dressing that satisfies on every flavor dimension simultaneously — a quality that makes food genuinely addictive rather than merely pleasant.


Flavor Variations

  • Spicy Orange Miso Salad: Add a teaspoon of chili garlic sauce or a pinch of cayenne to the dressing for a version with building heat.
  • Tofu Noodle Salad: Add cubed, pan-fried crispy tofu to the assembled salad for a more substantial, higher-protein version.
  • Mango Noodle Salad: Add thinly sliced fresh mango to the salad for a sweeter, more tropical character that pairs particularly beautifully with the orange dressing.

Nutritional Highlights (Per Serving)

CaloriesProteinCarbsFiberFat
~340 kcal14g52g6g10g

Storage

  • Refrigerator: Store the assembled salad in an airtight container for up to 2 days, though the noodles will absorb more dressing over time. For the best texture, store the components separately and assemble just before serving.
  • Dressing: The dressing keeps in a sealed jar in the refrigerator for up to 1 week and is outstanding on virtually everything — grain bowls, roasted vegetables, steamed broccoli, lettuce wraps.
  • Meal prep: This salad is excellent for meal prep when the components are stored separately — noodles, vegetables, and dressing each stored apart and assembled fresh for each serving.

Frequently Asked Questions

Can I use a different noodle instead of soba?

Yes — rice noodles, udon, ramen, or glass noodles all work well in this salad. Rice noodles make it naturally gluten-free; udon produces a chewier, more substantial result.

Can I make this salad ahead for a party?

Yes — prepare all components up to 24 hours ahead and store separately. Toss with the dressing 15–30 minutes before serving for the best texture, allowing time for the flavors to meld without the noodles becoming soggy.

What can I substitute for white miso if I can’t find it?

Yellow miso works as a direct substitute with a slightly stronger, more robust flavor. Red miso produces a more intensely savory, less sweet dressing. If miso is unavailable, a mixture of tahini, soy sauce, and a pinch of salt provides a similar fermented depth.


Tried this recipe? Leave a comment below and let us know how it turned out! Tag us on Instagram and Facebook — we love seeing your plant-powered creations. Looking for more vibrant vegan noodle and bowl recipes? Browse all recipes on Easy Vegan Recipes — new recipes posted every single week!