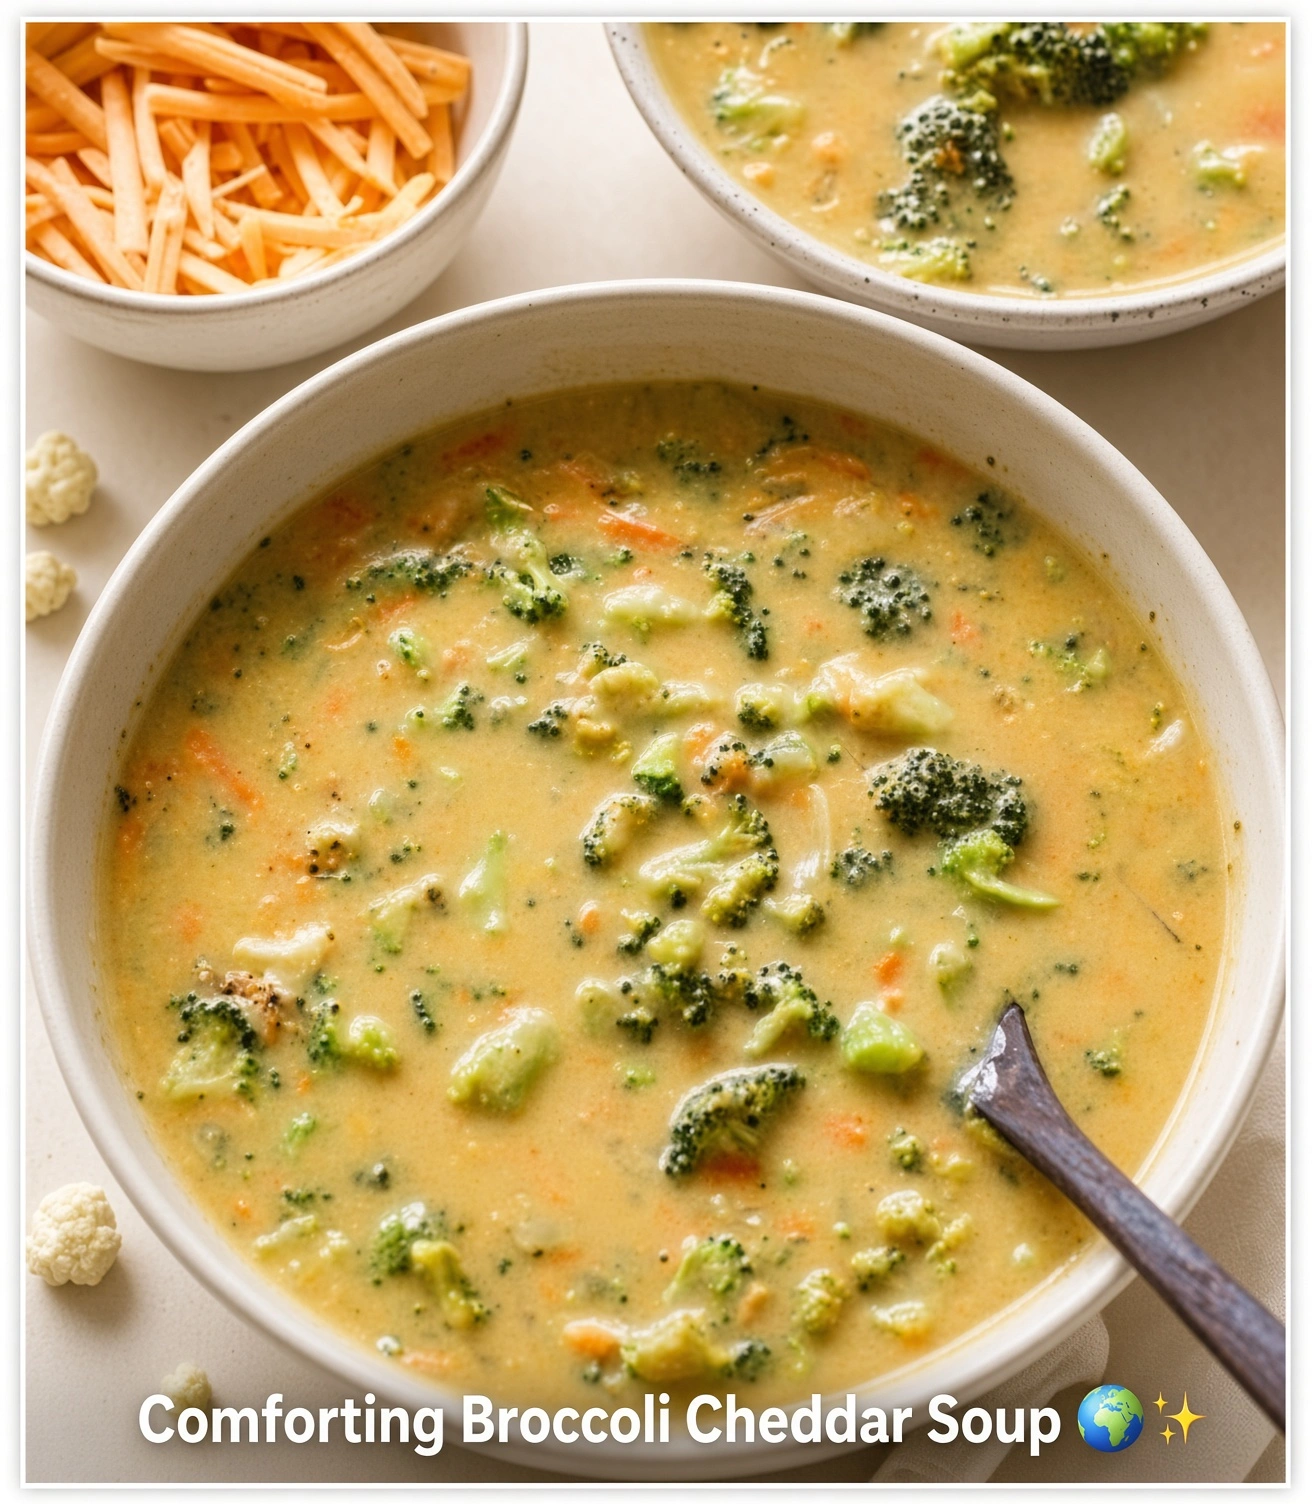
easy vegan dinner

Vegan Comforting Broccoli Cheddar Soup — The Creamiest Most Satisfying Plant-Based Soup You Will Make All Season

comforting broccoli cheddar soup

There are soups that warm you and there are soups like this Vegan Comforting Broccoli Cheddar Soup — the kind that comes out of the pot so thick, so deeply golden, and so richly flavored with sharp cheddar and sweet broccoli that it is genuinely difficult to believe there is not a single drop of dairy in it. This is that soup. The one that delivers every quality that makes broccoli cheddar soup so universally beloved — the silky, velvety base, the tender chunks of broccoli and carrot, the sharp, savory cheese flavor that runs through every spoonful — and does it completely from plants, in under 40 minutes, in a single pot. The one that makes people ask for the recipe before they have finished their first bowl. The one that proves, beyond any doubt, that comfort food does not require dairy to be genuinely, deeply comforting.

The cheddar flavor in this soup comes from a combination of nutritional yeast, white miso paste, apple cider vinegar, and smoked paprika — four ingredients that together create the sharp, savory, slightly tangy profile of a good cheddar without any animal products. The creamy base is built from blended cashews and potato, which thicken the broth into something luxuriously silky while adding their own mild, buttery flavor. Shredded vegan cheddar is stirred in at the end for extra richness and the stretchy, melted cheese texture that is impossible to replicate with nutritional yeast alone.

What makes this soup so outstanding is the two-texture technique — blending half the soup smooth while leaving the other half chunky, so every bowl has both the silky, velvety base and the satisfying, tender bite of whole broccoli florets and carrot pieces. It is the best of both a bisque and a chunky vegetable soup, in one bowl.

This recipe is 100% vegan, naturally dairy-free, ready in under 40 minutes, and the kind of soup that belongs in the regular rotation from the first cold day of the year to the last.


Recipe Information

Prep TimeCook TimeTotal TimeServingsCalories
10 mins30 mins40 mins4~380 kcal

Ingredients

For the Soup

  • 1 large head broccoli (about 500g), cut into small florets and stem diced
  • 2 medium carrots, peeled and finely diced
  • 1 medium yellow onion, finely diced
  • 4 cloves garlic, minced
  • 1 medium Yukon Gold potato, peeled and diced
  • 2 tbsp vegan butter or olive oil
  • 1 litre (4 cups) vegetable broth
  • 240ml (1 cup) unsweetened oat milk or other plant milk

For the Cheddar Flavor Base

  • 70g (½ cup) raw cashews, soaked in hot water for 20 minutes and drained
  • 4 tbsp nutritional yeast
  • 1 tbsp white miso paste
  • 1 tbsp apple cider vinegar
  • 1 tsp smoked paprika
  • ½ tsp turmeric (for color)
  • ½ tsp mustard powder
  • Salt and black pepper to taste

For Extra Cheesiness

  • 100g (1 cup) vegan cheddar, shredded
  • 1 tbsp cornstarch

To Serve

  • Extra shredded vegan cheddar
  • Toasted bread croutons or crusty bread
  • Pinch of smoked paprika
  • Fresh chives or parsley
  • Cracked black pepper

Instructions

  1. Sauté the aromatics. Melt the vegan butter in a large pot over medium heat. Add the diced onion and cook for 4–5 minutes until soft and translucent. Add the garlic and cook for 1 minute until fragrant.
  2. Add vegetables and broth. Add the diced carrot, potato, and broccoli stems (reserve the florets for later) to the pot. Pour in the vegetable broth and oat milk. Bring to a boil, then reduce to a simmer and cook for 12–15 minutes until the potato and carrot are completely tender.
  3. Make the cheddar base. While the vegetables simmer, blend the drained cashews, nutritional yeast, miso paste, apple cider vinegar, smoked paprika, turmeric, mustard powder, and 120ml (½ cup) of the hot soup broth in a high-speed blender until completely smooth. Set aside.
  4. Add broccoli florets. Add the reserved broccoli florets to the pot and simmer for 5 minutes until just tender but still bright green.
  5. Blend half the soup. Using a ladle, transfer roughly half of the soup to the blender and blend until completely smooth. Return to the pot with the remaining chunky soup and stir to combine. This creates the signature two-texture result — silky and chunky in every bowl.
  6. Add the cheddar base. Pour the blended cashew cheddar base into the soup and stir until fully incorporated. Toss the shredded vegan cheddar with the cornstarch, then stir into the soup over low heat until melted and the soup is glossy and thick. Season generously with salt and pepper.
  7. Serve. Ladle into bowls and top with extra shredded vegan cheddar, a pinch of smoked paprika, fresh chives, and cracked black pepper. Serve with crusty bread or croutons.

Pro Tips

  • Soak the cashews first. Even 20 minutes in hot water makes a significant difference to how smoothly the cashews blend — unsoaked cashews can leave small grains that make the soup slightly gritty rather than perfectly smooth.
  • Toss the shredded vegan cheddar in cornstarch before adding. The cornstarch helps the vegan cheese melt smoothly and evenly into the soup without clumping or separating, producing a glossier, more stable result.
  • Blend half, not all. Fully blended broccoli cheddar soup loses the textural contrast that makes the dish so satisfying. The half-blend technique gives you the creamiest possible base while preserving whole florets throughout.
  • Add turmeric for the right color. Nutritional yeast alone produces a pale, beige soup. A small amount of turmeric gives it the deep golden-yellow color that is visually associated with a great cheddar soup and makes it far more appetizing.

Why Nutritional Yeast Tastes Like Cheese

Nutritional yeast is a deactivated yeast — Saccharomyces cerevisiae grown on a medium of molasses, then harvested, heated to deactivate it, and dried — and its remarkable ability to mimic the flavor profile of aged cheese is not accidental but chemical. The primary flavor compounds in nutritional yeast are glutamates — naturally occurring amino acids produced during the yeast’s fermentation and growth — specifically glutamic acid, which is one of the most powerful umami-generating compounds in the natural world and is the same compound responsible for the savory depth of aged parmesan, miso paste, soy sauce, and mushrooms. Nutritional yeast also contains a range of sulfur-containing compounds produced during the yeast’s metabolic processes that are closely related to the sulfur compounds produced during cheese aging — the same family of molecules responsible for the sharp, slightly pungent character of aged cheddar. Combined with the acid from apple cider vinegar (which mimics the lactic acid produced by cheese-making bacteria), the fermented depth of white miso, and the smoky dimension of paprika, nutritional yeast becomes the foundation of a flavor profile that is unmistakably, satisfyingly cheese-like — entirely from plants.


Flavor Variations

  • Spicy Jalapeño Broccoli Cheddar Soup: Add 1–2 finely diced jalapeños with the onion and stir in a teaspoon of hot sauce with the cheddar base for a warmly spiced version.
  • Broccoli Cheddar Soup with White Beans: Add a drained can of cannellini beans with the broccoli florets for extra protein and a creamier, heartier soup.
  • Smoky Bacon Broccoli Cheddar Soup: Add 80g of diced smoked tempeh sautéed until crispy as a topping for a smoky, bacon-inspired finish.

Nutritional Highlights (Per Serving)

CaloriesProteinCarbsFiberFat
~380 kcal14g42g7g18g

Storage

  • Refrigerator: Store in a sealed container for up to 5 days. The soup thickens considerably as it sits — add a splash of broth or oat milk and stir well when reheating.
  • Freezer: Freeze the soup before adding the shredded vegan cheddar for up to 3 months. Thaw overnight in the refrigerator, reheat gently, and stir in fresh shredded vegan cheddar just before serving.
  • Reheat: Reheat over low-medium heat, stirring frequently, to prevent the cheese from sticking to the bottom of the pot.

Frequently Asked Questions

Can I make this nut-free?

Yes — replace the cashews with 1 cup of diced and boiled potato, blended smooth with the same seasonings. The result is slightly less rich but still very creamy and completely nut-free.

What vegan cheddar brand melts best in soup?

Violife and Daiya shredded cheddars melt most reliably in soups. Always toss the shredded cheese in cornstarch before adding to hot liquid for the smoothest result regardless of brand.

Can I use frozen broccoli?

Yes — frozen broccoli florets work well. Add directly from frozen in Step 4 and simmer for 6–7 minutes rather than 5.

My soup is too thick. How do I fix it?

Add warm vegetable broth or oat milk a splash at a time until the consistency is right, stirring well between additions.


Tried this recipe? Leave a comment below and let us know how it turned out! Tag us on Instagram and Facebook — we love seeing your plant-powered creations. Looking for more warming vegan soup and dinner recipes? Browse all recipes on Easy Vegan Recipes — new recipes posted every single week!

Vegan Potato Bake — The Creamiest Most Comforting Plant-Based Side Dish You Will Pull From the Oven All Year

vegan potato bake

There are side dishes that fill a role. And then there are side dishes like this Vegan Potato Bake — the kind that comes out of the oven bubbling at the edges, golden and crisp on top, with layers of thinly sliced potato so tender they offer no resistance to a spoon, all bound together in a creamy, garlicky cashew sauce that is so rich, so deeply savory, and so perfectly seasoned that it is genuinely difficult to stop eating it even after the plate has been cleared. This is that dish. The one that steals the show at every dinner table it appears on. The one that non-vegans request again before the meal is over. The one that proves, definitively, that the absence of dairy is no barrier whatsoever to a potato bake that is every bit as indulgent, as satisfying, and as impossibly creamy as any version made with heavy cream and gruyère.

This vegan potato bake is built on a foundation of thinly sliced Yukon Gold potatoes layered in a baking dish and bathed in a cashew cream sauce seasoned with garlic, nutritional yeast, white miso, Dijon mustard, and smoked paprika — a combination that delivers the rich, savory, slightly sharp flavor profile of a classic cream and cheese gratin without a single drop of dairy. Fresh thyme, rosemary, and a scatter of shredded vegan cheese on top complete the picture: when the dish comes out of the oven, that cheese is melted and golden, the sauce is bubbling, and the top layer of potato is crisp at the edges with a golden, deeply satisfying crust.

What makes this recipe so outstanding is the cashew cream — soaked, blended with vegetable broth and seasonings into a sauce that is as rich and coating as heavy cream but with an additional, subtle nuttiness that pairs beautifully with potato and gives the dish a depth that straight cream alone cannot always match.

This recipe is 100% vegan, naturally dairy-free and egg-free, ready in 70 minutes including baking time, and the kind of dish that belongs at every Sunday dinner, holiday table, and weeknight that deserves something genuinely special.


Recipe Information

Prep TimeCook TimeTotal TimeServingsCalories
20 mins50 mins70 mins6~390 kcal

Ingredients

For the Potatoes

  • 1.2kg (about 2.6 lbs) Yukon Gold potatoes, peeled and very thinly sliced (2–3mm)
  • 1 medium yellow onion, very thinly sliced
  • 3 cloves garlic, thinly sliced
  • 1 tsp salt
  • Fresh thyme and rosemary sprigs

For the Cashew Cream Sauce

  • 150g (1 cup) raw cashews, soaked in hot water for 30 minutes and drained
  • 480ml (2 cups) vegetable broth
  • 4 tbsp nutritional yeast
  • 1 tbsp white miso paste
  • 1 tbsp Dijon mustard
  • 1 tsp garlic powder
  • 1 tsp onion powder
  • 1 tsp smoked paprika
  • ½ tsp turmeric (for golden color)
  • 1 tsp salt
  • ½ tsp black pepper

For the Top

  • 100g (1 cup) vegan mozzarella or cheddar, shredded
  • 1 tbsp olive oil
  • Extra smoked paprika
  • Fresh thyme

Instructions

  1. Preheat and prepare. Preheat the oven to 375°F (190°C). Grease a 9×13 inch (23x33cm) baking dish generously with vegan butter or olive oil.
  2. Make the cashew cream sauce. Drain the soaked cashews and add to a high-speed blender with the vegetable broth, nutritional yeast, miso paste, Dijon mustard, garlic powder, onion powder, smoked paprika, turmeric, salt, and pepper. Blend for 60–90 seconds until completely smooth and silky. Taste and adjust seasoning — the sauce should be well-seasoned and deeply savory, as the potato layers are unseasoned.
  3. Layer the potatoes. Arrange one-third of the sliced potatoes in overlapping layers across the bottom of the prepared baking dish. Scatter over half the sliced onion and garlic. Pour over one-third of the cashew cream sauce. Repeat with another third of the potatoes, the remaining onion and garlic, and another third of the sauce. Finish with the final layer of potatoes, arranged as neatly as possible, and pour the remaining sauce over the top — it should just reach the top layer of potato.
  4. Add herbs and cover. Lay fresh thyme and rosemary sprigs across the top. Cover the dish tightly with foil.
  5. Bake covered. Bake covered at 375°F (190°C) for 35 minutes until the potatoes are beginning to soften — a knife inserted should meet some resistance but go through the top half easily.
  6. Add cheese and finish uncovered. Remove the foil. Scatter the shredded vegan cheese evenly over the top. Drizzle with olive oil and dust with extra smoked paprika. Return to the oven uncovered for 15–18 minutes until the cheese is melted and golden, the sauce is bubbling at the edges, and the top layer of potato is golden and slightly crisp.
  7. Rest before serving. Allow the potato bake to rest for 10 minutes before serving — this allows the sauce to thicken slightly and the layers to hold together when spooned out.

Pro Tips

  • Slice the potatoes very thin and evenly. A mandoline slicer set to 2–3mm is ideal — evenly thin slices cook through uniformly, while unevenly thick slices result in some layers that are overdone and others that are underdone.
  • Season the sauce generously. The potato layers themselves are not seasoned — all the salt and flavor comes from the sauce, so it needs to be well-seasoned. Taste before layering and adjust.
  • Cover for most of the baking time. Covering the dish creates a steam environment that cooks the potato layers through gently and evenly before the final uncovered phase develops the golden, cheesy top.
  • Rest before serving. The sauce thickens as the dish cools slightly — serving immediately produces a runny result. Ten minutes of resting makes each serving hold its shape and the sauce coat the potatoes properly.
  • Use Yukon Gold potatoes. Their naturally buttery, slightly creamy texture and moderate starch content make them ideal for a gratin-style bake — they hold their shape through cooking while becoming completely tender inside.

The Art of a Perfect Potato Gratin

The potato bake — known in France as gratin dauphinois — is one of the great dishes of European comfort cooking, and its principles translate beautifully to plant-based cooking. The essential elements are three: potatoes sliced thin enough to cook through in a reasonable oven time, a sauce rich enough in fat and flavor to coat every surface and infuse the layers as they bake, and enough time in the oven covered before the final uncovered phase so the interior is completely tender before the top begins to brown. The cashew cream used here behaves remarkably like heavy cream in this context — it coats the potato slices, absorbs their starch as it bakes, and gradually thickens through the combined effect of evaporation and starch release into something that is simultaneously a sauce and a binder, holding the layers together into a cohesive, sliceable dish. The nutritional yeast and miso provide the savory, cheese-like depth that dairy cream and gruyère would in the original, while the mustard and smoked paprika give the sauce the slight sharpness and complexity that prevents it from being simply rich without being interesting.


Flavor Variations

  • Vegan Potato Bake with Leek: Replace the sliced onion with thinly sliced leek for a sweeter, more delicate allium flavor that pairs beautifully with the cashew cream.
  • Herb-Crusted Potato Bake: Combine panko breadcrumbs, nutritional yeast, dried herbs, and olive oil and scatter over the cheese in the final uncovered phase for an extra-crispy, golden crust.
  • Sweet Potato and Regular Potato Bake: Alternate layers of sweet potato and Yukon Gold for a sweeter, more nutritionally complex version with beautiful color contrast.

Nutritional Highlights (Per Serving)

CaloriesProteinCarbsFiberFat
~390 kcal11g52g5g17g

Storage

  • Refrigerator: Store covered in the refrigerator for up to 5 days. The dish firms up as it cools and can be sliced cleanly when cold — reheat individual portions in the microwave or the whole dish covered in the oven at 350°F (175°C) for 20 minutes.
  • Freezer: Freeze individual portions wrapped tightly for up to 2 months. The texture changes slightly on thawing — the potatoes become softer — but the flavor is unaffected. Reheat from frozen in the oven covered with foil.
  • Make ahead: Assemble the entire dish the night before and refrigerate unbaked. Add 10–15 minutes to the covered baking time when cooking from cold.

Frequently Asked Questions

Can I use a different type of potato?

Yukon Gold is strongly recommended for its buttery texture. Russet potatoes can be used but absorb more liquid and can become slightly dry in the center layers. Waxy potatoes such as red-skinned varieties hold their shape very well but can take longer to become fully tender.

My sauce is not thick enough. What went wrong?

Blend the cashews for longer — a full 90 seconds in a high-speed blender is required for a truly smooth, thick sauce. Also ensure you are using raw cashews, not roasted, and that they were soaked for the full 30 minutes.

Can I make this without a high-speed blender?

Yes — soak the cashews for 2 hours in hot water for maximum softness, then blend in a regular blender for 2–3 minutes, stopping to scrape down the sides. The sauce may be slightly less silky but will still be very good.

Can I add more vegetables?

Yes — thinly sliced mushrooms, blanched and squeezed spinach, or finely diced bell pepper can all be scattered between layers for extra nutrition and flavor.


Tried this recipe? Leave a comment below and let us know how it turned out! Tag us on Instagram and Facebook — we love seeing your plant-powered creations. Looking for more comforting vegan side dish and dinner recipes? Browse all recipes on Easy Vegan Recipes — new recipes posted every single week!

Vegan Tomato Mozzarella Garlic Mushroom Pizza with Homemade Crust — The Most Crave-Worthy Plant-Based Pizza You Will Make All Week

tomato mozzarella garlic mushroom pizza

There is a reason pizza night is a weekly tradition in so many homes. This Vegan Tomato Mozzarella Garlic Mushroom Pizza has everything that makes a great pizza great: a chewy, golden crust with crisp edges, a bright and garlicky tomato sauce, pools of stretchy melted vegan mozzarella, and a generous scattering of deeply browned garlic mushrooms that bring a savory, almost meaty depth to every slice.

The topping combination is a classic for a reason. Sweet, ripe tomatoes balance the rich, melty cheese. Garlic-butter mushrooms add earthy umami. Fresh basil, added right after baking, lifts everything with a peppery, fragrant freshness. Nothing here is complicated, but each element is treated with care so the whole pizza tastes balanced and complete.

The homemade crust takes just 10 minutes of hands-on time and rises in about an hour, producing a dough that is soft inside and blisters beautifully in a hot oven. If you are short on time, store-bought vegan dough or a pre-made crust works well. The garlic mushrooms are cooked separately first, which drives off their moisture and prevents a soggy pizza, a step that makes a huge difference.

The vegan mozzarella melts best when shredded and mixed with a little of the homemade cashew-based sauce, or you can use a good store-bought vegan mozzarella. Either way, you get a golden, bubbling top that stretches with every slice.

This recipe is 100% vegan, serves 4, and takes about 45 minutes of active time plus rising.


Recipe Information

Prep TimeRise TimeCook TimeServingsCalories
20 mins60 mins15 mins4 (one 14-inch pizza or two 10-inch)~430 kcal per serving

Ingredients

For the Pizza Dough

  • 3 cups (375g) bread flour or all-purpose flour, plus extra for dusting
  • 2¼ tsp (7g) instant yeast
  • 1½ tsp salt
  • 1 tsp sugar
  • 1 cup (240ml) warm water (about 105°F / 40°C)
  • 2 tbsp olive oil

For the Quick Tomato Sauce

  • 1 can (400g) crushed tomatoes
  • 2 cloves garlic, minced
  • 1 tbsp olive oil
  • 1 tsp dried oregano
  • ½ tsp salt
  • ½ tsp sugar or maple syrup
  • Pinch of chili flakes
  • Black pepper to taste

For the Garlic Mushrooms

  • 8 oz (225g) cremini mushrooms, thinly sliced
  • 3 cloves garlic, minced
  • 1 tbsp olive oil
  • 1 tbsp vegan butter
  • 1 tbsp fresh thyme leaves or ½ tsp dried
  • ¼ tsp salt
  • Black pepper to taste
  • 1 tsp balsamic vinegar or soy sauce

For Assembly

  • 1½ cups (150g) shredded vegan mozzarella
  • 2 ripe Roma tomatoes, thinly sliced
  • 1 tbsp olive oil for brushing the crust
  • Handful of fresh basil leaves
  • Flaky sea salt
  • Cornmeal or semolina for dusting

Optional Finishing Touches

  • Drizzle of balsamic glaze
  • Chili flakes
  • Garlic oil
  • Fresh arugula
  • Vegan parmesan sprinkle

Instructions

  1. Activate the yeast. Stir the sugar and yeast into the warm water and let sit for 5–8 minutes until foamy.
  2. Make the dough. In a large bowl combine the flour and salt. Add the foamy yeast mixture and olive oil. Stir to form a shaggy dough, then knead on a lightly floured surface for 6–8 minutes until smooth and elastic. The dough should be soft and slightly tacky.
  3. Rise. Place in an oiled bowl, cover, and let rise in a warm place for 60 minutes until doubled in size.
  4. Make the sauce. Combine all sauce ingredients in a bowl. There is no need to cook it — the sauce will cook on the pizza. Stir well and taste for seasoning.
  5. Cook the mushrooms. Heat the olive oil and vegan butter in a large skillet over medium-high heat. Add the sliced mushrooms in a single layer and cook, without stirring too often, for 6–8 minutes until deeply golden and all moisture has evaporated. Add the garlic and thyme for the final minute. Finish with salt, pepper, and balsamic. Set aside.
  6. Preheat the oven. Place a pizza stone or inverted baking sheet on the middle rack and preheat the oven to its highest setting, 475–500°F (245–260°C), for at least 30 minutes.
  7. Shape the dough. Punch down the risen dough and shape into a ball. On a lightly floured surface stretch and press the dough into a 14-inch round, leaving the edge slightly thicker. Transfer to a sheet of parchment dusted with cornmeal.
  8. Build the pizza. Brush the edge of the crust with olive oil. Spread a thin layer of sauce over the center, leaving a 1-inch border. Scatter half the vegan mozzarella, then the sliced tomatoes, garlic mushrooms, and remaining cheese.
  9. Bake. Slide the pizza on its parchment onto the hot stone or baking sheet. Bake for 10–14 minutes until the crust is golden and the cheese is bubbling with a few browned spots.
  10. Finish. Remove from the oven. Top with fresh basil, a drizzle of olive oil, flaky salt, and any optional finishing touches. Let rest for 2 minutes before slicing.

Pro Tips for the Best Vegan Pizza

  • Cook the mushrooms first. Raw mushrooms release water in the oven and make the pizza soggy. Pre-cooking concentrates their flavor.
  • Get the oven very hot. A pizza stone or preheated baking sheet gives a crisp base. Preheat for at least 30 minutes.
  • Do not overload the pizza. Too many toppings prevent the crust from crisping and the cheese from melting properly.
  • Use a thin layer of sauce. Excess sauce makes the middle soggy. A light coating gives better flavor balance.
  • Pat the tomato slices dry. Dry slices keep the pizza from becoming watery.
  • Add basil after baking. Fresh basil blackens in the oven. Adding it at the end keeps it bright and fragrant.
  • Choose a good melting vegan mozzarella. Look for one that lists coconut oil and starches, which stretch well when heated.

Why This Topping Combination Works

Great pizza is about balance. The tomato sauce brings acidity and sweetness, the cheese brings creaminess and fat, and the mushrooms bring savory depth. Garlic bridges them all with its aromatic warmth. Fresh tomatoes add juicy bursts that cut through the richness.

Mushrooms are especially valuable on vegan pizza because they are high in natural glutamates, the compounds that create the savory taste associated with meat and aged cheese. When browned, they develop an almost meaty flavor and a chewy texture that satisfies without needing meat substitutes.

Tomatoes contribute lycopene, a powerful antioxidant that becomes more bioavailable when cooked with a little olive oil. Garlic provides allicin, studied for its cardiovascular benefits, while mushrooms supply B vitamins, selenium, and a small amount of vitamin D.


Flavor Variations

  • Pesto Mushroom Pizza: Replace the tomato sauce with vegan basil pesto for a fresh, herby, green version.
  • Spicy Arrabbiata Pizza: Add extra chili flakes and sliced fresh chilies to the sauce for a fiery version.
  • White Garlic Pizza: Skip the tomato sauce and spread a garlic cashew cream base instead for a rich white pizza.
  • Rainbow Veggie Pizza: Add sliced bell peppers, red onion, olives, and spinach to the mushrooms for a loaded veggie version.

Nutritional Highlights (Per Serving)

CaloriesProteinCarbsFiberFat
~430 kcal11g60g4g16g

Storage

  • Refrigerator: Store slices in an airtight container for up to 4 days. Reheat in a hot skillet, covered, or in a 400°F (200°C) oven for 6–8 minutes to re-crisp.
  • Freezer: Wrap individual slices tightly and freeze for up to 2 months. Reheat from frozen in a hot oven.
  • Dough: Refrigerate the risen dough for up to 3 days for deeper flavor, or freeze for 2 months. Thaw overnight in the fridge.
  • Toppings: The cooked mushrooms and sauce keep refrigerated for 4 days, so you can assemble pizza on short notice.

Frequently Asked Questions

Can I use store-bought pizza dough?

Yes — many store-bought doughs are vegan. Check the ingredients to confirm they contain no dairy, eggs, or honey. Let it come to room temperature before stretching.

What is the best vegan mozzarella for pizza?

Look for a shreddable vegan mozzarella that melts and stretches. Brands based on coconut oil with starches usually perform best. Homemade cashew mozzarella also works well.

Why is my crust soggy?

The most common causes are too much sauce, wet toppings, or an oven that was not hot enough. Pre-cook the mushrooms, use a thin layer of sauce, and preheat the oven and stone for 30 minutes.

Can I make the crust gluten-free?

Use a good gluten-free pizza flour blend with xanthan gum. The dough will be stickier and requires a shorter rise, so follow the blend’s package directions.

Can I bake this on a regular baking sheet?

Yes. Preheat the sheet in the oven, then slide the pizza on parchment onto it. It will not be quite as crisp as on a stone but still excellent.

Can I make the dough without yeast?

For a quick option, mix 2 cups of flour, 1 tablespoon of baking powder, ½ teaspoon of salt, and ¾ cup of plant yogurt. It makes a softer, flatbread-style crust and takes no rising time.


Tried this recipe? Leave a comment below and let us know how it turned out! Tag us on Instagram and Facebook — we love seeing your plant-powered creations. Looking for more easy vegan dinner recipes? Browse all recipes on Easy Vegan Recipes — new recipes posted every single week!

Vegan Burritos — The Most Satisfying Plant-Based Dinner You Will Make All Week

vegan burritos

There are dinners you make because something filling is needed. And then there are dinners like these Vegan Burritos — the kind that are stuffed so generously with seasoned black beans, fluffy cilantro lime rice, roasted sweet potato, creamy guacamole, and tangy salsa that the first forkful is simultaneously the most satisfying and the most complete bite imaginable, wrapped in a warm, toasted flour tortilla that holds everything together in a way that makes every single element taste better than it would on its own. This is that burrito. The one that rivals any restaurant version. The one that feeds a family from a single batch of filling and makes everyone at the table genuinely happy.

This recipe builds a truly loaded burrito from scratch — seasoned black beans simmered with cumin, smoked paprika, and garlic into a deeply flavored, slightly saucy filling; cilantro lime rice cooked with lime zest and fresh cilantro for bright, fragrant flavor; roasted sweet potato cubes caramelized in the oven until tender and slightly crispy at the edges; and a quick guacamole and pico de gallo that bring freshness and brightness to the rich, substantial filling.

What makes these burritos so outstanding is how each component is seasoned and prepared individually, then assembled together — ensuring every element contributes its own distinct character to the finished burrito rather than blending into a single uniform flavor.

This recipe is 100% vegan, naturally adaptable to gluten-free with corn tortillas, ready in about 45 minutes, and absolutely magnificent wrapped tightly, toasted briefly in a dry pan until the tortilla is golden and slightly crisp, and served immediately while everything inside is still warm.


Recipe Information

Prep TimeCook TimeTotal TimeServingsCalories
15 mins30 mins45 mins4~580 kcal

Ingredients

For the Seasoned Black Beans

  • 2 cans (800g) black beans, drained and rinsed
  • 1 small onion, finely diced
  • 3 cloves garlic, minced
  • 1 tbsp olive oil
  • 1 tsp cumin
  • 1 tsp smoked paprika
  • ½ tsp chili powder
  • ½ tsp salt
  • ¼ cup (60ml) vegetable broth

For the Cilantro Lime Rice

  • 1½ cups (280g) long grain white rice, cooked
  • Zest and juice of 1 lime
  • ¼ cup (15g) fresh cilantro, finely chopped
  • ½ tsp salt

For the Roasted Sweet Potato

  • 2 medium sweet potatoes, peeled and diced into 1.5cm cubes
  • 1 tbsp olive oil
  • ½ tsp cumin
  • ½ tsp smoked paprika
  • Salt and pepper

For the Quick Guacamole

  • 2 ripe avocados
  • 1 tbsp lime juice
  • ¼ tsp salt
  • ¼ tsp garlic powder

For Assembly

  • 4 large flour tortillas (30cm diameter)
  • ½ cup (120g) pico de gallo or fresh salsa
  • ½ cup (120g) vegan sour cream
  • 1 cup (30g) shredded lettuce or cabbage
  • ½ cup (60g) shredded vegan cheddar (optional)

Instructions

  1. Roast the sweet potato. Preheat the oven to 425°F (220°C). Toss the diced sweet potato with olive oil, cumin, smoked paprika, salt, and pepper. Spread on a lined baking sheet and roast for 20–25 minutes until golden and slightly crispy at the edges, flipping halfway.
  2. Cook the black beans. Heat the olive oil in a skillet over medium heat. Add the onion and cook for 4 minutes until softened. Add the garlic, cumin, smoked paprika, and chili powder and cook for 60 seconds. Add the black beans and vegetable broth. Simmer for 8–10 minutes, stirring occasionally, until the beans are thickened and deeply flavored. Season with salt.
  3. Make the cilantro lime rice. In a bowl combine the cooked rice with lime zest, lime juice, fresh cilantro, and salt. Toss to combine evenly.
  4. Make the guacamole. Mash the avocados with the lime juice, salt, and garlic powder until mostly smooth with some texture remaining.
  5. Warm the tortillas. Heat each tortilla in a dry skillet over medium heat for 30 seconds per side until warm and pliable.
  6. Assemble the burritos. Lay a warm tortilla flat. In the lower third of the tortilla layer the rice, black beans, roasted sweet potato, guacamole, pico de gallo, vegan sour cream, and lettuce, leaving a 3cm border on each side.
  7. Fold and roll. Fold the sides of the tortilla inward over the filling, then roll from the bottom up tightly, keeping the sides tucked in as you roll. Press firmly to seal.
  8. Toast and serve. Place the rolled burrito seam-side down in a dry skillet over medium heat and press lightly with a spatula. Cook for 1–2 minutes per side until golden and sealed. Serve immediately.

Pro Tips

  • Do not overfill — a tempting but very common mistake. Too much filling makes the burrito impossible to fold without splitting the tortilla. Stop at two thirds of the capacity the tortilla appears to have.
  • Warm the tortilla before filling — a cold tortilla cracks and tears when rolled. A warm, pliable tortilla folds cleanly and holds the burrito sealed.
  • Toast the finished burrito in a dry pan — this final step seals the seam, crisps the outside slightly, and makes the burrito much easier to eat without unraveling.
  • Season each component individually — a burrito where the rice, beans, and vegetables are each properly seasoned is dramatically better than one where everything is bland and relies on salsa for flavor.

Why Burritos Are the Perfect Plant-Based Meal

The burrito format is one of the most naturally plant-based-friendly meal structures in all of food culture. Its traditional components — beans, rice, vegetables, avocado, salsa, and herbs — are entirely plant-based in their original forms, making vegan burritos not a compromise version of the original but a return to its most authentic expression. Black beans alone provide a remarkable nutritional profile — complete protein, dietary fiber, folate, iron, and magnesium — making a well-made burrito one of the most nutritionally complete single-dish plant-based meals available.


Flavor Variations

  • Sofritas Style Burrito: Replace the black beans with crumbled tofu cooked in a chipotle-tomato sauce for a Chipotle-inspired filling.
  • Fajita Burrito: Add sautéed bell peppers and onions alongside the beans for a fajita-style version with more vegetable substance.
  • Breakfast Burrito: Replace the black beans with scrambled tofu and swap the sweet potato for diced roasted potato for a morning version.

Nutritional Highlights (Per Serving)

CaloriesProteinCarbsFiberFat
~580 kcal18g82g15g20g

Storage

  • Refrigerator: Store assembled, untoasted burritos wrapped tightly in foil for up to 3 days. Reheat in the oven at 375°F (190°C) for 15 minutes or in a skillet until warmed through.
  • Freezer: Wrap assembled burritos tightly in foil then a freezer bag for up to 2 months. Bake from frozen at 375°F (190°C) for 30–35 minutes until heated through.
  • Components separately: Each filling component stores well separately in the refrigerator for up to 4 days — assemble fresh burritos throughout the week in under 5 minutes.

Frequently Asked Questions

Can I make these burritos gluten-free?

Yes — use large corn tortillas or gluten-free flour tortillas. Corn tortillas are smaller and may require two per serving; warm them very thoroughly before rolling as they are more prone to cracking than flour tortillas.

How do I keep the burrito from unraveling?

Three things — warm the tortilla until very pliable, do not overfill, and toast seam-side down immediately after rolling. The heat seals the seam and the toasted exterior holds the burrito together.

Can I meal prep burritos for the week?

Yes — these are outstanding for meal prep. Assemble completely, wrap tightly in foil, and refrigerate for up to 3 days or freeze for up to 2 months. Reheat in the oven for the best result.


Tried this recipe? Leave a comment below and let us know how it turned out! Tag us on Instagram and Facebook — we love seeing your plant-powered creations. Looking for more addictive vegan snack and appetizer recipes? Browse all recipes on Easy Vegan Recipes — new recipes posted every single week!

Vegan Tofu Satay Skewer Bowls — The Most Satisfying Plant-Based Dinner You Will Make All Week

tofu satay skewer bowls

Some dinners feel like a restaurant meal made at home. These Vegan Tofu Satay Skewer Bowls are exactly that — golden, charred-edged tofu skewers brushed with a fragrant lemongrass-and-turmeric marinade, laid over fluffy rice with crisp cucumber, shredded carrot, and red cabbage, and finished with a silky, deeply savory peanut satay sauce that you will want to drink straight from the jar.

Satay is one of Southeast Asia’s most beloved street foods, traditionally made with marinated grilled meat and served with a rich peanut dipping sauce. This plant-based version keeps everything that makes satay so addictive — the smoky char, the warm spices, the sweet-salty-tangy peanut sauce — and swaps the meat for firm tofu that has been pressed, marinated, and baked or pan-seared until the edges turn crisp and caramelized.

What makes these bowls work so well is contrast. The tofu is chewy and crisp at the edges, tender inside. The vegetables are cold, crunchy, and fresh. The rice is warm and soft. The peanut sauce is creamy, glossy, and bright with lime. Every forkful has something different going on, and nothing feels heavy.

They are also ideal for meal prep: the marinade, sauce, and pickled vegetables all keep for days, so you can assemble a fresh bowl in minutes on a busy weeknight.

This recipe is 100% vegan, easily gluten-free, packed with plant-based protein, and ready in about 35 minutes plus a short marinating time.


Recipe Information

Prep TimeCook TimeTotal TimeServingsCalories
15 mins20 mins35 mins (+ 30 mins marinating)4~540 kcal

Ingredients

For the Tofu Skewers

  • 2 blocks (700g total) extra-firm tofu, pressed for 20 minutes and cut into 2cm cubes
  • 3 tbsp soy sauce or tamari
  • 2 tbsp maple syrup
  • 2 tbsp lime juice
  • 2 tbsp neutral oil
  • 3 cloves garlic, minced
  • 1 tbsp fresh ginger, grated
  • 1 stalk lemongrass, white part finely minced (or 1 tsp lemongrass paste)
  • 1 tsp ground turmeric
  • 1 tsp ground coriander
  • ½ tsp ground cumin
  • ¼ tsp chili flakes
  • 12 bamboo skewers, soaked in water for 20 minutes

For the Peanut Satay Sauce

  • ½ cup (130g) natural smooth peanut butter
  • 1 cup (240ml) full-fat coconut milk
  • 2 tbsp soy sauce or tamari
  • 2 tbsp maple syrup
  • 2 tbsp lime juice
  • 1 tbsp rice vinegar
  • 2 cloves garlic, minced
  • 1 tsp fresh ginger, grated
  • 1 tsp sriracha or chili garlic sauce (adjust to taste)
  • 2–4 tbsp warm water, to thin

For the Bowls

  • 3 cups (600g) cooked jasmine or basmati rice
  • 1 large cucumber, thinly sliced
  • 2 carrots, shredded or cut into ribbons
  • 2 cups (150g) red cabbage, finely shredded
  • 1 cup (150g) shelled edamame, cooked
  • 1 red bell pepper, thinly sliced
  • 4 spring onions, sliced

To Garnish

  • ¼ cup roasted peanuts, roughly chopped
  • Fresh cilantro or Thai basil
  • Lime wedges
  • Sesame seeds
  • Extra chili flakes

Instructions

  1. Press the tofu. Wrap the tofu blocks in a clean kitchen towel, place a heavy pan or a stack of books on top, and press for 20 minutes. Removing excess water is what allows the tofu to absorb the marinade and crisp up properly instead of steaming.
  2. Mix the marinade. In a large bowl whisk together the soy sauce, maple syrup, lime juice, oil, garlic, ginger, lemongrass, turmeric, coriander, cumin, and chili flakes until smooth.
  3. Marinate the tofu. Cut the pressed tofu into 2cm cubes and gently toss in the marinade until every piece is coated. Let sit for at least 30 minutes, or up to 4 hours in the refrigerator, turning once.
  4. Make the peanut sauce. Whisk the peanut butter, coconut milk, soy sauce, maple syrup, lime juice, rice vinegar, garlic, ginger, and sriracha together in a small saucepan over low heat. Stir for 3–4 minutes until smooth, warm, and glossy. Thin with warm water one tablespoon at a time until it falls from a spoon in a thick ribbon. Taste and adjust — more lime for brightness, more maple for sweetness, more sriracha for heat.
  5. Thread the skewers. Thread 4–5 tofu cubes onto each soaked skewer, leaving a little space between pieces so the heat can reach every side. Reserve the leftover marinade for basting.
  6. Cook the skewers. Oven: bake at 425°F (220°C) on a parchment-lined tray for 20–25 minutes, turning once and brushing with marinade halfway, until deeply golden and crisp at the edges. Grill or grill pan: cook over medium-high heat for 4–5 minutes per side until charred in places. Air fryer: cook at 400°F (200°C) for 12–14 minutes, turning once.
  7. Prep the vegetables. While the tofu cooks, slice the cucumber, shred the carrots and cabbage, slice the bell pepper, and cook the edamame according to package directions. Keeping everything crisp and cold is part of what makes these bowls so good.
  8. Assemble the bowls. Divide the warm rice between four bowls. Arrange the cucumber, carrot, cabbage, edamame, and bell pepper in neat sections on top. Lay three skewers across each bowl.
  9. Finish and serve. Drizzle generously with the warm peanut satay sauce and scatter with chopped peanuts, spring onions, cilantro, and sesame seeds. Serve with lime wedges and extra sauce on the side.

Pro Tips for the Best Tofu Satay Bowls

  • Press the tofu properly. Twenty minutes of pressing makes the difference between crisp, flavorful tofu and soggy, bland tofu. A tofu press is helpful but a towel and a heavy pan work just as well.
  • Choose extra-firm tofu. Firm and silken varieties fall apart on skewers. Extra-firm holds its shape through marinating, threading, and cooking.
  • Soak the skewers. Bamboo skewers soaked for 20 minutes will not scorch under the grill or in a hot oven.
  • Baste halfway through. Brushing the tofu with leftover marinade midway builds a sticky, caramelized glaze that mimics the char of traditional satay.
  • Warm the sauce just before serving. Peanut sauce thickens as it cools. Gently reheat with a splash of water or coconut milk to bring back that silky drizzle.
  • Use natural peanut butter. Peanut butter made from just peanuts and salt gives a cleaner, richer flavor and a smoother sauce than sweetened commercial brands.

Why This Bowl Is Packed With Plant-Based Nutrition

Tofu is one of the most complete plant proteins available. A single serving of these bowls delivers around 28 grams of protein, with all nine essential amino acids, plus meaningful amounts of calcium, iron, and manganese. Tofu also contains isoflavones, which have been studied for cardiovascular and bone health benefits.

Peanuts add monounsaturated fats, vitamin E, niacin, and a further boost of protein, while the coconut milk contributes medium-chain triglycerides for quick energy. Edamame adds fiber, folate, and vitamin K. The raw vegetables — cabbage, carrot, cucumber, and bell pepper — provide vitamin C, beta-carotene, and hydration, and their crunch makes the bowl more filling without extra calories.

Turmeric and ginger in the marinade bring natural anti-inflammatory compounds, and the lime juice improves absorption of the plant-based iron in the tofu and edamame.


Flavor Variations

  • Tempeh Satay Bowls: Swap the tofu for steamed and cubed tempeh for a nuttier, firmer, more protein-dense version.
  • Cauliflower Satay Bowls: Use thick cauliflower steaks or large florets in place of tofu for a lighter, naturally gluten-free option.
  • Noodle Satay Bowls: Replace the rice with rice noodles or soba and toss with a little of the peanut sauce for a cold noodle bowl.
  • Mushroom Satay Skewers: Thread king oyster or large shiitake mushrooms for a meaty, umami-rich alternative.

Nutritional Highlights (Per Serving)

CaloriesProteinCarbsFiberFat
~540 kcal28g54g9g24g

Storage

  • Refrigerator: Store the cooked tofu, rice, vegetables, and sauce in separate airtight containers for up to 4 days. Keeping the components separate preserves the crunch of the vegetables and the crispness of the tofu.
  • Peanut sauce: Keeps in a sealed jar in the refrigerator for up to 7 days. Reheat gently with a splash of water before using.
  • Freezer: The cooked tofu skewers freeze well for up to 2 months. The sauce also freezes beautifully. Thaw overnight in the refrigerator and re-crisp the tofu in a hot oven or air fryer.
  • Meal prep: Marinate the tofu and make the sauce on Sunday, then assemble fresh bowls in under 10 minutes through the week.

Frequently Asked Questions

Can I make these skewers without a grill?

Yes — the oven and air fryer methods both produce crisp, golden tofu with caramelized edges. A grill pan on the stovetop also works very well.

Can I make this recipe nut-free?

Replace the peanut butter with sunflower seed butter or tahini. Use toasted pumpkin seeds instead of chopped peanuts. The flavor will differ slightly but the sauce will still be rich and creamy.

How do I stop the tofu from falling apart on the skewers?

Use extra-firm tofu, press it thoroughly, and cut it into larger 2cm cubes. Thread gently through the center of each piece rather than near an edge.

Is this recipe gluten-free?

It is when you use tamari instead of soy sauce and serve it over rice. Always check labels on sriracha and peanut butter for hidden gluten.

Can I use store-bought satay sauce?

Yes, but check the label — many contain fish sauce or honey. The homemade sauce takes five minutes and tastes noticeably fresher and richer.

What can I serve alongside these bowls?

Try quick-pickled cucumbers, a simple miso soup, or crispy vegan spring rolls. A cold lime-and-mint drink goes beautifully with the peanut sauce.


Tried this recipe? Leave a comment below and let us know how it turned out! Tag us on Instagram and Facebook — we love seeing your plant-powered creations. Looking for more satisfying vegan bowls and dinner recipes? Browse all recipes on Easy Vegan Recipes — new recipes posted every single week!
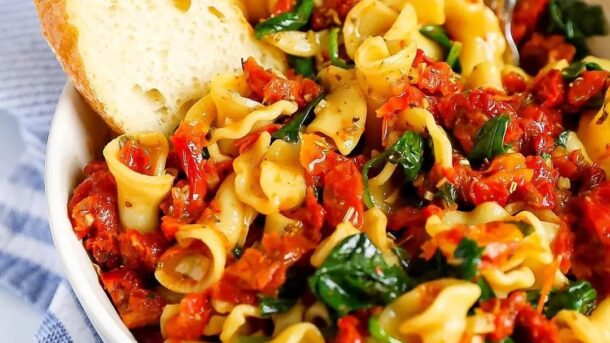
Creamy Vegan Tuscan Pasta with Sun-Dried Tomatoes and Spinach — The Most Comforting Plant-Based Pasta You Will Make All Week

Unknown 306684865 824264728566611 2962685386403606298 N 1 610x343

Creamy, garlicky, and packed with sun-dried tomatoes and tender spinach, this Vegan Tuscan Pasta is the kind of dinner that tastes like a restaurant special but comes together in a single pan in about 30 minutes. A silky, dairy-free cream sauce coats every strand of pasta, with bursts of tangy sun-dried tomato, wilted greens, and a hint of smoky paprika and Italian herbs that make each forkful rich and deeply satisfying.

Tuscan-style dishes are inspired by the rustic, flavorful cooking of Tuscany, where simple ingredients are treated with respect. Sun-dried tomatoes, garlic, olive oil, fresh herbs, and leafy greens appear again and again, and this pasta brings those flavors together in a creamy sauce that feels indulgent without being heavy.

The secret to the sauce is a blend of full-fat coconut milk and nutritional yeast, thickened with a little cornstarch and boosted by the oil from the sun-dried tomato jar. The result is velvety, cheesy, and tangy, with none of the coconut flavor you might expect. Fresh garlic, a splash of white wine or vegetable broth, and a squeeze of lemon add depth and brightness.

Mushrooms are optional but highly recommended. They add a meaty, savory dimension that makes the dish more filling and satisfying. Serve it with crusty bread and a simple green salad for a complete meal.

This recipe is 100% vegan, easy to make gluten-free, and ready in 30 minutes, making it perfect for busy weeknights and special dinners alike.


Recipe Information

Prep TimeCook TimeTotal TimeServingsCalories
10 mins20 mins30 mins4~520 kcal

Ingredients

For the Pasta

  • 12 oz (340g) penne, rigatoni, or fettuccine
  • 2 tbsp olive oil or oil from the sun-dried tomato jar
  • 8 oz (225g) cremini mushrooms, sliced (optional)
  • ½ cup (75g) sun-dried tomatoes in oil, drained and sliced
  • 5 cloves garlic, minced
  • 5 cups (150g) fresh baby spinach
  • Fresh basil or parsley to finish

For the Creamy Tuscan Sauce

  • 1 can (400ml) full-fat coconut milk
  • ½ cup (120ml) vegetable broth
  • ¼ cup (60ml) dry white wine (or extra vegetable broth)
  • 3 tbsp nutritional yeast
  • 1 tbsp cornstarch mixed with 2 tbsp cold water
  • 1 tbsp lemon juice
  • 1 tsp Italian seasoning
  • 1 tsp smoked paprika
  • ½ tsp onion powder
  • ½ tsp salt, plus more to taste
  • ¼ tsp black pepper
  • ¼ tsp chili flakes (optional)

To Serve

  • Vegan parmesan
  • Fresh basil leaves
  • Chili flakes
  • Toasted pine nuts
  • Lemon wedges
  • Crusty garlic bread

Instructions

  1. Boil the pasta. Cook the pasta in a large pot of well-salted water until al dente, according to package directions. Reserve 1 cup of the pasta water, then drain.
  2. Cook the mushrooms. Heat 1 tablespoon of oil in a large, deep skillet over medium-high heat. Add the mushrooms in a single layer and cook for 5–6 minutes without stirring too often, until deeply golden. Remove half for topping if desired.
  3. Build the flavor. Reduce the heat to medium. Add the remaining oil, sun-dried tomatoes, and garlic and cook for 1–2 minutes until fragrant. Stir in the Italian seasoning, paprika, and chili flakes.
  4. Deglaze. Pour in the white wine and scrape up any browned bits from the pan. Simmer for 1–2 minutes until reduced by half.
  5. Make the sauce. Add the coconut milk, vegetable broth, nutritional yeast, onion powder, salt, and pepper. Bring to a gentle simmer and cook for 4–5 minutes. Stir in the cornstarch slurry and cook for 1–2 minutes more until the sauce thickens enough to coat the back of a spoon.
  6. Wilt the spinach. Add the spinach in handfuls, stirring until wilted, about 1–2 minutes.
  7. Combine. Add the cooked pasta to the sauce and toss to coat. Add reserved pasta water, a splash at a time, until the sauce is silky and clings to the pasta. Stir in the lemon juice.
  8. Taste and adjust. Add more salt, pepper, lemon, or nutritional yeast as needed. The sauce should taste creamy, savory, tangy, and balanced.
  9. Serve. Divide among bowls and top with basil, vegan parmesan, chili flakes, and any reserved mushrooms. Serve right away while the sauce is at its creamiest.

Pro Tips for the Creamiest Tuscan Pasta

  • Use full-fat coconut milk. Light coconut milk makes a thin, watery sauce. Full-fat gives richness and body.
  • Use the oil from the sun-dried tomato jar. It is infused with tomato flavor and adds depth to the sauce.
  • Do not overcook the pasta. It continues to soften in the sauce, so pull it a minute early.
  • Save the pasta water. The starch helps the sauce cling and become silky.
  • Add the cornstarch slurry slowly. It thickens fast. Stop when the sauce coats a spoon.
  • Brown the mushrooms properly. Crowding the pan steams them. Cook in batches if needed.
  • Finish with lemon. A little acid cuts through the richness and wakes up all the flavors.

Why This Pasta Is So Satisfying

Creamy pasta works because of the balance between richness, acidity, and savory depth. Coconut milk gives body, nutritional yeast adds a cheesy, nutty umami, sun-dried tomatoes bring concentrated sweetness and tang, and garlic and herbs add aromatic warmth. Lemon and wine brighten everything so the sauce never feels heavy.

Sun-dried tomatoes are especially rich in lycopene, a powerful antioxidant, and the oil they are packed in helps your body absorb it. Spinach provides iron, folate, and vitamins A and K. Nutritional yeast is often fortified with B vitamins, including B12, and mushrooms contribute selenium and extra umami.

Together these ingredients make a pasta that feels indulgent but delivers meaningful nutrition, with about 15 grams of plant-based protein per serving.


Flavor Variations

  • Tuscan Pasta with White Beans: Stir in a can of drained cannellini beans for extra protein and a creamy texture.
  • Roasted Red Pepper Tuscan Pasta: Add chopped jarred roasted red peppers for sweetness and a smoky edge.
  • Tuscan Gnocchi: Swap the pasta for pan-fried potato gnocchi for a soft, pillowy version.
  • Spicy Tuscan Pasta: Add extra chili flakes and a spoonful of calabrian chili paste for a fiery version.

Nutritional Highlights (Per Serving)

CaloriesProteinCarbsFiberFat
~520 kcal15g68g6g20g

Storage

  • Refrigerator: Store in an airtight container for up to 4 days. The sauce thickens as it chills.
  • Reheating: Warm gently in a pan with a splash of plant milk or broth, stirring until creamy again.
  • Freezer: Cream-based pasta does not freeze perfectly, but the sauce alone freezes well for up to 2 months. Add freshly cooked pasta when reheating.
  • Meal prep: Cook the pasta slightly under al dente, since it will soften when reheated.

Frequently Asked Questions

Can I make this pasta without coconut milk?

Yes. Use unsweetened oat cream, soy cream, or a cashew cream made from soaked cashews blended with water. The flavor will be slightly milder and equally creamy.

Does this taste like coconut?

Not noticeably. The garlic, sun-dried tomatoes, herbs, and nutritional yeast overpower the coconut flavor, leaving a rich, savory cream sauce.

What can I use instead of white wine?

Use vegetable broth with a teaspoon of lemon juice or white wine vinegar to keep the acidity and depth.

Can I make this gluten-free?

Use gluten-free pasta and check that the broth and seasonings are certified gluten-free. Cook the pasta slightly less to avoid mushiness.

Can I add vegan sausage or chicken?

Yes. Sliced vegan Italian sausage or plant-based chicken strips work wonderfully. Brown them first and add them back with the pasta.

What pasta shape works best?

Short shapes like penne, rigatoni, and fusilli hold the sauce well. Long pasta like fettuccine or linguine is also excellent.


Tried this recipe? Leave a comment below and let us know how it turned out! Tag us on Instagram and Facebook — we love seeing your plant-powered creations. Looking for more easy vegan pasta and dinner recipes? Browse all recipes on Easy Vegan Recipes — new recipes posted every single week!

Vegan Spicy Jalapeno Tofu Bowls

vegan spicy jalapeno tofu bowls

There are dinners you make because something quick and satisfying is needed. And then there are dinners like these Vegan Spicy Jalapeño Tofu Bowls — the kind that combine crispy golden tofu coated in a fiery, glossy jalapeño sauce with fluffy rice, crunchy fresh vegetables, and a cooling dollop of avocado or vegan crema, building one of the most genuinely exciting and balanced bowls you will make all week. This is that bowl. The one where every element pulls its own weight — heat, crunch, freshness, and richness all present simultaneously. The one that disappears the moment it is set on the table.

This recipe coats crispy pan-fried tofu in a vibrant sauce built on fresh jalapeño, garlic, lime, and a touch of honey-style maple syrup, served over rice with fresh vegetables and a cooling element to balance the heat. It is a build-your-own bowl that comes together in well under thirty minutes and delivers genuine restaurant-quality flavor.

What makes this dish so outstanding is the jalapeño sauce — blended fresh rather than cooked down, preserving the bright, grassy heat of the chili and the sharp freshness of lime in a way that a long-simmered sauce never achieves, producing a sauce that tastes alive and vibrant against the rich, crispy tofu.

This recipe is 100% vegan, naturally gluten-free when made with tamari, ready in just 30 minutes, and absolutely wonderful served over steamed rice or quinoa with extra lime wedges alongside.


Recipe Information

Prep TimeCook TimeTotal TimeServingsCalories
15 mins15 mins30 mins4~420 kcal

Ingredients

For the Crispy Tofu

  • 450g firm tofu, pressed and cubed
  • 2 tbsp cornstarch
  • 2 tbsp neutral oil
  • ½ tsp salt

For the Jalapeño Sauce

  • 3 jalapeños, roughly chopped (deseeded for less heat)
  • 4 cloves garlic
  • ¼ cup (15g) fresh cilantro
  • 3 tbsp fresh lime juice
  • 2 tbsp soy sauce or tamari
  • 2 tbsp maple syrup
  • 2 tbsp olive oil
  • 2 tbsp water, to thin

For the Bowls

  • 2 cups (370g) cooked rice
  • 1 cup (175g) corn kernels, fresh or grilled
  • 1 cup (175g) black beans, drained and rinsed
  • 1 avocado, sliced
  • ½ small red onion, thinly sliced
  • ¼ cup (15g) fresh cilantro, chopped
  • 1 lime, cut into wedges

Optional Add-ins

  • Vegan crema or vegan sour cream, drizzled over
  • Pickled jalapeños for extra heat
  • Shredded red cabbage for crunch
  • Crumbled vegan cotija or feta

To Serve

  • Extra lime wedges
  • Tortilla chips alongside
  • Hot sauce for those who want more heat

Instructions

  1. Press and prepare the tofu. Press the tofu for at least 10 minutes to remove excess water. Cut into 2cm cubes and toss with the cornstarch and salt until evenly coated.
  2. Crisp the tofu. Heat the oil in a large skillet over medium-high heat. Add the tofu in a single layer and cook for 3–4 minutes per side, turning occasionally, until golden and crispy on all sides. Remove and set aside.
  3. Make the jalapeño sauce. Place the jalapeños, garlic, cilantro, lime juice, soy sauce, maple syrup, and olive oil in a blender. Blend until mostly smooth, adding water a tablespoon at a time to reach a thick but pourable consistency.
  4. Coat the tofu. Toss the crispy tofu in the jalapeño sauce until evenly coated, reserving a small amount of sauce for drizzling over the finished bowls.
  5. Assemble the bowls. Divide the rice between four bowls. Top each with the jalapeño-coated tofu, corn, black beans, sliced avocado, and red onion.
  6. Finish and serve. Drizzle with the reserved jalapeño sauce, scatter fresh cilantro over the top, and serve with lime wedges alongside.

Pro Tips

  • Press the tofu thoroughly for the crispiest result — excess moisture prevents proper browning.
  • Deseed the jalapeños for a milder sauce, or leave the seeds and membranes in for significantly more heat.
  • Toss the tofu in the sauce just before serving to maintain maximum crispiness.
  • Taste the sauce before using and adjust the lime, maple syrup, or salt to balance the heat to your preference.

Why This Bowl Works So Well

This bowl balances heat, freshness, crunch, and richness in a single dish — the fiery jalapeño sauce is balanced by the cooling avocado, the crispy tofu is balanced by the soft rice and beans, and the bright lime cuts through the richness of everything else. This kind of deliberate balance across multiple sensory dimensions is what makes a bowl meal genuinely satisfying rather than simply a collection of ingredients in a dish.


Flavor Variations

  • Mango Jalapeño Bowls: Add diced fresh mango for a sweet contrast against the spicy tofu.
  • Cilantro Lime Rice Version: Toss the cooked rice with extra lime juice and chopped cilantro before assembling for a more vibrant base.
  • Extra Spicy Version: Leave the jalapeño seeds in and add a fresh serrano pepper to the sauce for serious heat.

Nutritional Highlights (Per Serving)

CaloriesProteinCarbsFiberFat
~420 kcal18g50g11g17g

Storage

  • Refrigerator: Store components separately for up to 4 days. The tofu is best reheated in a hot pan or air fryer to restore crispiness; assemble fresh with cold components like avocado added just before eating.
  • Sauce: The jalapeño sauce keeps in the refrigerator for up to 5 days and is excellent on tacos, grain bowls, or as a dip.
  • Freezer: The crispy tofu can be frozen for up to 1 month; reheat in an air fryer or oven before using.

Frequently Asked Questions

How spicy is this dish?

With seeds removed, the heat is moderate and approachable. Leaving seeds in or adding additional fresh chili significantly increases the heat for those who prefer it spicier.

Can I use a different protein instead of tofu?

Yes — tempeh or chickpeas work well with the same sauce and crisping technique.

Can I make this ahead for meal prep?

Yes — prepare all components and store separately, assembling fresh each day. The tofu reheats best in an air fryer to restore its crispy texture.


Tried this recipe? Leave a comment below and let us know how it turned out! Tag us on Instagram and Facebook — we love seeing your plant-powered creations. Looking for more vibrant vegan bowl and dinner recipes? Browse all recipes on Easy Vegan Recipes — new recipes posted every single week!

Air Fryer Falafel — The Crispiest Plant-Based Falafel You Will Make All Week

307956910 137742138969078 4945838948038305927 N 1 435x343

There are falafels that come out soft and pale and vaguely disappointing. And then there are falafels like this Air Fryer Falafel — the kind that come out of the air fryer shatteringly crispy on the outside, with a crust that genuinely shatters on the first bite, giving way to a vivid green, herb-packed, fluffy interior of such extraordinary freshness and depth that it rivals any falafel from any restaurant you have ever visited. This is that falafel. The one made from dried chickpeas rather than canned — the single most important decision in falafel making. The one that uses generous amounts of fresh herbs, garlic, and spices for a flavor so vivid and so aromatic that the kitchen smells extraordinary from the moment the mixture hits the processor.

This recipe uses the traditional method of soaking dried chickpeas overnight rather than using canned, which is non-negotiable for authentic falafel texture — canned chickpeas are too wet and produce a dense, heavy falafel that falls apart rather than the light, crispy exterior and airy, herb-flecked interior that defines a genuinely great falafel.

What makes this air fryer falafel so outstanding is how it delivers the authentic deep-fried falafel experience with a fraction of the oil — the circulating high heat of the air fryer produces an exterior crunch that is genuinely comparable to deep-frying, while the herb-loaded interior stays vivid green and perfectly textured.

This recipe is 100% vegan, naturally gluten-free, ready in about 30 minutes after soaking, and absolutely magnificent served in warm pita with tahini sauce, pickled vegetables, and fresh herbs.


Recipe Information

Soak TimePrep TimeCook TimeTotal TimeServingsCalories
Overnight15 mins15 mins~8 hours4~280 kcal

Ingredients

For the Falafel

  • 1½ cups (300g) dried chickpeas, soaked overnight in cold water (do NOT use canned)
  • 1 small onion, roughly chopped
  • 4 cloves garlic
  • 1 cup (30g) fresh parsley, packed
  • ½ cup (15g) fresh cilantro, packed
  • 1½ tsp ground cumin
  • 1 tsp ground coriander
  • ½ tsp smoked paprika
  • ¼ tsp cayenne pepper
  • 1 tsp salt
  • ½ tsp black pepper
  • 1 tsp baking powder
  • 2 tbsp chickpea flour or all-purpose flour (only if mixture is too wet)
  • 2 tbsp olive oil for brushing

For the Tahini Sauce

  • 4 tbsp tahini
  • 3 tbsp lemon juice
  • 1 clove garlic, finely grated
  • 4–5 tbsp cold water to thin
  • Salt to taste

To Serve

  • Warm pita bread or flatbread
  • Shredded lettuce or cabbage
  • Sliced tomato and cucumber
  • Pickled red onion or turnip
  • Fresh parsley leaves
  • Extra tahini sauce drizzled over

Instructions

  1. Soak the chickpeas. Place the dried chickpeas in a large bowl and cover with at least double their volume of cold water. Soak overnight or for a minimum of 12 hours. They will roughly double in size. Drain and rinse thoroughly before using.
  2. Make the falafel mixture. Place the drained soaked chickpeas, onion, garlic, parsley, cilantro, cumin, coriander, smoked paprika, cayenne, salt, and pepper in a food processor. Pulse repeatedly — do not blend continuously — until the mixture resembles coarse, slightly crumbly sand with no whole chickpeas remaining but not so fine that it becomes a smooth paste. The texture should hold together when pressed but still feel slightly grainy. Add the baking powder and pulse twice to incorporate. If the mixture seems very wet, add 1–2 tablespoons of flour and pulse again.
  3. Rest the mixture. Transfer to a bowl, cover, and refrigerate for 30 minutes if time allows — this resting period firms the mixture and makes shaping significantly easier.
  4. Shape the falafel. Scoop heaped tablespoons of the mixture and shape into balls or flat patties approximately 4cm in diameter. Press firmly — they should hold their shape cleanly when placed on a surface.
  5. Air fry until crispy. Preheat the air fryer to 375°F (190°C). Brush or spray the falafel generously with olive oil on all sides — this is essential for achieving the crispy exterior. Arrange in a single layer in the basket with space between each piece. Air fry for 12–15 minutes, flipping halfway, until deeply golden and shatteringly crispy on the outside.
  6. Make the tahini sauce. Whisk together the tahini, lemon juice, and grated garlic. Add cold water a tablespoon at a time until the sauce reaches a smooth, drizzleable consistency. Season with salt.
  7. Serve immediately. Serve the hot falafel in warm pita with tahini sauce, fresh vegetables, and herbs while the exterior is at its crispiest.

Pro Tips

  • Use dried soaked chickpeas only — this is the most important rule in falafel making and cannot be bypassed. Canned chickpeas contain too much moisture and produce falafel that is dense, gummy, and falls apart during cooking.
  • Pulse rather than blend — the food processor should produce a coarse, sandy mixture with visible texture rather than a smooth paste. Over-processing produces dense falafel; under-processing produces crumbly falafel that falls apart.
  • Brush generously with oil before air frying — without oil the exterior stays dry rather than crisping into the characteristic golden crust.
  • Do not overcrowd the basket — every piece needs direct exposure to circulating hot air. Work in batches if your air fryer is small.
  • Serve immediately — falafel softens as it cools and is at its peak crispiness within 10 minutes of cooking.

The History of Falafel

Falafel is one of the most ancient and most beloved street foods in the Middle East, with a history that stretches back centuries through the culinary traditions of Egypt, the Levant, and the broader Arab world. The precise origin is contested — Egypt, Israel, Lebanon, and Palestine all claim falafel as their own — but the preparation’s roots in the Coptic Christian tradition of Egypt, where it was made with fava beans as a meat substitute during Lent, are well-documented and widely accepted as the oldest form of the dish.

The word falafel is believed to derive from the Arabic word for pepper or spice, reflecting the generously seasoned nature of the preparation. As it spread through the Middle East and eventually the world, the fava bean original gave way to chickpeas as the primary ingredient in most regional traditions, and the preparation became one of the most widely eaten street foods on the planet — equally beloved in Jerusalem, Cairo, Beirut, Berlin, London, and New York.

This air fryer version honors every element of the traditional preparation — the dried chickpea base, the generous fresh herbs, the aromatics — while using modern technology to deliver the characteristic crispy exterior with significantly less oil than traditional deep frying.


Flavor Variations

  • Extra Herb Falafel: Double the parsley and add a handful of fresh mint for a more intensely green, herbaceous version.
  • Spicy Falafel: Increase the cayenne and add a diced fresh chili to the processor for a version with building heat throughout.
  • Beet Falafel: Add a small cooked beetroot to the processor for a dramatically pink falafel with a slightly sweeter, earthier flavor.

Nutritional Highlights (Per Serving — 4 falafel)

CaloriesProteinCarbsFiberFat
~280 kcal12g34g9g11g

Storage

  • Best fresh: Falafel is at its crispiest within 10 minutes of cooking. Serve immediately whenever possible.
  • Refrigerator: Store cooked falafel in an airtight container for up to 4 days. Reheat in the air fryer at 375°F (190°C) for 4–5 minutes to restore crispiness.
  • Freezer: Freeze uncooked shaped falafel on a tray until solid then transfer to a freezer bag for up to 2 months. Air fry directly from frozen, adding 3–4 extra minutes.
  • Mixture: The uncooked falafel mixture keeps in the refrigerator for up to 2 days before shaping and cooking — make a large batch and cook fresh portions daily.

Frequently Asked Questions

Can I bake these instead of air frying?

Yes — brush generously with oil and bake at 425°F (220°C) for 20–25 minutes, flipping halfway. The result is slightly less crispy than air fried but still excellent.

Why is my falafel falling apart?

Falafel that falls apart is almost always caused by using canned chickpeas instead of soaked dried chickpeas, or by over-processing to a paste rather than a coarse, sandy texture. The mixture should feel grainy and slightly crumbly but hold together firmly when pressed.

Can I make the mixture ahead?

Yes — the falafel mixture improves with overnight refrigeration as the flavors meld and the mixture firms. Make the mixture the night before and shape and cook fresh the next day for the best result.


Tried this recipe? Leave a comment below and let us know how it turned out! Tag us on Instagram and Facebook — we love seeing your plant-powered creations. Looking for more addictive vegan snack and appetizer recipes? Browse all recipes on Easy Vegan Recipes — new recipes posted every single week!

TOFU AND MUSHROOM CHEEZY FLORENTINE

tofu and mushroom cheezy florentine

There are dinners you make because something needs to be on the table. And then there are dinners like this Tofu and Mushroom Cheezy Florentine — the kind that comes together in one pan, bubbling with a creamy, cheesy spinach sauce studded with golden mushrooms and tender tofu, deeply savory and satisfying enough to make anyone forget there is no dairy or eggs anywhere in the dish. This is that dinner. The one that turns a handful of simple ingredients into something that tastes genuinely indulgent. The one that gets requested again before the leftovers are even finished.

Florentine, in classical cooking, refers to dishes prepared with spinach, often bound in a rich, creamy sauce. This plant-based version combines that beloved spinach and cream pairing with seared mushrooms and pan-fried tofu, all brought together in a cashew-based cheese sauce that thickens beautifully and coats every component in deeply savory richness.

What makes this dish so outstanding is the layering of textures and flavors — crisp-edged tofu, deeply golden mushrooms, and silky wilted spinach all bound together in a sauce that tastes remarkably close to a classic cream and cheese florentine, without a trace of dairy.

This recipe is 100% vegan, naturally gluten-free, ready in about 35 minutes, and absolutely wonderful served over rice, pasta, or simply with crusty bread to soak up every bit of the sauce.


Recipe Information

Prep TimeCook TimeTotal TimeServingsCalories
10 mins25 mins35 mins4~340 kcal

Ingredients

For the Tofu and Mushrooms

  • 400g firm or extra firm tofu, pressed and cubed
  • 250g mushrooms (cremini or button), sliced
  • 2 tbsp olive oil, divided
  • 1 tsp soy sauce
  • Salt and black pepper to taste

For the Cheezy Florentine Sauce

  • 1 cup (130g) raw cashews, soaked in boiling water for 20 minutes then drained
  • 1½ cups (360ml) vegetable broth
  • 4 tbsp nutritional yeast
  • 4 cloves garlic, minced
  • 1 tbsp lemon juice
  • ½ tsp onion powder
  • ¼ tsp nutmeg
  • ½ tsp salt
  • ¼ tsp white pepper

For the Spinach

  • 5 cups (150g) fresh spinach, roughly chopped
  • 1 small onion, finely diced

Optional Add-ins

  • ¼ tsp chili flakes for gentle heat
  • ½ cup (60g) shredded vegan mozzarella stirred in at the end
  • Sun-dried tomatoes, chopped

To Serve

  • Crusty bread
  • Steamed rice or pasta
  • Fresh parsley, chopped

Instructions

  1. Press and cube the tofu. Press the tofu for at least 10 minutes to remove excess water, then cut into 2cm cubes.
  2. Sear the tofu. Heat 1 tablespoon of olive oil in a large skillet over medium-high heat. Add the tofu cubes and cook for 6–8 minutes, turning occasionally, until golden on most sides. Drizzle with soy sauce in the final minute of cooking. Remove and set aside.
  3. Sear the mushrooms. In the same pan, heat the remaining oil and add the mushrooms in a single layer. Sear undisturbed for 2–3 minutes before stirring, then continue cooking for another 2–3 minutes until deeply golden. Season with salt and pepper and remove from the pan.
  4. Cook the onion and spinach. Add the diced onion to the pan and cook for 3–4 minutes until softened. Add the spinach in batches, stirring until wilted, about 2–3 minutes total.
  5. Make the cheese sauce. Blend the drained cashews, vegetable broth, nutritional yeast, garlic, lemon juice, onion powder, nutmeg, salt, and white pepper until completely smooth.
  6. Combine everything. Pour the cashew sauce into the pan with the spinach and onion. Add the seared mushrooms and tofu back to the pan. Stir gently to combine and simmer for 4–5 minutes until the sauce has thickened slightly and everything is heated through.
  7. Serve immediately. Garnish with fresh parsley and serve hot over rice, pasta, or with crusty bread.

Pro Tips

  • Press the tofu thoroughly before cooking to ensure it sears properly rather than steaming in the pan.
  • Sear the tofu and mushrooms separately to give each enough space to brown properly.
  • Blend the cashew sauce until completely smooth for the silkiest texture.
  • Taste and adjust seasoning generously, as the sauce needs to flavor the entire dish.

Why This Combination Works

Tofu provides protein and a satisfying bite once properly seared, mushrooms contribute deep umami richness, and spinach adds the classic florentine character along with color and nutrients. Bound together in a rich cashew cheese sauce, these components create a dish that is balanced in texture and deeply satisfying in flavor.


Flavor Variations

  • Florentine Pasta Bake: Toss the finished dish with cooked pasta and bake with a breadcrumb topping for a baked pasta version.
  • Spicy Florentine: Add chili flakes or a diced jalapeño for gentle heat throughout.
  • Mushroom Lovers Version: Double the mushrooms and use a mix of varieties for extra depth.

Nutritional Highlights (Per Serving)

CaloriesProteinCarbsFiberFat
~340 kcal18g18g5g22g

Storage

  • Refrigerator: Store in an airtight container for up to 4 days. Reheat gently on the stovetop, adding a splash of broth if the sauce has thickened too much.
  • Freezer: Freezes reasonably well for up to 2 months, though the tofu texture softens slightly after thawing.

Frequently Asked Questions

Can I use a different protein instead of tofu?

Yes — tempeh or chickpeas can be substituted for a different texture and flavor.

Can I make this without a blender?

Yes — use store-bought vegan cream cheese thinned with broth and seasoned with the same garlic and nutritional yeast as an alternative base.

Can I add pasta directly into this dish?

Yes — toss cooked pasta directly into the finished sauce for a complete one-pan meal.


Tried this recipe? Leave a comment below and let us know how it turned out! Tag us on Instagram and Facebook — we love seeing your plant-powered creations. Looking for more comforting vegan dinner recipes? Browse all recipes on Easy Vegan Recipes — new recipes posted every single week!

Vegan Glazed Mushrooms with Sesame Seeds and Garlic Soy Glaze — The Most Addictive Plant-Based Side Dish You Will Make All Week

303413824 810681383678732 4897463673899747932 N 1 477x343

Sticky, savory, and deeply caramelized, these Vegan Glazed Mushrooms with Sesame Seeds are the kind of dish that disappears from the pan before it reaches the table. Meaty mushrooms are seared until golden and then tossed in a glossy garlic, ginger, and soy glaze that clings to every surface, finished with toasted sesame seeds and fresh spring onions for a bite that is salty, sweet, and full of umami.

Mushrooms are one of the most versatile ingredients in plant-based cooking. They have a naturally meaty texture and a deep, savory flavor that takes beautifully to bold sauces. When cooked properly, they brown, shrink, and concentrate, turning into tender, chewy morsels that soak up flavor like a sponge. This recipe is built around that idea: sear first for depth, then glaze for stickiness.

The glaze is simple but balanced. Soy sauce brings salt and umami, maple syrup adds sweetness and shine, rice vinegar gives a little brightness, and garlic and ginger provide aromatic punch. A touch of toasted sesame oil at the end adds a nutty fragrance. Cornstarch thickens the sauce just enough to cling in a lacquer-like coat rather than pooling at the bottom of the pan.

Serve these mushrooms as a main over steamed rice or noodles, tuck them into lettuce cups or buns, add them to grain bowls, or put them out as an appetizer with toothpicks. They work equally well for a quick weeknight dinner and for holiday entertaining.

This recipe is 100% vegan, easily gluten-free, and ready in just 20 minutes.


Recipe Information

Prep TimeCook TimeTotal TimeServingsCalories
5 mins15 mins20 mins4~180 kcal

Ingredients

For the Mushrooms

  • 1 lb (450g) cremini, shiitake, or king oyster mushrooms, cleaned and halved or quartered (king oyster sliced into thick rounds)
  • 2 tbsp neutral oil (avocado or sunflower)
  • 3 cloves garlic, minced
  • 1 tbsp fresh ginger, grated
  • 1 tbsp toasted sesame seeds, plus extra for garnish
  • 2 spring onions, sliced
  • ½ tsp salt

For the Sticky Glaze

  • 3 tbsp soy sauce or tamari
  • 2 tbsp maple syrup
  • 1 tbsp rice vinegar
  • 1 tbsp toasted sesame oil
  • 1 tsp cornstarch mixed with 2 tbsp water
  • ¼ tsp chili flakes (optional)
  • Black pepper to taste

To Serve

  • Steamed jasmine rice
  • Noodles or rice noodle bowls
  • Lettuce cups
  • Roasted broccoli or bok choy
  • Pickled cucumbers

Optional Additions

  • 1 tsp sriracha or chili crisp
  • 1 tbsp orange juice for brightness
  • Fresh cilantro
  • Crispy fried shallots
  • A squeeze of lime juice

Instructions

  1. Prepare the mushrooms. Wipe the mushrooms clean with a damp paper towel rather than rinsing, which makes them waterlogged. Cut into evenly sized pieces so they cook uniformly.
  2. Mix the glaze. In a small bowl combine the soy sauce, maple syrup, rice vinegar, sesame oil, chili flakes, and pepper. In another small bowl mix the cornstarch with cold water until smooth.
  3. Sear the mushrooms. Heat the oil in a large skillet over medium-high heat until shimmering. Add the mushrooms in a single layer, working in batches if needed. Cook without stirring for 3–4 minutes until the undersides are deeply golden, then toss and cook for another 3–4 minutes until browned all over and their moisture has evaporated. Season with salt.
  4. Add the aromatics. Reduce the heat to medium. Add the garlic and ginger and stir for 30–60 seconds until fragrant, taking care not to burn them.
  5. Glaze. Pour in the glaze mixture and let it bubble for 1 minute. Give the cornstarch slurry a quick stir and pour it in, stirring constantly. Cook for 1–2 minutes until the sauce thickens and turns glossy, coating the mushrooms in a sticky lacquer.
  6. Finish. Remove from the heat. Stir in the sesame seeds and half the spring onions.
  7. Serve. Transfer to a serving dish. Top with the remaining spring onions and sesame seeds. Serve immediately while hot and glossy.

Pro Tips for the Best Glazed Mushrooms

  • Do not crowd the pan. Overcrowding steams the mushrooms instead of browning them. Cook in batches for the best color and flavor.
  • Do not salt too early. Salt draws out moisture. Add it once they have started browning.
  • Wait before stirring. Letting the mushrooms sit undisturbed gives them time to develop a deep golden crust.
  • Use a hot pan. A properly heated skillet evaporates moisture fast, concentrating flavor.
  • Add the glaze last. Adding sauce too early prevents browning and makes the mushrooms soggy.
  • Toast the sesame seeds. A minute in a dry pan deepens their nutty flavor. Watch carefully so they do not burn.
  • Choose firm, fresh mushrooms. They brown better and have a better texture.

Why Mushrooms Are Perfect for Glazing

Mushrooms contain natural glutamates, the compounds responsible for the savory taste known as umami. When seared, they undergo the Maillard reaction and caramelization, creating deeper, more complex flavors. This is why browned mushrooms taste so rich and almost meaty, even without any meat.

Their porous structure also helps them hold sauce. After searing, they release most of their water and become receptive to a glaze, absorbing flavor while keeping a satisfying chew. That is why this dish tastes so concentrated and savory.

Nutritionally, mushrooms are low in calories yet provide B vitamins, selenium, potassium, and copper. Sesame seeds add calcium, magnesium, and healthy fats, while garlic and ginger contribute compounds studied for their anti-inflammatory and immune-supporting properties.


Flavor Variations

  • Spicy Gochujang Mushrooms: Replace half the soy sauce with gochujang for a sweet, spicy Korean-inspired glaze.
  • Orange Glazed Mushrooms: Add orange juice and zest to the glaze for a citrusy, sticky finish.
  • Teriyaki Mushrooms: Use a little extra maple syrup and mirin for a classic teriyaki style.
  • Honey-Free Garlic Butter Version: Use vegan butter and extra garlic, with a splash of balsamic for a rich western-style side.

Nutritional Highlights (Per Serving)

CaloriesProteinCarbsFiberFat
~180 kcal5g16g3g10g

Storage

  • Refrigerator: Store in an airtight container for up to 4 days. The glaze will thicken as it cools.
  • Reheating: Warm in a skillet over medium heat with a splash of water or broth, stirring until glossy again.
  • Freezer: Freeze for up to 2 months. Texture will soften slightly after thawing, so they are best for rice bowls or stir-fries.
  • Meal prep: Pair with rice and steamed vegetables for easy grab-and-go lunches.

Frequently Asked Questions

What type of mushrooms work best?

Cremini and shiitake are excellent for their flavor and texture. King oyster mushrooms, sliced into rounds or scored, create a meaty bite. A mixture of mushrooms gives the most depth.

Why are my mushrooms soggy?

Soggy mushrooms usually come from a crowded pan, low heat, or adding sauce too early. Use high heat, work in batches, and glaze at the end.

Can I make this gluten-free?

Use tamari or coconut aminos instead of soy sauce, and check the label on your rice vinegar and chili flakes.

Can I roast the mushrooms instead?

Yes. Roast at 425°F (220°C) for 20–25 minutes until browned, then toss with the glaze in a hot pan for 1–2 minutes to thicken.

Can I make this oil-free?

Dry-sauté the mushrooms in a non-stick pan until they release and evaporate their water, then add the glaze. They will be less browned but still flavorful.

How can I serve glazed mushrooms as a main?

Spoon over rice, noodles, or quinoa, and add steamed greens and a protein such as edamame or crispy tofu for a complete meal.


Tried this recipe? Leave a comment below and let us know how it turned out! Tag us on Instagram and Facebook — we love seeing your plant-powered creations. Looking for more easy vegan sides and mains? Browse all recipes on Easy Vegan Recipes — new recipes posted every single week!