Creamy mushroom toasts with rich, savory flavor and crispy bread. Moreover, they are easy to make and perfect for breakfast or brunch.
🧾 Ingredients (Serves 4)
8 slices bread (sourdough or whole wheat)
2 cups mushrooms (button or cremini, sliced)
1 small onion (finely chopped)
2 cloves garlic (minced)
2 tbsp olive oil or butter
1 tbsp all-purpose flour
1 cup milk or plant-based milk
½ tsp salt
½ tsp black pepper
½ tsp dried thyme or oregano
Fresh parsley for garnish
👩🍳 Instructions
First, toast the bread slices until golden and crisp. Set aside. Next, heat oil or butter in a pan over medium heat. Add onion and sauté until soft.
Then, add mushrooms and cook for 5–7 minutes until they release moisture and turn golden. After that, stir in garlic, flour, salt, pepper, and herbs. Cook for 30 seconds.
Slowly pour in milk while stirring to avoid lumps. Finally, simmer until the sauce thickens. Spoon creamy mushrooms over toast and garnish with parsley.
⭐ Tips for Perfect Mushroom Toasts
Firstly, use fresh mushrooms for the best texture and flavor. Additionally, cook mushrooms until golden to enhance their umami taste. Moreover, stir constantly when adding milk to keep the sauce smooth. If desired, add a splash of lemon juice for brightness.
🔄 Variations
Cheesy Version: Add grated cheese or nutritional yeast
Garlic Lovers: Add extra garlic or roasted garlic paste
Vegan Option: Use plant-based milk and olive oil
Herb Boost: Add rosemary, thyme, or chives
Spicy Twist: Sprinkle chili flakes or black pepper
💚 Health Benefits
Mushrooms are rich in antioxidants, therefore supporting immune health. Moreover, they are low in calories and high in fiber. Because this dish includes whole grains and healthy fats, it provides sustained energy. As a result, creamy mushroom toasts are a balanced and satisfying meal.
🧒 Kid-Friendly Version
For kids, chop mushrooms very finely or slice thinly. Additionally, use mild seasonings and skip strong herbs. Spread a thinner layer of mushroom mixture for easier eating. Finally, cut toast into fun shapes for added appeal.
Creamy coconut miso chickpea soup packed with flavor and plant-based protein. Moreover, it is vegan, nourishing, and perfect for cozy meals.
🧾 Ingredients (Serves 4)
1 can (400 g) chickpeas, drained and rinsed
1 small onion, finely chopped
2 cloves garlic, minced
1 tbsp fresh ginger, grated
1 tbsp olive oil or coconut oil
3 cups vegetable broth
1 cup coconut milk (full-fat for creaminess)
1½ tbsp white or yellow miso paste
½ tsp turmeric (optional)
½ tsp black pepper
1 cup spinach or bok choy (optional)
Fresh cilantro or spring onions for garnish
👩🍳 Instructions
First, heat oil in a pot over medium heat. Sauté onion until soft and translucent. Next, add garlic and ginger, and cook for 30 seconds until fragrant.
Then, add chickpeas, turmeric, and black pepper. Stir well. After that, pour in vegetable broth and bring to a gentle simmer for 10 minutes.
Meanwhile, dissolve miso paste in a small bowl with warm soup liquid. Finally, stir the miso mixture and coconut milk into the soup. Add spinach if using, cook for 2–3 minutes, and serve warm.
⭐ Tips for Best Flavor
Firstly, never boil the soup after adding miso to preserve its probiotics. Additionally, use full-fat coconut milk for a rich, creamy texture. Moreover, mash a few chickpeas for a thicker, heartier soup. If desired, add a squeeze of lime juice before serving for brightness.
🔄 Variations
Spicy Version: Add chili oil or red pepper flakes
Protein Boost: Add tofu cubes or edamame
Extra Veggies: Include mushrooms, carrots, or zucchini
Low-Fat Option: Use light coconut milk
Noodle Soup: Add rice noodles for a filling meal
💚 Health Benefits
Chickpeas are rich in plant-based protein and fiber, therefore supporting digestion and fullness. Moreover, miso provides beneficial probiotics that support gut health. Because coconut milk contains healthy fats, it helps keep you satisfied longer. As a result, this soup is nourishing, balanced, and comforting.
🧒 Kid-Friendly Version
For kids, use less miso for a milder flavor. Additionally, skip ginger if your child prefers simpler tastes. Mash chickpeas slightly to create a creamy, smooth texture. Finally, serve with rice or soft bread for an easy, comforting meal.
Easy vegan lemon shortbread cookies that are crisp, flavorful, and dairy-free. Therefore, they are perfect for snacks, desserts, or parties.
🧾 Ingredients (Makes 12–15 Cookies)
1½ cups all-purpose flour
½ cup powdered sugar
¼ cup coconut oil or vegan butter, solid
Zest of 1 lemon
1–2 tbsp lemon juice
¼ tsp salt
½ tsp vanilla extract
👩🍳 Instructions
First, preheat the oven to 175°C (350°F) and line a baking tray with parchment paper. Next, in a mixing bowl, combine flour, powdered sugar, lemon zest, and salt.
Then, cut in coconut oil or vegan butter until the mixture resembles coarse crumbs. Add lemon juice and vanilla extract, and mix until a dough forms.
Roll dough into a log (about 1.5 inches thick), wrap in parchment, and chill for 30 minutes. Slice chilled dough into ½-inch thick rounds and place on the baking tray.
Finally, bake for 12–15 minutes until edges are lightly golden. Cool completely before serving.
⭐ Tips for Perfect Cookies
Firstly, chill the dough to prevent spreading during baking. Additionally, use finely grated lemon zest for a more fragrant flavor. Moreover, avoid overbaking to maintain a crisp but tender texture. If desired, drizzle with a simple lemon glaze for extra sweetness and zing.
🔄 Variations
Glazed Version: Mix powdered sugar with lemon juice for a drizzle on top
Almond Twist: Add ¼ cup finely chopped almonds or almond extract
Coconut Flavor: Mix in 2 tbsp desiccated coconut for extra texture
Gluten-Free: Use a 1:1 gluten-free flour blend
Mini Cookies: Make smaller rounds for bite-sized treats
💚 Health Benefits
Lemon zest and juice are rich in vitamin C, therefore supporting immunity. Moreover, using plant-based fat reduces saturated fat content compared to traditional butter cookies. Because they are egg-free and dairy-free, these cookies are easier to digest and suitable for vegan diets. As a result, they are a flavorful, healthier alternative to classic shortbread.
🧒 Kid-Friendly Version
For kids, skip strong lemon juice for a milder flavor. Additionally, slice cookies into fun shapes using cookie cutters. Serve with plant-based milk or a small fruit side for a wholesome snack. Finally, decorate with a light drizzle of vegan glaze or colorful sprinkles for extra appeal.
Easy vegan roasted tomato pasta with roasted garlic and herbs. Therefore, it is healthy, comforting, and perfect for plant-based meals.
🧾 Ingredients (Serves 4)
400 g pasta (spaghetti, penne, or fusilli)
500 g cherry tomatoes or small vine tomatoes
3 cloves garlic (peeled)
2 tbsp olive oil
1 tsp salt
½ tsp black pepper
1 tsp dried oregano or Italian herbs
1 handful fresh basil (chopped)
2 tbsp nutritional yeast (optional, for cheesy flavor)
👩🍳 Instructions
First, preheat the oven to 200°C (400°F). Next, place tomatoes and garlic on a baking sheet. Drizzle with olive oil, sprinkle salt, pepper, and dried herbs. Roast for 20–25 minutes until tomatoes are soft and slightly caramelized.
Meanwhile, cook pasta according to package instructions until al dente. Drain and set aside. Transfer roasted tomatoes and garlic to a blender or use an immersion blender. Blend until smooth for a creamy sauce.
Finally, toss cooked pasta with the roasted tomato sauce, adding fresh basil and nutritional yeast if desired. Serve immediately.
⭐ Tips for Perfect Pasta
Firstly, use ripe tomatoes for maximum sweetness and flavor. Additionally, roast tomatoes long enough to enhance natural sugars and depth. Moreover, reserve a little pasta water to adjust sauce consistency if needed. If desired, add a drizzle of balsamic vinegar for extra tang.
🔄 Variations
Spicy Version: Add red chili flakes to the sauce
Creamy Vegan: Stir in 2–3 tbsp of cashew cream or coconut cream
Protein Boost: Mix in cooked chickpeas or lentils
Vegetable Twist: Add roasted zucchini, bell peppers, or mushrooms
Gluten-Free: Use gluten-free pasta for a completely GF dish
💚 Health Benefits
Tomatoes are rich in antioxidants, particularly lycopene, which supports heart health. Moreover, olive oil and herbs provide healthy fats and anti-inflammatory properties. Because it is plant-based and dairy-free, it is lower in saturated fat than traditional creamy pasta dishes. As a result, this dish is a nutrient-rich, satisfying, and heart-healthy meal.
🧒 Kid-Friendly Version
For kids, skip chili flakes and use milder seasonings. Additionally, chop or blend vegetables finely for smoother sauce. Serve with kid-favorite pasta shapes and a sprinkle of nutritional yeast instead of vegan cheese. Finally, drizzle with extra olive oil or mild plant-based butter for added richness.
There are appetizers you order at restaurants and never think to make at home. And then there are appetizers like these Vegan Spring Rolls — the kind that come out of the oil shatteringly crisp and deeply golden, filled with a savory, garlicky vegetable and glass noodle filling that is simultaneously light and deeply satisfying, served with a dipping sauce so good you will want to use it on everything. This is that spring roll. The one that rivals any restaurant version. The one that makes the effort entirely worth it the moment you bite through that crackling exterior.
This recipe fills rice paper or wheat wrappers with a quick-cooked filling of glass noodles, shredded cabbage, carrot, mushrooms, garlic, and ginger, seasoned with soy sauce and sesame oil, then fried until deeply golden and served with a classic sweet chili or soy-based dipping sauce. Every element is designed to produce the most satisfying spring roll possible — a crispy exterior, a flavorful filling that holds together without being too wet, and a sauce that complements rather than overwhelms.
What makes these spring rolls so outstanding is the filling technique — cooking out as much moisture as possible before rolling ensures the wrappers stay crispy rather than steaming from the inside out, the single most common problem with homemade spring rolls.
This recipe is 100% vegan, ready in about 40 minutes, and absolutely wonderful served immediately while the shells are at their crispiest.
Recipe Information
Prep Time
Cook Time
Total Time
Servings
Calories
20 mins
20 mins
40 mins
4
~280 kcal
Ingredients
For the Filling
100g glass noodles (vermicelli), soaked in warm water for 10 minutes then drained
2 cups (160g) green cabbage, very finely shredded
1 medium carrot, julienned
100g shiitake or cremini mushrooms, finely chopped
3 spring onions, thinly sliced
3 cloves garlic, minced
1 tbsp fresh ginger, grated
2 tbsp soy sauce or tamari
1 tsp sesame oil
1 tbsp neutral oil
Black pepper to taste
For the Rolls
20 spring roll wrappers (rice paper or wheat wrappers)
2 tbsp cornstarch mixed with 3 tbsp water (for sealing)
For Frying
3 cups (720ml) neutral vegetable oil
For the Dipping Sauce
3 tbsp soy sauce
2 tbsp rice vinegar
1 tbsp maple syrup
1 tsp sesame oil
1 clove garlic, grated
½ tsp chili flakes
Instructions
Make the filling. Heat the oil in a large skillet over medium-high heat. Add the garlic and ginger and cook for 30 seconds. Add the mushrooms and cook for 3–4 minutes until golden and most moisture has evaporated. Add the cabbage and carrot and cook for 3–4 minutes until softened. Add the drained glass noodles, soy sauce, sesame oil, and spring onions. Toss well and cook for 2 minutes. Season with pepper. Transfer to a bowl and let cool completely — this step is essential.
Roll the spring rolls. Lay a spring roll wrapper on a clean surface. Place 2–3 tablespoons of filling near the bottom edge. Fold the bottom up over the filling, then fold in both sides, then roll tightly upward. Seal the final edge with a dab of the cornstarch and water mixture. Repeat with remaining wrappers and filling.
Fry the spring rolls. Heat the oil in a deep pot to 350°F (175°C). Fry the spring rolls in batches of 3–4 for 3–4 minutes, turning occasionally, until deeply golden and crispy all over. Drain on a wire rack.
Make the dipping sauce. Whisk together the soy sauce, rice vinegar, maple syrup, sesame oil, garlic, and chili flakes until combined.
Serve immediately. Serve the hot spring rolls with the dipping sauce while at their crispiest.
Pro Tips
Cool the filling completely before rolling — warm filling creates steam inside the wrapper during frying, which softens the exterior instead of crisping it.
Roll tightly and seal well — loose rolls fall apart in the oil and filling leaks into the oil.
Fry at the correct temperature and in small batches to maintain oil temperature throughout.
Drain on a wire rack rather than paper towel to prevent the bottoms from steaming soft.
Why Cooling the Filling Matters So Much
The crispiness of a spring roll depends almost entirely on the moisture content of the filling and the temperature at which it is fried. A warm filling releases steam as it heats in the oil, which softens the wrapper from the inside out and produces a soft rather than crispy result. A completely cooled, properly dried filling does not produce this steam, allowing the wrapper to fry to a shatteringly crispy shell unimpeded.
Flavor Variations
Tofu Spring Rolls: Add finely crumbled, pressed tofu to the filling for extra protein.
Glass Noodle Only Rolls: Reduce the vegetables and increase the noodles for a lighter, more noodle-forward filling.
Fresh Spring Rolls: Skip frying entirely and serve the filling in fresh rice paper rounds with dipping sauce for a lighter, no-cook version.
Nutritional Highlights (Per Serving — 5 rolls)
Calories
Protein
Carbs
Fiber
Fat
~280 kcal
6g
38g
3g
12g
Storage
Best fresh: Spring rolls are at their best immediately after frying while the shells are still shatteringly crispy.
Refrigerator: Store cooked rolls for up to 2 days. Reheat in an air fryer at 375°F (190°C) for 5 minutes to restore crispiness.
Freezer: Freeze unfried, assembled spring rolls on a tray until solid then transfer to a freezer bag for up to 1 month. Fry directly from frozen, adding 1–2 extra minutes.
Frequently Asked Questions
Can I air fry these instead of deep frying?
Yes — spray the assembled rolls generously with oil and air fry at 390°F (200°C) for 12–14 minutes, turning halfway, for a lighter result with most of the crispiness of frying.
What wrappers work best?
Wheat spring roll wrappers produce the crispiest, most traditional result. Rice paper wrappers also work but produce a slightly different, more delicate texture.
Why are my spring rolls soggy?
Soggy spring rolls are almost always caused by filling that was not cooled completely before rolling, filling that was too wet, or oil that was not hot enough. Ensure the filling is completely cool and dry and maintain oil temperature at 350°F throughout frying.
Tried this recipe? Leave a comment below and let us know how it turned out! Tag us on Instagram and Facebook — we love seeing your plant-powered creations. Looking for more crispy vegan appetizer and snack recipes? Browse all recipes on Easy Vegan Recipes — new recipes posted every single week!
Hearty vegan mushroom pot pie with creamy filling and flaky crust. Moreover, it is dairy-free, easy to make, and perfect for family meals.
🧾 Ingredients (Serves 4–6)
Filling
2 cups mushrooms (sliced)
1 cup carrots (diced)
1 cup peas
1 onion (chopped)
2 cloves garlic (minced)
2 tbsp flour (all-purpose or gluten-free)
1½ cups vegetable broth
½ cup coconut milk or plant-based cream
2 tbsp olive oil
1 tsp thyme
½ tsp salt
½ tsp black pepper
Crust
1 sheet vegan puff pastry or 1 batch homemade vegan pie crust
👩🍳 Instructions
First, preheat the oven to 200°C (400°F). Next, heat olive oil in a pan and sauté onions and garlic until translucent. Add carrots and mushrooms and cook for 5–7 minutes.
Then, sprinkle flour over the vegetables and stir well. Gradually add vegetable broth and plant-based cream while stirring until thickened. Season with thyme, salt, and pepper.
Pour the filling into a baking dish. Cover with puff pastry or rolled-out pie crust, sealing the edges. Cut small slits on top for steam to escape.
Finally, bake for 25–30 minutes until the crust is golden and flaky. Serve warm.
⭐ Tips for Best Results
Firstly, use fresh mushrooms for the best flavor. Additionally, do not overcook the filling before baking to maintain texture. Moreover, brush the crust with plant-based milk for a golden, glossy finish. If desired, sprinkle sesame seeds or herbs on top for extra flavor.
🔄 Variations
Cheesy Vegan: Add vegan cheese to the filling before baking
Extra Veggies: Include zucchini, bell peppers, or potatoes
Gluten-Free: Use gluten-free flour and gluten-free puff pastry
Herby Flavor: Add rosemary, sage, or parsley for extra aroma
Mini Pot Pies: Make individual servings using ramekins
💚 Health Benefits
Mushrooms are rich in antioxidants, therefore supporting immune health. Moreover, the filling contains fiber and vitamins from mixed vegetables. Because it is plant-based and dairy-free, it is lighter than traditional pot pies. As a result, it is a nutritious, filling, and comforting meal option.
🧒 Kid-Friendly Version
For kids, chop vegetables finely for easier eating. Additionally, skip strong herbs or spicy ingredients. Use fun-shaped crusts or small ramekins for mini pot pies. Finally, serve with mild vegan gravy or a side of plant-based mashed potatoes.
Moist and creamy vegan chocolate pound cake made without eggs or dairy. Moreover, it is rich, easy to bake, and perfect for family desserts.
🧾 Ingredients (Loaf Pan, Serves 8–10)
1½ cups all-purpose flour
½ cup cocoa powder
1 tsp baking soda
½ tsp baking powder
¼ tsp salt
¾ cup sugar (or coconut sugar)
½ cup plant-based yogurt or cream
½ cup plant-based milk (almond, soy, oat)
½ cup vegetable oil or melted coconut oil
1 tsp vanilla extract
¼ cup dairy-free chocolate chips (optional)
👩🍳 Instructions
First, preheat the oven to 175°C (350°F) and grease a loaf pan. Next, in a bowl, whisk together flour, cocoa powder, baking soda, baking powder, salt, and sugar.
Meanwhile, in another bowl, mix plant-based yogurt, milk, oil, and vanilla extract until smooth. Then, gradually fold wet ingredients into dry ingredients until just combined. Avoid overmixing.
Optionally, fold in chocolate chips for extra richness. Pour the batter into the prepared loaf pan and smooth the top.
Finally, bake for 45–50 minutes or until a toothpick inserted comes out clean. Let it cool before slicing.
⭐ Tips for Best Results
Firstly, avoid overmixing to maintain a soft, tender crumb. Additionally, use room temperature ingredients for even baking. Moreover, sift cocoa powder to prevent lumps. If desired, brush the top with a little plant milk for a shiny crust.
🔄 Variations
Coffee Chocolate Cake: Add 1 tsp instant coffee for a mocha flavor
Nutty Chocolate Cake: Mix in chopped walnuts or pecans
Gluten-Free: Replace flour with a 1:1 gluten-free blend
Chocolate Swirl: Mix a vegan cream cheese for a marbled effect
Orange Chocolate: Add 1 tsp orange zest for a citrusy twist
💚 Health Benefits
This cake is egg-free and dairy-free, therefore easier to digest for sensitive diets. Moreover, cocoa powder provides antioxidants. Because it is plant-based, it contains less saturated fat than traditional chocolate cakes. As a result, it is a slightly lighter, indulgent treat suitable for vegans and families.
🧒 Kid-Friendly Version
For kids, reduce sugar slightly if desired. Additionally, fold in mini chocolate chips for extra fun bites. Serve slices with dairy-free whipped cream or a scoop of plant-based ice cream. Finally, make it in fun cupcake molds for individual portions.
Soft and crispy eggplant patties made with wholesome ingredients. Additionally, they are vegan, healthy, and easy to prepare at home.
🧾 Ingredients (Makes 8–10 Patties)
2 medium eggplants (peeled and grated)
1 small onion (finely chopped)
1 cup breadcrumbs (plus extra for coating)
2 tbsp chickpea flour (for binding)
1 clove garlic (minced)
½ tsp salt
½ tsp black pepper
½ tsp paprika or chili flakes (optional)
1 tbsp olive oil
Fresh parsley or cilantro (chopped, optional)
👩🍳 Instructions
First, sprinkle grated eggplant with a pinch of salt and let it sit for 10–15 minutes. Then, squeeze out excess water using a clean cloth or paper towel. Next, combine the grated eggplant, onion, garlic, breadcrumbs, chickpea flour, herbs, and spices in a large bowl. Mix well.
After that, shape the mixture into small patties. If sticky, chill for 10 minutes to help hold shape. Meanwhile, heat olive oil in a pan over medium heat. Fry patties for 3–4 minutes per side until golden and crispy.
Finally, serve warm with ketchup, vegan yogurt dip, or a salad.
⭐ Tips for Perfect Patties
Firstly, always squeeze out water from eggplant to avoid soggy patties. Additionally, do not overmix the batter to keep patties light. Moreover, use chickpea flour or breadcrumbs for binding instead of eggs. If desired, bake at 200°C (400°F) for 15–20 minutes as a healthier alternative.
🔄 Variations
Cheesy Vegan: Add vegan cheese cubes inside the patties
Spicy Version: Add chopped green chili or extra paprika
Herbful: Mix in thyme, rosemary, or basil for extra flavor
Gluten-Free: Use gluten-free breadcrumbs or almond flour
Sweet Potato Twist: Mix in mashed sweet potato for added sweetness
💚 Health Benefits
Eggplant is rich in antioxidants, therefore supporting heart and brain health. Moreover, these patties are high in fiber and low in cholesterol. Because they are vegan and lightly fried or baked, they are healthier than traditional patties. As a result, they provide a nutrient-rich, satisfying snack or meal option.
🧒 Kid-Friendly Version
For kids, skip spicy ingredients and chop vegetables finely. Additionally, make small, fun-shaped patties for easy handling. Serve with mild ketchup or vegan yogurt dip. Finally, bake instead of frying for a lighter and safer option.
Soft and fluffy homemade hamburger buns made from scratch. Moreover, they are easy to bake and perfect for family meals or burgers.
🧾 Ingredients (Makes 8 Buns)
3 cups all-purpose flour
2 tbsp sugar
1 tsp salt
1 packet (2¼ tsp) instant yeast
¾ cup warm water
¼ cup warm plant-based milk (optional for softer buns)
2 tbsp vegetable oil or melted vegan butter
1 tbsp flaxseed + 3 tbsp water (flax egg, optional for vegan version)
Sesame seeds for topping (optional)
👩🍳 Instructions
First, activate yeast by mixing warm water, sugar, and yeast. Let it sit for 5–10 minutes until foamy. Next, combine flour and salt in a large bowl. Then, add yeast mixture, plant-based milk, oil, and flax egg (if using). Mix until a sticky dough forms.
After that, knead the dough for 8–10 minutes until smooth and elastic. Cover and let it rise for 1–1.5 hours or until doubled in size.
Now, divide the dough into 8 equal portions and shape into smooth balls. Place on a baking tray lined with parchment paper. Flatten slightly and cover to rest for 20–30 minutes.
Finally, brush tops with plant milk, sprinkle sesame seeds if desired, and bake at 200°C (400°F) for 15–18 minutes until golden. Cool completely before slicing.
⭐ Tips for Perfect Buns
Firstly, use warm liquids to activate yeast properly. Additionally, knead the dough until elastic to achieve a soft, airy texture. Moreover, let the dough rise fully for lighter buns. If desired, brush tops with vegan butter after baking for extra softness.
🔄 Variations
Whole Wheat: Replace 1 cup flour with whole wheat flour
Gluten-Free: Use a 1:1 gluten-free flour blend
Sweet Buns: Add 1–2 tbsp maple syrup or sugar to the dough
Mini Sliders: Divide dough into smaller portions for slider buns
Seeded Buns: Top with sesame, poppy, or sunflower seeds
💚 Health Benefits
These buns are homemade and free of preservatives, therefore healthier than store-bought buns. Moreover, using whole wheat or flax eggs increases fiber and nutrients. Because you control the ingredients, you can reduce sugar and fat content. As a result, they are a nutritious and versatile base for healthy meals.
🧒 Kid-Friendly Version
For kids, make smaller slider-sized buns. Additionally, reduce salt and sugar slightly for gentler taste. Serve with mild fillings like vegan cheese, veggie patties, or plant-based burgers. Finally, let children help shape the dough into fun shapes for engagement.
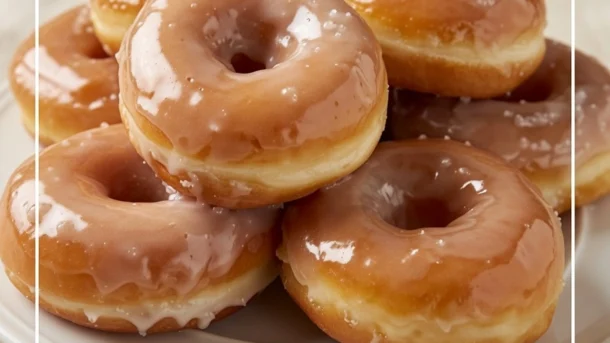
There are moments in baking that stop you completely. And then there are moments like pulling a batch of these Vegan Homemade Krispy Kremes from the hot oil — watching them emerge golden and impossibly light and already puffing up in that characteristic way that makes a great donut look like it is barely holding together from the inside out — dipping them immediately into the warm vanilla glaze and watching that glaze set to a barely-there, translucent, sweet coating that clings to the surface in a way that is so immediately, recognizably right that you understand in that moment exactly why Krispy Kreme became one of the most beloved donut brands in the entire world. These are those donuts. Light as air. Pillowy beyond belief. Glazed to perfection. And completely, entirely plant-based.
These donuts are built on a yeasted dough of extraordinary delicacy — enriched with oat milk, vegan butter, and just enough sugar to feed the yeast and create the characteristic sweetness that makes a great glazed donut so distinctive, and leavened with active dry yeast that produces a rise so dramatic and a crumb so impossibly light and airy that the finished donuts seem to weigh almost nothing despite their generous size. The secret to their legendary lightness is threefold — the enriched dough, the double rise that develops both flavor and structure, and the brief frying at the precise correct temperature that creates a barely-there crust and a completely, gloriously tender interior.
What makes this recipe so genuinely outstanding is its commitment to replicating not merely the flavor of a Krispy Kreme donut but its specific, extraordinary texture. The original Krispy Kreme donut is not merely sweet and fried — it is a specific textural experience of a crust so thin it is almost nonexistent, an interior so soft and pillowy it barely resists the bite, and a glaze so perfectly balanced between sweet and vanilla that it enhances rather than overwhelms everything beneath it. Achieving this in a plant-based version requires specific techniques — the right flour, the right liquid temperature for activating the yeast, the right oil temperature for frying, and the right glaze consistency for dipping — and this recipe delivers all of them.
This recipe is 100% vegan, ready in approximately 2 hours including rising time, and absolutely magnificent eaten warm — ideally within 30 seconds of being glazed, when the glaze is still slightly warm and the donut interior is at its most extraordinary.
Recipe Information
Prep Time
Rise Time
Cook Time
Total Time
Servings
Calories
20 mins
1.5 hours
20 mins
2 hrs 10 mins
12
~280 kcal
Ingredients
For the Donut Dough
3 cups (360g) all-purpose flour plus extra for dusting
2¼ tsp (7g) active dry yeast or instant yeast
¼ cup (50g) cane sugar
½ tsp fine salt
¾ cup (180ml) oat milk, warmed to 110°F (43°C)
¼ cup (55g) vegan butter, melted and slightly cooled
Chocolate glaze: Replace 3 tbsp powdered sugar with 3 tbsp cocoa powder and add 50g melted vegan dark chocolate
Strawberry glaze: Replace oat milk with fresh strawberry puree
Cinnamon sugar: Skip the glaze and roll warm donuts in cinnamon sugar
Filled donuts: Skip cutting the hole and fill with vegan vanilla cream or jam
To Serve
Warm from the fryer with fresh glaze
With a cup of coffee or oat milk latte
Stacked on a plate for the most beautiful presentation
With extra glaze for dipping alongside
Instructions
Activate the yeast. Warm the oat milk to exactly 110°F (43°C) — warm enough to activate the yeast but not so hot it kills it. A kitchen thermometer is ideal here. Add the sugar and yeast to the warm milk, stir gently, and leave for 5–10 minutes until the surface is foamy and the mixture smells distinctly yeasty. If no foam develops after 10 minutes the yeast is dead — start again with fresh yeast and correctly tempered milk.
Make the flax egg. Combine the flaxseed meal and water in a small bowl, stir, and rest for 5 minutes until gel-like.
Make the dough. In a large bowl or stand mixer bowl combine the flour and salt. Add the activated yeast mixture, melted vegan butter, flax egg, and vanilla extract. Mix with a wooden spoon or dough hook until a shaggy dough forms then knead for 8–10 minutes by hand on a lightly floured surface — or 6 minutes on medium speed in a stand mixer — until the dough is smooth, elastic, and slightly tacky but not sticky. It should spring back slowly when poked. This kneading develops the gluten structure that gives the donuts their characteristic chew and ability to hold the light, airy texture created by the yeast.
First rise. Place the dough in a lightly oiled bowl, cover with a clean damp kitchen towel or plastic wrap, and leave in a warm place for 60–75 minutes until doubled in size. The ideal proofing environment is a turned-off oven with just the light on — approximately 80°F (27°C) — which provides the consistent warmth that produces the most reliable, even rise.
Shape the donuts. Turn the risen dough out onto a lightly floured surface and roll to approximately 1.5cm (½ inch) thickness — not thinner or the donuts will be dense after frying. Use a 9cm (3½ inch) round cutter to cut out circles and a 3cm (1¼ inch) cutter or the cap of a bottle for the holes. Re-roll the scraps once to cut additional donuts. Place the cut donuts and holes on a parchment-lined baking sheet with space between each one.
Second rise. Cover the cut donuts loosely with a clean kitchen towel and allow to rise for a further 30–45 minutes until visibly puffed and pillowy — they will not double in size but should look noticeably lighter and more voluminous than when first cut. Do not skip this second rise — it is what produces the extraordinarily light, airy interior that defines a great glazed donut.
Make the glaze. While the donuts complete their second rise whisk together the sifted powdered sugar, warm oat milk, melted vegan butter, vanilla extract, and salt until completely smooth and flowing — the glaze should be thick enough to coat the back of a spoon but thin enough to drip slowly from it. If too thick add oat milk one teaspoon at a time. If too thin add powdered sugar one tablespoon at a time. Keep warm — a glaze that has cooled and thickened will not create the characteristic thin, translucent Krispy Kreme coating.
Fry the donuts. Heat the oil in a large deep pot to exactly 350°F (175°C) — use a thermometer and maintain this temperature throughout frying. Too cool and the donuts absorb oil and are greasy. Too hot and the exterior burns before the interior cooks. Carefully lower 2–3 donuts into the oil at a time — never crowd the pot. Fry for 60–90 seconds per side until deep golden on both sides. Remove with a slotted spoon and drain on a wire rack set over a baking sheet for 30 seconds — not paper towel which makes the bottom soggy.
Glaze immediately. Dip each warm donut into the glaze face down, hold for 3 seconds, lift and allow excess to drip off, then place glaze-side up on the wire rack. The glaze should be thin, translucent, and set within 60–90 seconds on the warm donut. Glaze the donut holes too — they are arguably the best part. Eat immediately for the most extraordinary experience.
Pro Tips for Perfect Vegan Krispy Kreme Style Donuts
Temperature is everything — measure it. The yeast activation temperature, the oil frying temperature, and the glaze temperature are all critical variables that significantly affect the finished result. A kitchen thermometer is not optional for this recipe — it is essential. The difference between oil at 340°F and 360°F produces a meaningfully different donut.
Do not skip the second rise. The first rise develops flavor. The second rise — after the donuts are cut and shaped — develops the specific lightness and airy texture that makes a great glazed donut so extraordinary. Donuts fried without the second rise will be noticeably denser and less pillow-like than those given the full proofing time.
Fry in small batches and maintain oil temperature. Adding too many donuts to the oil at once drops the oil temperature dramatically — causing the donuts to absorb oil before the exterior can set and producing greasy, dense results. Two to three donuts per batch with the oil returned to temperature between batches produces the best results.
Glaze while warm — not hot, not cool. The ideal glazing temperature is approximately 30–60 seconds after the donuts come out of the oil — warm enough that the glaze flows and adheres beautifully but not so hot it slides off before setting. A donut glazed when completely cool will have a thicker, more opaque glaze coating rather than the characteristic thin, translucent Krispy Kreme finish.
Eat within 30 minutes of glazing. Yeasted donuts deteriorate faster than almost any other baked good — the extraordinary lightness and pillowy texture that makes them so spectacular lasts for approximately 2 hours after frying, after which they begin to firm and toughen. Make them, glaze them, eat them immediately.
Use a wire rack not paper towel for draining. Paper towel creates a steam trap under the donut that makes the bottom soggy. A wire rack allows air to circulate completely around the donut and maintains the integrity of the exterior on all surfaces.
The Science of the Perfect Yeasted Donut
A yeasted donut is one of the most technically demanding preparations in all of home baking — and understanding the science behind why each step matters helps explain why these donuts are so extraordinary when the technique is followed precisely.
The yeast is the heart of the recipe. Saccharomyces cerevisiae — the species of yeast used in bread and donut making — consumes the sugars in the dough and produces carbon dioxide gas and ethanol as metabolic byproducts. The carbon dioxide becomes trapped in the gluten network developed during kneading and causes the dough to expand dramatically during both rising periods. The ethanol evaporates during frying and contributes to the characteristic flavor compounds that distinguish a yeasted donut from a cake donut.
The gluten network — developed during the 8–10 minutes of kneading — is what gives the donut its ability to stretch and expand as the yeast produces carbon dioxide without tearing. Insufficient kneading produces a weak gluten network that tears during rising and produces a dense, uneven crumb. Proper kneading produces an elastic, extensible network that stretches smoothly as the dough rises and then sets during frying into the characteristic light, pillowy structure of a great glazed donut.
The frying temperature is critical because of how the starch and protein in the dough respond to heat. At 350°F (175°C) the exterior of the donut sets almost immediately on contact with the oil — creating a thin, sealed crust that traps the moisture inside the donut and keeps the interior extraordinarily tender while the exterior turns golden. At lower temperatures the exterior takes too long to set and absorbs oil before the crust forms. At higher temperatures the exterior burns before the interior has time to cook through.
The glaze — so simple in its ingredients — achieves its characteristic thinness and translucency through the specific ratio of sugar to liquid and the temperature at which it is applied. Applied warm to a warm donut the glaze flows freely over the surface and sets to a thin, even film as both the glaze and the donut cool simultaneously. This simultaneous cooling is what creates the perfectly uniform, paper-thin coating that is the defining visual and textural characteristic of a Krispy Kreme glaze.
Flavor Variations
Chocolate Frosted: Dip in a chocolate glaze made from melted vegan dark chocolate, powdered sugar, oat milk, and vanilla for a rich, deeply chocolatey version that is particularly spectacular with rainbow sprinkles pressed into the surface while the chocolate is still wet.
Strawberry Glazed: Replace the oat milk in the glaze with fresh strawberry puree for a beautiful pink glaze with a natural, vibrant strawberry flavor and color that is particularly stunning in summer.
Cinnamon Sugar: Skip the glaze entirely and roll the warm fried donuts immediately in a generous mixture of cinnamon and caster sugar for a churro-inspired version that is particularly extraordinary with a dipping sauce of vegan chocolate ganache.
Filled Cream Donuts: Skip cutting the hole and fry as full circles. Once cooled use a piping bag to fill each donut with vegan vanilla pastry cream, vegan lemon curd, or strawberry jam for a filled donut that is an entirely different but equally spectacular experience.
Nutritional Highlights (Per Serving — 1 donut with glaze)
Calories
Protein
Carbs
Fiber
Fat
~280 kcal
4g
42g
1g
11g
These donuts are unambiguously an indulgence — and they are completely, unreservedly worth it. Made from real, whole, plant-based ingredients without artificial flavors, preservatives, or additives of any kind, they are a significantly cleaner version of the commercial original while delivering every element of the flavor and texture experience that makes glazed donuts so universally beloved. The flaxseed meal contributes ALA omega-3 fatty acids and lignans. The oat milk base provides beta-glucan fiber. The vegan butter contributes plant-based fats without the cholesterol of dairy butter. This is an indulgence with integrity.
Storage
Best eaten immediately: Yeasted glazed donuts are at their absolute, unequivocal peak within 30–60 minutes of being glazed. The texture deteriorates significantly after 2–3 hours as the yeast structure firms and the glaze absorbs into the surface. Make them and eat them immediately whenever possible.
Room temperature: Store unglazed fried donuts in an airtight container at room temperature for up to 1 day. Warm briefly in a 300°F (150°C) oven for 3–4 minutes before glazing and serving — this partially restores the fresh-fried texture.
Freezer — unfried dough: After cutting the donut shapes freeze them on a parchment-lined baking sheet until solid then transfer to a freezer bag for up to 1 month. Thaw overnight in the refrigerator, complete the second rise at room temperature for 45–60 minutes, then fry and glaze as directed.
Freezer — fried unglazed: Freeze fried unglazed donuts for up to 1 month. Thaw at room temperature for 30 minutes and warm in a 300°F (150°C) oven for 5 minutes before glazing and serving.
Frequently Asked Questions
Can I bake these instead of frying?
Yes — bake at 375°F (190°C) for 12–15 minutes until golden. Baked donuts have a more bread-like texture than fried ones and lack the characteristic thin, barely-there crust of a fried donut but are still delicious and significantly lower in fat. An air fryer at 350°F (175°C) for 5–6 minutes per side produces a result closer to fried than the oven.
Why didn’t my dough rise?
Failed dough rise is almost always caused by dead yeast or milk that was too hot and killed the yeast. Always check that your yeast is within its expiration date and that the milk temperature is between 105–115°F (40–46°C). If the yeast does not foam after 10 minutes in the warm milk it is dead — start again with fresh yeast.
Can I make the dough the night before?
Yes — after the first rise punch the dough down, wrap tightly in plastic wrap, and refrigerate overnight. The next morning remove from the refrigerator, roll and cut the donuts, and allow to complete the second rise at room temperature for 60–75 minutes before frying — the cold dough takes longer to proof than room temperature dough.
What oil is best for frying donuts?
A neutral oil with a high smoke point is essential — canola oil, sunflower oil, or refined coconut oil all work beautifully. Avoid olive oil which has too low a smoke point and too strong a flavor. The oil should be clean and fresh — reused oil with food particles produces off-flavors in the finished donuts.
How do I keep the glaze from being too thick?
The glaze thickens as it cools — reheat briefly in the microwave for 15 seconds and stir well to restore a flowing consistency. If making the glaze in advance keep it in a bowl set over warm water to maintain the ideal dipping temperature and consistency throughout the glazing process.
Can I make these donuts gluten-free?
Gluten-free yeasted donuts are significantly more challenging than regular ones — the gluten network is essential for trapping the carbon dioxide produced by the yeast. A dedicated gluten-free donut flour blend with added psyllium husk or xanthan gum produces the best results. Expect a slightly denser texture than the regular version but still genuinely delicious.
Tried this recipe? Leave a comment below and let us know how it turned out! Tag us on Instagram and Facebook — we love seeing your plant-powered creations. Looking for more indulgent vegan baking and dessert recipes? Browse all recipes on Easy Vegan Recipes — new recipes posted every single week!
We use cookies on our website to give you the most relevant experience by remembering your preferences and repeat visits. By clicking “Accept”, you consent to the use of ALL the cookies.
This website uses cookies to improve your experience while you navigate through the website. Out of these, the cookies that are categorized as necessary are stored on your browser as they are essential for the working of basic functionalities of the website. We also use third-party cookies that help us analyze and understand how you use this website. These cookies will be stored in your browser only with your consent. You also have the option to opt-out of these cookies. But opting out of some of these cookies may affect your browsing experience.
Necessary cookies are absolutely essential for the website to function properly. These cookies ensure basic functionalities and security features of the website, anonymously.
Cookie
Duration
Description
cookielawinfo-checkbox-analytics
11 months
This cookie is set by GDPR Cookie Consent plugin. The cookie is used to store the user consent for the cookies in the category "Analytics".
cookielawinfo-checkbox-functional
11 months
The cookie is set by GDPR cookie consent to record the user consent for the cookies in the category "Functional".
cookielawinfo-checkbox-necessary
11 months
This cookie is set by GDPR Cookie Consent plugin. The cookies is used to store the user consent for the cookies in the category "Necessary".
cookielawinfo-checkbox-others
11 months
This cookie is set by GDPR Cookie Consent plugin. The cookie is used to store the user consent for the cookies in the category "Other.
cookielawinfo-checkbox-performance
11 months
This cookie is set by GDPR Cookie Consent plugin. The cookie is used to store the user consent for the cookies in the category "Performance".
viewed_cookie_policy
11 months
The cookie is set by the GDPR Cookie Consent plugin and is used to store whether or not user has consented to the use of cookies. It does not store any personal data.
Functional cookies help to perform certain functionalities like sharing the content of the website on social media platforms, collect feedbacks, and other third-party features.
Performance cookies are used to understand and analyze the key performance indexes of the website which helps in delivering a better user experience for the visitors.
Analytical cookies are used to understand how visitors interact with the website. These cookies help provide information on metrics the number of visitors, bounce rate, traffic source, etc.
Advertisement cookies are used to provide visitors with relevant ads and marketing campaigns. These cookies track visitors across websites and collect information to provide customized ads.