Desserts

Vegan Apple Rice Pudding — The Warmly Spiced, Creamy, Old-Fashioned Comfort Dessert That Fills the Kitchen With the Smell of Cinnamon and Stewed Apple

vegan apple rice pudding

There is a particular kind of comfort food that works at a completely different register from the kind that is exciting or impressive — the kind that is warm, soft, quietly sweet, and familiar in a way that feels almost like memory. Vegan Apple Rice Pudding is that kind of food. It is a thick, creamy rice pudding made with short-grain rice cooked slowly in oat milk and coconut milk until every grain has swelled and softened into the surrounding liquid and the whole thing has thickened into a porridge-like consistency that coats the back of a spoon and slides slowly from a ladle — not stiff, not runny, but the precise yielding, spoonable texture that makes rice pudding worth making. On top sits a layer of warmly spiced stewed apple: soft, slightly translucent wedges of apple cooked down in a small amount of maple syrup, cinnamon, and a pinch of cardamom until they are tender and fragrant, with just enough structure left to hold their shape in a spoon rather than collapsing entirely into the pudding. The combination — cold-weather spice from the apple, gentle sweetness from the coconut milk, the soft, yielding, almost nursery-food comfort of the rice — is one of the most satisfying things a bowl can contain on a cold evening. It is 100% vegan, dairy-free, and made entirely from pantry and produce staples. It reheats beautifully the next morning. It is the kind of recipe that becomes part of a household’s seasonal repertoire and stays there.

The technique is the bloom-and-slow-build method. The most common failure of a homemade rice pudding is a result that is either grainy and loose (the rice cooked through but the liquid never thickened into a creamy, unified sauce) or stodgy and gluey (the rice over-cooked to the point where the starch released all at once and the pudding set into an unpleasant, heavy paste). Both failures come from the same root cause: cooking short-grain rice in liquid that was added all at once and brought to a rapid boil, which drives off too much liquid too quickly, forces the starch release in an uncontrolled surge, and gives the cook no opportunity to manage the consistency as it develops. The bloom-and-slow-build method controls the entire process. Stage one — the bloom: the short-grain rice is toasted dry in a wide, heavy-bottomed saucepan for exactly 2 minutes over medium heat until the grains are warm and faintly fragrant, then the first addition of liquid (just enough to cover) is added. This initial toast opens the outer surface of each grain slightly, allowing the starch to begin releasing gradually from the very first moment of liquid contact rather than in a sudden surge when the starch temperature threshold is crossed during rapid boiling. Stage two — the slow build: instead of adding all the liquid at once, the combined oat milk and coconut milk is added in three additions spaced approximately 8–10 minutes apart, stirring gently but regularly between each addition and allowing the pudding to thicken slightly before the next addition goes in. This staged liquid addition means the starch releases progressively into each successive addition of liquid, building the creamy, sauce-like consistency around the rice gradually rather than forcing it into a single, uncontrolled release. The result is a rice pudding with a genuinely silky, glossy, creamy consistency — every grain distinct and tender within a sauce that has the richness of the coconut milk and the light body of the oat milk, neither watery nor gluey, exactly as rice pudding should be.

This recipe serves 4 generously in deep bowls, or 6 in smaller portions.


Recipe Information

Prep TimeCook TimeTotal TimeServingsCalories
10 mins40 mins50 mins4–6~420 kcal

Ingredients

For the Rice Pudding

  • 1 cup (200g) short-grain rice (pudding rice, arborio, or sushi rice — the short, round grain with its high amylopectin starch content is essential; long-grain rice does not release starch in the same way and produces a thin, separated pudding that never comes together into the creamy consistency this method creates)
  • 1 can (400ml / 13.5fl oz) full-fat coconut milk — full-fat is important; light coconut milk does not provide sufficient fat to produce the creamy, rich mouthfeel of a good rice pudding
  • 2 cups (480ml) oat milk, unsweetened (oat milk’s natural sweetness and body complement the coconut milk; soy milk is a suitable substitute though it produces a slightly thinner result)
  • 3 tbsp maple syrup or caster sugar (the pudding is deliberately only mildly sweet — the apple topping provides additional sweetness; adjust to taste)
  • 1 tsp vanilla extract
  • ½ tsp ground cinnamon
  • Pinch of fine salt (salt is essential in sweet dishes — it amplifies the other flavors and prevents the pudding from tasting flat)

For the Spiced Stewed Apple

  • 3 medium apples (approximately 500g / 1lb 2oz) — a baking variety that holds some shape during cooking (Bramley, Braeburn, Pink Lady, or Granny Smith; avoid very soft eating apples that collapse entirely); peeled, cored, and cut into 1.5cm (⅝ inch) thick wedges
  • 2 tbsp maple syrup
  • 1 tbsp water
  • 1 tsp ground cinnamon
  • ¼ tsp ground cardamom (optional but excellent — adds a floral, slightly citrusy warmth that elevates the apple beyond simple cinnamon-stewed fruit)
  • ¼ tsp ground ginger
  • Pinch of fine salt
  • 1 tsp lemon juice (prevents browning and adds brightness that keeps the stewed apple from tasting flat)

For Serving (Optional)

  • A pinch of ground cinnamon dusted over the finished bowl
  • A drizzle of maple syrup
  • Toasted flaked almonds or chopped toasted pecans scattered over the apple layer
  • Fresh mint leaves

Instructions

  1. Toast the rice — Stage 1 (bloom). Add the short-grain rice to a wide, heavy-bottomed saucepan (a saucepan with a wide base gives more surface area for even heat distribution, which is important for the slow-build method). Place over medium heat with no liquid and no oil. Toast the dry rice, stirring regularly, for exactly 2 minutes — the grains will become warm and faintly fragrant but should not color. Do not toast longer than 2 minutes or the rice will begin to pop and the outer starch layer will harden rather than open.
  2. First liquid addition. Pour in the full can of coconut milk and stir well to combine with the toasted rice. Add a pinch of salt. Bring to a gentle simmer over medium heat, stirring regularly to prevent the rice from sticking to the base. Allow to cook at a gentle simmer for 8 minutes, stirring every 2 minutes, until the coconut milk has been largely absorbed and the mixture looks thick and beginning to be porridge-like.
  3. Second liquid addition — Stage 2 (slow build). Add 1 cup (240ml) of the oat milk. Stir well to incorporate and bring back to a gentle simmer. Cook for a further 8–10 minutes, stirring regularly, until this addition has been absorbed and the pudding has thickened again.
  4. Third liquid addition. Add the remaining 1 cup (240ml) of oat milk, along with the maple syrup, vanilla extract, and cinnamon. Stir well. Continue cooking at a very gentle simmer for a further 10–12 minutes, stirring regularly, until the rice is completely tender (taste a grain — it should be soft all the way through with no chalky center) and the pudding has a thick, creamy, sauce-like consistency that coats a spoon thickly. If the pudding seems too thick at any point, add oat milk 2 tablespoons at a time to loosen — it thickens further as it cools, so remove it from the heat slightly looser than the final desired consistency.
  5. Make the stewed apple. While the rice pudding is cooking its final stage, prepare the apple. Place the apple wedges in a medium saucepan with the maple syrup, water, cinnamon, cardamom (if using), ginger, salt, and lemon juice. Stir to coat. Cook over medium heat, stirring occasionally, for 10–12 minutes until the apple is completely tender and slightly translucent, with a syrupy sauce forming around the wedges. The apple should hold its shape in wedges — if it begins to collapse into a compote, reduce the heat and cook more gently. Remove from the heat and set aside.
  6. Serve. Spoon the rice pudding into deep bowls. Spoon the warm stewed apple over the top, along with any syrupy cooking liquid from the pan. Dust lightly with ground cinnamon, drizzle with maple syrup if desired, and scatter with toasted nuts if using. Serve immediately while the pudding is warm and the apple is hot.

Pro Tips

  • Stir regularly but gently — the stirring in a slow-build rice pudding serves two purposes: it prevents the rice from settling and sticking to the base (which happens quickly with short-grain rice in a fatty liquid), and it encourages the controlled starch release that creates the creamy sauce. Stir every 2 minutes during each liquid addition stage, using a wooden spoon or a silicone spatula and moving it across the full base of the pan.
  • Taste for doneness by eating a grain — the only reliable test for rice pudding doneness is tasting a grain. A grain that looks soft and swollen may still have a faintly chalky, undercooked center that makes the whole pudding feel slightly gritty. The grain should taste completely soft, tender, and creamy all the way through. If any chalkiness remains, cook for a further 3–5 minutes and taste again.
  • The pudding thickens significantly on cooling — remove it from the heat at a consistency that seems slightly looser than ideal. A pudding that is perfect in the pan will be stiff and paste-like once it has cooled in the bowl. If serving immediately, this is not a concern; if making ahead, plan to reheat with additional oat milk stirred in.
  • For a baked rice pudding version (a slower, more hands-off method): combine all the rice pudding ingredients except the vanilla in an ovenproof dish, stir well, and bake uncovered at 150°C (300°F) for 1 hour 45 minutes to 2 hours, stirring once at the halfway point, until the rice is tender and a golden skin has formed on top. The baked version develops a deeper, slightly caramelized flavor from the longer, slower oven heat.

Rice Pudding Across Cultures: One Grain, Every Civilization

Rice pudding — in one form or another — is one of the most widely distributed dishes in the world, appearing in some version in virtually every culture that has access to rice and to a sweet or milky liquid with which to cook it. The versions are remarkably diverse: arroz con leche (Spain and Latin America, cinnamon-spiced, often with a dark cinnamon dusting on top) traces its lineage to Moorish Spain and the Arab influence on Iberian cuisine that accompanied centuries of Islamic rule; kheer (India, Pakistan, and Bangladesh) is the ancient subcontinental version, often flavored with cardamom, saffron, and rose water, and mentioned in texts from the Ayurvedic period; riz au lait (France) is the classic European version, baked with a golden skin; muhallebi and sütlaç (Turkey and the wider Ottoman culinary sphere) are cooled, set versions often finished with a dusting of cinnamon or a drizzle of rose water; mazamorra blanca (Peru) is a colonial-era adaptation using native ingredients; and milk rice (kiri bath) in Sri Lanka is a ceremonial dish eaten at New Year and on auspicious occasions. The reason this dish appears so independently and persistently across so many cultures is almost certainly the combination of rice’s natural starchiness — which makes the cooking liquid progressively creamy without any additional thickener — and the human universal of finding warm, sweet, starchy food deeply comforting. The vegan version in this recipe removes the dairy that most of these traditions use, and in doing so joins a line of adaptation that has been happening for as long as the dish has existed: every version of rice pudding in the world is already an adaptation of a local ingredient to a universal technique, and coconut milk and oat milk are simply the newest ingredients to join a 3,000-year-old story.


Flavor Variations

  • Pear and Ginger Rice Pudding: Replace the stewed apple with stewed pear — use firm pears (Conference or Bosc), cut into thick wedges, cooked with 2 tablespoons of maple syrup, 1 teaspoon of fresh ginger (grated), ¼ teaspoon of ground ginger, a pinch of cinnamon, and a teaspoon of lemon juice for 8–10 minutes until just tender. The pear-ginger combination is lighter and more aromatic than apple-cinnamon and particularly well suited to warm months. Add 1 tablespoon of crystallized ginger, finely chopped, scattered over the finished bowl.
  • Mango and Cardamom Rice Pudding: Omit the cinnamon from the rice pudding base and replace with ½ teaspoon of ground cardamom. Replace the stewed apple entirely with fresh mango — 2 ripe mangoes, peeled and sliced into thick strips, warmed briefly in a pan with 1 tablespoon of maple syrup, a pinch of cardamom, and a squeeze of lime juice for just 3–4 minutes (the mango should be warm and fragrant but retain its fresh quality rather than fully stewing). The mango-cardamom version is tropical, fragrant, and outstanding served slightly warm rather than piping hot.
  • Dark Chocolate Rice Pudding: Add 3 tablespoons of high-quality cocoa powder and 50g of finely chopped dark vegan chocolate to the rice pudding in the final liquid stage (the third addition), stirring until the chocolate is fully melted and incorporated. The chocolate rice pudding is richer, darker, and more deeply flavored than the original; omit the cinnamon from the base and replace with a pinch of cayenne for a Mexican chocolate flavor profile. Serve with a spoonful of coconut cream and a scatter of cacao nibs rather than stewed apple.

Nutritional Highlights (Per Serving — Based on 5 Servings)

CaloriesProteinCarbsFiberFat
~420 kcal5g68g4g14g

Storage

  • Refrigerator: Rice pudding keeps covered in the refrigerator for up to 4 days. It thickens significantly on cooling — the refrigerated pudding will be considerably stiffer than the freshly made version. This is normal and expected.
  • Reheating: Reheat rice pudding in a saucepan over low-medium heat, adding oat milk 2–3 tablespoons at a time and stirring to restore the creamy, spoonable consistency. Alternatively, microwave individual portions for 2 minutes on high, stirring halfway, then stir in 1–2 tablespoons of oat milk to loosen. Do not reheat without adding liquid — dry-reheating makes the pudding stiff and slightly gluey.
  • Stewed apple (refrigerator): Keeps in a sealed container for up to 5 days. Reheat in a small saucepan over low heat or microwave for 60 seconds. The apple continues to soften slightly in the refrigerator and becomes more compote-like over time, which is equally pleasant spooned over the reheated pudding.
  • Freezer: Rice pudding does not freeze well — the starch structure breaks down during freezing and the thawed pudding has a separated, grainy texture that no amount of stirring fully restores. Make fresh or refrigerate for up to 4 days; do not freeze.

Frequently Asked Questions

Can I use long-grain rice instead of short-grain?

Long-grain rice is not suitable for this recipe. The creamy, unified consistency of a good rice pudding comes from the high amylopectin starch content of short-grain varieties (pudding rice, arborio, sushi rice), which releases into the cooking liquid as a creamy, thickening sauce. Long-grain rice has a higher amylose content and a different starch structure that produces separated, individual grains in a thin liquid rather than a unified creamy pudding. Arborio (risotto rice) is the easiest widely available substitute if pudding rice or sushi rice is not available — it produces an excellent rice pudding.

My pudding is lumpy — the rice clumped together. What went wrong?

Clumping is caused by the rice being cooked at too high a temperature without sufficient stirring, causing the starch to set around clusters of grains rather than releasing into the liquid. Keep the heat at a gentle simmer throughout — not a rolling boil — and stir every 2 minutes. If clumping has already occurred, add 3–4 tablespoons of hot oat milk and stir vigorously with a wooden spoon, working to break up any clusters. Most minor clumping can be resolved this way; severe clumping from high heat may produce a result that is too far gone to fully rescue.

Can I make this in a rice cooker?

A rice cooker is not suitable for this method — the controlled, staged liquid addition and the regular stirring that builds the bloom-and-slow-build structure are not possible in a sealed rice cooker. The baked version (described in Pro Tips) is the best hands-off alternative: oven at 150°C (300°F), all ingredients combined in one ovenproof dish, 1 hour 45 minutes to 2 hours, stir once at the halfway mark.

Is this recipe suitable for children?

Yes — this rice pudding is mild, sweet, naturally dairy-free, and one of the most child-friendly comfort foods possible. For young children, omit the cardamom (which some children find too floral) and reduce the cinnamon to ¼ teaspoon in both the pudding base and the stewed apple. The pudding can be made slightly sweeter by adding an extra tablespoon of maple syrup if needed. Ensure the apple is stewed until very soft for children who may have difficulty with firmer textures.


Tried this recipe? Leave a comment below and let us know how it turned out! Tag us on Instagram and Facebook — we love seeing your plant-powered creations. Looking for more addictive vegan snack and appetizer recipes? Browse all recipes on Easy Vegan Recipes — new recipes posted every single week!

Vegan Lemon Mousse — The Light, Silky, Intensely Citrusy Dessert That Sets in the Refrigerator and Disappears From the Bowl

vegan lemon mousse

There is a category of dessert whose entire appeal is lightness — not lightness in the sense of low calories or modest portion sizes, but lightness in the physical sense: a texture so airy and yielding that a spoon slides through it without resistance, a mouthful that dissolves almost before it lands, a flavor that is bright and intense without any of the heaviness that cream or butter usually bring to a dessert of equivalent richness. Mousse is that category, and a lemon mousse sits at the most elegant end of it — tart and bright and fragrant with lemon, sweet enough to balance the acidity without tipping into cloying, and set to a consistency that holds a clean spoon impression but collapses on the palate into something that feels almost like eating scented cold air. Vegan Lemon Mousse achieves exactly that texture without dairy cream, eggs, or gelatin — using whipped aquafaba (the liquid from a can of chickpeas, which whips into a stable, glossy meringue-like foam) and full-fat coconut cream (chilled overnight and whipped cold into stiff, cloud-like peaks) folded together with a concentrated lemon curd made from lemon juice, zest, maple syrup, and coconut oil. The result is a mousse that is genuinely light — properly airy, properly fluffy, properly mousse-like in the way that a set pudding or a whipped cream dessert is not — with a lemon flavor that is clean, sharp, and fragrant, and a texture that holds in individual glasses or ramekins in the refrigerator for up to 24 hours without collapsing or weeping. It is 100% vegan, dairy-free, egg-free, and made from pantry and refrigerator staples. It serves 4 in generous glasses or 6 in small dessert cups, and it is one of the most impressive things a vegan kitchen can produce for guests — because the people who eat it cannot quite explain how it was made without eggs or cream, and the answer, when given, is always met with a look of genuine surprise.

The technique is the triple-fold aeration method. The fundamental challenge of vegan mousse is structural: a traditional mousse achieves its characteristic lightness from two sources of aeration working in combination — whipped egg whites (which provide a foam structure built from denatured protein) and whipped heavy cream (which provides a fat-stabilized foam structure). Remove both and the mousse has no reliable structural mechanism for trapping and retaining the air bubbles that give it lift. The triple-fold aeration method solves this by building three distinct foam structures and folding them together in a precise sequence that preserves as much air as possible in the finished mixture. Foam one — aquafaba meringue: the liquid from a can of chickpeas is whipped with a small amount of cream of tartar (which lowers the pH of the liquid and helps the proteins unfold and form a more stable foam) for 5–7 minutes until it forms stiff, glossy peaks that can hold their shape when the bowl is tilted. This foam provides the primary structural framework — it is the lightest and most voluminous of the three foams and contributes the most airy lift to the finished mousse. Foam two — whipped coconut cream: full-fat coconut cream, chilled overnight so that the solid cream separates from the liquid, is whipped cold until it forms stiff peaks. This foam provides fat-stabilized structure and richness, and it helps the mousse hold its set in the refrigerator (the coconut fat solidifies at refrigerator temperatures, providing a structural matrix). Foam three — the lemon base: the lemon curd (lemon juice, zest, maple syrup, and melted coconut oil) is whisked until slightly emulsified and aerated. The folding sequence is critical: the lemon base is folded into the whipped coconut cream first (the fat-based foams combine most readily without deflation), and then this combined mixture is folded into the whipped aquafaba in two additions (the aquafaba foam is the most delicate and is always the last component, added by gentle folding rather than stirring). The triple-fold produces a finished mousse with a lighter, more genuinely airy texture than a two-component version would achieve, because each foam brings its own structural contribution and the folding sequence is designed to preserve each one’s air as it is incorporated.

This recipe makes 4 generous portions in wide glasses or 6 in small dessert cups.


Recipe Information

Prep TimeCook TimeTotal TimeChill TimeServingsCalories
20 mins5 mins25 mins2 hrs min4–6~290 kcal

Ingredients

For the Lemon Curd Base

  • 6 tbsp (90ml) fresh lemon juice (from approximately 3 large lemons — fresh lemon juice is essential; bottled lemon juice has a flat, slightly metallic quality that is very noticeable in a dessert where lemon is the primary flavor)
  • Zest of 2 large lemons (finely grated — zest contains the lemon’s fat-soluble aromatic compounds that fresh juice alone does not provide; the combination of juice and zest gives the mousse a rounded, fragrant lemon character rather than merely a sharp, acidic one)
  • 5 tbsp (75ml) maple syrup (adjust to taste — the mousse should be sweet enough to balance the lemon without masking it; taste the base mixture and add an additional tablespoon if the lemon seems very sharp)
  • 3 tbsp (45ml) refined coconut oil, melted (refined coconut oil is strongly preferred over virgin coconut oil here — refined has a neutral flavor; virgin coconut oil has a coconut aroma that competes with the lemon and is noticeable in the finished mousse)
  • 1 tbsp cornstarch (helps the lemon base thicken slightly and provides a small amount of additional structure to the folded mousse)
  • Pinch of fine salt (salt in sweet desserts is essential — it amplifies the lemon flavor and prevents the mousse from tasting flat or one-dimensional)
  • ½ tsp vanilla extract

For the Whipped Coconut Cream

  • 2 cans (800ml total) full-fat coconut milk or coconut cream, refrigerated overnight — this is the most important preparation step in the recipe. The cans must be refrigerated for a minimum of 12 hours (24 hours is better) so that the solid coconut cream separates completely from the liquid and rises to the top. Use only the solid cream from the top of the can; reserve the liquid for another use (smoothies, cooking). Do not shake the cans before opening. If the cream has not separated fully, the coconut cream will not whip. Brands with higher fat content (Aroy-D, Chaokoh, or a dedicated coconut cream rather than coconut milk) produce the best results. Do not use reduced-fat or “lite” coconut milk.
  • 1 tbsp icing (powdered) sugar

For the Aquafaba Meringue

  • 120ml (½ cup) aquafaba — the liquid from 1 standard 400g (14oz) can of chickpeas. The liquid should be slightly viscous (not thin and watery) — if the liquid from the can seems very thin, reduce it by simmering gently for 5 minutes until slightly thickened and more gel-like, then cool completely before whipping.
  • ¼ tsp cream of tartar (essential for stable aquafaba foam — cream of tartar lowers the pH and helps the proteins form a more stable foam structure; aquafaba whipped without cream of tartar produces a foam that deflates quickly and does not hold its shape reliably)

For Serving

  • Thin lemon slices or lemon zest curls (for garnish)
  • Fresh berries — raspberries or blueberries (the tart-sweet berries are an excellent contrast to the lemon mousse)
  • A very light dusting of icing sugar (optional)
  • Fresh mint leaves

Instructions

  1. Make the lemon curd base. In a small saucepan, whisk together the lemon juice, lemon zest, maple syrup, cornstarch, and salt. Cook over medium heat, whisking constantly, for 3–4 minutes until the mixture has thickened slightly and become glossy (the cornstarch will have activated and the mixture will have gone from liquid to a slightly gel-like consistency). Remove from the heat. Whisk in the melted coconut oil and vanilla extract until fully emulsified. Transfer to a bowl and allow to cool to room temperature (do not refrigerate — the coconut oil will solidify and make the mixture impossible to fold). The curd should be smooth, glossy, and pourable at room temperature.
  2. Whip the coconut cream. Remove the chilled coconut cream cans from the refrigerator without shaking. Open carefully and scoop only the solid white cream from the top into a large mixing bowl; discard or reserve the clear liquid. Add the icing sugar. Using an electric hand mixer or stand mixer, whip the coconut cream on high speed for 3–5 minutes until it is thick, fluffy, and holds stiff peaks — the cream should look like softly whipped dairy cream. Place the bowl in the refrigerator while you whip the aquafaba.
  3. Whip the aquafaba. In a large, clean, completely grease-free bowl (any trace of fat will prevent the aquafaba from whipping — wipe the bowl with a piece of paper towel dampened with lemon juice or white vinegar before adding the aquafaba), combine the aquafaba and cream of tartar. Using an electric hand mixer or stand mixer, whip on high speed for 5–7 minutes. The aquafaba will first become foamy, then white, then gradually form soft peaks, then stiff, glossy peaks. The finished meringue should be white, glossy, and stiff enough that the bowl can be turned upside down without the foam moving.
  4. Fold — triple-fold sequence. Step one: add the cooled lemon curd base to the whipped coconut cream. Using a large spatula, fold gently until just combined — use a figure-eight motion, cutting through the center and folding over the edges, keeping the movements slow and deliberate to preserve as much of the coconut cream’s air as possible. Do not stir or whisk. Step two: add one-third of the lemon-coconut mixture to the whipped aquafaba meringue and fold gently to lighten the mixture slightly. Step three: add the remaining two-thirds of the lemon-coconut mixture to the aquafaba and fold carefully until just combined — a few faint streaks remaining are acceptable; over-folding deflates the foam structure and produces a dense rather than airy mousse.
  5. Portion and chill. Spoon or pipe the mousse into 4 wide glasses or 6 small dessert cups, filling to about 1.5cm (½ inch) below the rim to leave room for garnish. Smooth the top with the back of a spoon. Cover each glass with cling film and refrigerate for a minimum of 2 hours (3–4 hours produces a firmer, more fully set mousse; the mousse can be made up to 24 hours ahead and refrigerated overnight).
  6. Garnish and serve. Remove from the refrigerator 10 minutes before serving (a slightly warmer mousse is more tender and melts more readily on the palate than one served straight from the refrigerator). Garnish with thin lemon slices or zest curls, a few fresh berries, and a mint leaf. Serve immediately.

Pro Tips

  • The overnight coconut cream chill is non-negotiable — this is the step that most home cooks skip (refrigerating for only an hour or two) and the step that most consistently explains why their coconut cream did not whip. The cream needs 12–24 hours in the refrigerator to fully separate and solidify. If in doubt, put the cans in the refrigerator the day before and forget about them — they are ready when you are.
  • Grease-free bowl for aquafaba — aquafaba protein foams are much more sensitive to fat contamination than dairy egg whites. Any trace of fat — residual oil on an unwashed bowl, a fingerprint, a drop of coconut cream — can prevent the aquafaba from reaching stiff peaks. Before whipping, wipe the bowl and beaters with a paper towel dampened with a small amount of lemon juice or white vinegar (both are acid-based degreasers) and allow to dry for 30 seconds.
  • Cool the lemon curd completely before folding — warm curd added to whipped coconut cream or aquafaba will melt the foam immediately, collapsing the air structure. The curd should be at room temperature or slightly cooler — if you are in a hurry, place the bowl in a larger bowl of cold water and stir gently for 3–4 minutes to accelerate cooling.
  • Fold, never stir — the mousse’s texture depends entirely on the preservation of air in the two foam components. Every unnecessary mixing motion deflates some of that air. Use the slowest, most deliberate folding movements you can manage: large, sweeping cuts through the center, lifting from the bottom, and folding over the top. Stop the moment the mixture is just combined — a few pale streaks are better than an over-folded, dense mousse.

Aquafaba: The Accidental Discovery That Changed Vegan Baking

Aquafaba — the viscous liquid that drains from a can of chickpeas and that most people pour down the sink without a second thought — was discovered as a functional egg white substitute almost entirely by accident, and its emergence as a foundational ingredient in vegan baking is one of the most remarkable developments in the history of food science in recent decades. The story begins in 2014, when French tenor and amateur cook Joël Roessel documented online that various legume liquids could be whipped into a meringue-like foam, and was accelerated dramatically in 2015 when American software engineer Goose Wohlt — working from Roessel’s observation — specifically identified chickpea brine as the most stable and most meringue-like of the legume foams and coined the name “aquafaba” (from the Latin aqua, water, and faba, bean). Wohlt published his findings on a Facebook vegan cooking group and the response was immediate and global: within weeks, thousands of cooks around the world were whipping chickpea brine into meringues, mousses, and macarons in their home kitchens, and within months the discovery had been covered by food publications, written up in food science journals, and adopted by professional pastry chefs. The food science behind why aquafaba whips is now reasonably well understood: chickpea cooking liquid contains proteins, saponins (soap-like compounds that reduce surface tension and help air bubbles form), and starches that together create a foam structure broadly similar to denatured egg white proteins, though with different stability characteristics and a longer whipping time requirement. The discovery of aquafaba did not simply add one ingredient to vegan cooking — it unlocked an entire category of recipes (meringues, mousses, macarons, chiffon cakes, pavlovas, soufflés) that had been functionally impossible to veganize before 2015, and it did so through the most unlikely of raw materials: the liquid that most home cooks had been throwing away for decades. It remains one of the most genuinely surprising and democratically available cooking discoveries of the 21st century.


Flavor Variations

  • Lime and Coconut Mousse: Replace the lemon juice with fresh lime juice and the lemon zest with lime zest (use 3 limes for the juice and 2 for the zest). Add ¼ teaspoon of coconut extract to the lemon curd base. The lime-coconut combination is tropical and fragrant, with the coconut cream’s natural coconut flavor now an asset rather than something to minimize. Serve garnished with toasted coconut flakes and a thin slice of fresh lime.
  • Passion Fruit Mousse: Replace 3 tablespoons of the lemon juice with the strained pulp of 4–5 passion fruits (approximately 3 tablespoons of passion fruit juice). Keep the remaining 3 tablespoons of lemon juice as a flavor base. The passion fruit adds an intensely tropical, floral, slightly musky flavor that pairs beautifully with the aquafaba’s clean white foam quality. The finished mousse is a pale golden color rather than white. Garnish with a teaspoon of fresh passion fruit pulp (seeds and all) spooned over the top of each glass just before serving.
  • Raspberry and Lemon Mousse: Make the full lemon mousse as directed. Before pouring into glasses, blend 150g (5oz) of fresh or frozen-and-thawed raspberries with 1 tablespoon of maple syrup until smooth, then strain through a fine sieve to remove the seeds. Layer the mousse and the raspberry coulis in alternating spoonfuls into each glass for a rippled effect. The raspberry coulis gives the finished glasses a visually striking pink-and-white marbled appearance and adds a different tart fruitiness alongside the lemon.

Nutritional Highlights (Per Serving — Based on 5 Servings)

CaloriesProteinCarbsFiberFat
~290 kcal3g24g1g21g

Storage

  • Refrigerator: The mousse keeps covered in the refrigerator for up to 24 hours. After 24 hours the aquafaba foam begins to deflate slowly and the mousse becomes progressively denser — it remains pleasant to eat but loses its characteristic light, airy texture. For the best experience, make the mousse the day it will be served or the evening before.
  • Make-ahead: This is an excellent make-ahead dessert for dinner parties — all the work is done in advance and the mousse simply needs to be garnished immediately before serving. Make up to 24 hours ahead, cover tightly, and garnish at the last moment.
  • Do not freeze: Freezing destroys the foam structure entirely and the thawed mousse will be dense, liquid, and separated. Do not freeze.
  • Weeping or separation: If the mousse begins to weep liquid from the base of the glass after more than 12–14 hours in the refrigerator, this is normal aquafaba foam deflation. The liquid is simply the aquafaba returning to its original form as the foam structure collapses slowly — the mousse is still safe and edible, but its texture will have changed. Eating within 24 hours prevents this.

Frequently Asked Questions

My aquafaba won’t form stiff peaks — it stays foamy and soft. What went wrong?

The two most common causes are fat contamination (any trace of oil or grease prevents foam formation — use a completely clean bowl and beaters, wipe with vinegar-dampened paper, and try again) and thin aquafaba (liquid from some brands of canned chickpeas is thinner and has lower protein content — reduce by simmering for 5 minutes, cool completely, and whip again). A third cause is humidity: aquafaba whips less readily in very humid conditions. Adding the cream of tartar is essential — it helps stabilize the foam significantly.

Can I use fresh-cooked chickpea liquid instead of canned?

Yes — the cooking liquid from freshly cooked dried chickpeas works as aquafaba, but it needs to be concentrated more than canned brine. Cook the chickpeas in a relatively small amount of water, and reduce the cooking liquid by simmering until it is thick and viscous before cooling and whipping. The protein content of home-cooked chickpea brine is more variable than commercial canned brine, so the whipping time and stability may differ slightly.

The mousse is not setting in the refrigerator — it remains very soft even after 4 hours. What happened?

A mousse that does not set is almost always caused by coconut cream that was not cold enough (it needs 12–24 hours refrigerator time to solidify fully) or coconut milk with too low a fat content (light or reduced-fat coconut milk cannot whip and will not set). Check the fat content on the can — full-fat coconut milk should contain 17–22g of fat per 100ml. If the mousse is very soft after 4 hours but not liquid, it may simply need additional chilling time — give it 2–4 more hours.

Can I make this without aquafaba?

Yes — the mousse can be made with just whipped coconut cream and the lemon curd base as a two-component version, which will be denser and richer than the triple-fold version but still very pleasant. Use 3 cans of chilled coconut cream (whipped to stiff peaks), fold in the lemon curd base, and chill as directed. The result will have less of the characteristic mousse lightness and more of the character of a whipped set cream — still excellent, but a different texture from the aquafaba version.


Tried this recipe? Leave a comment below and let us know how it turned out! Tag us on Instagram and Facebook — we love seeing your plant-powered creations. Looking for more addictive vegan snack and appetizer recipes? Browse all recipes on Easy Vegan Recipes — new recipes posted every single week!

Vegan Blueberry Cookies — The Soft, Jammy, Bursting-with-Fruit Cookie That Tastes Like a Blueberry Muffin in Every Bite

vegan blueberry cookies

There is a version of the blueberry cookie that most people have encountered and been mildly disappointed by — the one where the blueberries are studded through a standard sugar cookie dough, where they turn vaguely purple and slightly shriveled during baking, and where the cookie itself is pleasantly sweet but the blueberry flavor is thin and almost decorative rather than genuinely present in every bite. And then there is this version: a thick, soft cookie with a dense, slightly fudgy interior — more muffin-top than crispy cookie — in which the blueberry flavor is concentrated, jammy, and present throughout, where the berries have partially burst during baking and created small pockets of intensely fruity, slightly caramelized jam within the dough, and where the whole cookie smells, straight from the oven, like a blueberry muffin that has been pushed in on itself until all the flavor is compressed into a single round of baked dough. Vegan Blueberry Cookies are made with a brown sugar and coconut oil base (the brown sugar provides moisture and a deep caramel undertone that pairs with blueberry far better than white sugar; the coconut oil provides richness without dairy), flax egg for binding, and a mixture of fresh or frozen blueberries — some stirred in whole, some lightly mashed into the dough before baking. They are thick, they are soft, they are jammy, they are genuinely blueberry-flavored rather than blueberry-colored, and they are the kind of cookie that gets eaten warm from the tray in a way that makes counting them unnecessary. They are 100% vegan, dairy-free, egg-free, and made in one bowl in under 30 minutes. The technique is what makes the blueberry flavor so present and so concentrated.

The technique is the crush-and-swirl method. The problem with blueberries in baked goods is a distribution problem: whole blueberries are approximately 84% water and, during baking, that water releases rapidly into the surrounding dough, creating wet pockets around each berry that can make the dough underbake in those areas and dilute the blueberry flavor into the broader dough rather than concentrating it. If the berries are small and whole, the moisture release is modest; if they are large and plentiful, the cookie can end up wet and sunken around each berry. The crush-and-swirl method solves both the flavor concentration problem and the moisture problem in one step. The blueberries are divided into two portions: two-thirds are kept whole and stirred in at the end as usual; one-third are lightly crushed in a small bowl with the back of a fork until they are broken and releasing their juice (not fully mashed — the goal is broken, juice-releasing berries rather than a smooth purée). The crushed portion is then swirled into the dough at the very end — three or four strokes of a spatula only, creating a ripple of intensely concentrated blueberry through the dough rather than an even distribution. The effect is twofold: the crushed berry juice partially infuses the surrounding dough with concentrated blueberry flavor (far more intense than any individual whole berry can provide), and the reduced water content of the crushed portion (the released juice coats the surface of the dough in a thin, concentrated layer rather than sitting as a large pocket of water inside a whole berry) creates a better moisture balance in the finished cookie — the crushed berries contribute flavor without waterlogging. The whole berries provide bursts of fresh fruit; the crushed swirl provides the jammy, concentrated blueberry backbone that makes these cookies taste genuinely of blueberry rather than merely containing them.

This recipe makes 12 cookies.


Recipe Information

Prep TimeCook TimeTotal TimeMakesCalories
15 mins12–14 mins30 mins12 cookies~195 kcal

Ingredients

  • 200g (1⅔ cups) all-purpose flour
  • 1 tsp baking powder
  • ½ tsp baking soda
  • ½ tsp fine salt
  • ½ tsp ground cinnamon (optional but very good — a small amount of cinnamon deepens the blueberry flavor without being identifiable in the finished cookie; omit for a cleaner, more purely blueberry result)
  • 100g (½ cup, packed) light brown sugar — brown sugar is important here; its molasses content contributes moisture, a slightly caramel depth, and a chewier texture than white sugar. Do not substitute with white sugar.
  • 50g (¼ cup) caster (fine white) sugar
  • 4 tbsp (60ml) refined coconut oil, melted and slightly cooled (refined coconut oil has a neutral flavor; virgin coconut oil works but gives a faint coconut taste that some people enjoy in a blueberry cookie — either is fine)
  • 3 tbsp (45ml) plant milk, unsweetened (oat milk or soy milk — used to adjust the dough consistency)
  • 1 flax egg (1 tablespoon ground flaxseed mixed with 3 tablespoons of water and left to gel for 10 minutes — the gel that forms is the binding agent that replaces an egg; do not skip the 10-minute resting time or the mixture will not have gelled sufficiently to bind the dough)
  • 1 tsp vanilla extract
  • 180g (1¼ cups) fresh or frozen blueberries — fresh blueberries produce the cleanest result; frozen blueberries work equally well and are available year-round, but they release more moisture during baking (the ice crystals in frozen berries rupture cell walls, making them wetter); if using frozen, do not thaw before using and expect the baking time to extend by 1–2 minutes

Instructions

  1. Make the flax egg. Combine 1 tablespoon of ground flaxseed with 3 tablespoons of water in a small bowl. Stir well and set aside for a minimum of 10 minutes — the mixture will become thick and gel-like. This is the binding agent for the cookies; it needs the full 10 minutes to develop.
  2. Preheat and prepare. Preheat the oven to 180°C (355°F). Line two baking sheets with parchment paper.
  3. Mix the dry ingredients. In a large mixing bowl, whisk together the flour, baking powder, baking soda, salt, and cinnamon until evenly combined.
  4. Mix the wet ingredients. In a medium bowl, whisk together the melted coconut oil, brown sugar, caster sugar, plant milk, flax egg, and vanilla extract until smooth and well combined — the sugars should be largely dissolved into the oil and milk mixture.
  5. Combine wet and dry. Pour the wet ingredients into the dry ingredients. Stir with a spatula until just combined — a soft, slightly sticky dough will form. If the dough seems very stiff, add 1 additional tablespoon of plant milk; if it seems very loose and wet, add 1 tablespoon of flour. The dough should hold its shape when scooped but not be dry or crumbly.
  6. Crush-and-swirl — the technique. Divide the blueberries: set aside approximately 120g (⅔ of the total quantity) as whole berries. Place the remaining 60g in a small bowl and crush lightly with the back of a fork — 4–5 presses, breaking the berries and releasing their juice without reducing them to a smooth purée. You want broken, juice-releasing fruit rather than a smooth sauce. Fold the whole blueberries gently into the dough, distributing them evenly. Add the crushed blueberries and their juice over the top of the dough. Using the spatula, swirl through the dough with 3–4 strokes only — enough to create visible streaks and ripples of intense blueberry through the dough but not enough to blend it homogenously. The dough should have visible purple-blue swirls running through it.
  7. Portion and bake. Using a cookie scoop or two spoons, portion the dough into 12 equal mounds on the prepared baking sheets, spacing them approximately 5cm (2 inches) apart. The cookies will spread slightly but not dramatically — the coconut oil base produces a thicker, more contained spread than butter. If desired, gently press a few additional whole blueberries on top of each cookie mound for a more dramatic appearance. Bake at 180°C (355°F) for 12–14 minutes until the edges are set and the tops look just barely done — the centers should still look very slightly underdone and soft. Do not wait for the tops to look fully baked; carryover heat from the tray will continue cooking them after they are removed from the oven.
  8. Cool on the tray. This is important: do not transfer the cookies to a rack immediately. Leave them on the hot baking sheet for 5 minutes — the carryover heat continues setting the cookies during this time, and cookies moved too soon will fall apart as the coconut oil (which sets firm at room temperature) has not had time to solidify back into the dough after melting in the oven. After 5 minutes, transfer carefully to a wire rack and allow to cool for at least 10 minutes before eating (if you can).

Pro Tips

  • Use room temperature coconut oil — melted coconut oil that is hot when added to the cold sugars and flax egg can slightly cook the flax egg and produce an uneven dough. Allow the melted coconut oil to cool to barely warm before using — it should be liquid but not hot to the touch.
  • Do not over-swirl the crushed blueberries — the swirl is what creates the jammy, concentrated pockets of blueberry flavor distributed through the cookie. Three to four strokes of the spatula is exactly right: you want visible purple streaks through the dough, not a uniformly purple dough. Over-swirling distributes the juice too evenly and the finished cookie will be uniformly blueberry-colored rather than having those distinct pockets of intense fruit.
  • Pull them from the oven when they look underdone — this is the instruction that goes against every instinct but is the most important one for soft, fudgy blueberry cookies. At 12–14 minutes, the edges will be just set and the centers will look very soft and slightly raw. This is correct. The cookies will continue cooking on the hot tray for 5 minutes, and a cookie that looks perfectly done when it leaves the oven will be dry and slightly crispy once it has finished cooling. Trust the underbake.
  • Freeze the dough balls for cookies on demand — portion the dough into balls, place on a tray, freeze until solid (approximately 2 hours), then transfer to a freezer bag. Frozen dough balls bake directly from frozen at 180°C for 14–16 minutes — add 2 minutes to the baking time and bake one tray at a time. This produces freshly baked cookies in under 20 minutes with no thawing or dough preparation.

The Blueberry’s American Origin and Its Journey to Global Berry

The blueberry (Vaccinium corymbosum and related species) is one of a very small number of major food crops that are genuinely North American in origin — cultivated from a wild plant indigenous to the forests and bogs of eastern North America, where the small, dark blue-black berry had been eaten by Indigenous peoples for thousands of years before European contact. The Algonquin peoples called it “star berry” — referring to the distinctive five-pointed star pattern formed by the calyx at the base of each berry — and incorporated it into pemmican (a concentrated mixture of dried meat, fat, and dried berries), teas, and various preparations that exploited both its flavor and its preservation qualities (blueberries contain natural preservative compounds including anthocyanins and organic acids). European settlers adopted the blueberry rapidly from Indigenous neighbors, and it became a staple of early American food culture, but its transformation from wild-foraged fruit to globally cultivated crop is almost entirely a 20th-century story. Until the early 20th century there was no commercially cultivated blueberry — all blueberries were wild-harvested, a labor-intensive process that limited availability and made blueberries a seasonal, regional specialty. The commercial blueberry industry was created largely through the work of Elizabeth Coleman White, a New Jersey cranberry farmer, and Frederick Coville, a USDA botanist, who collaborated between 1911 and 1916 to develop the first commercially viable cultivated blueberry — selecting wild plants for large berry size, productivity, and compatibility with cultivated soil conditions. White paid local woodspeople to bring her wild plants with unusually large berries, eventually identifying the parent plants of almost every modern commercial blueberry variety. The cultivated blueberry took decades to spread globally — it was largely unknown in Europe before the mid-20th century, and its current status as a year-round supermarket staple in countries where it does not grow natively is a very recent phenomenon. The cookie on this tray, made with blueberries that may have traveled thousands of miles from their growing region to a kitchen in any part of the world, represents the very end of a supply chain that Elizabeth Coleman White and Frederick Coville built in the bogs of New Jersey a little over a century ago.


Flavor Variations

  • Lemon Blueberry Cookies: Add the finely grated zest of 1 large lemon to the wet ingredients and replace the vanilla extract with ½ teaspoon of lemon extract (or 1 teaspoon of fresh lemon juice). After the cookies have cooled completely, drizzle with a simple lemon glaze: 3 tablespoons of icing sugar whisked with 1–2 teaspoons of fresh lemon juice until it forms a thick, pourable glaze. The lemon-blueberry combination is the most classic of the flavor variations and the one most likely to convert people who claim not to like blueberry desserts.
  • White Chocolate Blueberry Cookies: Add 80g (3oz) of roughly chopped vegan white chocolate to the dough along with the whole blueberries in Step 6. The white chocolate melts into small pools in the cookie and provides a creamy, sweet contrast to the tart, jammy blueberry. Use a good-quality vegan white chocolate (made with cocoa butter rather than vegetable fat) for the best result — cheap vegan white chocolate has an unpleasant waxy mouthfeel that stands out in a cookie.
  • Blueberry and Cardamom Cookies: Add ½ teaspoon of ground cardamom to the dry ingredients in place of (or alongside) the cinnamon. Cardamom and blueberry is a Scandinavian flavor pairing — the floral, slightly citrusy warmth of cardamom elevates the blueberry in the same way that lemon does, though in a warmer, spicier direction. These are particularly good served warm with a strong cup of black coffee. Finish with a very small pinch of flaky salt pressed into the top of each cookie before baking.

Nutritional Highlights (Per Cookie — Based on 12 Cookies)

CaloriesProteinCarbsFiberFat
~195 kcal2g30g1g8g

Storage

  • Room temperature: Store in an airtight container at room temperature for up to 3 days. A piece of bread stored in the container with the cookies (a classic baking trick) keeps them softer for longer — the bread provides moisture that the cookies absorb gradually, preventing them from drying out.
  • Refrigerator: The cookies keep in the refrigerator for up to 5 days. Coconut oil solidifies at refrigerator temperatures, so refrigerated cookies are firmer and slightly denser than room-temperature ones — allow them to come to room temperature for 15–20 minutes before eating for the best texture, or warm briefly in a 150°C (300°F) oven for 3–4 minutes.
  • Freezer (baked): Baked cookies freeze well for up to 2 months in a sealed bag. Defrost at room temperature for 1 hour or warm in a 150°C oven for 5–6 minutes directly from frozen.
  • Freezer (dough): Cookie dough balls freeze for up to 3 months (see Pro Tips). Bake from frozen at 180°C for 14–16 minutes — no thawing required.

Frequently Asked Questions

My cookies spread too much and are thin and crispy instead of thick and soft. What went wrong?

Over-spreading is almost always caused by coconut oil that was too hot when added to the dough (hot oil prevents the dough from forming structure, producing a very loose batter that spreads flat in the oven), or a dough that was baked immediately without any chilling. If your cookies are spreading too much, chill the portioned dough balls in the refrigerator for 30 minutes before baking — cold dough spreads more slowly in the oven’s heat, giving the structure time to set before the spread takes over.

Can I use frozen blueberries?

Yes — frozen blueberries work very well in this recipe (they are available year-round and often have more intense flavor than out-of-season fresh berries). Do not thaw before using — add them frozen directly from the freezer in Step 6. Frozen berries release slightly more moisture during baking than fresh, so the baking time may need to extend by 1–2 minutes. The crush-and-swirl method works equally well with frozen berries — crush while still partially frozen.

Can I replace the flax egg with something else?

Yes — a chia egg (1 tablespoon of chia seeds mixed with 3 tablespoons of water, rested for 10 minutes) works identically to a flax egg and produces the same binding effect. Alternatively, 3 tablespoons of unsweetened applesauce can replace the flax egg — it provides binding and adds a faint apple note that is entirely pleasant with blueberry. Aquafaba (3 tablespoons of chickpea brine) also works, producing a slightly lighter, less dense cookie.

The cookies are very soft and fall apart when I try to move them from the tray. What went wrong?

Cookies that fall apart immediately after baking have been moved too soon — coconut oil needs time to re-solidify after baking. Leave the cookies on the hot tray for the full 5 minutes before attempting to move them. If they still seem fragile after 5 minutes, give them another 2–3 minutes — the solidification time varies slightly with kitchen temperature (in a warm kitchen, coconut oil solidifies more slowly).


Tried this recipe? Leave a comment below and let us know how it turned out! Tag us on Instagram and Facebook — we love seeing your plant-powered creations. Looking for more addictive vegan snack and appetizer recipes? Browse all recipes on Easy Vegan Recipes — new recipes posted every single week!

Homemade Vegan Lemon Ice Cream — The Intensely Citrusy, Silky-Smooth Scoop That Needs No Machine and No Churning

homemade vegan lemon ice cream

There is a particular quality to a great lemon ice cream that separates it entirely from every other flavor of ice cream — a quality of brightness, of clean sharp citrus meeting cold creamy sweetness, of a dessert that manages to be simultaneously refreshing and rich in a way that almost nothing else is. A great lemon ice cream is not subtle. It does not whisper lemon at you from a polite distance. It is immediate and assertive and intensely, unambiguously itself: the lemon is the first thing, the middle thing, and the last thing you taste, and the cream is the vehicle that carries it, amplifies it, and gives it the body to linger. Homemade Vegan Lemon Ice Cream is exactly that kind of ice cream. It is made with full-fat coconut cream, fresh lemon zest and juice, a small amount of cashew cream for additional richness and smoothness, maple syrup for sweetness, and a pinch of turmeric that contributes nothing to flavor but gives the ice cream a pale, luminous yellow color that makes it look, visually, precisely like what it is. It requires no ice cream machine and no churning — the technique achieves a scoopable, smooth, non-icy texture entirely through the management of fat, air, and freezing speed, without any mechanical agitation at all. It comes together in 15 minutes of active time and 6 hours in the freezer, and it produces a lemon ice cream that is genuinely creamy, intensely flavored, and smooth enough to scoop cleanly from the container with a warm spoon. It is 100% vegan, dairy-free, and egg-free. The technique is the reason it does not freeze into an icy, crystalline block.

The technique is the whip-then-freeze method. The fundamental problem with making ice cream without a machine is the formation of large ice crystals. An ice cream machine works by churning the mixture constantly as it freezes — the mechanical agitation breaks up ice crystals as they form, preventing them from growing large enough to produce a coarse, icy texture, and simultaneously whips air into the mixture as it freezes, producing the light, creamy, scoopable texture that defines good ice cream. Without a machine, the mixture freezes in still air, and ice crystals are free to grow large and interconnected, producing a solid, icy block with a granular texture when scooped. The whip-then-freeze method replicates the key functions of churning — crystal disruption and air incorporation — through a different mechanism. Stage one — whip the coconut cream before freezing: the full-fat coconut cream (chilled overnight so the fat separates to a solid layer at the top of the can) is whipped to soft peaks before any other ingredient is added. Whipping incorporates a large volume of air into the fat network of the coconut cream, and that air — distributed throughout the mixture as billions of microscopic bubbles stabilized by the fat — serves two functions during freezing: it insulates the mixture from rapid temperature changes (slowing the freezing rate and allowing smaller, more uniform ice crystals to form), and it mechanically interferes with the ice crystal network, preventing the crystals from connecting into the large, coarse structures that produce an icy texture. Stage two — fold in lemon and cashew cream carefully: the lemon juice, zest, and cashew cream are folded into the whipped coconut cream rather than stirred or beaten, preserving the air bubbles incorporated during whipping. A single overly vigorous stir at this stage can deflate a significant portion of the foam and produce a denser, icier result. Stage three — freeze in a shallow, wide container: a shallow, wide container maximizes the surface area of the mixture exposed to the freezer’s cold air, causing the mixture to freeze faster and more uniformly than a deep, narrow container where the center freezes significantly more slowly than the edges. The combination of whipped air, careful folding, and fast-freeze geometry produces a no-churn ice cream with a smooth, scoopable texture that would be indistinguishable from a machine-churned result to anyone who did not know.

This recipe makes approximately 750ml (1½ pints) of ice cream, serving 6–8.


Recipe Information

Prep TimeFreeze TimeTotal TimeServingsCalories
15 mins6 hours6h 15 mins6–8~285 kcal

Ingredients

  • 2 × 400ml (14oz) tins of full-fat coconut cream — this is the single most important ingredient in the recipe. Full-fat coconut cream (not coconut milk, which has a much lower fat content and will not whip) must be refrigerated for a minimum of 8 hours (overnight is best) before use. The cold causes the fat to separate and solidify at the top of the can in a thick, solid layer. Only this solid layer is used; the liquid at the bottom is reserved for another use (smoothies, curries, soups). The fat content of the coconut cream brand matters significantly — higher-fat brands produce a richer, more stable whipped cream that holds its air better during freezing. Look for a brand with a fat content of at least 20–22% and a minimal ingredient list (coconut extract and water only, with no added stabilizers or emulsifiers that can interfere with whipping).
  • 80g (½ cup) raw cashews, soaked in boiling water for 30 minutes and drained (blended into a smooth cream and added to the coconut cream base; the cashew cream adds richness, a slight neutral creaminess that balances the sharpness of the lemon, and additional fat for smoothness and body — the ice cream can be made without the cashews but is noticeably creamier and smoother with them)
  • 60ml (¼ cup) water (for blending the cashews into cream)
  • 120ml (½ cup) fresh lemon juice — from approximately 3–4 large lemons; fresh lemon juice is essential and cannot be replaced with bottled lemon juice. The brightness, aromatic complexity, and clean citrus flavor of fresh lemon juice is entirely different from the flat, slightly cooked quality of bottled; in a dessert where lemon is the primary flavor, this distinction is clearly perceptible in the finished ice cream.
  • Zest of 3 large lemons — finely grated using a Microplane or the fine side of a box grater; the zest contains the lemon’s essential oils (limonene and other aromatic compounds), which carry a more complex, more intensely aromatic citrus flavor than the juice alone; together, juice and zest provide a lemon flavor that is both sharp (from the juice’s citric acid) and deeply aromatic (from the zest’s volatile oils)
  • 120ml (½ cup) maple syrup (adjust to taste — start with 100ml and add more after folding if a sweeter ice cream is preferred; the freezing process slightly dulls sweetness perception, so the mixture should taste pleasantly sweet and slightly over-sweet at room temperature)
  • 1 tsp vanilla extract (provides a rounded, sweet background note that tempers the sharpness of the lemon)
  • ¼ tsp fine salt (a small pinch of salt in ice cream is not about flavor — it amplifies the perception of sweetness and makes the lemon flavor more vivid and present)
  • ¼ tsp ground turmeric (optional — contributes zero flavor at this quantity but turns the ice cream a warm, pale yellow color that makes it visually striking; without it, vegan lemon ice cream tends to be a slightly grey-white color that does not suggest lemon)

Instructions

  1. Chill the coconut cream. The night before (or at least 8 hours before making the ice cream), place the unopened tins of coconut cream in the coldest part of the refrigerator. Do not shake or tip the tins — the fat needs to separate undisturbed.
  2. Soak the cashews. Place the cashews in a heatproof bowl, cover with boiling water, and leave for 30 minutes. Drain thoroughly.
  3. Make the cashew cream. Combine the drained cashews with the water in a high-powered blender. Blend on high for 60–90 seconds until completely smooth — no visible cashew pieces, completely creamy. Set aside.
  4. Prepare the lemon. Zest all 3 lemons before juicing them (it is significantly easier to zest an intact lemon than a juiced one). Combine the lemon zest and juice in a small bowl with the maple syrup, vanilla extract, salt, and turmeric. Stir well to combine. Taste: the mixture should taste sharply lemony, sweet, and very intense — it will be diluted when folded into the coconut cream.
  5. Whip the coconut cream — Stage 1 of the technique. Open the chilled coconut cream tins carefully, keeping them upright. Use a spoon to scoop out only the solid white fat layer from the top of each tin, transferring it to a large, clean mixing bowl. Discard or reserve the watery liquid remaining in the tins (it will not whip). Using an electric hand mixer or a stand mixer with a whisk attachment, whip the solid coconut fat on high speed for 2–3 minutes until it forms soft peaks — it should look like loosely whipped cream, with volume and billowing texture. Do not over-whip to stiff peaks; soft peaks retain more of the air incorporated during whipping and produce a lighter, airier result. If the coconut cream is not whipping (remaining liquid or grainy rather than forming peaks), the tins were not cold enough or the brand has too low a fat content — place the bowl and the cream in the freezer for 15 minutes and try again.
  6. Fold — Stage 2 of the technique. Add the cashew cream to the whipped coconut cream and fold in gently with a large spatula using 4–5 strokes. Add the lemon-maple mixture and fold in with an additional 8–10 careful strokes — large, slow, sweeping movements from the bottom of the bowl upward. The goal is full incorporation without deflating the whipped coconut cream. Stop folding as soon as the mixture is uniform in color and no streaks of lemon mixture are visible. The final mixture should still look light and airy, not dense or liquid.
  7. Freeze — Stage 3 of the technique. Pour the mixture into a wide, shallow freezer-safe container — a 23 × 33cm (9 × 13 inch) baking dish lined with parchment paper works very well, as does a wide, shallow plastic container. The shallower and wider the container, the faster and more uniformly the mixture freezes. Smooth the surface with a spatula. Cover tightly with a lid or cling film pressed directly against the surface of the mixture (contact covering prevents ice crystals from forming on the exposed top surface). Freeze for a minimum of 6 hours, or overnight.
  8. Serve. Remove from the freezer 5–8 minutes before serving to allow the ice cream to soften slightly — it will be very firm straight from the freezer. Use a warm scoop (run under hot water and dried) to portion into balls. Serve in bowls or cones, garnished with a small amount of additional lemon zest and, if desired, a very thin slice of lemon.

Pro Tips

  • The overnight chill for the coconut cream tins is not optional — it is the single most important preparation step in the recipe. Insufficiently chilled coconut cream will not separate fully, the fat layer will be thin and partially liquid, and the whipped cream will be loose and unstable. A well-chilled tin of high-fat coconut cream produces a thick, solid fat layer that whips easily to stable soft peaks. If making this recipe for the first time, buy an extra tin and chill all of them — the extra tin provides insurance if one brand or tin performs poorly.
  • Taste and adjust sweetness before freezing — once frozen, the sweetness of the ice cream cannot be adjusted. Frozen desserts taste less sweet than their room-temperature equivalents because cold temperature suppresses sweetness perception; the mixture should taste slightly sweeter than you want the finished ice cream to taste. If it seems correctly sweet at room temperature, it will taste slightly under-sweet once frozen. Add an extra tablespoon of maple syrup if in any doubt.
  • Use a Microplane for the lemon zest — a Microplane zester (or the fine holes of a box grater) produces fine, feathery zest that distributes evenly through the ice cream. A vegetable peeler or coarse grater produces large, uneven strips of zest that are unpleasant to encounter in a cold, creamy ice cream. The zest should be so fine it almost disappears into the mixture.
  • Store with a layer of cling film pressed directly on the surface — the air gap between the ice cream surface and a container lid allows ice crystals to form on the top of the ice cream during storage, producing a rough, icy crust. Pressing cling film directly against the surface eliminates the air gap and keeps the surface as smooth as the interior.

Ice Cream’s History: Ancient Luxury, Confectioner’s Secret, and the Industrial Scoop

Ice cream — or the continuum of frozen, sweetened preparations that led to what we call ice cream today — has a history that is simultaneously ancient and surprisingly recent, depending on where the line is drawn. Ancient civilizations in China, Persia, and the Arab world had various preparations involving snow or ice mixed with sweetened or flavored liquids: Chinese emperors of the Tang dynasty (618–907 CE) reportedly consumed a frozen dish of buffalo milk, flour, and camphor; Persian nobles mixed snow with grape juice, rose water, and saffron in a preparation called “sharbat” (from which the English words “sherbet” and “sorbet” derive); Alexander the Great reportedly had snow and ice brought from the mountains and flavored with honey. These preparations, though cold and sweet, are not what we would recognize today as ice cream — they were flavored ices rather than cream-based frozen desserts. The critical invention was the discovery, in the 16th and early 17th centuries in Italy and France, that a mixture of salt and ice could produce temperatures well below the freezing point of water, allowing cream-based mixtures to be frozen rather than merely chilled. The first true cream-based frozen desserts appear in Italian and French court records of the early 17th century — served at Florentine and Parisian courts as extraordinarily expensive, technically demanding novelties that required significant quantities of ice transported from mountains or stored in ice houses. The transformation of ice cream from aristocratic luxury to mass commodity is an entirely industrial story: mechanical refrigeration (developed in the mid-19th century), the ice cream cone (popularized at the 1904 St. Louis World’s Fair), and continuous-process freezing machinery (which made commercial ice cream production economically viable at scale) are the three inventions that democratized ice cream across the 20th century. The no-churn approach that this recipe uses is a domestic adaptation of commercial soft-serve technology — the discovery that a sufficiently high fat content combined with sufficient air incorporation can produce a smooth, scoopable frozen dessert without mechanical churning is a principle that commercial manufacturers have exploited for decades and that home cooks have only recently adopted widely.


Flavor Variations

  • Lemon and Raspberry Ripple: After the folded mixture is poured into the freezer container, drop 3 tablespoons of raspberry jam or a quickly made raspberry coulis (100g of fresh or frozen raspberries blended with 1 tablespoon of maple syrup and strained) in spoonfuls over the top of the lemon mixture. Use a skewer or chopstick to draw swirling lines through the jam and ice cream base, creating a rippled pattern. Freeze as directed. The sharp-sweet raspberry against the bright lemon produces a classic British-style ripple combination in a vegan format.
  • Lemon and Lavender Ice Cream: Add 1 teaspoon of food-grade dried culinary lavender to the lemon-maple mixture before folding. The lavender blooms slightly in the mixture over the freezing period, releasing its floral, slightly herbal perfume into the ice cream. Lemon and lavender is a refined, fragrant combination that works beautifully in the creaminess of the coconut base. Use culinary lavender only — ornamental lavender (from a garden center) may contain pesticides and has a less clean, more soapy flavor.
  • Lemon and Ginger Ice Cream: Add 1 teaspoon of freshly grated ginger and ½ teaspoon of ground ginger to the lemon-maple mixture. The ginger adds warmth and a faint spicy note that amplifies the lemon’s brightness in the same way that ginger amplifies lemon in a hot drink — the two flavors make each other seem stronger than either would alone. Finish each serving with a scatter of finely chopped crystallized ginger for texture and a more intense ginger punch.

Nutritional Highlights (Per Serving — Based on 7 Servings)

CaloriesProteinCarbsFiberFat
~285 kcal3g22g1g21g

Storage

  • Freezer: Keeps for up to 6 weeks in the freezer in a sealed container with cling film pressed against the surface. Beyond 6 weeks, ice crystal growth increases and the texture becomes progressively icier and less smooth — the ice cream is still edible but less creamy. For best texture and flavor, consume within 3–4 weeks.
  • Softening before serving: This ice cream is very firm straight from the freezer (firmer than commercial dairy ice cream because it contains no added stabilizers or emulsifiers). Always remove from the freezer 5–8 minutes before serving and use a warm scoop. In a warm kitchen (above 25°C), 3–4 minutes may be sufficient.
  • Re-freezing: If the ice cream softens significantly — for example, if it was left out too long — it can be refrozen, but the texture will be noticeably icier after a second freeze-thaw cycle. This is because the freeze-thaw process allows ice crystals to recrystallize into larger, coarser structures. Consume re-frozen ice cream within a few days and manage expectations about texture.
  • Individual portions: For single-serving convenience, scoop the freshly made (not yet fully frozen) mixture into individual silicone muffin molds or paper cups, cover, and freeze. Individual portions need only 3–4 hours to freeze fully and can be stored in a freezer bag for up to 6 weeks — remove one at a time and allow to stand for 3–4 minutes before serving.

Frequently Asked Questions

My coconut cream didn’t whip — it stayed liquid and grainy. What went wrong?

The most common causes are: (1) the tins were not cold enough — they needed a full 8–12 hours in the coldest part of the refrigerator; (2) the brand has a low fat content or contains added emulsifiers (guar gum, carrageenan) that prevent fat separation and whipping; (3) the mixing bowl was warm — the bowl and beaters should be cold before whipping (place in the refrigerator for 15 minutes if in doubt). If the cream will not whip after correct chilling, try a different brand. Not all full-fat coconut cream brands whip reliably; trial and error with available local brands is normal.

Can I make this in an ice cream machine instead?

Yes — if you have an ice cream machine, skip the whipping step entirely. Combine all ingredients (blend the cashews into cream, combine with the coconut cream, lemon, maple syrup, vanilla, salt, and turmeric) and churn in the machine according to its instructions. Transfer to a container and freeze for 2–3 hours until firm enough to scoop. The machine-churned version has a slightly lighter, airier texture than the no-churn version.

The ice cream tastes too sour. How do I fix it?

The lemon quantity in this recipe is calibrated for an intensely citrusy result — it is a forward, bold lemon ice cream, not a subtle one. If a milder lemon flavor is preferred, reduce the lemon juice to 80ml (⅓ cup) and use the zest of 2 lemons rather than 3. Before freezing, taste the mixture and add additional maple syrup 1 tablespoon at a time until the balance feels right. Remember that the mixture should taste slightly sweeter than you want the final ice cream to taste.

Can I use coconut milk instead of coconut cream?

No — coconut milk has a significantly lower fat content than coconut cream and will not whip. The fat content of coconut cream (typically 20–24%) is what allows it to form stable foam when whipped; coconut milk (typically 10–14% fat) does not have sufficient fat for this purpose and will produce a liquid mixture that freezes into a solid, icy block. Always use full-fat coconut cream.


Tried this recipe? Leave a comment below and let us know how it turned out! Tag us on Instagram and Facebook — we love seeing your plant-powered creations. Looking for more addictive vegan snack and appetizer recipes? Browse all recipes on Easy Vegan Recipes — new recipes posted every single week!

Vegan Peanut Butter Pie Cheesecake — The Silky, No-Bake, Deeply Nutty Showstopper That Sets Perfectly Every Time

vegan peanut butter pie cheesecake

There are desserts that impress by being technically complicated, and there are desserts that impress by being so immediately, overwhelmingly delicious that the question of how they were made never arises — the eating takes over completely. Vegan Peanut Butter Pie Cheesecake belongs firmly in the second category. It is a no-bake dessert with a thick, crumbly chocolate biscuit base, a filling that is simultaneously a peanut butter cheesecake and a peanut butter pie — silky, dense, intensely nutty, with the faint tang of cream cheese and a sweetness that is rich without being cloying — and a top layer of dark chocolate ganache that sets to a glossy, snappable shell over the peanut butter filling and makes the whole thing look, when sliced, like something that arrived from a very serious dessert counter rather than a home kitchen. The filling is made from vegan cream cheese, coconut cream, natural peanut butter, maple syrup, and vanilla, blended until completely smooth and folded with a minimum of handling into the set base. It requires no baking, no eggs, no dairy, and no specialist equipment beyond a food processor and a springform tin. It is 100% vegan, dairy-free, and egg-free. It serves 10–12 and keeps in the refrigerator for four days, improving slightly as the flavors meld overnight. The technique is the reason the filling is silky rather than grainy or loose.

The technique is the room-temperature blend and cold-set method. The central challenge of a no-bake vegan cheesecake filling — particularly one that contains both vegan cream cheese and peanut butter — is achieving a filling that is completely smooth, cohesive, and dense enough to slice cleanly once set, without being either grainy (from incompletely blended cream cheese or peanut butter) or loose (from a filling that lacks the structural density to hold its shape when the tin is removed). The failure modes are predictable and consistent: vegan cream cheese blended cold produces a lumpy, slightly grainy texture because the fats in vegan cream cheese are solidified at refrigerator temperature and do not fully emulsify even under prolonged blending; peanut butter added to a cold filling seizes slightly, creating streaks rather than a uniform mixture; and a filling that is not set for a sufficient time produces a portion that collapses or slumps when the springform tin is released. The room-temperature blend and cold-set method addresses each failure mode in sequence. Stage one — room temperature: the vegan cream cheese is removed from the refrigerator a full hour before blending and brought to room temperature; the coconut cream is also warmed to room temperature (briefly, in a bowl of warm water if necessary). At room temperature, the fats in both ingredients are soft and fully pliable, and they blend together into a completely smooth, uniform emulsion in 2–3 minutes of high-speed processing — the same ingredients blended cold would require 5–7 minutes and would still produce a slightly uneven texture. Stage two — blend order: the room-temperature cream cheese is blended first and alone until completely smooth before any other ingredient is added; then the peanut butter is added and blended in; then the coconut cream; then the maple syrup and vanilla last. This order ensures each ingredient is fully integrated before the next is introduced, preventing the peanut butter from seizing against cold cream cheese and the coconut cream from diluting an under-processed base. Stage three — cold set: the filled tin is refrigerated for a minimum of 6 hours (overnight is ideal) before the ganache is added and the tin is released. The long cold set allows the coconut cream’s fat to fully solidify around the protein network of the cream cheese and peanut butter, creating a filling that is genuinely firm, slices cleanly, and holds its shape when portioned. The ganache is added after the initial cold set and allowed to set separately — adding it to a warm or incompletely set filling would melt the surface of the cheesecake and produce a muddy, mixed layer rather than a clean ganache shell.

This recipe makes one 23cm (9-inch) cheesecake, serving 10–12.


Recipe Information

Prep TimeSet TimeTotal TimeServesCalories
25 mins7 hours7h 25 mins10–12~485 kcal

Ingredients

For the Chocolate Base

  • 300g (10½oz) vegan chocolate digestive biscuits or Oreos (Oreos are vegan in most markets; chocolate digestives provide a slightly less sweet, more biscuity base) — crushed to fine crumbs
  • 80g (⅓ cup) vegan butter or refined coconut oil, melted
  • 2 tbsp cocoa powder (optional — deepens the chocolate flavor of the base; omit for a standard biscuit-crumb base)
  • 1 tbsp maple syrup (binds and sweetens the base slightly; adds a faint caramel note)

For the Peanut Butter Filling

  • 400g (14oz) vegan cream cheese, at room temperature for 1 hour before use — do not use cold cream cheese (see technique above). Full-fat vegan cream cheese produces a richer, more stable filling than reduced-fat versions; cashew-based or coconut-based vegan cream cheeses generally produce a smoother result than starch-heavy versions.
  • 250g (1 cup) natural smooth peanut butter — natural peanut butter (100% peanuts, no added stabilizers, oil, or sugar) is strongly preferred here; commercial peanut butter blends (such as Jif or Skippy) contain hydrogenated oils and sugar that alter the flavor and can produce a slightly cloying, over-sweet filling. Natural peanut butter provides the pure, slightly savory, intensely nutty flavor that makes this dessert so good. Stir the peanut butter thoroughly before measuring if the oil has separated.
  • 200ml (¾ cup + 1 tbsp) coconut cream, at room temperature — the solid fat from a can of full-fat coconut cream (no need to chill and separate for this recipe — the coconut cream is used as a liquid fat here, not whipped); use the whole well-shaken can or combine both solid and liquid layers together
  • 120ml (½ cup) maple syrup
  • 1 tsp vanilla extract
  • 1 tbsp lemon juice (fresh — a small amount of acid balances the richness of the peanut butter and cream cheese and provides the faint tang that makes this filling taste like a cheesecake rather than a peanut butter mousse)
  • ¼ tsp fine salt (amplifies all other flavors; particularly important in a peanut-butter-forward filling where salt is a flavor partner rather than merely a seasoning)

For the Chocolate Ganache

  • 150g (5oz) vegan dark chocolate (minimum 70% cocoa solids — higher cocoa percentage produces a less sweet, more intensely flavored ganache that cuts the richness of the peanut butter filling beautifully; below 60% the ganache will be noticeably sweeter and less complex)
  • 120ml (½ cup) full-fat coconut cream (the fat in the coconut cream emulsifies with the chocolate to create a smooth, glossy ganache that sets firm enough to snap when cut but is not brittle)
  • 1 tbsp maple syrup (optional — adds a faint sweetness to the ganache; omit for a more intensely bitter chocolate shell)

For Finishing (Optional)

  • 50g (about 6–8) salted roasted peanuts, roughly chopped — scattered over the ganache before it sets; the salt on the peanuts against the bitter chocolate and sweet peanut butter filling is an extraordinary combination
  • Flaky sea salt — a pinch scattered over the ganache surface
  • Peanut butter drizzle — 2 tablespoons of natural peanut butter warmed briefly in the microwave until pourable, drizzled over the set ganache in thin lines

Instructions

  1. Take out the cream cheese. Remove the vegan cream cheese from the refrigerator and leave at room temperature for 1 hour before you need it. This step cannot be rushed effectively — cold cream cheese will not blend smoothly.
  2. Make the base. Crush the biscuits to fine crumbs using a food processor (pulse 10–15 times) or by sealing them in a zip-lock bag and rolling with a rolling pin until no large pieces remain. In a mixing bowl, combine the biscuit crumbs, melted vegan butter, cocoa powder, and maple syrup. Mix until every crumb is moistened and the mixture holds together when squeezed. Press firmly and evenly into the base of a lightly greased 23cm (9-inch) springform tin — use the back of a spoon or the flat base of a glass to press the crumbs into a compact, even layer. Refrigerate the base while you make the filling.
  3. Make the filling — Stage 1 (blend order). In a food processor or high-speed blender, combine the room-temperature vegan cream cheese alone first. Process on high for 60 seconds until completely smooth — scrape down the sides and process for another 30 seconds. The cream cheese should be perfectly smooth with no lumps. Add the peanut butter and process for a further 60 seconds, scraping down as needed. Add the coconut cream and process for 30 seconds. Add the maple syrup, vanilla extract, lemon juice, and salt and process for a final 30–60 seconds until the filling is completely smooth, glossy, and uniform. Taste: it should be intensely peanut buttery, sweet, slightly tangy, and rich. Adjust sweetness or salt to taste at this stage — once set, adjustments cannot be made.
  4. Fill and cold-set — Stage 3. Remove the base from the refrigerator. Pour the peanut butter filling over the base and smooth the top with a spatula — tap the tin gently on the counter 3–4 times to release any air bubbles. Cover tightly with cling film pressed against the surface of the filling (contact covering prevents a skin from forming). Refrigerate for a minimum of 6 hours, or overnight. The filling should be completely firm and set before the ganache is added — press the center gently with a finger; it should feel firm and spring back slightly rather than leaving an indentation.
  5. Make the ganache. Once the filling is fully set, make the ganache: finely chop the dark chocolate and place in a heatproof bowl. Heat the coconut cream in a small saucepan over medium heat until it just begins to simmer around the edges (do not boil). Pour the hot coconut cream over the chopped chocolate. Leave undisturbed for 2 minutes, then stir gently from the center outward in slow, circular motions until the chocolate is completely melted and the ganache is smooth and glossy. Add the maple syrup if using and stir to combine. Allow the ganache to cool for 5 minutes until it is warm but no longer hot.
  6. Top and final set. Remove the cheesecake from the refrigerator. Pour the ganache over the surface of the set filling, tilting the tin gently to distribute it evenly to the edges. If using finishing toppings (chopped peanuts, flaky salt, peanut butter drizzle), add them now while the ganache is still liquid — they will set into the ganache surface as it cools. Return the cheesecake to the refrigerator for a minimum of 1 hour until the ganache is fully set.
  7. Release and serve. Run a thin knife or palette knife around the inside edge of the springform tin to loisten any filling that has adhered to the side. Carefully unclasp and remove the springform ring. Use a sharp knife dipped in hot water and wiped dry between each cut to slice cleanly through the ganache shell without cracking it. Serve cold, directly from the refrigerator.

Pro Tips

  • Bring everything to room temperature — the filling instructions say room-temperature cream cheese, but the instruction extends further: a cold blender bowl and cold peanut butter will partially re-solidify the cream cheese you worked to warm up, producing a slightly less smooth filling. If the kitchen is cold, briefly warm the blender jug with hot water, dry it, and use peanut butter that has been at room temperature for at least 30 minutes.
  • A hot, dry knife is the only way to cut this cleanly — the ganache shell will crack under a cold knife because chocolate is brittle. Dip the knife in a jug of hot water, shake off the excess, wipe completely dry with a cloth, and cut in one smooth downward motion without sawing. Repeat the dip-wipe between every slice. The chocolate ganache cuts like glass when approached correctly; it shatters when approached with a cold blade and force.
  • Make it the day before — this is a dessert that genuinely needs time, and “the day before” is always the right answer for a no-bake cheesecake. A cheesecake pulled from the refrigerator at the 6-hour mark is set enough to serve but is slightly softer at the center and has a less clean slice than one that has had 12–14 hours to fully firm. Make it the afternoon before a dinner party, slice it cold, and it will be perfect.
  • Natural peanut butter consistency matters — natural peanut butter can vary enormously in consistency between brands; some are very thick and almost paste-like, others are runny enough to pour. A thicker peanut butter produces a denser, firmer filling; a runny one produces a softer, more mousse-like result. For the firmest, most easily sliced filling, use a thicker natural peanut butter. If the only available option is very runny, add 1 additional tablespoon of coconut cream and increase the cold-set time to 8 hours.

Peanuts in the World: A Legume, a Continent, and the Invention of Peanut Butter

The peanut (Arachis hypogaea) is not a nut. It is a legume — a member of the same plant family as lentils, chickpeas, and beans — that develops its seeds underground rather than on a tree, a growth habit so unusual that it gave rise to the alternative name “groundnut” in much of the English-speaking world outside North America. Peanuts are native to South America — the region of origin is generally identified as the lowlands of what is now Bolivia and northwestern Argentina, where wild Arachis species still grow and where peanut remains have been found in archaeological contexts dating to approximately 7,600 years ago. Peanuts were cultivated throughout pre-Columbian South and Central America, where they were a significant food crop for the Inca and for numerous Mesoamerican civilizations, and they were introduced to Europe, Africa, and Asia via the Spanish and Portuguese Columbian Exchange networks in the 16th century. In West Africa in particular, the peanut was adopted with extraordinary speed and thoroughness, becoming a central ingredient in regional cooking within a century of introduction — a rate of adoption that reflected the peanut’s exceptional adaptability to the climate and soils of sub-Saharan West Africa and the already well-established culinary use of other oilseeds in the region. The peanut was re-introduced to North America from West Africa during the Atlantic slave trade — an irony that makes the peanut’s North American story inseparable from that history. The invention of peanut butter as a commercial product is most often attributed to John Harvey Kellogg (yes, the cereal inventor), who patented a process for producing peanut paste as a protein supplement for patients at his Battle Creek Sanitarium in Michigan in 1895, and to Marcellus Edson of Montreal, whose 1884 Canadian patent for “peanut candy” describes a product that is essentially a smooth peanut paste — the historical record is genuinely contested. What is documented is that peanut butter became a mass-market American staple after its introduction at the 1904 St. Louis World’s Fair (the same event that popularized the ice cream cone), and that commercial peanut butter production in the United States expanded dramatically through the First and Second World Wars, when it served as a high-protein, shelf-stable protein source for military rations.


Flavor Variations

  • Chocolate Peanut Butter Cheesecake: Add 3 tablespoons of good quality cocoa powder to the filling along with the maple syrup. The cocoa-peanut butter combination produces a filling that tastes like a Reese’s peanut butter cup — rich, intensely chocolatey-nutty, and deeply satisfying. Reduce the maple syrup by 1 tablespoon to compensate for the bitterness of the cocoa. Finish with the dark chocolate ganache as directed and a generous scattering of chopped salted peanuts.
  • Caramel Peanut Butter Cheesecake: Replace the maple syrup in the filling with 120ml (½ cup) of a simple vegan caramel sauce (coconut sugar, coconut cream, and vegan butter cooked together until thickened). The caramel adds a deeper, more molasses-like sweetness than maple syrup and produces a filling with an almost toffee-like undertone that pairs extraordinarily well with the peanut butter. Drizzle additional caramel sauce over the ganache before serving.
  • White Chocolate Peanut Butter Cheesecake: Replace the dark chocolate ganache with a white chocolate ganache: melt 150g (5oz) of good-quality vegan white chocolate with 100ml (⅓ cup + 1 tbsp) of coconut cream, following the same method. The white chocolate ganache is significantly sweeter and less bitter than dark, and the combination of white chocolate and peanut butter has a dessert-bar quality that is very appealing. Scatter flaky sea salt generously over the white chocolate ganache before it sets — the salt is essential to balance the increased sweetness.

Nutritional Highlights (Per Slice — Based on 11 Slices)

CaloriesProteinCarbsFiberFat
~485 kcal11g38g3g33g

Storage

  • Refrigerator: Store covered in the refrigerator for up to 4 days. The flavor deepens and improves over the first 24–48 hours as the filling ingredients meld. Keep the springform tin base under the cheesecake for storage — it protects the biscuit base and makes moving the cheesecake easier. Cover with a large inverted bowl or cling film draped loosely over the top (do not press cling film against the ganache surface — it will pull the ganache when removed).
  • Freezer: Freezes very well for up to 2 months. Freeze the whole cheesecake (without any fresh garnishes) on its springform base, uncovered, until the ganache is solid (approximately 2 hours), then wrap tightly in cling film and foil. Defrost overnight in the refrigerator — do not defrost at room temperature, which can cause condensation on the ganache surface. The frozen-and-thawed filling is slightly less smooth than freshly set, but the flavor is fully preserved.
  • Individual slices: Pre-sliced portions can be frozen individually wrapped in cling film and stored in a freezer bag for up to 2 months. A frozen slice can be eaten partially thawed (20–30 minutes at room temperature) for a firmer, almost ice cream-like texture, or fully thawed in the refrigerator for 2–3 hours.
  • The ganache shell: The dark chocolate ganache shell protects the filling from absorbing refrigerator odors — the cheesecake is much better stored with the ganache intact than cut open and stored in pieces without a covering.

Frequently Asked Questions

The filling is grainy and lumpy instead of smooth. What went wrong?

Grainy filling is almost always caused by cold cream cheese — the fats in vegan cream cheese are solidified at refrigerator temperature and simply do not emulsify properly even under prolonged blending. The room-temperature step is the most important instruction in the recipe; a full hour at room temperature is required, not 10 minutes on the counter. If the filling is already made and grainy, transfer it to a small saucepan and warm gently over very low heat, stirring constantly, until the fats melt and the mixture becomes smooth — then allow to cool slightly before pouring onto the base.

Can I use almond butter or cashew butter instead of peanut butter?

Yes — almond butter produces a more delicate, slightly less assertive flavor; cashew butter produces the mildest, most neutral result (almost more of a pure cream cheesecake than a nut-butter pie). Both are excellent substitutes and follow the same technique. If using cashew butter, consider adding 1 additional tablespoon of maple syrup as cashew butter is less naturally sweet than peanut butter. Sunflower seed butter is an allergy-friendly substitute for nut-free households.

Can I make individual portions instead of one large cheesecake?

Yes — divide the biscuit base and filling among 12 lined muffin cups or individual silicone molds. Press the crumb base in the bottom of each cup, fill with the peanut butter mixture, and refrigerate for 4 hours before topping with ganache. Individual portions set faster than a large cheesecake and are an excellent party dessert — easier to serve and portion without slicing.

My ganache has seized and become grainy instead of smooth. How do I fix it?

Seized ganache is usually caused by water contamination (even a small drop of water can cause chocolate to seize) or overheating the coconut cream. To fix seized ganache: add 1 tablespoon of warm coconut cream at a time, stirring gently after each addition. The added fat usually brings the ganache back to a smooth, glossy emulsion after 2–3 additions. If the ganache cannot be rescued, melt it again over a bain marie with an additional 50ml of coconut cream, stirring constantly.


Tried this recipe? Leave a comment below and let us know how it turned out! Tag us on Instagram and Facebook — we love seeing your plant-powered creations. Looking for more addictive vegan snack and appetizer recipes? Browse all recipes on Easy Vegan Recipes — new recipes posted every single week!
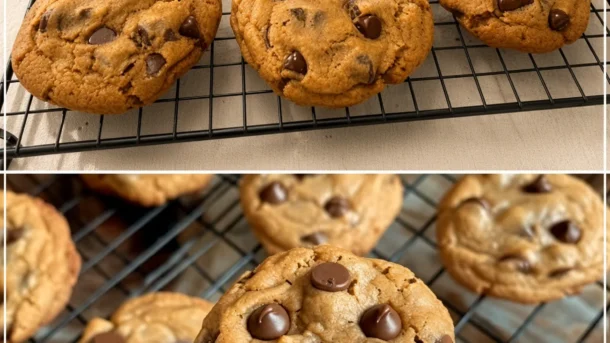
Vegan German Chocolate Cheesecake — The Most Indulgent Plant-Based Dessert You Will Ever Make

vegan german chocolate cheesecake

There are desserts that make an occasion feel genuinely special. And then there are desserts like this Vegan German Chocolate Cheesecake — the kind that combines the rich, tangy creaminess of a classic cheesecake with the deeply chocolatey base of a German chocolate cake, topped with the iconic sticky coconut pecan frosting that makes German chocolate cake so beloved, into a single, spectacular dessert that looks like it came from a professional bakery and tastes even better than it looks. This is that dessert. The one that silences the table on the first bite. The one that people remember long after the occasion is over.

This cheesecake starts with a rich chocolate Oreo-style cookie crust, filled with a silky cashew and vegan cream cheese filling deeply flavored with dark chocolate and vanilla, baked until set and perfectly smooth, then crowned with the signature German chocolate topping — a slow-cooked caramelized coconut pecan frosting so rich and deeply flavored that it elevates the cheesecake beneath it from excellent to genuinely extraordinary.

What makes this cheesecake so outstanding is the layering of distinct but complementary elements — the crunch of the chocolate crust, the silky richness of the chocolate cheesecake filling, and the sticky, caramelized, texturally complex coconut pecan topping, all present simultaneously in every single forkful.

This recipe is 100% vegan, ready in about 90 minutes of active preparation plus chilling time, and absolutely magnificent served in generous slices at any celebration where you want to demonstrate beyond doubt that plant-based desserts are not a compromise but a genuine upgrade.


Recipe Information

Prep TimeCook TimeChill TimeTotal TimeServingsCalories
30 mins55 mins6 hours~8 hours12~520 kcal

Ingredients

For the Chocolate Cookie Crust

  • 250g vegan chocolate sandwich cookies (Oreo-style)
  • 5 tbsp vegan butter, melted

For the Chocolate Cheesecake Filling

  • 2 cups (260g) raw cashews, soaked in boiling water for 30 minutes then drained
  • 400g vegan cream cheese, softened
  • ½ cup (120ml) full-fat coconut cream
  • ¾ cup (150g) cane sugar
  • 150g vegan dark chocolate (70%), melted and cooled slightly
  • 2 tbsp cocoa powder
  • 2 tsp pure vanilla extract
  • 2 tbsp cornstarch
  • Pinch of salt

For the Coconut Pecan Topping

  • 1 cup (200g) brown sugar or coconut sugar
  • 1 cup (240ml) full-fat coconut cream
  • ½ cup (115g) vegan butter
  • 1½ cups (130g) shredded coconut, toasted
  • 1 cup (110g) pecans, toasted and roughly chopped
  • 1 tsp pure vanilla extract
  • Pinch of salt

Instructions

  1. Make the chocolate crust. Preheat the oven to 325°F (160°C). Process the chocolate cookies in a food processor until fine crumbs form. Add the melted vegan butter and pulse until combined. Press firmly into the base and slightly up the sides of a greased 23cm (9-inch) springform pan. Bake for 8 minutes. Set aside to cool slightly.
  2. Make the cheesecake filling. Place the drained cashews, vegan cream cheese, coconut cream, sugar, melted chocolate, cocoa powder, vanilla extract, cornstarch, and salt in a high-speed blender. Blend for 90 seconds until completely smooth, silky, and lump-free. Taste and adjust sweetness if needed.
  3. Bake the cheesecake. Pour the filling over the prepared crust and smooth the top. Bake at 325°F (160°C) for 45–50 minutes until the edges are set and the center has only a very slight wobble. Do not overbake — the filling firms considerably during chilling.
  4. Cool and chill. Remove from the oven and let cool completely at room temperature, then refrigerate for a minimum of 6 hours, ideally overnight, until completely firm.
  5. Make the coconut pecan topping. In a saucepan over medium heat, combine the brown sugar, coconut cream, vegan butter, and salt. Bring to a simmer, stirring, and cook for 8–10 minutes until thickened and caramelized to a deep golden color. Remove from heat and stir in the vanilla extract, toasted coconut, and toasted pecans. Cool for 15–20 minutes until thickened to a spreadable consistency.
  6. Top and serve. Spread the coconut pecan topping generously over the surface of the chilled cheesecake. Slice with a sharp knife dipped in hot water and wiped between cuts for the cleanest slices.

Pro Tips

  • Blend the cheesecake filling for the full 90 seconds — any graininess from the cashews is unacceptable in a finished cheesecake and requires thorough blending to eliminate.
  • Do not overbake the cheesecake — a slight wobble in the center is correct; the filling sets completely during chilling.
  • Chill for the full 6 hours minimum — ideally overnight — before adding the topping or slicing.
  • Cook the coconut pecan topping until properly thickened and caramelized; an undercooked topping will be too liquid to hold its shape on the cheesecake.
  • Dip the knife in hot water and wipe between slices for the most professional, clean presentation.

The Story Behind German Chocolate Cake and Cheesecake

As discussed in our Vegan German Chocolate Loaf Cake recipe, German chocolate cake is an American creation named after Samuel German, whose dark baking chocolate became the base for a now-iconic dessert featuring the signature coconut pecan frosting. This cheesecake adaptation takes that beloved flavor profile — chocolate base, creamy filling, sticky coconut pecan topping — and reimagines it in cheesecake form, which provides a richer, more velvety canvas for all three components than a traditional layer cake.


Flavor Variations

  • Espresso German Chocolate Cheesecake: Add 1 teaspoon of espresso powder to the cheesecake filling for a mocha depth that amplifies the chocolate flavor throughout.
  • No-Bake Version: Replace the cornstarch with agar agar and skip the baking — pour the filling over a no-bake crust and refrigerate until set for a lighter, simpler version.
  • Mini Cheesecakes: Divide the crust and filling between a lined muffin tin for individual portions that are particularly convenient for parties and celebrations.

Nutritional Highlights (Per Serving)

CaloriesProteinCarbsFiberFat
~520 kcal8g54g4g32g

Storage

  • Refrigerator: Store covered in the springform pan or in an airtight container for up to 5 days. The cheesecake actually improves on day 2 as the flavors deepen.
  • Freezer: Freeze individual slices wrapped tightly for up to 2 months. Thaw overnight in the refrigerator before serving.
  • Make ahead: This cheesecake is an ideal make-ahead dessert — the filling is best after overnight chilling, making it perfect for preparing the day before any celebration.

Frequently Asked Questions

Can I make this cheesecake without a springform pan?

A springform pan is strongly recommended for the cleanest release and most professional presentation. A deep cake tin lined with parchment paper can work as an alternative if needed.

Why did my cheesecake crack?

Cracking is usually caused by overbaking or cooling too quickly. Remove from the oven while the center still wobbles very slightly, and let cool gradually at room temperature before refrigerating.

Can I make this without cashews?

Cashews can be replaced with additional vegan cream cheese for a simpler filling, though the texture will be slightly different — less silky and more dense than the cashew version.


Tried this recipe? Leave a comment below and let us know how it turned out! Tag us on Instagram and Facebook — we love seeing your plant-powered creations. Looking for more showstopping vegan cheesecake and dessert recipes? Browse all recipes on Easy Vegan Recipes — new recipes posted every single week!

Vegan Pumpkin Butter Cookies — Soft, Spiced, and Melt-in-Your-Mouth Autumn Baking at Its Best

vegan pumpkin butter cookies

There is a specific kind of cookie that autumn seems to demand — not the crisp, snapping kind made for dunking, and not the oversized, doughy kind that needs to be eaten warm from a tray, but the soft, tender, pillowy kind that yields gently under the slightest pressure and releases a warmth of spiced, caramelized flavor that is somehow both comforting and complex. Vegan Pumpkin Butter Cookies are exactly that cookie. They are thick and soft with a slightly domed top, warmly golden from a full tablespoon of pumpkin pie spice and a generous measure of brown sugar, and they have the distinctive tender, almost cake-like crumb that pumpkin brings to baked goods — a crumb that holds its moisture over days, that stays as soft on day three as it was on day one, and that comes from the pumpkin purée acting as both a flavoring and a moisture reservoir inside the dough. The butter in the recipe is vegan block butter — the kind that creams properly, holds air when beaten, and gives the cookies their slight lift and richness — and it is browned before use, a step that takes three minutes and produces a deeply nutty, toffee-like flavor that turns a good spiced cookie into an exceptional one. They are finished with a drizzle of vanilla glaze that sets to a soft shell over the cooled cookies, pooling in the slight dome of each surface and adding a sweetness that balances the warmth of the spice. They are 100% vegan, dairy-free, and egg-free. They make 18 cookies. The technique is the reason the cookies are soft and thick rather than flat and spread-thin.

The technique is the brown-butter-and-chill method. The structural challenge specific to pumpkin cookies is excess moisture. Pumpkin purée contains approximately 90% water by weight — far more moisture than most cookie mix-ins — and that moisture, when it enters a standard butter-sugar-flour dough, disrupts the gluten development and fat structure in ways that cause the cookies to spread flat, puff and then collapse, or bake to a wet, underbaked-feeling center even when the exterior looks done. The brown-butter-and-chill method addresses the moisture problem in two stages. Stage one — brown the butter: vegan block butter is melted in a light-colored saucepan over medium-high heat and cooked, whisking occasionally, for 4–5 minutes beyond the point of melting, until the milk proteins (present in vegan butter as added plant proteins) brown and the butter smells deeply nutty. Browned butter contains significantly less water than unbrowned butter — approximately 15–20% of the butter’s water content evaporates during the browning process — meaning that the dough starts with less total liquid. Additionally, browned butter does not cream to the same volume as softened butter, which means the dough is denser and more compact, which resists spreading during baking. Stage two — chill the dough: the assembled dough (after incorporating the pumpkin and all other ingredients) is chilled in the refrigerator for a minimum of 60 minutes, and ideally overnight. Chilling firms the fat in the dough (which has been liquefied by the browning process) back to a semi-solid state, and — crucially — allows the flour to fully hydrate by absorbing moisture from the pumpkin purée during the rest period. By the time the dough goes into the oven, the excess pumpkin moisture has been absorbed into the flour rather than sitting free in the dough; the chilled fat resists rapid spreading at the start of baking; and the cookies bake thick, soft, and domed rather than flat and wet.

This recipe makes 18 cookies.


Recipe Information

Prep TimeCook TimeTotal TimeServingsCalories
20 mins + 60 mins chill12 mins~90 mins18 cookies~195 kcal

Ingredients

For the Cookies

  • 225g (1 cup / 2 sticks) vegan block butter — use a block-style vegan butter (such as Miyoko’s, Violife, or Earth Balance Buttery Sticks); tub-style vegan spread contains too much water and too little fat to brown properly or provide sufficient structure; this distinction is important and should not be substituted
  • 200g (1 cup, packed) light brown sugar
  • 50g (¼ cup) granulated white sugar
  • 180g (¾ cup) pumpkin purée — use pure canned pumpkin purée (one ingredient: pumpkin), not pumpkin pie filling (which contains added sugars and spices and will make the cookies too sweet and over-spiced); blot the purée on a paper towel before measuring to remove surface moisture
  • 1 tsp vanilla extract
  • 1 tsp apple cider vinegar — acts as the egg replacer in combination with the pumpkin; the acidity reacts with the leavening to provide lift, and the vinegar flavor bakes out completely and is undetectable in the finished cookie
  • 280g (2¼ cups) all-purpose flour (plain flour), spooned and leveled — do not pack the flour; packed flour produces a dry, dense cookie
  • 1 tsp baking soda
  • ½ tsp baking powder
  • 1 tbsp pumpkin pie spice (or a blend of: 1½ tsp cinnamon + ¾ tsp ground ginger + ¼ tsp ground nutmeg + ¼ tsp ground allspice + ¼ tsp ground cloves)
  • ½ tsp fine salt

For the Vanilla Glaze

  • 120g (1 cup) powdered sugar (icing sugar), sifted
  • 2–3 tbsp unsweetened oat milk or soy milk
  • ½ tsp vanilla extract
  • A pinch of cinnamon (optional)

Instructions

  1. Brown the butter — Stage 1. Place the vegan block butter in a light-colored saucepan (light-colored is important — it allows you to see the color change of the browning milk proteins clearly; a dark pan makes it nearly impossible to judge doneness). Melt over medium heat, then increase to medium-high. Cook, whisking frequently, for 4–5 minutes after the butter has fully melted. The butter will foam, then the foam will subside, and the butter will begin to smell nutty and toasty — watch for small golden-brown specks forming on the bottom of the pan. As soon as the specks turn golden-brown and the butter smells deeply nutty (like toffee or toasted hazelnuts), remove immediately from the heat and pour into a large mixing bowl. The browning happens quickly once it starts and the butter can burn within 30 seconds of going too far — stay close and watch carefully.
  2. Cool the browned butter. Allow the browned butter to cool for 10 minutes until it is warm but no longer hot. It will be liquid at this stage; this is correct.
  3. Mix the sugars. Add the brown sugar and granulated sugar to the warm browned butter. Whisk vigorously for 1–2 minutes until well combined and slightly thickened. The sugars will partially dissolve in the warm butter.
  4. Add the wet ingredients. Add the pumpkin purée, vanilla extract, and apple cider vinegar to the butter-sugar mixture. Whisk until fully combined and smooth. The mixture will be a warm amber-orange color.
  5. Add the dry ingredients. In a separate bowl, whisk together the flour, baking soda, baking powder, pumpkin pie spice, and salt. Add the dry ingredients to the wet ingredients and fold with a spatula until just combined — do not overmix; stop as soon as no dry flour streaks remain. The dough will be soft and slightly sticky.
  6. Chill the dough — Stage 2. Cover the bowl tightly with cling film and refrigerate for a minimum of 60 minutes. For best results (thicker, more flavorful cookies with a deeper spice profile), chill overnight. Do not skip this step — unchilled dough will spread flat during baking.
  7. Preheat and prepare. When ready to bake, preheat the oven to 180°C (350°F). Line two baking trays with parchment paper.
  8. Portion the cookies. Remove the dough from the refrigerator — it will be firm and easy to handle. Using a medium cookie scoop (approximately 2 tablespoons of dough per cookie), portion the dough onto the prepared trays, spacing cookies at least 5cm (2 inches) apart. Roll each portion briefly in your hands to form a smooth ball, then place on the tray. Do not flatten — the cookies will spread slightly in the oven and the domed shape is desirable.
  9. Bake. Bake at 180°C for 11–13 minutes until the edges are set and the tops look just barely done — the centers should still look very slightly underdone and the cookies should feel soft when pressed gently. They will firm as they cool. Do not overbake — a pumpkin cookie baked until it looks fully done in the oven will be dry and crumbly when cool.
  10. Cool. Allow the cookies to cool on the tray for 5 minutes before transferring to a wire rack to cool completely. Do not glaze warm cookies — the glaze will melt and run off.
  11. Make the glaze. Whisk together the sifted powdered sugar, 2 tablespoons of oat milk, vanilla extract, and cinnamon if using. The glaze should be thick enough to coat the back of a spoon and drizzle in a slow, steady stream — add the third tablespoon of oat milk only if needed to reach this consistency. Drizzle over the fully cooled cookies using a fork or a piping bag. Allow the glaze to set for 15–20 minutes at room temperature before serving or storing.

Pro Tips

  • Blot the pumpkin purée on a paper towel before measuring — this step removes the surface moisture from the purée and takes 30 seconds; the difference is surprisingly significant. Open the can, spoon the purée onto 2–3 layers of paper towel, fold over and press gently, then measure the blotted purée. Combined with the brown-butter and overnight chill, this three-stage moisture reduction is what gives the cookies their consistently thick, domed profile rather than a flatter, wetter cookie.
  • The cookies are best on day 2 — on the day of baking the spice notes are bright and slightly sharp; after overnight rest in a sealed container, the brown sugar, pumpkin, and spices meld into a warmer, deeper, more rounded flavor. If making for a special occasion, bake the day before and glaze the day of serving.
  • For a crinkle-top cookie effect, remove the cookies from the oven after 10 minutes, tap the tray firmly on the countertop 2–3 times to deflate them slightly, return to the oven for 1–2 more minutes. The tapping creates the crinkled, wrinkled surface of a traditional crinkle cookie — purely aesthetic but very effective. This is optional and does not affect flavor.
  • These cookies freeze beautifully — freeze the unglazed baked cookies in a sealed container for up to 2 months. Thaw at room temperature for 1 hour and glaze fresh before serving. The unglazed cookies are also excellent frozen and eaten directly from the freezer as a cold treat.

Pumpkin in Baking: The Vegetable That Became an Autumn Icon

Pumpkin’s journey from a practical field crop to the defining flavor of a cultural season is one of the more unlikely transformations in the history of food. The genus Cucurbita — which includes pumpkins, squash, and gourds — was domesticated in Mesoamerica approximately 10,000 years ago, making it among the earliest cultivated plants in the Americas. For most of its agricultural history, pumpkin was grown primarily for its seeds and its flesh served as a reliable calorie source — dense, storable, and versatile — rather than as a flavoring agent. The Pilgrims who encountered pumpkin in 17th-century New England ate it as a staple vegetable: boiled, mashed, stuffed, and dried — practical winter food rather than seasonal indulgence. The transformation of pumpkin into a flavoring rather than a food happened gradually through the lens of pie. Pumpkin pie, made by cooking sweetened pumpkin purée in a spiced custard and baking it in a pastry shell, became associated with New England harvest celebrations through the 18th and 19th centuries, and its association with Thanksgiving — formalized as a national holiday in 1863 — gave pumpkin a fixed position in the American seasonal calendar that no other flavor possessed. The leap from pumpkin-as-pie to pumpkin-as-universal-baking-flavor accelerated in the 20th century as commercial canned pumpkin purée (introduced by Libby’s in the 1920s) made the ingredient accessible year-round, and as recipe magazines and food advertisers discovered that consumers responded with strong seasonal purchase behavior to products positioned around pumpkin spice. The specific spice blend associated with pumpkin — cinnamon, ginger, nutmeg, allspice, cloves — is itself a historically European combination applied to an American ingredient; the spices traveled to the New World via trade routes that pumpkin never used. In baking, pumpkin’s technological function is as important as its flavor: the purée’s high water content and the presence of natural emulsifying compounds in the flesh act as both a moisture reservoir and a fat-partial replacer, meaning that cookies and cakes made with pumpkin stay moist significantly longer than those made without it — a practical quality that its seasonal reputation has long overshadowed.


Flavor Variations

  • Brown Butter Maple Cookies: Replace the granulated white sugar entirely with an additional 50g of brown sugar, and add 2 tablespoons of pure maple syrup (not maple-flavored syrup) along with the pumpkin purée. Reduce the oat milk in the glaze to 1 tablespoon and add 1 tablespoon of maple syrup to the glaze instead. The result is a deeper, more caramelized cookie with a pronounced maple character that pairs beautifully with the browned butter notes.
  • Chocolate Chip Pumpkin Cookies: Fold 150g (¾ cup) of vegan dark chocolate chips into the finished dough before chilling. The combination of dark chocolate and pumpkin spice is unexpectedly harmonious — the bitterness of the chocolate provides contrast to the warm sweetness of the spiced pumpkin dough, and the chips add textural variation to the soft, uniform crumb. Omit the vanilla glaze or use a chocolate drizzle (melted vegan dark chocolate thinned with a small amount of coconut oil) instead.
  • Chai Spice Cookies: Replace the pumpkin pie spice blend with a chai-inspired blend: 1 tsp cinnamon + ½ tsp ground cardamom + ½ tsp ground ginger + ¼ tsp ground black pepper + ¼ tsp ground cloves. Add 1 teaspoon of finely ground black tea leaves (from a tea bag, emptied) to the dry ingredients. The chai spice version is more complex and slightly more assertive than the classic pumpkin spice blend, with cardamom’s floral brightness and the subtle heat of the black pepper creating a flavor profile reminiscent of a masala chai in cookie form.

Nutritional Highlights (Per Cookie — Based on 18 Cookies, Without Glaze)

CaloriesProteinCarbsFiberFat
~195 kcal2g28g1g9g

Storage

  • Room temperature: Store in a sealed airtight container at room temperature for up to 5 days. The cookies remain soft and moist throughout — the pumpkin purée acts as a natural humectant, retaining moisture in the crumb over time. Place a small piece of bread in the container if you want to extend softness even further (the cookies will draw moisture from the bread before losing it themselves, an old baker’s trick).
  • Glazed vs. unglazed storage: The cookies store better unglazed — the glaze softens slightly in a sealed container due to moisture from the cookies. For the best texture, store unglazed and glaze in small batches as needed. If storing glazed, allow the glaze to set fully (at least 1 hour) before layering in a container, and place parchment paper between layers to prevent sticking.
  • Freezer: Freeze unglazed baked cookies in a single layer until solid (about 2 hours), then transfer to a freezer bag for up to 2 months. Thaw at room temperature for 1 hour — the cookies return to their fresh-baked texture remarkably well. Glaze after thawing.
  • Dough: The unbaked, chilled dough keeps in the refrigerator for up to 3 days, or can be scooped into balls and frozen for up to 2 months (bake directly from frozen, adding 2–3 minutes to the baking time).

Frequently Asked Questions

My cookies spread flat instead of staying thick and domed. What went wrong?

Flat pumpkin cookies are almost always caused by either insufficient chilling time or using tub-style vegan spread instead of vegan block butter. Tub-style spreads have a higher water content and lower fat content than block butter, which means they cannot brown correctly and provide less structural fat in the dough. For the next batch, use vegan block butter and chill the dough for a full 60 minutes minimum — overnight is even better. Also check that the baking soda is fresh (a fresh pack fizzes immediately when a small amount is dropped in vinegar; old baking soda fizzes weakly or not at all).

Can I use fresh pumpkin purée instead of canned?

Yes — homemade pumpkin purée works well, with one important caveat: homemade purée is often significantly wetter than canned. After making the purée, strain it through a fine mesh sieve or cheesecloth for 30–60 minutes to remove excess water before measuring. The amount needed after straining is the same as the canned amount in the recipe. Canned pure pumpkin purée has a more consistent moisture content and tends to produce more reliable results in baking.

Can I make these gluten-free?

Yes — substitute a 1:1 gluten-free baking flour blend (one that includes xanthan gum) for the all-purpose flour in an equal amount. The chill time becomes even more important for gluten-free cookies: gluten-free flours absorb liquid more slowly than wheat flour, so an overnight chill (rather than just 60 minutes) gives the flour time to fully hydrate the pumpkin moisture. Gluten-free pumpkin cookies may spread slightly more than the wheat version; if this is an issue, chill the portioned dough balls on the baking tray for a further 15 minutes before baking.

The glaze is too thick/too thin. How do I fix it?

If the glaze is too thick to drizzle easily, add oat milk ½ teaspoon at a time until it reaches a slow, steady drizzling consistency. If the glaze is too thin and runs off the cookies, add sifted powdered sugar 1 tablespoon at a time. The correct consistency is thick enough to hold its shape briefly when drizzled but thin enough to settle into the domed surface of the cookie rather than sitting as a stiff line.


Tried this recipe? Leave a comment below and let us know how it turned out! Tag us on Instagram and Facebook — we love seeing your plant-powered creations. Looking for more addictive vegan snack and appetizer recipes? Browse all recipes on Easy Vegan Recipes — new recipes posted every single week!

Vegan Orange Cranberry Shortbread Cookies — Buttery, Crumbly, Bright, and Perfectly Festive

vegan orange cranberry shortbread cookies

A great shortbread cookie is one of the most elegant things a kitchen can produce — deceptively simple in its ingredient list, demanding in its technique, and deeply satisfying in its result. The defining qualities of shortbread are texture: a crumb that is simultaneously crisp and tender, that snaps cleanly under pressure and then dissolves almost instantly on the tongue in a way that no other cookie quite replicates, and that delivers its butter flavor with an immediacy and richness that longer-mixed, leavened cookies cannot match. Vegan Orange Cranberry Shortbread Cookies take the classic shortbread formula and elevate it with two well-matched additions — fresh orange zest, whose aromatic oils perfume the dough with a bright, citrusy character that intensifies during baking, and dried cranberries, whose chewy, sweet-tart bursts of flavor provide both textural contrast and a visual beauty in the finished cookie that makes them as pleasing to look at as to eat. The vegan butter used in place of dairy butter performs identically in this recipe — the key to shortbread’s distinctive crumb is a high fat content and minimal gluten development, both of which vegan block butter delivers precisely — and the finished cookies are completely indistinguishable from a traditional dairy shortbread in both texture and flavor. They are 100% vegan, dairy-free, and egg-free. They make 24 cookies. They keep for two weeks in a tin. They are the ideal make-ahead gift cookie, the most reliable festive bake, and the easiest way to produce something genuinely impressive from a 30-minute afternoon. The technique is the reason the crumb is crisp-tender rather than hard, sandy, or crumbling.

The technique is the cold-fat-cut-and-minimal-mix method. Shortbread’s distinctive crumb is the result of a specific fat-to-flour relationship that is fundamentally different from most other cookie recipes. Where most cookie doughs cream the butter and sugar together vigorously (incorporating air and encouraging emulsification, which distributes fat evenly throughout the dough and enables gluten development), shortbread requires the opposite: fat that coats the flour particles rather than emulsifying with them, creating a physical barrier that restricts water movement and gluten bond formation. This fat-coating mechanism — called “shortening” in baking science, which is where the word “shortbread” originates — produces a crumb with very little structural gluten, which is why shortbread crumbles and snaps rather than stretching or chewing. The cold-fat-cut-and-minimal-mix method implements this mechanism in two stages. Stage one — cold fat: unlike most cookie recipes that call for softened butter at room temperature, the vegan block butter is used cold, straight from the refrigerator, and cut into small cubes before being added to the flour. Cold fat does not cream or emulsify — it cuts into the flour in small pieces that remain partially intact through mixing, coating the flour particles with fat without dissolving into them. Each small piece of cold fat in the dough also creates a tiny pocket of steam during baking as the water in the fat vaporizes, which contributes to the slight lift and the clean snap of a properly made shortbread. Stage two — minimal mix: the dough is mixed only until it just comes together — no longer. Every additional stroke of mixing after the dough coheres develops more gluten bonds, and more gluten means a tougher, harder, less tender cookie. The correct stopping point is when the dough holds together when pressed but still looks slightly rough and shaggy — not smooth, not uniform, not fully homogenized. The orange zest and cranberries are worked in with the final strokes, and the dough is then chilled before slicing and baking.

This recipe makes 24 cookies.


Recipe Information

Prep TimeCook TimeTotal TimeServingsCalories
20 mins + 30 mins chill14 mins~65 mins24 cookies~130 kcal

Ingredients

For the Shortbread

  • 250g (1 cup + 2 tbsp / 2¼ sticks) vegan block butter, cold — cut into 1cm cubes and returned to the refrigerator until needed; the coldness of the butter at the moment of mixing is fundamental to the technique; do not use tub-style vegan spread, which is too soft and too high in water content to produce a proper shortbread crumb
  • 100g (½ cup) caster sugar (superfine sugar) — caster sugar’s finer grain dissolves more evenly into the dough than granulated sugar without requiring the creaming step; if only granulated sugar is available, pulse it briefly in a food processor to refine the grain slightly
  • 280g (2¼ cups) all-purpose flour (plain flour), spooned and leveled — do not pack; accurate flour measurement is important in shortbread since excess flour produces a dry, crumbly dough that cracks when sliced
  • 30g (¼ cup) rice flour or cornstarch (cornflour) — a traditional shortbread addition that further restricts gluten development and contributes to the distinctive dry, crisp snap of the finished cookie; if unavailable, replace with an equal amount of additional all-purpose flour
  • ¼ tsp fine salt — salt is a flavor amplifier in shortbread; its absence makes the finished cookie taste flat; its presence sharpens and brightens the butter and citrus flavors
  • Zest of 2 large oranges — use a microplane or the finest side of a box grater; zest only the bright orange outer layer of the peel, avoiding the white pith beneath, which is bitter; the zest should be added immediately after grating, while the aromatic oils are still fully volatile
  • 80g (⅓ cup) dried cranberries, roughly chopped — roughly chopping the cranberries distributes them more evenly through the dough and prevents large, hard pieces from causing the cookies to crack when sliced; dried cranberries that are very hard and dry can be soaked in hot water for 5 minutes and patted dry before chopping

For Finishing (Optional)

  • 2 tbsp granulated sugar or raw sugar, for rolling — rolling the log of dough in coarse sugar before chilling and slicing creates a sparkling, slightly crunchy sugar edge on each cookie that is both visually beautiful and texturally satisfying
  • 1 tbsp orange juice — mixed with 80g powdered sugar to make a simple glaze for drizzling over the cooled cookies; optional but excellent for a more finished, festive appearance

Instructions

  1. Prepare the cold butter. Cut the cold vegan block butter into 1cm cubes. If the butter has warmed at all during cutting, return the cubed butter to the refrigerator for 10 minutes before proceeding. Cold butter is the foundation of this technique — if it warms to room temperature before mixing, the method changes and the crumb will be less crisp.
  2. Combine the dry ingredients. In a large mixing bowl, whisk together the flour, rice flour (or cornstarch), caster sugar, and salt. Add the orange zest and use your fingertips to rub it briefly into the flour mixture — this step breaks the zest’s oil cells against the flour, distributing the citrus aroma more evenly through the dough than simply adding the zest unmixed.
  3. Cut in the cold butter — Stage 1. Add the cold butter cubes to the flour mixture. Using your fingertips (or a pastry cutter), work the butter into the flour by pressing and flattening each cube between your fingers — the goal is to create irregular, flat pieces of butter ranging from the size of a small pea to the size of a lentil, each coated in flour. Work quickly to keep the butter cold; if your hands are warm, briefly run them under cold water and dry them before starting. The mixture should resemble rough, clumpy breadcrumbs with visible pieces of butter — not a smooth or uniform texture.
  4. Add the cranberries and bring together — Stage 2. Add the roughly chopped dried cranberries to the butter-flour mixture. Using your hands, gently press and squeeze the mixture together, turning the bowl as you work, until the dough just barely coheres — it should hold together when pressed firmly in your palm but still look slightly rough and uneven on the surface. Stop at this point. Do not knead, do not squeeze further, do not press for uniformity. Overworking is the most common shortbread mistake; the rough, slightly shaggy appearance at this stage is correct and desirable.
  5. Shape into a log. Turn the dough out onto a clean work surface. Gently press and roll it into a log approximately 5cm (2 inches) in diameter and 20–22cm (8–9 inches) long. Uniform diameter is important for even slicing and even baking. If the dough cracks slightly as you shape it, press the cracks closed gently — a small amount of cracking at this stage is normal. If rolling in sugar: spread the granulated or raw sugar on the work surface and roll the log through it, pressing lightly so the sugar adheres to the outside.
  6. Chill. Wrap the log tightly in cling film and refrigerate for a minimum of 30 minutes, and up to 48 hours. The chilling step re-firms the butter (which will have softened slightly from handling), relaxes any minimal gluten that developed during mixing, and makes the log firm enough to slice cleanly without distorting.
  7. Preheat and slice. Preheat the oven to 170°C (340°F) — shortbread bakes at a lower temperature than most cookies; a higher temperature will brown the exterior before the center has dried out properly, producing a crisp shell with a soft, underbaked interior rather than the uniformly crisp-tender crumb of a correct shortbread. Remove the log from the refrigerator. Using a sharp knife, slice into rounds approximately 8mm (just under ½ inch) thick. Place on parchment-lined baking trays with at least 3cm between each cookie.
  8. Bake. Bake at 170°C for 13–15 minutes until the cookies are pale golden at the edges and just barely set in the centers — they should look slightly underdone at the center; they will firm as they cool. Do not bake until golden-brown all over — an over-baked shortbread is hard rather than crisp-tender. The correct color is pale gold at the very edges, cream at the center.
  9. Cool completely. Allow the cookies to cool on the tray for 5 minutes, then transfer to a wire rack to cool completely before handling — warm shortbread is fragile and will crumble if moved too soon. The cookies firm significantly as they cool. If making the orange glaze: mix 80g sifted powdered sugar with 1 tablespoon of orange juice to a thick drizzling consistency and drizzle over fully cooled cookies. Allow to set for 20 minutes before storing.

Pro Tips

  • The colder the butter, the better the crumb — if your kitchen is warm (above 22°C / 72°F), work in short bursts and return the dough to the refrigerator for 5 minutes whenever the butter begins to feel soft between your fingers. A well-chilled shortbread dough cut into a cold log produces a dramatically crisper cookie than a warm dough, because the fat enters the oven cold and firms rather than running, maintaining the fat-particle structure through the early stage of baking.
  • Shortbread is extremely forgiving in terms of flavor additions but not in terms of technique — the cold fat and minimal mix rules are absolute. Flavor the dough in any direction you like: lavender and lemon, cardamom and pistachio, rosemary and olive oil (replace 50g of the butter with good olive oil for an Italian-style shortbread), cinnamon and pecan — but always keep the butter cold and always stop mixing the moment the dough coheres.
  • The sugar-rolled edge is not decoration — the coarse sugar on the outside of the log creates a crunchy, crystalline border on each cookie slice that provides textural contrast to the tender crumb of the interior. It also makes the cookies visually distinctive and contributes a caramelized sweetness at the edge that is slightly different from the interior sweetness. It takes 30 seconds and the result is worth it.
  • These cookies are ideal for gifting — they keep for up to 2 weeks in an airtight tin at room temperature, which means they can be made well in advance of any occasion. Layer between sheets of parchment paper to prevent the glaze (if using) from sticking.

Shortbread and the Scottish Baking Tradition: From Royal Luxury to Everyday Tin

Shortbread’s origins are Scottish and almost certainly medieval, though the exact point at which a twice-baked bread (the medieval “biscuit bread”) evolved into the butter-enriched, sugar-sweetened shortbread recognizable today is difficult to date precisely. The earliest written recipe that clearly describes shortbread — as distinct from other enriched biscuits — appears in a Scottish cookbook from 1736, but the ingredient and the tradition were considerably older: butter has been produced in Scotland since at least the Iron Age (salted, pressed butter preserved in peat bogs — “bog butter” — has been found in Scottish and Irish archaeological sites dating back 3,000 years), and Scotland’s cold, wet climate made it one of the most productive dairy regions in Britain. The association of shortbread with Mary, Queen of Scots, who is said to have favored a version made with caraway seeds (a “petticoat tails” shortbread, whose name is thought to derive either from “petites gatelles” — small cakes — or from the bell-shaped skirt fashion of the 16th-century French court where Mary spent her youth), gives the tradition a specifically royal dimension that has been enthusiastically marketed by Scottish producers ever since. Shortbread became an export commodity during the 19th century, when the development of tin packaging allowed fragile, shelf-stable shortbread to survive long sea voyages — the famous round shortbread tin, decorated with Highland imagery, became one of the most recognized symbols of Scottish domestic exports during the Victorian era and remains so today. The orange and cranberry variation in this recipe belongs to the modern tradition of flavored shortbreads that became popular in British and American bakeries during the late 20th century, drawing on the base formula’s remarkable receptiveness to citrus and dried fruit additions while retaining the essential crumb character — crisp, tender, unmistakably buttery — that has made shortbread one of the most beloved biscuits in the world for nearly three centuries.


Flavor Variations

  • Lemon Poppy Seed Shortbread: Replace the orange zest with the zest of 2 large lemons and add 2 tablespoons of poppy seeds along with the cranberries (or in place of them). The lemon-poppy combination is a classic for good reason — the bright, sharp lemon zest and the subtle nutty crunch of the poppy seeds produce a shortbread that is clean, bright, and as good with afternoon tea as it is as a dessert cookie. Finish with a lemon glaze (lemon juice in place of orange juice) drizzled over cooled cookies.
  • Chocolate Dipped Shortbread: Omit the cranberries and orange zest for a plain shortbread, or keep the orange zest and omit the cranberries. Once the cookies have cooled completely, dip one half of each cookie in melted vegan dark chocolate (70% cocoa, melted with 1 teaspoon of coconut oil to ensure a thin, glossy coating). Place on parchment paper and allow the chocolate to set at room temperature or in the refrigerator for 15 minutes. The combination of the butter-rich shortbread and the bitter dark chocolate is one of the most satisfying flavor pairings in baking — simple, elegant, and universally loved.
  • Rosemary Sea Salt Shortbread: Replace the orange zest and cranberries with 1 tablespoon of fresh rosemary, very finely chopped (dried rosemary is too coarse and harsh for this application). Finish each cookie with a few flakes of Maldon sea salt pressed lightly onto the surface before baking. The rosemary sea salt shortbread is a savory-leaning variation that works as a cheese accompaniment, a predinner nibble, or an unusual and sophisticated gift. Use a slightly less sweet dough: reduce the caster sugar to 80g.

Nutritional Highlights (Per Cookie — Based on 24 Cookies, Without Glaze)

CaloriesProteinCarbsFiberFat
~130 kcal1g16g0.5g7g

Storage

  • Room temperature: Store in an airtight tin at room temperature for up to 2 weeks — shortbread is one of the most shelf-stable homemade cookies, and its low moisture content means it does not go stale quickly. A tin rather than a plastic container is traditional and preferable — tins allow a very small amount of air movement that keeps the cookies crisp, while sealed plastic can create a micro-humid environment that softens them slightly over time.
  • If the cookies have softened slightly (from humidity or an imperfect tin seal): place them on a baking tray in a 150°C oven for 5–8 minutes. They will re-crisp as they cool.
  • Freezer: Both the unbaked dough log and the baked cookies freeze extremely well. The dough log can be frozen for up to 3 months — slice and bake directly from frozen, adding 3–4 minutes to the baking time. Baked cookies freeze in a sealed container for up to 3 months and thaw at room temperature in 30 minutes with no quality loss.
  • Gifting: Layer cooled shortbread in a tin between sheets of parchment paper. If including glazed cookies, ensure the glaze is completely set before layering (at least 1 hour after glazing at room temperature). A tin of orange cranberry shortbread stays fresh and beautiful for up to 2 weeks, making it an exceptional make-ahead gift.

Frequently Asked Questions

My shortbread spread and turned flat in the oven. What went wrong?

Flat shortbread is almost always caused by butter that was too warm when it went into the oven — either the dough was not chilled long enough before baking, or the kitchen was warm enough that the cookies softened on the tray before the oven had time to set their structure. For the next batch, chill the sliced cookies on the tray in the refrigerator for 15 minutes before baking. The cookies should go into the oven cold.

My shortbread is hard rather than crisp-tender. What happened?

Hard shortbread is caused by overmixing (too much gluten development) or overbaking. Check both: if the dough was mixed until smooth and uniform rather than stopping at the just-cohered, rough stage, gluten developed and the cookies will be harder than they should be. If the edges were golden-brown all over when removed from the oven, the cookies were overbaked — correct shortbread comes out of the oven looking slightly underdone. Reduce the mixing time and/or the baking time for the next batch.

Can I use a food processor instead of mixing by hand?

Yes — a food processor makes this recipe faster and keeps the butter cold more easily than hand mixing. Combine the dry ingredients and orange zest in the processor and pulse 3 times to combine. Add the cold butter cubes and pulse in 3-second bursts, 5–7 times, until the mixture resembles rough breadcrumbs with visible butter pieces — stop well before the mixture forms a ball or looks smooth. Add the cranberries and pulse once or twice just to distribute. Turn out onto a work surface and press together by hand to form the log. Do not process beyond the described stages — a food processor can overmix shortbread very quickly.

Can I make these gluten-free?

Yes — substitute a 1:1 gluten-free baking flour blend for the all-purpose flour and keep the rice flour as written (rice flour is already gluten-free and particularly effective at producing a crisp crumb in gluten-free shortbread). The texture of gluten-free shortbread is slightly more delicate and more prone to cracking when sliced; chill the log for the full 30 minutes (45 minutes is better) and use a very sharp knife with a single pressing-down motion rather than a sawing motion to slice cleanly.


Tried this recipe? Leave a comment below and let us know how it turned out! Tag us on Instagram and Facebook — we love seeing your plant-powered creations. Looking for more addictive vegan snack and appetizer recipes? Browse all recipes on Easy Vegan Recipes — new recipes posted every single week!

Vegan Cheesecake Brownies — Fudgy Dark Chocolate Meets Silky Cream Cheese Swirl in One Extraordinary Bake

vegan cheesecake brownies

The cheesecake brownie occupies a category that is, by most objective measures, completely excessive — a brownie that is already one of the richest things a home kitchen can produce, layered with a cheesecake filling that adds its own density, creaminess, and tangy richness on top. And yet the result is not too much of anything; it is exactly the right amount of everything. The contrast between the dense, fudgy, intensely chocolatey brownie base and the cool, silky, slightly tangy cream cheese layer is one of the most compelling flavor and texture pairings in the baking repertoire — the bitterness of dark chocolate meeting the clean acidity of the cream cheese; the chew of the brownie giving way to the creaminess of the cheesecake; the visual drama of the swirled black-and-white surface before cutting, and the revealed layers of each slice after. Vegan Cheesecake Brownies deliver all of this without a gram of dairy or a single egg. The brownie base is built from vegan dark chocolate, vegan block butter, brown sugar, flaxseed egg, and just enough flour to hold the structure without stiffening the fudge; it is intensely chocolatey, deeply fudgy, and barely cakey in the way that all the best brownies are. The cheesecake layer is made from vegan cream cheese, powdered sugar, vanilla, and a small amount of cornstarch that sets the layer softly during baking, allowing it to be cut cleanly without collapsing. The two layers are swirled together at the surface before baking, producing the marbled pattern that is the visual signature of this bake. They are 100% vegan, dairy-free, and egg-free. They make 16 squares. They are the most impressive thing on any dessert table they have ever appeared on. The technique is the reason the brownie stays fudgy and the cheesecake layer sets cleanly rather than curdling or sinking.

The technique is the thermal-stage baking method. The fundamental technical challenge of a cheesecake brownie is that the brownie base and the cheesecake layer have different optimal baking temperatures and different baking timelines. A fudgy brownie needs high-ish heat (175–180°C) to set the edges and form a crinkled, slightly crisp surface crust while keeping the interior moist and fudgy — it bakes relatively quickly (20–25 minutes) and relies on the initial burst of high heat to set the structure before the center over-dries. A baked cheesecake layer, by contrast, needs gentler heat (150–160°C) to set slowly and uniformly without curdling the fat proteins in the cream cheese, and it benefits from a slow, even temperature that produces a smooth, crack-free surface. In a layered cheesecake brownie baked at a single temperature, one of the two components is always compromised: baked at brownie temperature, the cheesecake layer can curdle and brown at the edges; baked at cheesecake temperature, the brownie is under-caramelized and dull. The thermal-stage baking method resolves this conflict by baking in two distinct temperature stages within a single bake. Stage one — the brownie set: the assembled cheesecake brownie goes into a preheated oven at 175°C for the first 15 minutes. This initial high-heat stage sets the brownie base’s structure, develops the surface crust of the brownie, and begins the caramelization of the sugars in the brownie layer without fully baking the cheesecake filling, which has not yet reached its setting temperature in this time frame. Stage two — the cheesecake finish: after 15 minutes, the oven temperature is reduced to 155°C for a further 18–22 minutes. The lower temperature allows the cheesecake layer to set slowly and uniformly — the cream cheese proteins gel gently without curdling, the cornstarch sets without seizing, and the brownie base continues drying to its final fudgy texture without over-baking. The result is a brownie that is correctly caramelized and fudgy, with a cheesecake layer that is set, smooth, and clean-cutting — both components optimized in a single uninterrupted bake.

This recipe makes 16 squares (from a 20×20cm / 8×8 inch square tin).


Recipe Information

Prep TimeCook TimeTotal TimeServingsCalories
25 mins35 mins + 2 hrs chill~3 hrs total16 squares~265 kcal

Ingredients

For the Flaxseed Egg

  • 2 tbsp ground flaxseed (flaxseed meal)
  • 5 tbsp cold water
  • Combine and rest for 10 minutes until the mixture becomes thick and gel-like — this is the egg replacer for the brownie base; the gel mimics the binding and moisture function of eggs in a conventional brownie without adding any eggy flavor

For the Brownie Base

  • 150g (5oz) vegan dark chocolate (70% cocoa or above), roughly chopped — high-quality vegan dark chocolate is the flavor foundation of this recipe; most dark chocolate above 70% is naturally vegan (contains no milk), but always check the label for milk or milk powder in the ingredients; a lower cocoa percentage chocolate will produce a sweeter, less intense brownie
  • 100g (scant ½ cup) vegan block butter — block-style only; tub-style vegan spread has too much water content and will produce a wet, dense brownie rather than a fudgy one
  • 150g (¾ cup, packed) light brown sugar — brown sugar’s molasses content contributes a caramel depth that white sugar lacks; it is what gives a great brownie its characteristic depth of flavor beyond just “sweet chocolate”
  • 1 tsp vanilla extract
  • The prepared flaxseed egg (from above)
  • 80g (⅔ cup) all-purpose flour (plain flour), spooned and leveled — the relatively small amount of flour is intentional; this is a fudgy brownie, not a cakey one; excess flour produces a cakier, drier texture
  • 2 tbsp Dutch-process cocoa powder — adds additional chocolate depth and darkens the color; Dutch-process cocoa (alkalized) is less acidic and produces a darker, more mellow chocolate flavor than natural cocoa; either type works, but Dutch-process is preferred
  • ¼ tsp fine salt
  • ¼ tsp baking powder — a very small amount adds the faintest lift without making the brownie cakey

For the Cheesecake Layer

  • 300g (10½oz) vegan cream cheese, at room temperature — bring the cream cheese out of the refrigerator 1 hour before making; room-temperature cream cheese blends to a completely smooth, lump-free mixture; cold cream cheese will have lumps that baking cannot smooth out; use a block-style or tub-style vegan cream cheese (both work here, unlike the brownie base where block butter is required)
  • 80g (⅔ cup) powdered sugar (icing sugar), sifted
  • 1 tsp vanilla extract
  • 1 tbsp cornstarch (cornflour) — sets the cheesecake layer to a sliceable consistency during baking; without cornstarch the cream cheese layer remains too soft and does not cut cleanly; do not substitute with arrowroot powder in this application (arrowroot can cause a slimy texture in dairy-free cream cheese mixtures when baked)
  • 1 tsp lemon juice — adds the subtle tang that distinguishes cheesecake from sweetened cream; essential for the authentic cheesecake flavor note

Equipment

  • 20×20cm (8×8 inch) square baking tin, greased and lined with parchment paper with overhang on two sides (the overhang creates handles for lifting the cooled brownie slab out of the tin cleanly)

Instructions

  1. Make the flaxseed egg. Combine the ground flaxseed and cold water in a small bowl. Stir well and leave to rest for 10 minutes at room temperature. The mixture will become thick and viscous — a gel that holds its shape slightly when the bowl is tilted. Set aside.
  2. Prepare the tin and preheat. Grease the baking tin with a thin layer of vegan butter or neutral oil. Line with parchment paper, leaving at least 5cm (2 inches) of overhang on two opposite sides to create lifting handles. Preheat the oven to 175°C (350°F).
  3. Make the brownie base. Place the chopped vegan dark chocolate and vegan block butter together in a heatproof bowl set over a saucepan of barely simmering water (make sure the base of the bowl does not touch the water). Stir gently until both are completely melted and combined to a glossy, smooth mixture. Remove from the heat and allow to cool for 5 minutes — the mixture should be warm but not hot before the next step.
  4. Add the sugar and vanilla. Add the light brown sugar and vanilla extract to the warm chocolate-butter mixture. Whisk until completely combined — the sugar will partially dissolve in the warm mixture and the mixture will thicken slightly.
  5. Add the flaxseed egg. Add the prepared flaxseed gel to the chocolate mixture. Whisk vigorously for 1 minute until fully incorporated and the mixture is thick, glossy, and smooth. The flaxseed gel emulsifies into the chocolate mixture similarly to how a whole egg would.
  6. Add the dry ingredients. Sift the flour, cocoa powder, salt, and baking powder into the chocolate mixture. Fold with a spatula until just combined — stop as soon as no dry flour streaks remain. Do not overmix; overmixing develops gluten and produces a cakey rather than fudgy brownie. The batter will be thick, glossy, and very dense.
  7. Pour the brownie batter. Pour and spread the brownie batter evenly into the prepared tin, smoothing the top with a spatula. Reserve 3 tablespoons of brownie batter in the bowl — this reserved batter will be dotted over the cheesecake layer for swirling.
  8. Make the cheesecake layer. In a clean bowl, beat the room-temperature vegan cream cheese with the sifted powdered sugar, vanilla extract, cornstarch, and lemon juice until completely smooth and lump-free — use a hand mixer or a fork and firm stirring; the mixture should be silky and smooth with no visible lumps. Do not overmix or incorporate air — a light, airy cheesecake layer will puff and crack during baking; a dense, smooth layer will set cleanly.
  9. Add the cheesecake layer and swirl. Pour and spread the cheesecake mixture evenly over the brownie batter in the tin, covering the brownie layer completely. Dot the reserved 3 tablespoons of brownie batter over the cheesecake surface at irregular intervals (6–8 small dollops). Using a butter knife or a skewer, drag through the dollops in long, slow S-curves to create the marbled swirl pattern — 4–5 passes is sufficient; over-swirling will muddy the pattern and turn the marbling grey.
  10. Bake — Stage 1. Bake at 175°C for 15 minutes. At this point the edges will have begun to set and the surface will show the beginning of brownie caramelization, but the cheesecake layer will still look very soft and wobbly in the center — this is correct.
  11. Reduce heat and continue — Stage 2. Without opening the oven door fully (a sudden drop in temperature can cause the cheesecake layer to crack), reduce the oven temperature to 155°C (310°F). Continue baking for 18–22 minutes until the cheesecake layer is set with a slight wobble in the very center when the tin is gently shaken — the outer 2–3cm should be fully set and the center should wobble as one piece rather than as a liquid. The brownie edges should be set and slightly pulling away from the sides of the tin.
  12. Cool and chill. Remove from the oven and allow to cool completely in the tin at room temperature — approximately 1 hour. Then transfer to the refrigerator and chill for a minimum of 2 hours, preferably overnight. Do not attempt to cut before chilling — warm cheesecake brownie is extremely soft and will not cut cleanly; the chilling step is what produces clean, defined layers in each slice.
  13. Slice and serve. Lift the chilled brownie slab from the tin using the parchment paper handles. Place on a cutting board. Using a sharp knife dipped in hot water and wiped clean between each cut, slice into 16 squares (4×4 cuts). The hot knife melts slightly through the cheesecake layer and produces clean, smooth cuts without tearing the layers.

Pro Tips

  • Room-temperature cream cheese is not optional — it is the single most impactful preparation step for the cheesecake layer. Cold cream cheese, even when beaten vigorously, retains microscopic lumps that baking cannot smooth; room-temperature cream cheese becomes fully smooth within 30 seconds of mixing. Take it out of the refrigerator 1 hour before you plan to start baking.
  • Reserve brownie batter for the swirl before you spread the main batter into the tin — once the batter is in the tin it is much harder to retrieve cleanly. Set aside 3 tablespoons in the bowl immediately after mixing and before pouring.
  • The hot knife is the difference between professional-looking cuts and ragged, torn slices — dip the knife in a mug of just-boiled water, wipe dry, and make one cut. Repeat for every cut. It takes an extra 60 seconds and the result is worth it.
  • These brownies improve over 24–48 hours in the refrigerator — the brownie base becomes slightly more fudgy as the moisture redistributes, the cheesecake layer firms further, and the flavors integrate. Made on Friday for a Saturday event, they will be at their absolute best.

The Brownie’s Surprisingly Recent American Origin Story

The brownie is one of the few iconic baked goods with a documented and contested American origin, and its history — spanning barely 130 years — makes it one of the newest classic recipes in the Western baking canon. Unlike shortbread (which traces back to medieval Scotland), pie (ancient), or bread (prehistoric), the brownie appears to have been invented, or at least first documented, in the late 19th-century United States, a period of rapid culinary innovation driven by the proliferation of domestic cookbooks, women’s magazines, and the standardized availability of ingredients like commercial baking chocolate. The two most frequently cited origin stories place the brownie’s invention at the 1893 Chicago World’s Columbian Exposition, where (according to one account) Bertha Palmer, wife of Chicago hotel magnate Potter Palmer, asked the Palmer House Hotel’s pastry chef to create a dessert that a lady could eat elegantly at the fair — portable, self-contained, not requiring a fork. The resulting chocolate square, made with walnuts and an apricot glaze, is still served at the Palmer House Hotel today and bears a reasonable resemblance to a modern brownie. A competing account credits the town of Bangor, Maine, where a 1904 community cookbook from the Bangor chapter of the Eastern Star organization contains a recipe called “Brownie’s” made with molasses, butter, and walnuts — more of a molasses bar cookie than a chocolate brownie, which suggests that the name “brownie” (derived from the Scottish and English folklore figure of the helpful domestic spirit, as well as from its brown color) predated the chocolate version and was applied to a variety of small, dense, single-serving bar cookies. The first published chocolate brownie recipe closely resembling the modern form appeared in the 1897 Sears, Roebuck & Co. catalog, and the form was further standardized in the 1906 Boston Cooking School Cookbook by Fannie Farmer — the same cookbook whose precise measurement system transformed American home cooking. The cheesecake brownie, layering the American brownie with a baked cream cheese filling derived from the Jewish-American New York cheesecake tradition, is a mid-to-late 20th century development, one of the most successful hybrid desserts in the American baking repertoire.


Flavor Variations

  • Raspberry Cheesecake Brownies: Dot 80g of fresh or frozen raspberries over the cheesecake layer along with the reserved brownie swirl dollops before baking. Press them gently into the cheesecake mixture so they are partially submerged. The raspberries burst during baking, releasing their tart, bright juice into the cheesecake layer and creating pockets of fruit that contrast beautifully with both the cream cheese and the chocolate. Frozen raspberries work as well as fresh and do not need thawing before use.
  • Salted Caramel Cheesecake Brownies: Drizzle 3 tablespoons of thick vegan caramel sauce (coconut milk caramel or a commercial vegan version) over the cheesecake layer before adding the swirl dollops, then swirl together with the brownie batter to create a three-component swirl. Finish each baked and cooled square with a pinch of flaky sea salt. The combination of dark chocolate, salted caramel, and cream cheese is one of the most indulgent flavor combinations in baking — deeply sweet, slightly salty, and completely irresistible.
  • Peanut Butter Cheesecake Brownies: Replace 100g of the vegan cream cheese with 100g of smooth peanut butter in the cheesecake layer. The peanut butter makes the cheesecake layer slightly denser and richer, adds a roasted-nut flavor that pairs excellently with dark chocolate, and creates a beautiful golden-tan swirl against the dark brownie that is visually striking. Reduce the powdered sugar in the cheesecake layer to 60g, as peanut butter adds its own sweetness.

Nutritional Highlights (Per Square — Based on 16 Squares)

CaloriesProteinCarbsFiberFat
~265 kcal3g30g2g15g

Storage

  • Refrigerator: Store in a sealed container in the refrigerator for up to 6 days — the cheesecake layer requires refrigeration, and cold storage also firms the brownies to their optimal fudgy-dense texture. Remove from the refrigerator 15–20 minutes before serving to allow the brownie base to return to its full fudgy softness (the brownie base becomes very firm when very cold; a brief rest at room temperature restores its texture). The cheesecake layer remains good cold.
  • Freezer: Freeze individual squares wrapped tightly in cling film for up to 2 months. Thaw in the refrigerator overnight or at room temperature for 1–2 hours. The fudgy brownie base freezes and thaws extremely well; the cheesecake layer may develop a very slight texture change after freezing but remains excellent. Do not microwave to thaw — it will soften the cheesecake layer unevenly.
  • Room temperature: These brownies should not be left at room temperature for more than 2–3 hours due to the dairy-free cream cheese layer — return to refrigeration after serving.
  • Gifting: These are stunning cut into 16 squares and layered in a box with parchment paper between layers — one of the most impressive homemade gifts possible. Keep chilled during transport.

Frequently Asked Questions

The cheesecake layer cracked during baking. What went wrong?

Cracks in the cheesecake layer are almost always caused by either baking at too high a temperature (the proteins in the cream cheese seize and crack rather than setting gently), overmixing the cheesecake layer (incorporating air that then releases during baking as cracks), or a sudden temperature drop (opening the oven door during the stage-2 low-temperature phase). For the next batch: ensure Stage 2 runs at 155°C, mix the cheesecake layer only until just smooth, and reduce the oven temperature by lowering the thermostat rather than opening the door.

My brownie base turned out cakey rather than fudgy. What happened?

A cakey brownie has too much flour, too much leavening, or was overmixed after the flour was added. Check: was the flour leveled rather than packed? Was the baking powder no more than ¼ teaspoon? Did you stop folding the moment the flour disappeared? Any of these beyond their specified amounts or the mixing extended past combining point will add structure and produce a cakier texture.

Can I make these in a 9×13 inch (23×33cm) tin for a larger batch?

Yes — double all ingredient quantities. Use a 23×33cm tin lined with parchment. The two-stage baking time will remain approximately the same (15 minutes at 175°C, then 20–25 minutes at 155°C), but check doneness by the same visual cues: the cheesecake layer should wobble as one piece in the center when gently shaken. A larger, thinner slab will actually set slightly faster than a smaller, thicker one.

The layers separated when I cut the brownies. How do I get clean layers?

Clean layers require thorough chilling (minimum 2 hours; overnight is better), a sharp knife, and the hot-knife technique described in step 13. If the layers are still separating after all of these: the cheesecake layer may have been underbaked slightly (it was too soft to set into a cohesive layer). The cheesecake layer is ready when the outer 2–3cm are fully firm and only the very center has a single-piece wobble when shaken — any sloshing or liquid movement means it needs more time at 155°C.


Tried this recipe? Leave a comment below and let us know how it turned out! Tag us on Instagram and Facebook — we love seeing your plant-powered creations. Looking for more addictive vegan snack and appetizer recipes? Browse all recipes on Easy Vegan Recipes — new recipes posted every single week!

Vegan Strawberry Cheesecake Trifle — The Showstopping Layered Dessert That Feeds a Crowd and Steals the Room

vegan strawberry cheesecake trifle

A trifle is, by design, a dessert built for an audience — a layered, glass-sided construction that reveals its own interior as its best selling point, a dessert that is meant to be carried to a table and placed in the center and admired before the first spoonful is served. Vegan Strawberry Cheesecake Trifle is exactly this kind of dessert, and it delivers the full theatrical impact of a great trifle with every component made from entirely plant-based ingredients: a base of golden, vanilla-scented sponge cake, soaked briefly in a strawberry syrup that perfumes the cake and keeps it moist; a thick, silky cheesecake cream layer made from vegan cream cheese, whipped coconut cream, vanilla, and lemon, that is rich enough to hold its shape between the layers and tangy enough to taste genuinely like cheesecake; a layer of fresh strawberries macerated in a little sugar and lemon juice until they are glossy and syrupy; and a final cloud of whipped coconut cream on top, finished with more fresh strawberries and crushed biscuits. Every element of this trifle can be made the day before, assembled the evening before serving, and refrigerated overnight — in fact, overnight assembly is the recommended approach, because the trifle improves dramatically as the layers settle together, the sponge absorbs the syrup fully, and the cheesecake cream firms to a sliceable consistency that produces clean, distinct layers in the bowl. It is 100% vegan, dairy-free, and egg-free. It serves 10–12. It is the dessert that ends every gathering with someone asking for the recipe. The technique is the reason the layers stay distinct rather than merging into a soft, undifferentiated mass.

The technique is the chill-between-layers method. The structural challenge of any layered trifle is gravity and moisture migration: soft cream layers, wet fruit layers, and soaked cake all exert downward pressure and release moisture over time, causing the layers to compress, blur, and eventually merge if not given adequate time to set between each addition. In a dairy trifle, heavy cream and custard set firmly enough through their fat and egg content to resist compression; in a plant-based trifle, the cream cheese and coconut cream layers are softer and more mobile at room temperature, requiring deliberate management to maintain definition. The chill-between-layers method inserts a 20–30 minute refrigeration rest between the application of each layer during assembly. Each layer is added to the serving dish, then the dish is returned to the refrigerator for 20–30 minutes before the next layer is added. During this rest, the cheesecake cream layer firms slightly at the surface as its fats cool and re-solidify, creating a semi-set boundary that supports the weight of the layer above it without the two merging. The macerated strawberry layer, which is wet, is always placed between two cream layers rather than directly against the cake, preventing the fruit’s released liquid from saturating the cake unevenly from above; the cake is soaked from below by the strawberry syrup only, which it absorbs at a controlled rate rather than being flooded. The result is a trifle with clearly visible, distinct layers that hold their separation through the overnight rest and remain cleanly defined when the trifle is served the following day — the visual drama of the trifle is preserved from assembly to the last spoonful.

This recipe serves 10–12 in a large trifle bowl (approximately 3-litre / 3-quart capacity).


Recipe Information

Prep TimeCook TimeTotal TimeServingsCalories
45 mins + overnight chill25 mins~14 hrs total10–12~385 kcal

Ingredients

For the Vanilla Sponge Cake

  • 240g (2 cups) all-purpose flour (plain flour), spooned and leveled
  • 200g (1 cup) caster sugar (superfine sugar)
  • 1½ tsp baking powder
  • ½ tsp baking soda
  • ½ tsp fine salt
  • 240ml (1 cup) unsweetened oat milk or soy milk
  • 80ml (⅓ cup) neutral oil (vegetable or sunflower oil)
  • 2 tsp vanilla extract
  • 1 tbsp apple cider vinegar — reacts with the baking soda to provide lift and acts as the egg replacer in combination with the oil; the vinegar flavor bakes out completely

For the Strawberry Syrup (for soaking the cake)

  • 150g (5oz) fresh or frozen strawberries, roughly chopped
  • 3 tbsp sugar
  • 3 tbsp water
  • 1 tsp lemon juice
  • Combine in a small saucepan, bring to a simmer over medium heat, and cook for 5 minutes until the strawberries have broken down and the syrup is slightly thickened. Strain through a fine sieve, pressing the solids to extract all the liquid. Cool completely before use.

For the Macerated Strawberries

  • 500g (18oz / 1 lb) fresh strawberries, hulled and sliced or quartered
  • 2 tbsp caster sugar
  • 1 tbsp lemon juice
  • Toss together and leave to rest for 20–30 minutes until the strawberries are glossy and have released their juices. The released juices become the strawberry “sauce” visible at this layer in the finished trifle.

For the Cheesecake Cream

  • 400g (14oz) vegan cream cheese, at room temperature (brought out of the fridge 1 hour before use — room-temperature cream cheese blends completely smooth without lumps; cold cream cheese retains lumps that mixing cannot eliminate)
  • 2 × 400ml tins of full-fat coconut cream, refrigerated overnight — when refrigerated, the thick coconut cream separates from the watery liquid and rises to the top; scoop only the thick solid portion from the top of each tin (discard the liquid or save for smoothies); approximately 250–300g (9–10oz) of thick cream should be obtained from two tins; the thick cream, when whipped, triples in volume and provides the airy lift that lightens the cheesecake cream
  • 100g (¾ cup) powdered sugar (icing sugar), sifted
  • 2 tsp vanilla extract
  • 2 tbsp lemon juice
  • ½ tsp lemon zest (optional — intensifies the cheesecake tang)

For the Topping

  • 1 × 400ml tin of full-fat coconut cream, refrigerated overnight (as above — scoop the thick solid portion only)
  • 2 tbsp powdered sugar
  • ½ tsp vanilla extract
  • 200g (7oz) fresh strawberries, halved, for the top — the most beautiful strawberries in the punnet, saved for the final layer
  • 80g (3oz) vegan digestive biscuits or graham crackers, roughly crushed — scattered over the top just before serving; do not add until the moment of serving as they soften quickly in contact with the cream

Instructions

Day Before (or Morning Of): Make the Components

  1. Bake the sponge. Preheat oven to 180°C (355°F). Grease and line a 20×30cm (8×12 inch) rectangular baking tin or a 23cm (9 inch) round tin. In a large bowl, whisk together the flour, sugar, baking powder, baking soda, and salt. In a jug, whisk together the oat milk, oil, vanilla extract, and apple cider vinegar. Pour the wet ingredients into the dry and fold until just combined — do not overmix. Pour into the prepared tin and bake for 22–25 minutes until a skewer inserted in the center comes out clean and the top springs back when lightly pressed. Allow to cool completely in the tin, then turn out.
  2. Make the strawberry syrup. Combine the chopped strawberries, sugar, water, and lemon juice in a small saucepan. Bring to a simmer over medium heat and cook for 5 minutes, stirring, until the strawberries break down. Strain through a fine sieve, pressing the solids. Cool completely.
  3. Macerate the strawberries. Toss the sliced fresh strawberries with caster sugar and lemon juice. Set aside at room temperature for 20–30 minutes, then refrigerate in a sealed container until assembly.
  4. Make the cheesecake cream. In a large mixing bowl, beat the room-temperature vegan cream cheese until completely smooth. Add the sifted powdered sugar, vanilla, lemon juice, and lemon zest. Beat until combined and smooth. In a separate cold bowl (chilled in the freezer for 10 minutes), whip the thick coconut cream from the two refrigerated tins using a hand mixer or stand mixer until it holds soft peaks — 2–3 minutes on medium-high speed. Gently fold the whipped coconut cream into the cream cheese mixture in three additions, folding carefully to preserve the air. The finished cheesecake cream should be thick, silky, and hold its shape when a spoon is lifted. Refrigerate until assembly.
  5. Make the topping whipped cream. Whip the thick coconut cream from the third refrigerated tin with the powdered sugar and vanilla extract until it holds medium-firm peaks. Refrigerate until assembly.

Assembly (Evening Before Serving — Chill-Between-Layers Method)

  1. Prepare the sponge. Cut the cooled sponge cake into cubes or thick fingers approximately 4–5cm in size. Arrange in a single, even layer covering the base of the trifle bowl. Spoon the strawberry syrup evenly over the cake, using all of it — the cake should be well soaked and glossy. The soaked cake is the foundation layer; it does not need to chill before the next layer is added as the syrup absorption happens gradually.
  2. First cheesecake cream layer — chill. Spoon half of the cheesecake cream over the soaked cake layer and spread to an even layer, covering the cake completely. Return the trifle bowl to the refrigerator for 20–30 minutes until the cream surface is slightly firmed.
  3. Macerated strawberry layer — chill. Spoon all of the macerated strawberries (with their released juices) over the cheesecake cream layer in an even layer. Press a few strawberry pieces gently against the glass sides of the bowl so they are visible from outside — this is the visual signature of a trifle. Return to the refrigerator for 20–30 minutes.
  4. Second cheesecake cream layer — chill. Spoon the remaining half of the cheesecake cream over the strawberry layer and spread to an even layer. Return to the refrigerator for 20–30 minutes until the surface is slightly firmed.
  5. Topping and overnight rest. Spoon or pipe the topping whipped coconut cream over the final cheesecake cream layer. Smooth or create decorative swirls with the back of a spoon. Arrange the halved fresh strawberries decoratively over the cream topping. Cover the trifle bowl loosely with cling film and refrigerate overnight (minimum 6 hours; overnight is ideal).

Serving

  1. Just before serving, scatter the crushed digestive biscuits over the top of the cream. Serve immediately from the bowl with a large spoon that reaches to the bottom — each serving should contain all four layers.

Pro Tips

  • The overnight refrigeration of the coconut cream tins is non-negotiable — at room temperature, full-fat coconut cream does not separate into its thick and liquid components and cannot be whipped. Plan ahead: put the tins in the coldest part of the refrigerator (usually the back of the bottom shelf) at least 12 hours before you plan to make the trifle. If a tin has been refrigerated but the cream has not fully solidified, it either contained a “lite” or low-fat coconut cream (which will never whip properly) or the tin was exposed to heat at some point. Always buy full-fat coconut cream (not coconut milk, which has a lower fat content) and check the tin before opening — it should feel very cold and solid at the top.
  • The chill-between-layers method is what makes this trifle look as good as it tastes — 20–30 minutes per layer is the minimum rest; longer is not harmful. If you are assembling over the course of an afternoon with other tasks in between, this method fits naturally around the rest of your day.
  • Press fruit against the glass — the visual drama of a trifle is entirely dependent on what is visible through the side of the bowl. Take an extra 60 seconds to press a neat row of strawberry slices against the inside of the glass at the fruit layer; the resulting striped, colorful cross-section is the image that makes trifle so visually compelling.
  • Add the crushed biscuits only at the moment of serving — biscuits placed on cream more than 10–15 minutes before serving will soften completely and lose their textural contrast. Keep them in a small bowl beside the trifle and scatter just before the first spoon goes in.

The English Trifle: A Dish Built from Leftovers That Became a Celebration

The trifle’s history is simultaneously humble and grand — a dessert that began, in its earliest forms, as a way to use up leftover cake and cream and evolved over three centuries into one of the most recognizable celebration desserts in the English-speaking world. The word “trifle” appears in English as early as the 16th century, though its early culinary uses referred to a simple dish of thick cream flavored with sugar, ginger, and rosewater rather than the layered construction we recognize today. The first layered trifle — combining cake soaked in alcohol with custard and cream — appears in English cookbooks from the late 18th century, most notably in Hannah Glasse’s The Art of Cookery Made Plain and Easy (1747), which describes a dish built from ratafias (almond biscuits), macaroons, sponge fingers, and cream. The incorporation of jelly (gelatin-set fruit) into the trifle, which became standard in Victorian-era recipes and remains characteristic of the British trifle today, was a 19th-century development that added the characteristic wobble and color of the British version — though the jelly layer divides trifle purists fiercely to this day, with the anti-jelly camp maintaining that jelly has no place in a proper trifle. The alcoholic soak of the sponge (traditionally sherry, now sometimes replaced with fruit juice in family versions) is another defining characteristic of the English trifle, though its use varies significantly by household and occasion. The word “trifle” itself — meaning a thing of little importance, from the Old French “trufle” (mockery, deception) — has been interpreted by food historians as a reference either to the dish’s origins as a made-from-scraps improvisation, or to the lightness and insubstantiality of a cream-and-cake dessert compared to the hearty savory dishes that preceded it at the table. The vegan strawberry cheesecake trifle in this recipe replaces the traditional elements (dairy cream, egg custard, gelatin jelly) with plant-based equivalents that maintain the structural and visual logic of the original while making it fully accessible to everyone at the table.


Flavor Variations

  • Lemon and Blueberry Cheesecake Trifle: Replace the strawberries with 500g of fresh blueberries macerated with 2 tablespoons of sugar and 1 tablespoon of lemon juice, and increase the lemon zest and lemon juice in the cheesecake cream to create a more assertively lemony flavor. Make a blueberry syrup for the sponge soak (blueberries, sugar, water, lemon) in place of the strawberry syrup. The lemon-blueberry combination produces a trifle that is brighter and more tart than the strawberry version, with a beautiful purple-blue color at the fruit layer that contrasts dramatically with the white cream.
  • Chocolate Raspberry Trifle: Replace the vanilla sponge with a chocolate sponge (add 30g / ¼ cup of Dutch-process cocoa to the dry ingredients and reduce the flour by the same amount). Replace the strawberries with 400g of fresh raspberries macerated with 2 tablespoons of sugar. Make a raspberry syrup for the sponge soak. Add 2 tablespoons of good-quality cocoa powder to the cheesecake cream for a chocolate cheesecake flavor. Finish with raspberries and shaved vegan dark chocolate on top. The chocolate-raspberry combination is arguably the most indulgent trifle variation possible.
  • Tropical Mango Coconut Trifle: Replace the strawberries with 500g of fresh or thawed frozen mango, diced, with a squeeze of lime and a pinch of chilli flakes for complexity. Make a mango syrup for the sponge soak. Add 1 teaspoon of lime zest and replace the lemon juice with lime juice in the cheesecake cream. Finish the top with toasted coconut flakes and fresh mango. This tropical version is exceptional in summer and leans into the natural coconut flavor of the coconut cream components.

Nutritional Highlights (Per Serving — Based on 12 Servings)

CaloriesProteinCarbsFiberFat
~385 kcal4g48g2g20g

Storage

  • Refrigerator: The assembled trifle keeps in the refrigerator for up to 3 days — it is best on day 1 and day 2 after assembly, when the layers are at their most defined. By day 3 the sponge has fully absorbed the surrounding moisture and the layers are less distinct, though the flavor remains excellent. Keep covered with cling film.
  • The crushed biscuits on top: if storing for more than a few hours before serving, keep the crushed biscuits in a separate sealed container and add at the last moment — biscuits placed on the trifle in advance will soften overnight and lose their crunch entirely.
  • Components stored separately: the sponge (un-soaked), cheesecake cream, and macerated strawberries can all be made and stored separately in the refrigerator for up to 2 days before assembly — an excellent approach for a planned occasion where prep time is divided across two days.
  • Not suitable for freezing — the assembled trifle does not freeze well; the fruit releases excessive moisture on thawing and the cream layers change texture. Freeze only the un-soaked sponge cake (up to 1 month) if making significantly in advance.

Frequently Asked Questions

My coconut cream didn’t whip — it stayed liquid. What went wrong?

There are two likely causes. First: the tins were not cold enough — the coconut cream needs at least 12 hours in a cold refrigerator to solidify the fat fully; if the back of the bottom shelf was too warm, or the tins sat near the door where temperature fluctuates, the cream may not have solidified sufficiently. Second: lite or reduced-fat coconut cream was used — lite coconut cream has a lower fat content and will not whip regardless of chilling time. For the next batch, use full-fat coconut cream (check the label: fat content should be approximately 17–22g per 100ml) and place the tins at the coldest point of the refrigerator for a full 12–24 hours.

The cheesecake cream is runny and won’t hold its shape. How do I fix it?

A runny cheesecake cream is usually caused by either a coconut cream that was insufficiently whipped (it needs to reach soft peaks before folding into the cream cheese — if it is still liquid when folded in, it will thin the entire mixture), or vegan cream cheese that was too cold and lumpy rather than being fully smooth before the coconut cream was added. To rescue a too-soft cheesecake cream: refrigerate the mixture for 30 minutes, then gently fold in an additional 2 tablespoons of sifted powdered sugar and, if the mixture is still too soft, another 2 tablespoons of freshly whipped coconut cream. The mixture should firm slightly with the additional powdered sugar.

Can I use shop-bought sponge cake to save time?

Yes — a store-bought plain sponge, vanilla cake, or even madeira loaf cake works well and significantly reduces the preparation time. Choose a plain, lightly flavored sponge rather than one with filling or frosting; the strawberry syrup soak and the cheesecake cream provide all the flavor needed. Cut the store-bought cake into cubes as directed and proceed from the assembly stage.

Can I make individual trifles in glasses instead of one large bowl?

Yes — individual trifles in tall glasses (a rocks glass, a wide wine glass, or a dessert glass) are an elegant dinner party option and have the additional advantage that each serving is already portioned. Divide all the components equally across the glasses and chill between each layer as directed. Individual trifles take slightly less time per layer to set than a single large trifle due to the smaller volume of cream. Assemble up to 24 hours in advance and refrigerate covered.


Tried this recipe? Leave a comment below and let us know how it turned out! Tag us on Instagram and Facebook — we love seeing your plant-powered creations. Looking for more addictive vegan snack and appetizer recipes? Browse all recipes on Easy Vegan Recipes — new recipes posted every single week!