There are desserts that taste pleasant. And then there are desserts like these Best Vegan Creamy Lemon Squares — the kind that deliver such a sharp, bright, intensely lemony filling over such a perfectly crumbly, buttery shortbread base that the contrast between the two stops you completely on the first bite. This is that lemon square. The one that makes everything else taste a little flat afterward. The one that is equally spectacular served at a summer picnic, a holiday dessert table, or sliced into small squares and eaten one after another from the refrigerator at midnight because the craving was specific and these are exactly what was needed.
These lemon squares start with a classic vegan shortbread base — cold vegan butter, flour, powdered sugar, and a pinch of salt pressed into a tin and baked until lightly golden — then topped with a filling of fresh lemon juice, lemon zest, coconut cream, and cornstarch cooked into a smooth, intensely lemony curd that sets over the shortbread into a firm, sliceable layer of extraordinary brightness and richness.
What makes these squares so outstanding is the ratio — more lemon than most recipes use and less sweetness than most recipes default to, producing a filling that tastes genuinely, assertively, gloriously lemony rather than merely sweet with a faint citrus note, set into a creamy, silky layer that holds clean edges when sliced.
This recipe is 100% vegan, naturally gluten-free when made with gluten-free flour, ready in about 55 minutes plus chilling, and absolutely magnificent dusted with powdered sugar and served cold in generous squares.
Recipe Information
Prep Time
Cook Time
Chill Time
Total Time
Servings
Calories
20 mins
30 mins
2 hours
2 hrs 50 min
16
~190 kcal
Ingredients
For the Shortbread Base
1½ cups (180g) all-purpose flour
⅓ cup (40g) powdered sugar
½ tsp fine salt
½ cup (115g) cold vegan butter, cut into small cubes
For the Creamy Lemon Filling
¾ cup (180ml) fresh lemon juice (from 4–5 large lemons)
Zest of 3 lemons
¾ cup (150g) cane sugar
1 cup (240ml) full-fat coconut cream
4 tbsp cornstarch
¼ tsp turmeric (for color — adds no discernible flavor)
Pinch of salt
2 tbsp vegan butter (stirred in at the end for gloss)
For Finishing
Powdered sugar for dusting
Extra lemon zest for garnish (optional)
Instructions
Preheat and prepare the tin. Preheat the oven to 350°F (175°C). Line a 20cm (8-inch) square baking tin with parchment paper, leaving overhang on two sides for easy removal.
Make the shortbread base. In a bowl combine the flour, powdered sugar, and salt. Add the cold vegan butter cubes and rub into the flour quickly with your fingertips until the mixture resembles fine, sandy breadcrumbs that hold together when pressed. Press firmly and evenly into the prepared tin to form a uniform base approximately 8mm thick.
Blind bake the base. Bake the shortbread base for 18–20 minutes until set and very lightly golden at the edges. It should feel firm and dry to the touch. Remove from the oven and let cool for 5 minutes while making the filling — the base does not need to cool completely.
Make the lemon filling. In a medium saucepan whisk together the lemon juice, lemon zest, sugar, coconut cream, cornstarch, turmeric, and salt until the cornstarch is completely dissolved. Place over medium heat and cook, whisking continuously without stopping, until the mixture thickens dramatically and large bubbles begin to appear on the surface — approximately 8–10 minutes. Remove from heat and whisk in the vegan butter cubes until melted and incorporated.
Pour over the base. Pour the hot lemon filling immediately over the still-warm shortbread base. Smooth the surface with an offset spatula. The filling should be thick enough to flow slowly rather than running freely.
Chill until set. Allow to cool at room temperature for 20 minutes then refrigerate for a minimum of 2 hours, ideally overnight, until the filling is completely firm and set throughout.
Slice and dust. Lift the set lemon square slab out of the tin using the parchment overhang. Using a sharp knife dipped in hot water and wiped dry between each cut, slice into 16 even squares. Dust generously with powdered sugar immediately before serving.
Pro Tips
Whisk the filling continuously without stopping from the moment the pan goes on the heat — any pause allows the cornstarch to settle and form lumps on the bottom of the pan.
Pour the filling over a warm rather than cold shortbread base — this helps the filling adhere to and set against the base rather than separating into a distinct layer.
Use fresh lemon juice only — bottled lemon juice produces a flat, one-dimensional filling that is noticeably inferior to the bright, complex flavor of fresh.
Chill for the full 2 hours minimum before slicing — cutting into partially set lemon squares produces ragged, messy edges. A fully set square slices perfectly cleanly.
Dip the knife in hot water and wipe between every cut for the sharpest, most professional edges.
Why These Lemon Squares Are the Best Version
Most lemon square recipes err on the side of too much sweetness and too little lemon, producing a dessert that is pleasant but not particularly memorable. This recipe specifically inverts that ratio — using significantly more fresh lemon juice and zest than standard and less sugar — producing squares where the lemon is the dominant, forward flavor and the sweetness exists to balance and round it rather than to overwhelm it. This produces the specific, sharp, bright, almost electric lemon flavor that makes a truly great lemon square genuinely difficult to stop eating.
Flavor Variations
Lime Squares: Replace the lemon juice and zest with fresh lime juice and lime zest for a more tropical, slightly more tart version with a beautiful pale green filling.
Lemon Lavender Squares: Add 1 teaspoon of culinary dried lavender to the filling while cooking and strain out before pouring for a fragrant, floral version.
Raspberry Lemon Squares: Press a layer of fresh raspberries onto the shortbread base before adding the filling for a raspberry-lemon combination that is spectacular in summer.
Nutritional Highlights (Per Square)
Calories
Protein
Carbs
Fiber
Fat
~190 kcal
1g
26g
0g
9g
Storage
Refrigerator: Store in an airtight container in a single layer for up to 5 days. These squares are best served cold — the filling is firmer and more sliceable and the contrast with the shortbread base is more pronounced when chilled.
Freezer: Freeze in a single layer until solid then transfer to a freezer-safe container with parchment between layers for up to 2 months. Thaw in the refrigerator overnight before serving.
Dusting: Dust with powdered sugar immediately before serving rather than in advance — the powdered sugar absorbs moisture from the filling during storage and becomes invisible and damp if added too early.
Frequently Asked Questions
Why is my filling not setting firmly?
Filling that does not set is caused by insufficient cornstarch, insufficient cooking time, or not chilling for long enough. Ensure the filling has thickened dramatically on the stovetop with visible large bubbles before pouring, and chill for the full 2 hours minimum.
Can I make these gluten-free?
Yes — use a 1:1 gluten-free flour blend for the shortbread base. The filling is naturally gluten-free. The shortbread may be slightly more crumbly than the regular version but still delicious.
Why did the filling separate from the base?
This usually happens when cold filling is poured over a cold or fully cooled base. Pouring hot filling over a still-warm base helps them bond as they cool together. A thin layer of jam brushed over the cooled shortbread before adding the filling can also help adhesion.
Tried this recipe? Leave a comment below and let us know how it turned out! Tag us on Instagram and Facebook — we love seeing your plant-powered creations. Looking for more bright, indulgent vegan dessert bar recipes? Browse all recipes on Easy Vegan Recipes — new recipes posted every single week!
There are desserts that take you back to a specific moment — a grandmother’s kitchen, a summer barbecue, a Sunday afternoon that smelled of vanilla and ripe bananas. And then there are desserts like this Vegan Banana Pudding — the kind that captures every single one of those feelings and delivers them in a bowl so beautiful, so deeply nostalgic, and so profoundly satisfying that people go quiet for a moment on the first spoonful and then immediately ask for the recipe. This is that dessert. The one that tastes like a memory. The one that is simultaneously the most comforting and the most elegant thing on the dessert table. The one that makes people stop and say — with genuine, unreserved disbelief — that this is entirely plant-based.
This is a banana pudding of extraordinary classical beauty — layers of silky, vanilla-scented custard pudding made from scratch with oat milk and coconut cream, alternating with crisp vanilla wafer cookies that soften slowly into the pudding into something that is neither quite cookie nor quite cake but something entirely and magnificently its own, and generous slices of ripe, fragrant banana that perfume every layer with their sweet, tropical presence, all crowned with a cloud of whipped coconut cream so light and so voluminous that it trembles when the dish is set on the table. It is stunning to look at. It is extraordinary to eat. And it takes thirty minutes to make.
What makes this pudding so genuinely outstanding is the from-scratch vanilla custard. Unlike instant pudding mixes — which rely on artificial flavors, colorings, and stabilizers to achieve their characteristic texture — this custard is made the classical way: oat milk warmed with vanilla bean, enriched with coconut cream, thickened with cornstarch and a touch of agar agar into a pudding of such extraordinary silkiness and depth of flavor that it is in a completely different category from anything that comes from a packet. The flavor is clean, pure, and deeply vanilla — with a richness from the coconut cream that makes every spoonful feel genuinely indulgent.
This recipe is 100% vegan, naturally gluten-free when made with gluten-free vanilla wafers, made without refined sugar in the custard, ready in just 30 minutes of active preparation plus chilling time, and absolutely, completely, magnificently worth every moment it requires.
Recipe Information
Prep Time
Cook Time
Chill Time
Servings
Calories
15 mins
15 mins
4 hours
6
~420 kcal
Ingredients
For the Vanilla Custard Pudding
3 cups (720ml) unsweetened oat milk
1 cup (240ml) full-fat coconut cream
½ cup (100g) cane sugar or coconut sugar
4 tbsp cornstarch
1 tsp agar agar powder (for additional firmness — optional but recommended)
2 tsp pure vanilla extract or seeds from 1 vanilla bean
¼ tsp turmeric (purely for the classic yellow color — adds no flavor)
Pinch of salt
2 tbsp vegan butter (stirred in at the very end for extraordinary richness)
4–5 ripe but firm bananas, sliced into coins approximately 1cm thick
200g vegan vanilla wafer cookies (Nilla wafers style — check for vegan varieties)
1 tbsp lemon juice (toss with banana slices to prevent browning)
For Topping
Additional banana slices for decoration
Crushed vanilla wafer cookies
Extra whipped coconut cream
Fresh mint leaves
A light dusting of cinnamon or nutmeg
Vegan caramel drizzle (optional but extraordinary)
Instructions
Refrigerate the coconut cream overnight. Place both cans of full-fat coconut cream in the coldest part of the refrigerator for a minimum of 8 hours — ideally 24 hours. The cold separates the solid coconut fat from the liquid, making it possible to whip it into the light, stable cream that crowns this pudding. This is the one step that cannot be rushed — plan ahead.
Make the vanilla custard. In a medium heavy-bottomed saucepan whisk together the oat milk, coconut cream, sugar, cornstarch, agar agar if using, turmeric, and salt until the cornstarch is completely dissolved with no lumps remaining — this pre-whisking before heat is applied prevents lumps from forming during cooking. Place over medium heat and cook, whisking continuously and reaching every corner of the pan, until the mixture thickens to a pudding consistency — approximately 8–10 minutes. The pudding is ready when it coats the back of a spoon thickly and a line drawn through it with a finger holds its shape cleanly.
Finish the custard. Remove from heat immediately and stir in the vanilla extract and vegan butter until completely incorporated. The butter adds a richness and gloss to the finished pudding that makes it feel genuinely luxurious. Pour through a fine mesh sieve into a clean bowl to remove any lumps and produce a perfectly smooth custard. Press a sheet of plastic wrap directly onto the surface of the custard — preventing a skin from forming — and allow to cool for 15 minutes before using while still slightly warm.
Prepare the banana slices. Slice the bananas into coins approximately 1cm thick and toss immediately with the lemon juice in a bowl — the acid prevents the banana from oxidizing and turning brown, keeping the slices fresh and visually beautiful throughout the chilling time. The lemon flavor is completely undetectable in the finished pudding.
Whip the coconut cream. Open the refrigerated coconut cream cans without shaking. Scoop only the solid white coconut fat from the top of each can into a large cold mixing bowl — discard or save the liquid at the bottom for smoothies. Whip on high speed with a hand mixer or stand mixer for 2–3 minutes until light, fluffy, and holding soft peaks. Add the powdered sugar, vanilla extract, and salt and whip for a further 60 seconds until the cream is thick, stable, and gloriously voluminous. Refrigerate until assembly.
Assemble the pudding. Use a large trifle bowl, deep rectangular dish, or individual serving glasses — clear vessels show the beautiful layers most dramatically. Begin with a layer of vanilla wafer cookies covering the entire base. Add a layer of banana slices arranged in a single, even layer over the cookies. Pour or ladle a generous layer of the warm custard over the bananas — enough to fill between the banana slices and come just above them. Repeat the layers — cookies, bananas, custard — until all ingredients are used finishing with a final layer of custard on top.
Add the whipped coconut cream. Spoon or pipe the whipped coconut cream over the top of the assembled pudding in generous, billowing clouds. Use the back of a spoon to create beautiful swoops and peaks in the cream for the most visually spectacular presentation. Alternatively pipe the cream using a large star tip for a more elegant, decorated finish.
Decorate and chill. Arrange additional banana slices decoratively over the whipped cream. Scatter crushed vanilla wafer crumbs over the entire surface. Add fresh mint leaves for color and a light dusting of cinnamon or nutmeg. Drizzle with vegan caramel if using. Cover loosely and refrigerate for a minimum of 4 hours — ideally overnight. During this chilling time the custard sets completely, the cookies soften into the custard into something magnificently between cookie and cake, and the flavors meld into the extraordinary unified whole that makes banana pudding so deeply satisfying.
Serve beautifully. Serve directly from the refrigerator — banana pudding is at its finest when cold, when the custard is perfectly set, the cream is at its firmest, and the cookies have softened to their ideal texture. Scoop generous portions ensuring every serving contains all layers — cookie, banana, custard, and cream — in every spoonful.
Pro Tips for the Most Extraordinary Vegan Banana Pudding
Whisk the custard continuously and without stopping. The moment you stop whisking a custard cooking over direct heat is the moment lumps begin to form. Whisk continuously — reaching every corner and edge of the pan — from the moment the pan goes on the heat until the moment it comes off. A silicone whisk that conforms to the curved bottom of the saucepan is the ideal tool for this application.
Use ripe but firm bananas. The ideal banana for pudding is fully yellow with just the beginning of brown spots — ripe enough to be sweet and fragrant but firm enough to hold its shape during assembly and chilling rather than turning mushy. Underripe bananas lack sweetness. Overripe bananas collapse during chilling and produce an unappetizing texture.
Press plastic wrap directly onto the custard surface. This simple step — placing the plastic wrap in direct contact with the custard surface rather than over the top of the bowl — prevents the custard skin that forms when custard cools exposed to air. A skin-free custard produces a perfectly smooth, silky pudding layer that is visually and texturally superior in every respect.
Chill for the full 4 hours minimum — overnight is better. The transformation that happens during the chilling period is one of the most remarkable in all of dessert making — the cookies absorb moisture from the custard and soften from crispy wafers into something that is simultaneously yielding and substantial — and this transformation requires sufficient time to complete fully. A pudding chilled for only 1–2 hours will have crunchy cookies and a looser custard. A pudding chilled overnight will have perfectly softened cookies and a firmly set, magnificently silky custard.
Assemble in a clear vessel always. The layered beauty of banana pudding — the alternating ivory custard, golden banana, and pale cookie layers — is one of its most appealing qualities and can only be appreciated through a clear glass or bowl. A trifle bowl is the most spectacular presentation. Individual mason jars or clear glasses are beautiful for individual servings and particularly elegant for dinner party desserts.
Add the decorated banana slices to the top immediately before serving. Banana slices used for decoration on the very top of the pudding will begin to brown during the chilling period despite the lemon juice treatment — add the decorative top banana slices in the final 30 minutes before serving for the most visually beautiful presentation.
The Timeless Appeal of Banana Pudding
Banana pudding is one of the most beloved desserts in American culinary history — a preparation so deeply embedded in Southern food culture in particular that it has transcended its regional origins to become one of the most universally recognized and requested desserts across the entire country. Its origins trace to the late nineteenth century when vanilla custard pudding — a staple of American home cooking — began to be layered with the increasingly available and affordable banana, creating a combination that proved so immediately and universally appealing that it became a classic almost instantaneously.
The genius of banana pudding lies in its textural evolution during the chilling period. When first assembled the dessert has three distinct textures — crispy cookies, silky custard, and firm banana. After four hours of chilling these three textures have begun to meld and transform — the cookies have absorbed custard moisture and softened into something halfway between a cookie and a cake, the custard has set to a firm, sliceable consistency, and the bananas have released some of their natural sugars into the surrounding custard, perfuming every layer with their characteristic sweetness. After overnight chilling the transformation is complete — the pudding has become a unified whole that is entirely different from and entirely more extraordinary than the sum of its assembled parts.
This vegan version honors every element of the classical preparation while replacing the dairy custard with an oat milk and coconut cream custard that is — in the context of a layered, chilled pudding — indistinguishable from its dairy counterpart in richness, silkiness, and depth of vanilla flavor. The whipped coconut cream replaces whipped dairy cream with a result so similar in texture and flavor that blind tasters consistently identify it as dairy. The vegan vanilla wafers provide the same textural journey from crispy to softened that makes banana pudding so uniquely satisfying.
This is not a lesser version of a great dessert. It is a great dessert. The bananas are real. The vanilla is real. The joy is completely, entirely real.
Flavor Variations
Chocolate Banana Pudding: Replace one cup of the oat milk with chocolate oat milk and add 3 tablespoons of raw cacao powder to the custard for a deeply chocolate version that is particularly spectacular with a layer of vegan chocolate ganache between the custard and whipped cream layers.
Caramel Banana Pudding: Replace the vanilla custard with a caramel custard made by cooking the sugar until it caramelizes to a deep amber before adding the oat milk — creating a butterscotch-flavored custard that pairs magnificently with the banana and whipped cream for an extraordinarily indulgent caramel banana experience.
Tropical Banana Pudding: Add a layer of diced mango and toasted coconut between the banana and custard layers and replace the vanilla wafers with coconut shortbread cookies for a tropical-inspired version that is particularly spectacular in summer and pairs beautifully with a passion fruit drizzle over the whipped cream.
Peanut Butter Banana Pudding: Swirl 3 tablespoons of natural peanut butter into the warm custard before assembling and add a layer of chopped roasted peanuts between the banana and custard layers for a version inspired by the classic Elvis combination of peanut butter and banana that is one of the most addictive dessert flavors imaginable.
Nutritional Highlights (Per Serving)
Calories
Protein
Carbs
Fiber
Fat
~420 kcal
5g
62g
3g
18g
At 420 calories per serving this pudding delivers the genuine indulgence of a classic dessert alongside meaningful nutrition from its whole food ingredients. The bananas provide potassium — one of the most important minerals for cardiovascular and muscle function — alongside Vitamins B6 and C, manganese, and prebiotic fiber that feeds beneficial gut bacteria. The oat milk base contributes beta-glucan fiber with well-documented cholesterol-lowering properties and meaningful amounts of iron and B vitamins. The coconut cream provides medium-chain triglycerides that support metabolic health and rapid energy availability. The vanilla — used generously in this recipe — contributes vanillin, a powerful antioxidant compound with anti-inflammatory properties that has been studied for neuroprotective effects.
Storage
Assembled pudding: Cover tightly with plastic wrap and store in the refrigerator for up to 3 days. The pudding actually improves for the first 24 hours as the cookies continue to soften and the flavors deepen and meld. Beyond 3 days the banana slices begin to brown noticeably and the cookie layers become too soft — the pudding is best consumed within 3 days of assembly.
Custard separately: The vanilla custard stores in an airtight container in the refrigerator for up to 5 days — press plastic wrap directly onto the surface to prevent a skin from forming. Reheat gently in a saucepan over low heat with a splash of oat milk, whisking continuously, if you wish to use it warm for another application.
Whipped coconut cream: Store in an airtight container in the refrigerator for up to 3 days. It will firm considerably during storage — allow to sit at room temperature for 5 minutes and whisk briefly to restore its original lightness before using.
Individual servings: Assembled individual puddings in sealed mason jars or glasses keep beautifully in the refrigerator for up to 3 days — making them an outstanding make-ahead dessert for dinner parties, meal prep, or packed lunches. Add the decorative banana slices and cookie crumb topping in the final 30 minutes before serving.
Frequently Asked Questions
Why did my custard turn out lumpy?
Lumpy custard is almost always caused by one of two things — the cornstarch was not fully dissolved in the cold milk before heating, or the custard was not stirred continuously during cooking. Whisk the cornstarch and cold milk together very thoroughly before applying heat and whisk continuously and without stopping throughout the entire cooking process. If lumps do form despite continuous stirring strain the finished custard through a fine mesh sieve while still warm — this removes virtually all lumps and produces a perfectly smooth result.
How ripe should the bananas be for banana pudding?
Fully yellow bananas with just the beginning of brown spots are ideal — they are sweet enough to contribute genuine banana flavor to the pudding, firm enough to hold their shape during the chilling period, and fragrant enough to perfume the surrounding custard with their characteristic aroma. Avoid very green bananas which are starchy and flavorless, and very overripe bananas which will turn mushy and brown quickly during the chilling period.
Can I make this pudding without coconut cream?
Yes — replace the coconut cream in the custard with additional oat milk and add 2 tablespoons of cashew butter for richness. For the whipped topping use a commercial vegan whipped cream from a can, aquafaba whipped with cream of tartar and powdered sugar, or a whipped cashew cream made from blended soaked cashews with vanilla and powdered sugar. The coconut cream version is the most consistently successful and most similar to dairy whipped cream but these alternatives are all viable.
Can I use instant vegan pudding mix instead of making the custard from scratch?
Yes — a good quality vegan instant pudding mix prepared with oat milk produces a perfectly acceptable custard layer that saves significant time and effort. The from-scratch custard in this recipe is superior in flavor depth and texture but the instant version is an excellent shortcut for occasions when time is limited. Add a teaspoon of vanilla extract and a tablespoon of coconut cream to the instant pudding mixture for a richer, more flavorful result.
What vegan vanilla wafers should I use?
Several brands produce vegan vanilla wafer cookies that perform beautifully in banana pudding. Check the ingredients list for any dairy, eggs, or honey — many standard vanilla wafer cookies are accidentally vegan. If dedicated vegan vanilla wafers are unavailable in your area substitute with vegan shortbread cookies, vegan digestive biscuits, or vegan graham crackers — all produce excellent results with a slightly different but equally delicious character in the finished pudding.
Can I serve this pudding warm?
Traditional banana pudding is served chilled — the chilling period is essential for the cookie softening and custard setting that define the dessert. However the warm custard alone served immediately after cooking over sliced bananas and vanilla wafers with whipped coconut cream on top produces a delicious warm banana pudding trifle that is a completely different but equally wonderful dessert experience — particularly spectacular served warm in winter with the cold whipped coconut cream providing an extraordinary temperature contrast.
Tried this recipe? Leave a comment below and let us know how it turned out! Tag us on Instagram and Facebook — we love seeing your plant-powered creations. Looking for more dreamy, indulgent vegan dessert recipes? Browse all recipes on Easy Vegan Recipes — new recipes posted every single week!
There are cakes that are simply sweet. And then there are cakes like this Vegan Blueberry Sour Cream Cake — the kind that comes out of the oven impossibly tender, almost custard-like in its moistness, studded throughout with bursts of juicy blueberries that have partially sunk into the crumb during baking, with a flavor so rich and so deeply satisfying that it tastes like something far more indulgent than a simple loaf cake. This is that cake. The one that proves a single can of vegan sour cream is capable of producing the moistest cake you have ever made.
This recipe uses vegan sour cream as the primary fat and moisture source in the batter, a technique borrowed from classical baking that produces a cake of extraordinary tenderness and richness without the heaviness of a cake made purely with oil or butter. Fresh blueberries tossed in flour before being folded through prevent them from sinking entirely to the bottom, distributing pockets of jammy fruit throughout every slice.
What makes this cake so outstanding is the sour cream itself — its tangy richness and high fat content produce a crumb that stays moist for days, with a subtle tanginess that balances the sweetness of the cake and the blueberries beautifully, creating a more sophisticated flavor than a standard vanilla cake.
This recipe is 100% vegan, ready in about 65 minutes, and absolutely wonderful served plain, with a light glaze, or with a dollop of vegan whipped cream alongside fresh berries.
Zest of 1 lemon added to the batter for brightness
1 tsp cinnamon for warmth
A scattering of turbinado sugar over the top before baking for extra crunch
Instructions
Preheat the oven and prepare the pan. Preheat the oven to 350°F (175°C). Grease and line a 23 x 13cm (9 x 5 inch) loaf tin or a 20cm (8-inch) round cake tin with parchment paper.
Mix dry ingredients. In a bowl whisk together the flour, baking powder, baking soda, and salt.
Cream the butter and sugar. In a large bowl beat the vegan butter and sugar together for 3 minutes until pale and fluffy.
Add the sour cream. Beat in the vegan sour cream, plant milk, and vanilla extract until smooth and well combined.
Combine. Add the dry ingredients to the wet mixture in two additions, folding gently until just combined. Do not overmix.
Coat and fold in the blueberries. Toss the fresh blueberries in the tablespoon of flour until lightly coated — this helps prevent them from sinking entirely to the bottom. Gently fold them into the batter with two or three strokes.
Bake. Pour the batter into the prepared pan and smooth the top. Bake for 48–55 minutes until a skewer inserted in the center comes out clean or with just a few moist crumbs. Cover loosely with foil if the top browns too quickly before the center is done.
Cool and glaze. Cool in the pan for 15 minutes before turning out onto a wire rack to cool completely. If using the glaze, whisk together the powdered sugar, plant milk, and vanilla extract until smooth and drizzle over the completely cooled cake.
Pro Tips
Use full-fat vegan sour cream for the richest, most tender result — lower-fat versions will not produce the same moist crumb.
Toss the blueberries in flour before folding them in — this simple step genuinely helps prevent them from sinking entirely to the bottom of the cake during baking.
Do not overmix once the flour is added, as this is what keeps the crumb tender rather than tough.
Cool the cake completely before glazing, or the glaze will melt and slide off rather than setting properly.
Why Sour Cream Produces Such a Moist Cake
Sour cream is significantly higher in fat than most plant milks and contributes both moisture and richness simultaneously, while its acidity reacts with the baking soda to produce additional lift and an extremely tender crumb. This combination of high fat content and acidic tenderizing is what makes sour cream-based cakes consistently among the moistest in all of baking, staying fresh and tender for considerably longer than cakes made with oil or plant milk alone.
Flavor Variations
Lemon Blueberry Sour Cream Cake: Add the zest of two lemons to the batter and a tablespoon of lemon juice to the glaze for a brighter, citrus-forward version.
Blueberry Streusel Cake: Top the batter with a crumbly streusel of oats, brown sugar, and vegan butter before baking for a more textured, bakery-style finish.
Mixed Berry Sour Cream Cake: Use a mixture of blueberries, raspberries, and blackberries for a more complex berry flavor throughout.
Nutritional Highlights (Per Serving)
Calories
Protein
Carbs
Fiber
Fat
~310 kcal
4g
42g
2g
14g
Storage
Room temperature: Store in an airtight container for up to 2 days.
Refrigerator: Keeps well for up to 6 days due to the high fat content from the sour cream; bring to room temperature before serving.
Freezer: Freeze unglazed cake, well wrapped, for up to 2 months. Thaw completely before glazing and serving.
Frequently Asked Questions
Can I use frozen blueberries instead of fresh?
Yes — add directly from frozen without thawing and toss in flour as directed. The cake may need a few extra minutes of baking time.
Can I make this cake gluten-free?
Yes, using a 1:1 gluten-free flour blend, though the crumb may be slightly more delicate than the regular version.
Why did my blueberries sink to the bottom anyway?
Some sinking is normal even with the flour coating, especially with very large or juicy blueberries. Using slightly smaller, firmer berries and ensuring the batter is properly thick before folding them in helps minimize this further.
Tried this recipe? Leave a comment below and let us know how it turned out! Tag us on Instagram and Facebook — we love seeing your plant-powered creations. Looking for more moist, indulgent vegan cake recipes? Browse all recipes on Easy Vegan Recipes — new recipes posted every single week!
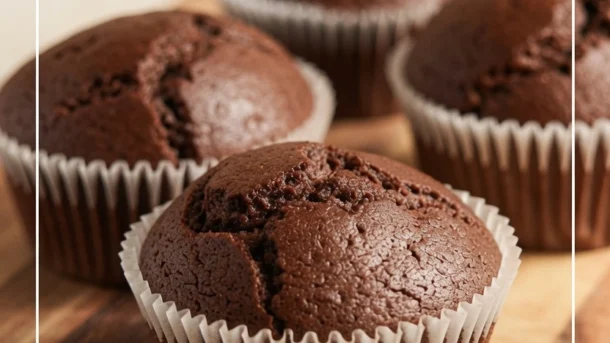
There are muffins you bake because breakfast needs something sweet. And then there are muffins like these Vegan Flourless Chocolate Muffins — the kind that come out of the oven with a slightly cracked, deeply dark top and an interior so dense, so fudgy, and so intensely chocolatey that they taste far more like a brownie than anything that should reasonably be called a muffin. This is that muffin. The one that proves flourless baking is not a compromise but a genuinely different and in many ways superior category of chocolate treat. The one that is so rich and satisfying that a single muffin genuinely, completely satisfies a chocolate craving.
These muffins use almond flour and oat flour in place of all-purpose flour, with flax eggs and almond butter providing binding and richness in the absence of both gluten and eggs. The result is a deeply fudgy, dense, intensely chocolate muffin that is naturally gluten-free, higher in protein and fiber than a standard muffin, and somehow tastes more indulgent despite being made from ingredients that are genuinely more nourishing.
What makes these muffins so outstanding is the texture — the combination of melted dark chocolate, almond butter, and the two alternative flours produces a crumb that is fudgy and dense in a way that wheat flour simply cannot replicate, creating a muffin that is categorically different from a standard chocolate muffin in the best possible way.
This recipe is 100% vegan, naturally gluten-free, ready in just 30 minutes, and absolutely wonderful eaten slightly warm when the chocolate is still soft and the fudgy texture is at its most spectacular.
Recipe Information
Prep Time
Cook Time
Total Time
Servings
Calories
10 mins
20 mins
30 mins
10
~210 kcal
Ingredients
For the Muffins
150g vegan dark chocolate (70% cocoa), melted and cooled slightly
¼ cup (25g) oat flour (certified gluten-free if needed)
2 tbsp cocoa powder
1 tsp baking powder
¼ tsp fine salt
Optional Add-ins
½ cup (85g) vegan chocolate chips folded through for extra indulgence
¼ tsp espresso powder to intensify the chocolate flavor
A pinch of flaky sea salt pressed onto each muffin before baking
¼ cup (30g) chopped toasted walnuts or pecans folded through
Instructions
Preheat the oven. Preheat the oven to 350°F (175°C). Line a 10-hole muffin tin with paper liners.
Make the flax eggs. Combine the flaxseed meal and water, stir, and let rest for 5 minutes until gel-like.
Melt the chocolate. Melt the dark chocolate in a heatproof bowl over a pot of gently simmering water, stirring until smooth. Let cool for 5 minutes.
Combine wet ingredients. In a large bowl whisk together the melted chocolate, almond butter, sugar, prepared flax eggs, plant milk, and vanilla extract until smooth and well combined.
Add dry ingredients. Add the almond flour, oat flour, cocoa powder, baking powder, and salt to the wet mixture. Fold until just combined — the batter will be thick and dense. Fold in any optional add-ins.
Fill and bake. Divide the batter evenly between the 10 lined muffin holes — it will be considerably thicker than standard muffin batter. Smooth the tops slightly. Bake for 18–22 minutes until the tops are set and a slight crack has formed on the surface. The centers will seem underdone — this is correct. They firm up to a fudgy consistency as they cool.
Cool before eating. Let cool in the tin for 10 minutes before transferring to a wire rack. These muffins are good warm but genuinely spectacular once fully cooled, when the fudgy center texture has fully set.
Pro Tips
Do not overbake — flourless chocolate muffins firm up considerably during cooling and should be removed from the oven when they still look underdone in the center.
Allow the melted chocolate to cool slightly before adding to the other wet ingredients — hot chocolate can begin to cook the flax eggs.
Use good quality dark chocolate with at least 70% cocoa — the chocolate is the dominant flavor in this recipe and its quality is directly reflected in the finished muffin.
Let the muffins cool fully before eating for the best fudgy texture — eating them warm produces a slightly gooey, almost molten center that is also delicious but different in character.
Why Flourless Chocolate Baking Works
Removing wheat flour from a chocolate muffin does not produce a lesser version — it produces a fundamentally different product with its own distinct appeal. Without the gluten network that wheat flour creates, flourless chocolate muffins cannot trap as much air and therefore cannot rise to a light, cakey texture. Instead they set around their fat, chocolate, and nut flour base into a dense, fudgy, concentrated mass that delivers more chocolate flavor per bite than a conventional muffin, with a texture that is closer to a ganache or truffle than a standard baked good.
This is not a compromise. It is a different category.
Flavor Variations
Peanut Butter Chocolate Muffins: Replace the almond butter with natural peanut butter for a classic peanut butter and chocolate combination.
Mocha Chocolate Muffins: Add 1 teaspoon of espresso powder to the batter for a deep coffee-chocolate mocha character.
Orange Chocolate Muffins: Add the zest of an orange to the batter for a chocolate-orange version that is particularly spectacular for the holiday season.
Nutritional Highlights (Per Muffin)
Calories
Protein
Carbs
Fiber
Fat
~210 kcal
6g
20g
4g
13g
Storage
Room temperature: Store in an airtight container for up to 3 days. The texture improves during storage as the fudgy center sets further.
Refrigerator: Keeps for up to 6 days. Bring to room temperature or warm briefly before eating.
Freezer: Freeze individually wrapped muffins for up to 2 months. Thaw at room temperature or microwave for 30 seconds.
Frequently Asked Questions
Can I use a different nut butter instead of almond butter?
Yes — peanut butter produces a slightly stronger flavor, cashew butter produces a milder result, and tahini produces a more neutral, slightly sesame-flavored version. All work well with the same quantities.
Why are my muffins falling apart?
Flourless muffins are more fragile than conventional muffins, especially when warm. Let them cool fully in the tin before removing and handling. They firm up considerably once completely cool.
Can I make these without oat flour?
Yes — replace the oat flour with additional almond flour in the same quantity for a fully nut-flour-based muffin with a slightly richer, more tender result.
Tried this recipe? Leave a comment below and let us know how it turned out! Tag us on Instagram and Facebook — we love seeing your plant-powered creations. Looking for more indulgent vegan chocolate and gluten-free dessert recipes? Browse all recipes on Easy Vegan Recipes — new recipes posted every single week!
There are desserts that look ordinary going into the oven and come out as something genuinely surprising. And then there are desserts like this Vegan Strawberry Pudding Cake — the kind that bakes into a single dish that separates all by itself into a soft, cakey top layer and a warm, luscious strawberry pudding sauce beneath it, with no effort or technique beyond simply pouring the batter into a dish and letting the oven do something almost magical. This is that dessert. The one that makes people ask how you got two distinct layers from one pour. The one that comes out bubbling with jammy strawberry sauce beneath a tender, golden sponge and tastes like the best summer dessert imaginable.
A pudding cake is one of the most wonderfully deceptive preparations in baking — a single batter, poured into a dish with boiling water poured over the top, that separates during baking into a cakey layer above and a glossy, saucy pudding below. This strawberry version builds on that technique with fresh or frozen strawberries, a light vanilla sponge batter, and a strawberry sugar layer that dissolves into the sauce as the cake bakes.
What makes this pudding cake so outstanding is the textural contrast between the layers — a slightly crisp, cakey top giving way to the soft interior of the sponge, and then the warm, glossy, intensely strawberry sauce beneath that pools in the spoon when served and turns a simple bowl of cake into something genuinely special.
This recipe is 100% vegan, ready in just 45 minutes, and absolutely magnificent served warm with a scoop of vegan vanilla ice cream that melts into the hot strawberry sauce in the most extraordinary way.
Recipe Information
Prep Time
Cook Time
Total Time
Servings
Calories
15 mins
30 mins
45 mins
6
~290 kcal
Ingredients
For the Cake Batter
1 cup (120g) all-purpose flour
½ cup (100g) cane sugar
1½ tsp baking powder
¼ tsp fine salt
½ cup (120ml) plant milk
3 tbsp melted coconut oil or neutral vegetable oil
1 tsp pure vanilla extract
1 cup (150g) fresh or frozen strawberries, hulled and halved
For the Pudding Layer
½ cup (100g) cane sugar
1 tbsp cornstarch
1 cup (240ml) boiling water
1 tbsp strawberry jam or preserves
To Serve
Vegan vanilla ice cream
Extra fresh strawberries
A dusting of powdered sugar
Instructions
Preheat the oven. Preheat the oven to 350°F (175°C). Lightly grease a deep 20cm (8-inch) square or round baking dish.
Arrange the strawberries. Scatter the halved strawberries evenly across the base of the prepared baking dish.
Make the cake batter. In a bowl whisk together the flour, sugar, baking powder, and salt. Add the plant milk, melted oil, and vanilla extract and stir until just combined into a smooth batter. Pour the batter evenly over the strawberries in the baking dish.
Make the pudding layer. In a small bowl combine the sugar and cornstarch. Scatter this mixture evenly over the top of the batter — do not stir. Dot the strawberry jam over the surface. Then carefully pour the boiling water evenly over the entire surface — again, do not stir. This is the step that looks wrong but is correct.
Bake. Place in the preheated oven and bake for 28–32 minutes until the top is set and lightly golden and the sauce is visibly bubbling around the edges.
Rest and serve. Let rest for 5 minutes before serving. Spoon into bowls ensuring each serving gets both the cakey top and the strawberry pudding sauce from beneath. Serve warm with vegan vanilla ice cream.
Pro Tips
Do not stir after adding the boiling water — the separation into two distinct layers depends entirely on leaving the layers undisturbed so they can separate properly during baking.
Use ripe, sweet strawberries for the most vibrant sauce — if your strawberries are slightly tart, increase the pudding layer sugar by a tablespoon.
Serve immediately after the brief rest, as the pudding sauce is at its most fluid and abundant while hot — it absorbs more into the cake layer as it cools.
A deep dish is important — the pudding layer bubbles vigorously during baking and needs room to expand without overflowing.
The Science Behind the Magic
The “magic” of a pudding cake is actually a straightforward application of density and heat. The boiling water dissolves the sugar layer on top and creates a liquid that sinks through the batter during baking because it is denser than the unbaked sponge. Meanwhile the batter, which contains baking powder, rises upward and sets into the cakey layer as it bakes. The result is a self-separating dessert that looks effortful and produces two genuinely different textures from a single preparation.
Flavor Variations
Blueberry Pudding Cake: Replace the strawberries with fresh or frozen blueberries and add a pinch of cinnamon to the batter.
Lemon Strawberry Pudding Cake: Add the zest of a lemon to the batter and a tablespoon of lemon juice to the boiling water for a brighter, citrus-forward version.
Mixed Berry Pudding Cake: Use a mixture of strawberries, raspberries, and blackberries for a more complex, layered berry flavor.
Nutritional Highlights (Per Serving)
Calories
Protein
Carbs
Fiber
Fat
~290 kcal
3g
52g
2g
7g
Storage
Best fresh: This dessert is at its best served warm, straight from the oven, when the pudding sauce is at its most fluid and abundant.
Refrigerator: Store covered for up to 3 days. Reheat individual portions in the microwave for 60–90 seconds before serving; the pudding sauce will loosen again when warmed.
Freezer: Not recommended, as the pudding layer does not freeze and thaw well.
Frequently Asked Questions
Why didn’t my cake separate into two layers?
This is almost always caused by stirring after adding the boiling water, using a dish that is too shallow, or underbaking. Do not stir at any point after adding the water, use a deep dish, and bake until the top is properly set and the edges are visibly bubbling.
Can I use frozen strawberries?
Yes — add directly from frozen without thawing. The cake may need an extra 3–5 minutes of baking time since the frozen fruit releases more liquid.
Can I make this gluten-free?
Yes — use a 1:1 gluten-free flour blend in the batter. The pudding layer is already gluten-free.
Tried this recipe? Leave a comment below and let us know how it turned out! Tag us on Instagram and Facebook — we love seeing your plant-powered creations. Looking for more magical vegan dessert recipes? Browse all recipes on Easy Vegan Recipes — new recipes posted every single week!
There are desserts that make an occasion feel genuinely special. And then there are desserts like this Vegan German Chocolate Cheesecake — the kind that combines the rich, tangy creaminess of a classic cheesecake with the deeply chocolatey base of a German chocolate cake, topped with the iconic sticky coconut pecan frosting that makes German chocolate cake so beloved, into a single, spectacular dessert that looks like it came from a professional bakery and tastes even better than it looks. This is that dessert. The one that silences the table on the first bite. The one that people remember long after the occasion is over.
This cheesecake starts with a rich chocolate Oreo-style cookie crust, filled with a silky cashew and vegan cream cheese filling deeply flavored with dark chocolate and vanilla, baked until set and perfectly smooth, then crowned with the signature German chocolate topping — a slow-cooked caramelized coconut pecan frosting so rich and deeply flavored that it elevates the cheesecake beneath it from excellent to genuinely extraordinary.
What makes this cheesecake so outstanding is the layering of distinct but complementary elements — the crunch of the chocolate crust, the silky richness of the chocolate cheesecake filling, and the sticky, caramelized, texturally complex coconut pecan topping, all present simultaneously in every single forkful.
This recipe is 100% vegan, ready in about 90 minutes of active preparation plus chilling time, and absolutely magnificent served in generous slices at any celebration where you want to demonstrate beyond doubt that plant-based desserts are not a compromise but a genuine upgrade.
Recipe Information
Prep Time
Cook Time
Chill Time
Total Time
Servings
Calories
30 mins
55 mins
6 hours
~8 hours
12
~520 kcal
Ingredients
For the Chocolate Cookie Crust
250g vegan chocolate sandwich cookies (Oreo-style)
5 tbsp vegan butter, melted
For the Chocolate Cheesecake Filling
2 cups (260g) raw cashews, soaked in boiling water for 30 minutes then drained
400g vegan cream cheese, softened
½ cup (120ml) full-fat coconut cream
¾ cup (150g) cane sugar
150g vegan dark chocolate (70%), melted and cooled slightly
2 tbsp cocoa powder
2 tsp pure vanilla extract
2 tbsp cornstarch
Pinch of salt
For the Coconut Pecan Topping
1 cup (200g) brown sugar or coconut sugar
1 cup (240ml) full-fat coconut cream
½ cup (115g) vegan butter
1½ cups (130g) shredded coconut, toasted
1 cup (110g) pecans, toasted and roughly chopped
1 tsp pure vanilla extract
Pinch of salt
Instructions
Make the chocolate crust. Preheat the oven to 325°F (160°C). Process the chocolate cookies in a food processor until fine crumbs form. Add the melted vegan butter and pulse until combined. Press firmly into the base and slightly up the sides of a greased 23cm (9-inch) springform pan. Bake for 8 minutes. Set aside to cool slightly.
Make the cheesecake filling. Place the drained cashews, vegan cream cheese, coconut cream, sugar, melted chocolate, cocoa powder, vanilla extract, cornstarch, and salt in a high-speed blender. Blend for 90 seconds until completely smooth, silky, and lump-free. Taste and adjust sweetness if needed.
Bake the cheesecake. Pour the filling over the prepared crust and smooth the top. Bake at 325°F (160°C) for 45–50 minutes until the edges are set and the center has only a very slight wobble. Do not overbake — the filling firms considerably during chilling.
Cool and chill. Remove from the oven and let cool completely at room temperature, then refrigerate for a minimum of 6 hours, ideally overnight, until completely firm.
Make the coconut pecan topping. In a saucepan over medium heat, combine the brown sugar, coconut cream, vegan butter, and salt. Bring to a simmer, stirring, and cook for 8–10 minutes until thickened and caramelized to a deep golden color. Remove from heat and stir in the vanilla extract, toasted coconut, and toasted pecans. Cool for 15–20 minutes until thickened to a spreadable consistency.
Top and serve. Spread the coconut pecan topping generously over the surface of the chilled cheesecake. Slice with a sharp knife dipped in hot water and wiped between cuts for the cleanest slices.
Pro Tips
Blend the cheesecake filling for the full 90 seconds — any graininess from the cashews is unacceptable in a finished cheesecake and requires thorough blending to eliminate.
Do not overbake the cheesecake — a slight wobble in the center is correct; the filling sets completely during chilling.
Chill for the full 6 hours minimum — ideally overnight — before adding the topping or slicing.
Cook the coconut pecan topping until properly thickened and caramelized; an undercooked topping will be too liquid to hold its shape on the cheesecake.
Dip the knife in hot water and wipe between slices for the most professional, clean presentation.
The Story Behind German Chocolate Cake and Cheesecake
As discussed in our Vegan German Chocolate Loaf Cake recipe, German chocolate cake is an American creation named after Samuel German, whose dark baking chocolate became the base for a now-iconic dessert featuring the signature coconut pecan frosting. This cheesecake adaptation takes that beloved flavor profile — chocolate base, creamy filling, sticky coconut pecan topping — and reimagines it in cheesecake form, which provides a richer, more velvety canvas for all three components than a traditional layer cake.
Flavor Variations
Espresso German Chocolate Cheesecake: Add 1 teaspoon of espresso powder to the cheesecake filling for a mocha depth that amplifies the chocolate flavor throughout.
No-Bake Version: Replace the cornstarch with agar agar and skip the baking — pour the filling over a no-bake crust and refrigerate until set for a lighter, simpler version.
Mini Cheesecakes: Divide the crust and filling between a lined muffin tin for individual portions that are particularly convenient for parties and celebrations.
Nutritional Highlights (Per Serving)
Calories
Protein
Carbs
Fiber
Fat
~520 kcal
8g
54g
4g
32g
Storage
Refrigerator: Store covered in the springform pan or in an airtight container for up to 5 days. The cheesecake actually improves on day 2 as the flavors deepen.
Freezer: Freeze individual slices wrapped tightly for up to 2 months. Thaw overnight in the refrigerator before serving.
Make ahead: This cheesecake is an ideal make-ahead dessert — the filling is best after overnight chilling, making it perfect for preparing the day before any celebration.
Frequently Asked Questions
Can I make this cheesecake without a springform pan?
A springform pan is strongly recommended for the cleanest release and most professional presentation. A deep cake tin lined with parchment paper can work as an alternative if needed.
Why did my cheesecake crack?
Cracking is usually caused by overbaking or cooling too quickly. Remove from the oven while the center still wobbles very slightly, and let cool gradually at room temperature before refrigerating.
Can I make this without cashews?
Cashews can be replaced with additional vegan cream cheese for a simpler filling, though the texture will be slightly different — less silky and more dense than the cashew version.
Tried this recipe? Leave a comment below and let us know how it turned out! Tag us on Instagram and Facebook — we love seeing your plant-powered creations. Looking for more showstopping vegan cheesecake and dessert recipes? Browse all recipes on Easy Vegan Recipes — new recipes posted every single week!
There are desserts that require a hot oven and careful timing. And then there are desserts like this No-Bake Vegan Cherry Dream Cheesecake — the kind that comes together in thirty minutes without turning on a single appliance beyond a blender, that chills in the refrigerator into a perfectly smooth, sliceable cheesecake with a buttery cookie base and a cloud of vanilla cream cheese filling, all crowned with a glossy, jewel-like cherry topping that is so deeply, vibrantly beautiful that it belongs on the cover of a magazine. This is that cheesecake. The one that requires almost no effort and produces maximum impact. The one that makes people assume you spent far longer than you actually did.
This cheesecake layers a simple pressed cookie and butter crust with a whipped cashew and vegan cream cheese filling that sets in the refrigerator into a smooth, creamy, sliceable layer, topped with a vibrant cherry compote made from fresh or frozen cherries cooked briefly into a glossy, deep burgundy sauce that pools beautifully over the white cream and sets around the edges into something that is both genuinely delicious and genuinely beautiful.
What makes this cheesecake so outstanding is its effortlessness — no baking, no water bath, no careful temperature monitoring — just blending, pressing, pouring, and waiting, producing a result that looks and tastes like a professionally made dessert with a fraction of the effort.
This recipe is 100% vegan, completely no-bake, ready in 30 minutes of active preparation plus chilling time, and absolutely magnificent served ice cold from the refrigerator on a hot summer day.
Recipe Information
Prep Time
Chill Time
Total Time
Servings
Calories
30 mins
6 hours
6.5 hours
12
~390 kcal
Ingredients
For the Cookie Crust
250g vegan vanilla sandwich cookies or digestive biscuits
5 tbsp vegan butter, melted
For the Cream Cheese Filling
1½ cups (195g) raw cashews, soaked in boiling water for 30 minutes then drained
400g vegan cream cheese, softened
½ cup (120ml) full-fat coconut cream
¾ cup (90g) powdered sugar
2 tsp pure vanilla extract
3 tbsp lemon juice
1 tsp agar agar powder dissolved in 3 tbsp warm water
Pinch of salt
For the Cherry Topping
400g fresh or frozen pitted cherries
⅓ cup (65g) cane sugar
1 tbsp lemon juice
1 tsp pure vanilla extract
1½ tbsp cornstarch mixed with 3 tbsp water
Optional Garnish
Fresh whole cherries arranged on top
Vegan whipped cream around the edge
A light dusting of powdered sugar
Instructions
Make the cookie crust. Pulse the cookies in a food processor until fine crumbs form. Add the melted vegan butter and pulse until the mixture holds together when pressed. Press firmly into the base and slightly up the sides of a greased 23cm (9-inch) springform pan. Refrigerate while preparing the filling.
Make the cheesecake filling. Blend the drained cashews, softened vegan cream cheese, coconut cream, powdered sugar, vanilla extract, lemon juice, and salt in a high-speed blender for 90 seconds until completely smooth and silky. Add the dissolved agar agar and blend for a further 30 seconds to incorporate.
Pour and chill. Pour the filling over the prepared crust and smooth the top with an offset spatula. Refrigerate for a minimum of 6 hours, or ideally overnight, until completely firm and set.
Make the cherry topping. Place the cherries, sugar, and lemon juice in a saucepan over medium heat. Cook for 8–10 minutes, stirring occasionally, until the cherries have softened and released a deep burgundy syrup. Add the vanilla extract and cornstarch slurry and stir for 1–2 minutes until the sauce has thickened to a glossy, spoonable consistency. Cool completely to room temperature.
Top and serve. Once the cheesecake is fully set, spoon the cooled cherry topping over the surface. Arrange fresh whole cherries if desired. Slice with a hot, dry knife for the cleanest slices.
Pro Tips
Blend the filling for the full 90 seconds for a completely smooth, lump-free result — any cashew graininess in a no-bake cheesecake is more noticeable than in a baked version.
The agar agar is essential for a no-bake cheesecake that sets firmly enough to slice cleanly — do not omit or substitute with gelatin.
Cool the cherry topping completely before adding it to the set cheesecake to prevent it softening and destabilizing the cream filling surface.
Chill for the full 6 hours — a no-bake cheesecake needs this time to set properly, especially in the center.
Why No-Bake Cheesecake Is Perfect For Summer
No-bake cheesecakes have a distinct advantage over baked versions in warm weather — they require no oven, making them genuinely suitable for hot summer days when the last thing anyone wants to do is heat the kitchen, and they are served ice cold directly from the refrigerator, making them refreshing in a way a warm-from-the-oven dessert simply cannot be.
Flavor Variations
No-Bake Blueberry Dream Cheesecake: Replace the cherry topping with a blueberry compote for a different berry combination.
No-Bake Strawberry Dream Cheesecake: Replace the cherry topping with a vibrant strawberry sauce for a classic summer version.
No-Bake Mango Dream Cheesecake: Replace the cherry topping with fresh mango puree and diced mango for a tropical version.
Nutritional Highlights (Per Serving)
Calories
Protein
Carbs
Fiber
Fat
~390 kcal
6g
42g
2g
23g
Storage
Refrigerator: Store covered for up to 5 days. The cheesecake holds its texture beautifully and is arguably even better on day 2 once all the flavors have fully melded.
Freezer: Freeze without the cherry topping for up to 2 months. Thaw overnight in the refrigerator and add fresh cherry topping before serving.
Make ahead: This is an ideal make-ahead dessert — assemble the cheesecake up to 2 days in advance and refrigerate, adding the topping on the day of serving.
Frequently Asked Questions
Can I use canned cherries instead of fresh or frozen?
Yes — drain canned cherries well before using and reduce the sugar in the topping significantly, as canned cherries are typically packed in heavy syrup and are already sweet.
Can I make this without agar agar?
Agar agar is the key setting agent in this no-bake cheesecake. Without it the filling will be too soft to slice cleanly. If unavailable, 1 teaspoon of kappa carrageenan can be used as an alternative.
Why is my no-bake cheesecake not setting?
This is usually caused by agar agar that was not dissolved properly, or insufficient chilling time. Dissolve the agar agar in warm water until completely clear before adding, and chill for the full 6 hours minimum.
Tried this recipe? Leave a comment below and let us know how it turned out! Tag us on Instagram and Facebook — we love seeing your plant-powered creations. Looking for more effortless vegan no-bake dessert recipes? Browse all recipes on Easy Vegan Recipes — new recipes posted every single week!
There are desserts that impress. And then there are desserts like this Vegan Chocolate Tart — the kind that silences a room the moment it is set on the table, that makes people lean forward before they have even been served a slice, that delivers with every single forkful a depth of chocolate flavor so intense, so pure, and so completely satisfying that the word dessert feels wholly inadequate. This is that tart. The one that looks like it came from a Parisian patisserie window. The one that tastes like the finest chocolate truffle you have ever eaten but in slice form. The one that no one believes for a single second is entirely plant-based until you tell them — and even then they ask you to say it again.
This is a tart of extraordinary elegance and extraordinary simplicity. A buttery, crisp chocolate shortcrust pastry shell — made from almond flour, coconut oil, and raw cacao — filled with a ganache of such silky, glossy, intensely chocolatey perfection that it sets in the refrigerator into something that is simultaneously firm enough to slice cleanly and yielding enough to melt completely on the tongue within seconds. The ganache is made from just three ingredients — dark vegan chocolate, full-fat coconut cream, and a touch of maple syrup — and it is one of the most extraordinary things you will ever make from three ingredients.
What makes this tart so genuinely outstanding is the quality of its restraint. There is nothing superfluous here. No unnecessary ingredients competing for attention. No elaborate techniques masking mediocre flavors. Just the finest dark chocolate you can find, treated with the respect it deserves, allowed to be exactly what it is — extraordinary — in the most beautiful vessel possible.
This recipe is 100% vegan, naturally gluten-free when made with almond flour, ready in just 30 minutes of active preparation plus chilling time, and absolutely magnificent served with fresh raspberries, a dusting of flaky sea salt, and a scoop of vegan vanilla ice cream.
Recipe Information
Prep Time
Cook Time
Chill Time
Servings
Calories
20 mins
12 mins
2 hours
8
~380 kcal
Ingredients
For the Chocolate Tart Shell
2 cups (200g) almond flour
3 tbsp raw cacao powder or cocoa powder
3 tbsp coconut oil, melted
2 tbsp maple syrup
1 tsp pure vanilla extract
Pinch of salt
For the Chocolate Ganache Filling
300g vegan dark chocolate (70% cocoa or higher — quality is everything here)
1 can (400ml) full-fat coconut cream
2 tbsp maple syrup
1 tsp pure vanilla extract
¼ tsp fine sea salt
1 tbsp coconut oil (for extra gloss)
Optional Toppings
Fresh raspberries or strawberries
Flaky sea salt scattered over the surface
Edible gold leaf for extraordinary occasions
Freeze-dried raspberry powder dusted over
Vegan white chocolate drizzle for visual contrast
Toasted crushed hazelnuts or almonds around the edge
Fresh mint leaves
Cocoa powder dusted through a fine sieve
To Serve
Vegan vanilla ice cream
Vegan whipped coconut cream
Fresh berry compote
A drizzle of raspberry coulis
Strong espresso or coffee alongside
Instructions
Preheat the oven and prepare the tin. Preheat your oven to 350°F (175°C). Grease a 23cm (9-inch) loose-bottomed tart tin generously with coconut oil — the loose bottom is essential for removing the finished tart cleanly and presenting it beautifully. Line the base with a circle of parchment paper for additional insurance.
Make the chocolate tart shell. In a large bowl combine the almond flour, cacao powder, and salt. Whisk together until evenly combined and lump-free. Add the melted coconut oil, maple syrup, and vanilla extract and mix with a fork until the mixture comes together into a soft, slightly sticky dough that holds its shape when pressed. The dough should feel like slightly damp sand — firm enough to press into the tin but not so wet that it sticks to your fingers excessively.
Press the shell into the tin. Transfer the dough to the prepared tart tin and press evenly across the base and up the sides using your fingers and the back of a spoon — working to achieve a completely uniform thickness of approximately 4–5mm throughout. Pay particular attention to the corners where the base meets the sides — these areas tend to be thicker than the rest and will take longer to cook if left too thick. Use a flat-bottomed glass to smooth and compress the base for the most even result.
Blind bake the shell. Prick the base all over with a fork — approximately 20 pricks across the surface — to prevent the base from puffing during baking. Place in the preheated oven and bake for 10–12 minutes until the shell is set, dry to the touch, and smells deeply of toasted chocolate. It should feel firm when gently pressed in the center. Do not overbake — the shell will firm further as it cools and an overbaked almond flour shell becomes brittle and crumbly. Allow to cool completely in the tin before adding the filling.
Make the chocolate ganache. Place the chopped dark chocolate in a large heatproof bowl. Pour the full-fat coconut cream into a small saucepan and heat over medium heat until it just reaches a simmer — small bubbles appearing around the edges of the pan. Do not allow it to boil vigorously. Pour the hot coconut cream immediately over the chopped chocolate and leave completely undisturbed for 3 full minutes — this resting time allows the heat of the cream to melt the chocolate gently and evenly without the need for stirring.
Emulsify the ganache. After 3 minutes begin stirring from the center of the bowl outward in slow, deliberate circular motions — never beating or whisking which incorporates air and dulls the glossy surface. Stir until the ganache is completely smooth, uniformly glossy, and flowing like liquid silk. Add the maple syrup, vanilla extract, salt, and coconut oil and stir gently to incorporate. The finished ganache should be deeply glossy, completely smooth, and intensely fragrant of dark chocolate.
Pour the ganache into the shell. Pour the warm ganache into the completely cooled tart shell in a single, slow, steady pour — starting from the center and allowing it to flow outward to the edges naturally. Tap the tin gently on the counter three or four times to release any air bubbles and level the surface. If any bubbles remain on the surface pass a kitchen torch briefly over them or touch each one with the tip of a toothpick to break them.
Add toppings and chill. Arrange any desired toppings — fresh raspberries, a scatter of flaky sea salt, a dusting of freeze-dried raspberry powder — over the surface of the ganache while it is still warm and fluid enough to hold them in place. Transfer to the refrigerator and chill for a minimum of 2 hours — ideally 4 hours or overnight — until the ganache is completely set and firm enough to slice cleanly.
Unmould and serve beautifully. Remove the tart from the refrigerator 15 minutes before serving — allowing it to come slightly toward room temperature improves both the texture and the flavor of the ganache dramatically. Place the tart tin on a tall glass or can and allow the outer ring to drop away. Slide onto a serving plate or cake stand. Slice with a sharp knife dipped in hot water and wiped dry between each cut for the cleanest, most professional slices. Serve with vegan vanilla ice cream or whipped coconut cream alongside.
Pro Tips for a Perfect Vegan Chocolate Tart
Use the best quality dark chocolate you can afford. The ganache is three ingredients — the chocolate is the overwhelming majority of the flavor. A mediocre chocolate produces a mediocre ganache regardless of technique. Look for dark chocolate with a minimum of 70% cocoa solids, a short ingredients list, and ideally single-origin cacao for the most complex, nuanced flavor.
Heat the coconut cream to a simmer — not a boil. Boiling coconut cream can cause the fat to separate from the liquid, producing a grainy, split ganache rather than the silky, emulsified result this recipe achieves. Heat just until the first small bubbles appear around the edges then pour immediately.
Rest the cream on the chocolate for the full 3 minutes. This resting period — without touching, stirring, or disturbing the mixture — allows the heat of the cream to distribute evenly through the chocolate and melt it gently from the outside in. Stirring too soon while the chocolate is still partially unmelted produces a grainy, lumpy ganache.
Stir from the center outward in slow circles. This specific stirring technique — starting at the center and moving outward in slow, deliberate circles — produces a perfectly emulsified ganache with maximum gloss. Stirring vigorously or in random directions incorporates air and produces a matte, duller surface.
Cool the shell completely before filling. A warm shell causes the ganache to melt and absorb into it rather than sitting in a clean, defined layer above it. The shell must be at room temperature — ideally slightly cool — before the ganache is poured.
Dip the knife in hot water between slices. This professional technique produces clean, sharp slices with the ganache cut rather than dragged. Dip, wipe dry, cut, repeat — the difference in presentation between slices cut with a dry knife and slices cut with a hot, dry knife is significant and completely worth the extra 5 seconds per slice.
The Art and Science of Chocolate Ganache
Ganache is one of the most elegant preparations in all of confectionery — and understanding the science behind it explains why this three-ingredient filling is so extraordinarily good and why the specific technique used to make it matters so much.
Ganache is an emulsion — a stable suspension of fat droplets in a water-based liquid — created when the fat in chocolate and the fat in cream are combined in the presence of the emulsifying compounds naturally present in cocoa. The lecithin in dark chocolate acts as a natural emulsifier, allowing the fat and water phases to combine into a smooth, stable, glossy liquid that sets to a firm, silky solid as it cools.
The quality of the emulsion — and therefore the quality of the finished ganache — depends entirely on the technique used to create it. Stirring from the center outward in slow circles begins the emulsification process at the point of highest fat concentration in the bowl and gradually incorporates the surrounding liquid into a stable emulsion. Beating or whisking incorporates air into the mixture, disrupts the emulsion structure, and produces a ganache that is matte rather than glossy and grainy rather than silky.
The ratio of chocolate to cream in this recipe — approximately 300g of chocolate to 400ml of coconut cream — produces a ganache that is soft enough to pour and spread easily when warm but firm enough to slice cleanly after chilling. A higher chocolate-to-cream ratio produces a firmer ganache suitable for truffles. A lower ratio produces a pourable sauce. This specific ratio is calibrated for a tart filling that holds its shape when sliced while melting completely on the tongue within seconds of tasting.
The coconut cream in this recipe performs identically to dairy cream in the ganache-making process — its fat content, water content, and temperature behavior are sufficiently similar to dairy cream that the emulsification chemistry proceeds in exactly the same way. The subtle sweetness of the coconut complements rather than competes with the bitterness of the dark chocolate, adding a gentle tropical note that makes this vegan ganache arguably more interesting in flavor than its dairy counterpart.
Flavor Variations
Salted Caramel Chocolate Tart: Before pouring the chocolate ganache spread a generous layer of salted date caramel over the cooled tart shell. Pour the ganache over the caramel layer and chill as directed for a tart with a molten caramel surprise beneath the chocolate that is one of the most extraordinary dessert combinations imaginable.
Raspberry Chocolate Tart: Arrange a layer of fresh raspberries over the cooled tart shell before pouring the ganache — the berries will be suspended in the chocolate as it sets, creating a tart with a beautiful ruby interior and a bright, fruity tartness that cuts through the richness of the chocolate perfectly.
Mint Chocolate Tart: Add half a teaspoon of pure peppermint extract to the ganache in place of the vanilla for a mint chocolate tart with a cool, refreshing character that is particularly spectacular decorated with fresh mint leaves and a dusting of cacao powder.
Orange Chocolate Tart: Add the zest of two large oranges and a tablespoon of Grand Marnier or fresh orange juice to the ganache for a version inspired by the classic chocolate-orange combination — particularly spectacular served with candied orange peel decorating the surface.
Nutritional Highlights (Per Serving)
Calories
Protein
Carbs
Fiber
Fat
~380 kcal
7g
28g
5g
28g
At 380 calories per serving this tart delivers genuine indulgence alongside meaningful nutrition from its whole food ingredients. The almond flour shell provides protein, healthy monounsaturated fats, Vitamin E, and magnesium alongside its buttery, crisp texture. The dark chocolate filling provides an extraordinary concentration of flavonoid antioxidants — particularly epicatechin and catechin — that have been studied for cardiovascular protective properties, blood pressure reduction, and mood enhancement through serotonin stimulation. The coconut cream contributes medium-chain triglycerides alongside the richness that makes this tart so deeply satisfying.
Storage
Refrigerator: Store the tart covered loosely with plastic wrap in the refrigerator for up to 5 days. Remove 15 minutes before serving to allow the ganache to soften slightly to the perfect texture. The tart actually improves on day 2 as the flavors deepen and the ganache reaches its ideal texture.
Freezer: This tart freezes beautifully for up to 2 months. Freeze without toppings — add fresh toppings after thawing. Freeze sliced or whole on a baking sheet until solid then wrap tightly in plastic wrap and foil. Thaw overnight in the refrigerator.
Room temperature: The tart can be kept at cool room temperature for up to 4 hours for serving at a dinner party — the ganache softens to an extraordinarily luxurious, almost mousse-like texture at room temperature that is in some ways even more spectacular than the firmer refrigerator version.
Individual slices: Slice the tart before storing for the most convenient serving system — individual slices wrapped in parchment paper keep perfectly in the refrigerator for up to 5 days and make an extraordinary make-ahead dessert for dinner parties or special occasions.
Frequently Asked Questions
Can I make this tart without a tart tin?
Yes — a springform cake tin of similar diameter works well as an alternative. The sides will be straight rather than fluted but the tart will be equally delicious. Individual tart tins — 8–10cm diameter — produce beautiful personal-sized tarts that are particularly elegant for dinner party desserts.
Why did my ganache turn grainy?
A grainy ganache is caused by one of three things — the cream was too hot when poured over the chocolate causing the cocoa butter to separate, the mixture was stirred too vigorously incorporating air and disrupting the emulsion, or the cream and chocolate were not at compatible temperatures when combined. If the ganache seizes or turns grainy add a tablespoon of warm coconut cream and stir gently from the center — this usually rescues the emulsion and restores smoothness.
Can I use milk chocolate instead of dark?
Yes — vegan milk chocolate produces a sweeter, creamier, less intense ganache that is particularly appealing to anyone who finds dark chocolate too bitter. Reduce the maple syrup to one tablespoon as milk chocolate is significantly sweeter than dark. The finished tart will be lighter in color and flavor with a more approachable, crowd-pleasing character.
How do I know when the tart shell is properly baked?
The shell is properly baked when it is set and dry to the touch, the edges have pulled very slightly away from the sides of the tin, and the kitchen smells of toasted chocolate and almond. It should feel firm when very gently pressed in the center but not hard or brittle. Remember it will firm further as it cools — a shell that feels slightly soft when hot will be perfectly crisp when cool.
Can I make this tart nut-free?
Yes — replace the almond flour with oat flour made from blending rolled oats to a fine powder in a food processor. Add an additional tablespoon of coconut oil to compensate for the lower fat content of oat flour. The shell will be slightly less rich than the almond flour version but still delicious and completely nut-free.
Can I make the ganache without coconut cream?
Yes — any high-fat plant milk works in ganache making though the results vary. Oat cream produces a good result with a neutral flavor. Cashew cream — made from blended soaked cashews with water — produces an extraordinarily rich, neutral-tasting ganache that many consider superior to the coconut cream version. Avoid low-fat plant milks which do not contain sufficient fat to properly emulsify with the chocolate.
Tried this recipe? Leave a comment below and let us know how it turned out! Tag us on Instagram and Facebook — we love seeing your plant-powered creations. Looking for more stunning vegan dessert recipes? Browse all recipes on Easy Vegan Recipes — new recipes posted every single week!
There are desserts you make because something sweet is needed after dinner. And then there are desserts like this Vegan Snickers Peanut Buster Parfait — the kind that make people go completely silent the moment the first spoonful reaches their lips, that layer chocolate and caramel and peanut butter and vanilla cream in a glass with such deliberate, architectural beauty that people photograph them before eating them, and that deliver with every single spoonful a combination of flavors and textures so deeply, extravagantly satisfying that the word dessert feels almost too modest a description. This is that parfait. The one that makes guests assume you spent hours in the kitchen when you spent thirty minutes. The one that tastes so indulgently, so unapologetically rich that no one believes for a single second that there is not a drop of dairy anywhere in the glass. The one that you will make once and then make every week thereafter because life is genuinely better with this parfait in it.
This is a parfait of extraordinary layered indulgence — a base of rich, fudgy chocolate brownie crumble giving way to a cloud of whipped coconut vanilla cream, then a generous drizzle of sticky salted caramel made from dates and coconut cream, then a layer of crunchy roasted peanuts and a swirl of natural peanut butter, then more cream, more caramel, more chocolate — built upward in a glass until it reaches a crown of chopped vegan Snickers, a final drizzle of caramel, and a scattering of peanuts that makes it look like something from the window of the finest dessert restaurant you have ever visited.
What makes this parfait so genuinely outstanding is the precision of its flavor engineering. Every element has been calibrated against every other to create the specific combination that makes a Snickers bar so universally beloved — the sweetness of the caramel balanced by the salt, the richness of the chocolate balanced by the crunch of the peanuts, the heaviness of the peanut butter balanced by the lightness of the cream — and then elevated beyond the original through the use of ingredients that are simultaneously more wholesome and more complex in flavor than anything in a commercial candy bar.
This recipe is 100% vegan, made without refined sugar in several key components, ready in just 30 minutes of active preparation plus chilling time, and absolutely, completely, unreservedly magnificent.
Refrigerate the coconut cream overnight. This step must be done the night before — place the cans of full-fat coconut cream in the coldest part of the refrigerator for a minimum of 8 hours and ideally 12–24 hours. The cold causes the coconut fat to separate and solidify at the top of the can, making it possible to whip it into a light, stable cream. This is the single step that cannot be rushed or substituted — it is the foundation of the entire dessert.
Make the chocolate brownie crumble base. Place the pitted medjool dates in a food processor and process until a smooth paste forms — approximately 60 seconds. Add the rolled oats, cacao powder, peanut butter, maple syrup, vanilla extract, and salt. Process until the mixture comes together into a rough, slightly sticky dough that holds its shape when pressed between your fingers. Add water one tablespoon at a time if the mixture is too dry to come together. The texture should resemble a firm, fudgy brownie — dense, slightly sticky, and deeply chocolatey. Press an even layer approximately 1.5cm thick into the bottom of four serving glasses or bowls.
Make the vegan salted date caramel. Drain the soaked dates and place in a high-speed blender with the coconut cream, maple syrup, vanilla extract, and sea salt. Blend on high for 60–90 seconds until completely smooth, glossy, and caramel-colored. Add water one tablespoon at a time until a thick but pourable, drizzleable consistency is achieved — thick enough to create distinct ribbons when drizzled but thin enough to flow and settle between layers. Taste and adjust salt — the caramel should be noticeably salty in the best possible way. Transfer to a squeeze bottle or small bowl and set aside.
Whip the coconut cream. Remove the refrigerated coconut cream cans from the refrigerator without shaking or turning them. Open carefully and scoop only the solid white coconut fat from the top of each can into a large cold mixing bowl — leave the clear liquid at the bottom of the can for another use. Using a hand mixer or stand mixer whip the solid coconut cream on high speed for 2–3 minutes until light, fluffy, and holding soft peaks. Add the powdered sugar, vanilla extract, and pinch of salt and whip for a further 60 seconds until the cream is thick, stable, and gloriously voluminous. Keep refrigerated until assembly.
Warm the peanut butter layer. Spoon the natural peanut butter into a small microwave-safe bowl and microwave for 20–30 seconds until pourable. Stir in the maple syrup until combined. The peanut butter should flow easily from a spoon — if too thick add a teaspoon of coconut oil or plant milk and stir to combine.
Assemble the parfaits. Working one glass at a time layer the parfait in this order for the most visually stunning and flavor-balanced result: Start with the chocolate brownie crumble base already pressed into the bottom. Add a generous layer of whipped coconut cream. Drizzle with salted date caramel. Scatter roughly chopped peanuts. Drizzle with the warm peanut butter. Add another layer of whipped coconut cream. Drizzle with more date caramel. Add another scattering of peanuts. Repeat this layering until the glass is generously filled and brimming with visible layers of cream, caramel, and peanuts all the way to the top.
Add the spectacular finishing layer. Crown each parfait with a generous pile of roughly chopped vegan Snickers pieces arranged with deliberate beauty on the very top. Drizzle with the remaining salted date caramel in slow, generous ribbons over the Snickers pieces and down the inside of the glass. Follow with a drizzle of melted vegan dark chocolate in a contrasting pattern. Scatter additional roasted peanuts over the top. Finish with a pinch of flaky sea salt over the entire surface — this final salt addition is what makes the dessert complete, amplifying every other flavor in the glass and providing the specific sweet-salty contrast that makes Snickers-inspired desserts so uniquely irresistible.
Chill before serving. Refrigerate the assembled parfaits for a minimum of 1 hour before serving — this chilling time allows the layers to set slightly, the flavors to meld, and the date caramel to firm to a beautiful consistency that holds its shape between the cream layers rather than sinking to the bottom. The parfaits can be refrigerated for up to 24 hours before serving making them an outstanding make-ahead dessert for dinner parties and celebrations.
Pro Tips for the Most Extraordinary Vegan Snickers Parfait
Refrigerate the coconut cream for the full 8 hours minimum — ideally 24 hours. The degree of fat separation in the coconut cream is directly proportional to the length of refrigeration time. A can refrigerated for 24 hours produces significantly more solid fat and therefore significantly more whipped cream volume than one refrigerated for only 8 hours. Plan ahead and refrigerate the cans the moment you know you are making this recipe.
Use full-fat coconut cream specifically — not coconut milk and not light coconut cream. Only full-fat coconut cream contains sufficient fat content to whip to a stable, voluminous cream. Light coconut cream and coconut milk do not separate sufficiently during refrigeration and will not whip to the correct consistency regardless of how long they are refrigerated or how long they are beaten.
Do not overprocess the brownie base. The oats in the brownie base should retain some texture — process just until the mixture comes together into a cohesive dough with the oats still providing visible, slightly chewy texture rather than a completely smooth paste. This retained texture creates a more interesting, satisfying contrast against the smooth cream layers above it.
Salt the caramel aggressively and confidently. The salted caramel element of this parfait depends on a genuinely noticeable level of salt in the date caramel — this is not a background note but a defining flavor element. Taste the caramel and add salt until the sweetness of the dates is balanced by a clear, pleasant saltiness that makes the caramel taste complex and addictive rather than simply sweet.
Warm the peanut butter until genuinely pourable. Natural peanut butter at room temperature is often too thick to drizzle attractively and tends to land in heavy clumps rather than flowing ribbons. Warming it for 20–30 seconds and stirring thoroughly produces a consistency that drizzles in beautiful, even ribbons that create the most visually appealing layers.
Serve in clear glasses always. The extraordinary visual drama of a layered parfait depends entirely on the visible layers being on display — clear glasses or glass bowls are essential. A parfait served in an opaque bowl is simply a mixed dessert. A parfait served in a clear glass is a stunning, architectural achievement that is as beautiful to look at as it is extraordinary to eat.
The Wholesome Magic Behind Every Indulgent Layer
Despite its deeply indulgent character this parfait is built on ingredients of genuine nutritional substance — and understanding what makes each component so remarkable helps explain why this dessert feels satisfying in a way that commercial Snickers bars simply never do.
Medjool dates — used in both the brownie base and the caramel — are one of nature’s most extraordinary sweeteners. Unlike refined sugar which provides empty calories with no nutritional value, medjool dates provide their sweetness alongside meaningful amounts of fiber, potassium, magnesium, copper, manganese, and B vitamins. The fiber content of dates slows the absorption of their natural sugars significantly — producing a gentler, more sustained energy release than refined sugar and preventing the rapid blood sugar spike and subsequent crash that characterizes refined sugar consumption.
The natural peanut butter in this recipe provides one of the most nutritionally impressive fat profiles of any nut butter — rich in monounsaturated oleic acid and linoleic acid, providing meaningful amounts of protein, magnesium, phosphorus, zinc, and niacin alongside resveratrol — the same antioxidant compound found in red wine — and p-coumaric acid with antioxidant properties. The combination of protein and fat in peanut butter is what makes this parfait so extraordinarily satisfying — it provides genuine satiety rather than the temporary satisfaction of a sugar rush followed by rapid hunger.
Full-fat coconut cream provides medium-chain triglycerides — a unique form of saturated fat that is metabolized differently from long-chain saturated fats, being rapidly converted to energy by the liver rather than stored as body fat. MCTs have been studied for their ability to support metabolic rate, promote satiety, and support brain function through the production of ketones.
Raw cacao powder — used in the brownie base — is one of the most antioxidant-rich foods available anywhere in the plant kingdom, containing extraordinary concentrations of flavonoids including epicatechin and catechin that have been studied for cardiovascular protective properties, mood enhancement through the stimulation of serotonin and endorphin production, and broad-spectrum antioxidant protection throughout the body.
Flavor Variations
Vegan Reese’s Parfait: Replace the date caramel with a chocolate ganache made from melted vegan dark chocolate and coconut cream, and double the peanut butter layer for an intensely peanut butter and chocolate parfait inspired by Reese’s Peanut Butter Cups that is equally spectacular.
Vegan Twix Parfait: Replace the peanuts and peanut butter with a thick layer of vegan shortbread crumble and a generous drizzle of vegan caramel for a Twix-inspired version with the most beautiful buttery shortbread and caramel combination layered with coconut vanilla cream.
Banana Snickers Parfait: Add generous layers of thinly sliced fresh banana between the cream and caramel layers for a version that adds natural freshness and a beautiful fruity sweetness that makes the parfait feel lighter and more tropical — spectacular in summer.
Chocolate Hazelnut Parfait: Replace the peanut butter with hazelnut butter and the peanuts with toasted hazelnuts for a Ferrero Rocher-inspired version with an extraordinarily rich, complex nut flavor and a beautiful toasted hazelnut crunch throughout every layer.
Nutritional Highlights (Per Serving)
Calories
Protein
Carbs
Fiber
Fat
~580 kcal
12g
62g
8g
32g
At 580 calories per serving this parfait is genuinely indulgent — and entirely worth it. It delivers 12 grams of plant-based protein from the peanut butter, peanuts, and oats, 8 grams of dietary fiber from the dates, oats, and peanuts, and an exceptional concentration of healthy fats from the coconut cream, peanut butter, and dark chocolate. The dates provide potassium, magnesium, and B vitamins alongside their natural sweetness. The cacao provides extraordinary antioxidant flavonoids. The peanuts contribute resveratrol and niacin. This is a dessert that indulges completely and nourishes genuinely — the finest possible combination in plant-based sweet making.
Storage
Assembled parfaits: Store covered with plastic wrap in the refrigerator for up to 24 hours before serving. Beyond 24 hours the brownie base begins to absorb moisture from the cream layers and soften — the parfait is still delicious but loses some of its textural contrast. For the finest presentation serve within 24 hours of assembly.
Components separately: Each component stores beautifully on its own — the brownie base mixture in an airtight container in the refrigerator for up to 5 days, the whipped coconut cream covered in the refrigerator for up to 3 days (re-whip briefly if it softens), and the date caramel in a sealed jar in the refrigerator for up to 2 weeks. Having these components made in advance makes assembly a five-minute task whenever the craving strikes.
Date caramel: This is perhaps the most useful component to make in large batches — it stores in a sealed jar in the refrigerator for up to 2 weeks and freezes beautifully for up to 2 months. Use it as a topping for oatmeal, pancakes, waffles, ice cream, or any dessert that benefits from a rich, sweet, salty caramel element. It is one of the most versatile and extraordinary sauces in the entire plant-based kitchen.
Freezing: The assembled parfait does not freeze well — the coconut cream loses its whipped texture and the brownie base becomes icy. Freeze individual components separately and assemble fresh. The brownie base mixture and date caramel freeze particularly well and are worth keeping in the freezer for spontaneous dessert assembly.
Frequently Asked Questions
Can I make the whipped coconut cream without a mixer?
Yes — whisk vigorously by hand for 4–5 minutes until the cream is light and fluffy. A cold bowl and cold whisk help significantly — place both in the freezer for 10 minutes before whipping. Hand whisking requires more effort than a mixer but produces an excellent result and is a completely viable method.
What if my coconut cream did not solidify after refrigeration?
Some brands of coconut cream do not solidify reliably — particularly those with additives, stabilizers, or guar gum in high quantities. If your coconut cream did not separate use a different brand for future batches. In the meantime the unwhipped coconut cream can be used as a pourable cream rather than a whipped cream — the parfait will be less voluminous but still deeply delicious. Brands that consistently solidify reliably include Aroy-D and Chaokoh.
Can I use store-bought caramel sauce instead of making the date caramel?
Yes — a good quality vegan caramel sauce from a jar works perfectly in this recipe for a faster assembly. Choose a salted caramel variety for the most harmonious flavor pairing with the peanuts and chocolate. The date caramel in this recipe is superior in both flavor and nutrition but the store-bought version is an excellent shortcut when time is limited.
Can I make this parfait nut-free?
Yes — replace the peanut butter with sunflower seed butter for a nut-free version with a similar richness and spreading quality. Replace the roasted peanuts with toasted pumpkin seeds or sunflower seeds for crunch. The flavor profile will be different but still deeply delicious and the texture of the layers will remain identical.
How do I prevent the layers from mixing together?
Distinct, visible layers are achieved by working deliberately and patiently — adding each layer in a gentle, slow pour or careful spoon rather than dumping. The coconut cream should be thick enough to support the caramel drizzle without the caramel sinking through immediately. Chilling the partially assembled parfait for 10 minutes between cream layers produces the most distinct, beautifully separate layers in the finished glass.
Can I serve this parfait warm?
The brownie base and date caramel can be served warm but the whipped coconut cream must be kept cold — it melts quickly at room temperature and loses its structure. For a warm dessert variation serve the warm brownie crumble and warm date caramel in a bowl topped with scoops of vegan vanilla ice cream and the peanut elements for a deconstructed warm Snickers sundae that is equally spectacular.
Tried this recipe? Leave a comment below and let us know how it turned out! Tag us on Instagram and Facebook — we love seeing your plant-powered creations. Looking for more indulgent, showstopping vegan dessert recipes? Browse all recipes on Easy Vegan Recipes — new recipes posted every single week!
There are cookies you bake because something sweet is needed. And then there are cookies like these Vegan Cottage Cheese Cookie Bites — the kind that use a base of vegan cottage cheese to produce a soft, slightly chewy, protein-rich cookie bite that is genuinely satisfying in a way that a standard sugar cookie simply is not, delivering the comfort of a cookie alongside the nutritional substance of a high-protein snack. This is that cookie. The one that feels like a treat and functions like a proper snack. The one that people reach for again and again from the jar on the counter.
These bites use vegan cottage cheese — blended smooth for a creamy, neutral base — combined with oat flour, a touch of maple syrup, vanilla extract, and chocolate chips into a dough that bakes into soft, tender, slightly cakey rounds with crisp edges and a moist, chewy center. The vegan cottage cheese adds protein and moisture while contributing almost no flavor of its own, making these bites taste like indulgent cookies while delivering considerably more nutritional substance than their appearance suggests.
What makes these bites so outstanding is the texture — softer and more tender than a standard cookie, with a slightly cakey interior that makes them feel genuinely satisfying after just two or three pieces, unlike many lower-calorie cookies that leave you reaching for more.
This recipe is 100% vegan, naturally gluten-free when made with certified gluten-free oat flour, ready in just 25 minutes, and absolutely wonderful eaten warm from the oven when the chocolate chips are still melted, or at room temperature from the refrigerator as a protein-rich snack.
Recipe Information
Prep Time
Cook Time
Total Time
Servings
Calories
10 mins
15 mins
25 mins
12 bites
~95 kcal
Ingredients
For the Cookie Bites
1 cup (240g) vegan cottage cheese
1½ cups (135g) oat flour (blended from rolled oats)
3 tbsp maple syrup
1 tsp pure vanilla extract
½ tsp baking powder
Pinch of salt
½ cup (85g) vegan chocolate chips
Optional Add-ins
2 tbsp natural peanut butter stirred through the dough
¼ tsp cinnamon for warmth
2 tbsp desiccated coconut folded through
A scattering of flaky sea salt pressed onto each bite before baking
Instructions
Preheat the oven. Preheat the oven to 350°F (175°C). Line a baking sheet with parchment paper.
Blend the cottage cheese. Place the vegan cottage cheese in a blender or food processor and blend until completely smooth — this eliminates any lumps and produces a silky, even-textured dough.
Make the dough. In a large bowl combine the blended vegan cottage cheese, oat flour, maple syrup, vanilla extract, baking powder, and salt. Mix until a soft, slightly sticky dough forms. Fold in the chocolate chips.
Shape the bites. Scoop tablespoon-sized portions of dough onto the prepared baking sheet, spacing them about 3cm apart. Flatten each slightly with the back of a spoon — these bites do not spread much during baking.
Bake. Bake for 13–16 minutes until the edges are set and lightly golden and the centers look just cooked through.
Cool briefly and serve. Let cool on the baking sheet for 5 minutes before transferring. Serve warm or at room temperature.
Pro Tips
Blend the vegan cottage cheese thoroughly before adding to the dough — any lumps will create an uneven texture in the finished bites.
Do not overbake — these bites firm up considerably as they cool and should be removed from the oven while the centers still look slightly underdone.
Flatten each portion slightly before baking as the dough does not spread significantly on its own.
Store in the refrigerator for the best texture and longest shelf life — the vegan cottage cheese base means these hold up better cold than at room temperature.
Why Vegan Cottage Cheese Works in Cookies
Vegan cottage cheese — typically made from tofu, cashews, or other plant bases — provides a creamy, protein-rich, mildly flavored base that adds moisture and binding to cookie dough without contributing a strong flavor of its own. This makes it an ideal ingredient for higher-protein baked goods, producing a tender, slightly cakey texture that standard cookies lack.
Flavor Variations
Peanut Butter Chocolate Chip: Stir 2 tablespoons of natural peanut butter into the dough before adding the chocolate chips.
Lemon Blueberry: Replace the chocolate chips with dried blueberries and add lemon zest to the dough for a brighter, fruit-forward version.
Double Chocolate: Add 2 tablespoons of cocoa powder to the dough alongside the chocolate chips for a deeply chocolatey version.
Nutritional Highlights (Per Bite)
Calories
Protein
Carbs
Fiber
Fat
~95 kcal
4g
13g
1g
3g
Storage
Refrigerator: Store in an airtight container for up to 5 days. These bites hold their texture best when refrigerated.
Freezer: Freeze in a sealed container for up to 2 months. Thaw at room temperature or microwave for 20–30 seconds.
Room temperature: Can be kept at room temperature for up to 2 days in an airtight container.
Frequently Asked Questions
What is vegan cottage cheese made from?
Vegan cottage cheese is typically made from tofu, cashews, or almonds blended with lemon juice, vinegar, and seasonings to replicate the mild, slightly tangy, textured character of dairy cottage cheese. Several brands now produce commercially available vegan cottage cheese, or it can be made at home from firm tofu.
Can I make my own vegan cottage cheese for this recipe?
Yes — blend 300g of firm tofu with 2 tablespoons of lemon juice, 1 tablespoon of apple cider vinegar, and a pinch of salt until smooth for a quick homemade version that works perfectly in this recipe.
Can I use a different flour instead of oat flour?
Yes — almond flour produces a slightly denser, nuttier bite. All-purpose flour also works but produces a chewier, less tender result than oat flour.
Tried this recipe? Leave a comment below and let us know how it turned out! Tag us on Instagram and Facebook — we love seeing your plant-powered creations. Looking for more protein-packed vegan snack and dessert recipes? Browse all recipes on Easy Vegan Recipes — new recipes posted every single week!
We use cookies on our website to give you the most relevant experience by remembering your preferences and repeat visits. By clicking “Accept”, you consent to the use of ALL the cookies.
This website uses cookies to improve your experience while you navigate through the website. Out of these, the cookies that are categorized as necessary are stored on your browser as they are essential for the working of basic functionalities of the website. We also use third-party cookies that help us analyze and understand how you use this website. These cookies will be stored in your browser only with your consent. You also have the option to opt-out of these cookies. But opting out of some of these cookies may affect your browsing experience.
Necessary cookies are absolutely essential for the website to function properly. These cookies ensure basic functionalities and security features of the website, anonymously.
Cookie
Duration
Description
cookielawinfo-checkbox-analytics
11 months
This cookie is set by GDPR Cookie Consent plugin. The cookie is used to store the user consent for the cookies in the category "Analytics".
cookielawinfo-checkbox-functional
11 months
The cookie is set by GDPR cookie consent to record the user consent for the cookies in the category "Functional".
cookielawinfo-checkbox-necessary
11 months
This cookie is set by GDPR Cookie Consent plugin. The cookies is used to store the user consent for the cookies in the category "Necessary".
cookielawinfo-checkbox-others
11 months
This cookie is set by GDPR Cookie Consent plugin. The cookie is used to store the user consent for the cookies in the category "Other.
cookielawinfo-checkbox-performance
11 months
This cookie is set by GDPR Cookie Consent plugin. The cookie is used to store the user consent for the cookies in the category "Performance".
viewed_cookie_policy
11 months
The cookie is set by the GDPR Cookie Consent plugin and is used to store whether or not user has consented to the use of cookies. It does not store any personal data.
Functional cookies help to perform certain functionalities like sharing the content of the website on social media platforms, collect feedbacks, and other third-party features.
Performance cookies are used to understand and analyze the key performance indexes of the website which helps in delivering a better user experience for the visitors.
Analytical cookies are used to understand how visitors interact with the website. These cookies help provide information on metrics the number of visitors, bounce rate, traffic source, etc.
Advertisement cookies are used to provide visitors with relevant ads and marketing campaigns. These cookies track visitors across websites and collect information to provide customized ads.