Breakfast

Vegan Chickpea Frittata Muffin

vegan chickpea frittata muffin

There are breakfast recipes that require a plate and a fork and a proper sit-down moment. And then there are recipes like these Vegan Chickpea Frittata Muffins — the kind that come out of the oven golden and set, portable enough to eat on the go, packed with vegetables and protein, and genuinely satisfying in a way that most grab-and-go breakfasts simply are not. This is that recipe. The one that solves the weekday breakfast problem permanently. The one that you bake once on Sunday and eat all week from the refrigerator, warm or cold, without ever compromising on flavor or substance.

These muffins use a chickpea flour batter as their base — the same reliable, protein-rich base as the full-size frittata, seasoned with turmeric, garlic, and nutritional yeast — baked in a muffin tin with vegetables and herbs folded through, producing individual-portion frittatas that are firm enough to hold their shape, satisfying enough to count as a real breakfast, and convenient enough to eat in the car.

What makes these muffins so outstanding is their versatility — the base batter works with almost any combination of vegetables, herbs, or vegan cheese, meaning these can be customized to whatever is in the refrigerator and made differently every batch without ever changing the fundamental technique.

This recipe is 100% vegan, naturally gluten-free, ready in just 35 minutes, excellent for meal prep, and absolutely wonderful served warm with a drizzle of hot sauce or a dollop of vegan yogurt alongside.


Recipe Information

Prep TimeCook TimeTotal TimeServingsCalories
10 mins22 mins32 mins6~130 kcal

Ingredients

For the Batter

  • 1 cup (115g) chickpea flour
  • 1¼ cups (300ml) plant milk
  • 2 tbsp nutritional yeast
  • ½ tsp turmeric
  • ½ tsp garlic powder
  • ½ tsp onion powder
  • ½ tsp baking powder
  • ½ tsp salt
  • ¼ tsp black pepper
  • ¼ tsp black salt / kala namak (optional, for egg-like aroma)

For the Vegetables

  • ½ cup (75g) red bell pepper, finely diced
  • ½ cup (60g) baby spinach, roughly chopped
  • ¼ cup (30g) red onion, finely diced
  • 2 tbsp fresh chives or parsley, finely chopped
  • ¼ cup (30g) vegan cheese, shredded (optional)

Optional Add-ins

  • Cherry tomatoes, halved, placed on top before baking
  • Sun-dried tomatoes, finely chopped
  • Mushrooms, finely diced and sautéed
  • Corn kernels
  • Broccoli, very finely chopped

To Serve

  • Hot sauce or sriracha drizzle
  • Vegan yogurt alongside
  • Fresh herbs scattered over

Instructions

  1. Preheat and prepare the muffin tin. Preheat the oven to 375°F (190°C). Grease a 12-hole muffin tin generously with oil or line with silicone muffin liners.
  2. Make the batter. In a large bowl whisk together the chickpea flour, nutritional yeast, turmeric, garlic powder, onion powder, baking powder, salt, black pepper, and black salt if using. Gradually whisk in the plant milk until completely smooth with no lumps.
  3. Add the vegetables. Fold in the diced bell pepper, chopped spinach, red onion, and fresh herbs. Fold in the vegan cheese if using.
  4. Fill the muffin tin. Divide the batter evenly between the 12 muffin holes, filling each about three quarters full. Place a cherry tomato half or any optional topping on each if desired.
  5. Bake. Bake for 20–22 minutes until the muffins are set, lightly golden on top, and a toothpick inserted in the center comes out clean.
  6. Cool briefly and serve. Let cool in the tin for 5 minutes before removing — the muffins firm up as they cool and are easier to remove once slightly cooled. Serve warm or at room temperature.

Pro Tips

  • Grease the muffin tin very generously, as chickpea flour batter tends to stick more than a standard muffin batter.
  • Whisk the batter until completely smooth before adding vegetables to avoid lumps.
  • Do not overfill the muffin holes, as the batter puffs slightly during baking.
  • Let the muffins cool in the tin for a few minutes before removing for the cleanest release.

Why These Are Perfect for Meal Prep

Unlike many breakfast items that lose their appeal when reheated, these frittata muffins hold their texture and flavor exceptionally well both at room temperature and reheated, making them genuinely ideal for preparing a week’s worth of breakfasts in one 35-minute baking session.


Flavor Variations

  • Mediterranean Muffins: Use sun-dried tomatoes, olives, and vegan feta as the vegetable mix-ins.
  • Spicy Muffins: Add finely diced jalapeño and chili flakes to the batter for building heat.
  • Mushroom and Herb Muffins: Use finely diced sautéed mushrooms and fresh thyme as the primary mix-ins.

Nutritional Highlights (Per Serving — 2 muffins)

CaloriesProteinCarbsFiberFat
~130 kcal8g14g3g4g

Storage

  • Refrigerator: Store in an airtight container for up to 5 days. Reheat in the microwave for 45–60 seconds or in a low oven for 8 minutes.
  • Freezer: Freeze cooled muffins individually wrapped for up to 2 months. Thaw overnight in the refrigerator and reheat before serving.
  • Room temperature: These muffins can be eaten cold or at room temperature, making them genuinely grab-and-go friendly.

Frequently Asked Questions

Can I use a different flour instead of chickpea flour?

Chickpea flour is essential for the correct texture and protein content in these muffins. Other flours will not set in the same way and are not recommended as direct substitutes.

Why are my muffins sticking to the tin?

Chickpea flour batter sticks more readily than standard batter. Use silicone muffin liners or grease the tin very thoroughly with oil before filling.

Can I make these as one large frittata instead?

Yes — pour the entire batter into a greased baking dish and bake at 375°F (190°C) for 28–32 minutes until set throughout.


Tried this recipe? Leave a comment below and let us know how it turned out! Tag us on Instagram and Facebook — we love seeing your plant-powered creations. Looking for more convenient vegan breakfast and meal prep recipes? Browse all recipes on Easy Vegan Recipes — new recipes posted every single week!

High Protein Brunch Bowl

high protein brunch bowl

There are brunches you make because the weekend demands something more than cereal. And then there are brunches like this Vegan High Protein Brunch Bowl — the kind that stacks crispy herb roasted potatoes, silky scrambled tofu, garlicky sautéed greens, seasoned black beans, and a drizzle of hot sauce and avocado into a bowl so generously loaded and so deeply satisfying that it keeps you full until dinner. This is that brunch. The one that makes waking up on a Saturday morning feel genuinely worthwhile. The one that delivers more plant-based protein in a single bowl than most people manage in an entire day.

This recipe builds a high-protein brunch bowl from scratch using four distinct components, each seasoned and prepared separately so every element contributes its own distinct flavor and texture rather than blending into a single uniform taste. The scrambled tofu provides the protein anchor, roasted potatoes provide substance and crunch, sautéed greens provide freshness and nutrition, and seasoned black beans provide additional protein and hearty filling power.

What makes this bowl so outstanding is the scrambled tofu — seasoned with black salt, turmeric, and nutritional yeast into something that captures the fluffy, eggy character of classic scrambled eggs in a way that is genuinely remarkable, forming a brunch bowl centerpiece that makes the protein count feel entirely secondary to how much you are enjoying the meal.

This recipe is 100% vegan, naturally gluten-free, ready in about 35 minutes, and absolutely wonderful assembled in large, generous bowls and served immediately while everything is at its hottest.


Recipe Information

Prep TimeCook TimeTotal TimeServingsCalories
10 mins25 mins35 mins4~480 kcal

Ingredients

For the Herb Roasted Potatoes

  • 600g baby potatoes or Yukon Gold, halved
  • 2 tbsp olive oil
  • 1 tsp smoked paprika
  • ½ tsp garlic powder
  • ½ tsp dried rosemary
  • Salt and black pepper

For the Scrambled Tofu

  • 450g firm tofu, crumbled
  • 1 tbsp olive oil
  • 2 tbsp nutritional yeast
  • ½ tsp turmeric
  • ¼ tsp black salt (kala namak) — essential for the egg-like aroma
  • ½ tsp garlic powder
  • Salt and pepper to taste

For the Sautéed Greens

  • 4 cups (120g) spinach or kale, roughly chopped
  • 2 cloves garlic, minced
  • 1 tbsp olive oil
  • Salt and pepper

For the Seasoned Black Beans

  • 1 can (400g) black beans, drained and rinsed
  • ½ tsp cumin
  • ¼ tsp smoked paprika
  • Salt to taste

For the Bowl

  • 1 avocado, sliced
  • Hot sauce for drizzling
  • Fresh chives or parsley, chopped
  • Extra nutritional yeast for serving
  • Lemon wedges

Instructions

  1. Roast the potatoes. Preheat the oven to 425°F (220°C). Toss the halved potatoes with olive oil, smoked paprika, garlic powder, rosemary, salt, and pepper. Spread in a single layer on a lined baking sheet and roast for 22–25 minutes, flipping halfway, until golden and crispy.
  2. Season the black beans. Place the drained black beans in a small saucepan over medium heat with the cumin, smoked paprika, and salt. Heat for 3–4 minutes, stirring, until warmed through and fragrant. Keep warm.
  3. Sauté the greens. Heat the olive oil in a skillet over medium heat. Add the garlic and cook for 30 seconds. Add the greens and cook for 2–3 minutes, stirring, until wilted and tender. Season with salt and pepper. Keep warm.
  4. Make the scrambled tofu. Heat the olive oil in a skillet over medium heat. Crumble the tofu into the pan, breaking it into scrambled egg-sized pieces. Add the nutritional yeast, turmeric, black salt, and garlic powder. Cook, stirring occasionally, for 5–6 minutes until heated through, slightly golden, and deeply fragrant.
  5. Assemble the bowls. Divide all components between four bowls — roasted potatoes, scrambled tofu, sautéed greens, and black beans.
  6. Finish and serve. Add sliced avocado to each bowl. Drizzle with hot sauce, scatter fresh herbs, and serve with lemon wedges immediately.

Pro Tips

  • The black salt is the single most important ingredient in the scrambled tofu — its sulfur compounds create a genuinely egg-like aroma that makes the tofu convincingly similar to scrambled eggs. Do not omit or substitute.
  • Roast the potatoes at the highest temperature possible for the crispiest result — lower temperatures produce pale, soft potatoes.
  • Prepare all components simultaneously or in parallel to have everything hot and ready at the same time.
  • Season each component individually and generously — underseasoning one element makes the whole bowl taste flat.

Why This Bowl Delivers Outstanding Protein

Each component of this bowl contributes meaningful plant-based protein. Tofu provides approximately 20 grams of complete protein per serving. Black beans contribute an additional 7–8 grams. Nutritional yeast adds several more grams alongside B vitamins. Together, a single bowl provides approximately 28–32 grams of plant-based protein, making this genuinely one of the highest-protein plant-based meals available, comparable to a protein-rich animal-based brunch without any of the dietary drawbacks.


Flavor Variations

  • Mexican Brunch Bowl: Add salsa, vegan sour cream, and corn alongside the black beans for a Mexican-inspired version.
  • Mediterranean Brunch Bowl: Replace the black beans with white beans and add roasted cherry tomatoes and olives for a Mediterranean variation.
  • Loaded Sweet Potato Bowl: Replace the roasted potatoes with roasted sweet potato cubes for a sweeter, more colorful base.

Nutritional Highlights (Per Serving)

CaloriesProteinCarbsFiberFat
~480 kcal28g42g14g22g

Storage

  • Refrigerator: Store components separately in airtight containers for up to 4 days. Reheat each component separately and assemble fresh with cold avocado added just before serving.
  • Freezer: The scrambled tofu and black beans freeze well for up to 2 months. Roasted potatoes can also be frozen, though they soften slightly after thawing.
  • Meal prep: This bowl is ideal for weekly meal prep — prepare all components on Sunday and assemble individual bowls throughout the week in under 5 minutes.

Frequently Asked Questions

Can I make this bowl gluten-free?

Yes — all components of this bowl are naturally gluten-free as written, making it an ideal high-protein gluten-free brunch option.

What is kala namak and where can I find it?

Kala namak, also known as black salt, is a South Asian volcanic rock salt with a distinctive sulfurous smell that mimics the aroma of eggs in plant-based cooking. It is available at Indian grocery stores, health food stores, and online. Regular salt can be substituted, though the egg-like quality will be lost.

Can I prep this bowl the night before?

Yes — all components except the avocado can be fully prepared the night before and refrigerated. Reheat in the morning and add fresh avocado just before serving.


Tried this recipe? Leave a comment below and let us know how it turned out! Tag us on Instagram and Facebook — we love seeing your plant-powered creations. Looking for more high-protein vegan breakfast and brunch recipes? Browse all recipes on Easy Vegan Recipes — new recipes posted every single week!

Air Fried Carrot Bacon — The Most Addictive Plant-Based Bacon You Will Make All Week

air fried carrot bacon

There are plant-based bacon substitutes that taste like a reasonable approximation. And then there are substitutes like this Air Fried Carrot Bacon — the kind that comes out of the air fryer in thin, curled, deeply caramelized strips that are simultaneously chewy and slightly crispy at the edges, coated in a smoky, salty, maple-touched glaze that hits every single flavor note that makes bacon so irresistible — the smoke, the salt, the sweet, the savory — in a thin orange strip that has no business tasting this good and absolutely does. This is that carrot bacon. The one that gets eaten straight from the basket before it even makes it to the plate. The one that converts people.

This recipe uses thin ribbons of carrot peeled lengthwise and marinated in a deeply savory, smoky marinade of soy sauce, liquid smoke, smoked paprika, maple syrup, and garlic powder, then air fried at high heat until the edges crisp and the coating caramelizes into something that is genuinely, authentically reminiscent of the real thing in flavor — even if the texture is its own delightful, chewy, slightly crisp thing.

What makes this carrot bacon so outstanding is the marinade — every ingredient is chosen to replicate a specific quality of bacon. Soy sauce provides the salt and umami. Liquid smoke provides the smokiness. Smoked paprika deepens the smoke and adds color. Maple syrup provides the slight sweetness that balances the salt. Together they coat the thin carrot ribbons and concentrate during air frying into an extraordinarily complex, deeply savory glaze.

This recipe is 100% vegan, naturally gluten-free when made with tamari, ready in just 25 minutes, and absolutely magnificent layered into sandwiches, crumbled over salads, piled into breakfast bowls, or eaten straight from the air fryer basket at the kitchen counter.


Recipe Information

Prep TimeMarinate TimeCook TimeTotal TimeServingsCalories
10 mins10 mins10 mins30 mins4~80 kcal

Ingredients

For the Carrot Bacon

  • 4 large carrots, peeled into thin ribbons using a vegetable peeler

For the Smoky Marinade

  • 3 tbsp soy sauce or tamari
  • 1 tbsp maple syrup
  • 1 tbsp olive oil
  • 1 tsp smoked paprika
  • ½ tsp liquid smoke
  • ½ tsp garlic powder
  • ¼ tsp onion powder
  • ¼ tsp black pepper

Optional Add-ins

  • ½ tsp chipotle powder for extra smokiness and gentle heat
  • 1 tsp rice vinegar for a slightly tangier, more complex marinade
  • A pinch of cayenne for building heat

To Serve

  • In sandwiches and wraps with lettuce, tomato, and vegan mayo
  • Crumbled over salads as a savory topping
  • Piled into breakfast bowls with scrambled tofu and roasted potatoes
  • On top of avocado toast
  • In a vegan BLT
  • Alongside pancakes or waffles for a full vegan breakfast

Instructions

  1. Peel the carrot ribbons. Using a vegetable peeler, run the peeler along the length of each carrot to produce long, thin, flat ribbons. Continue peeling the same carrot from top to bottom, rotating as the sides become flat. The ribbons should be thin enough to be slightly translucent when held to the light — this thinness is essential for the right texture after cooking.
  2. Make the marinade. In a wide, shallow bowl or dish whisk together the soy sauce, maple syrup, olive oil, smoked paprika, liquid smoke, garlic powder, onion powder, and black pepper until combined.
  3. Marinate the ribbons. Add the carrot ribbons to the marinade and toss gently to coat every surface. Let marinate for 10 minutes, turning once halfway, so the ribbons absorb as much of the marinade as possible.
  4. Air fry in batches. Preheat the air fryer to 375°F (190°C). Arrange the marinated carrot ribbons in a single layer in the air fryer basket — do not overlap, as overlapping produces steaming rather than crisping. Work in batches if needed. Air fry for 8–10 minutes, checking at 7 minutes, until the edges are curled and slightly crispy and the coating has caramelized to a deep, glossy finish.
  5. Watch carefully in the final minutes. Carrot bacon can go from perfectly caramelized to burnt very quickly due to the sugar in the maple syrup and carrots. Check every minute in the final 2–3 minutes and remove when they look deeply colored but not dark.
  6. Serve immediately. Transfer to a plate and serve immediately while still warm and at their best texture — slightly crispy at the edges, chewy through the middle, deeply glazed throughout.

Pro Tips

  • Peel the ribbons as thinly as possible — thicker carrot strips take longer to cook and produce a softer, less bacon-like result. The thinnest ribbons the peeler can produce are ideal.
  • Do not skip the liquid smoke — it is the single ingredient most responsible for the bacon-like flavor. Without it the marinade produces a delicious glazed carrot, but the bacon character is significantly reduced.
  • Air fry in a single layer without overlapping — every ribbon needs direct exposure to the circulating hot air to crisp properly.
  • Watch closely in the final minutes — the maple syrup in the marinade means these can burn quickly once they start to caramelize.
  • Eat immediately — carrot bacon softens as it cools and is at its best texture within 5 minutes of cooking.

Why Carrots Make Such Convincing Bacon

Carrots are one of the most effective plant-based bacon substrates for a specific reason — when sliced into thin ribbons and cooked at high heat, they develop a slightly chewy, yielding texture that is closer to cooked bacon than almost any other vegetable. Their natural sweetness, when caramelized by heat and amplified by maple syrup, replicates the slight sweetness of cured bacon. Their orange pigment deepens to a reddish-brown during high-heat cooking that visually reinforces the bacon impression. And their structural integrity — they do not collapse or disintegrate the way softer vegetables do — means they emerge from the air fryer as distinct, handleable strips rather than a pile of vegetable mush.

The marinade does the rest. Liquid smoke is the key ingredient — a concentrated distillation of real wood smoke that adds genuine, natural smokiness rather than an artificial flavoring. Soy sauce provides the deep, savory, slightly umami character of cured meat. Maple syrup provides the sweet-salty balance that makes bacon so specifically addictive. Smoked paprika contributes color and additional smoke. Together these elements make the carrot an extraordinarily convincing vehicle for the bacon flavor profile.


Flavor Variations

  • Spicy Carrot Bacon: Add chipotle powder and a pinch of cayenne to the marinade for a spicier version with a building heat that lingers pleasantly.
  • Teriyaki Carrot Bacon: Replace the Western bacon marinade with a teriyaki-style marinade of soy sauce, mirin, and ginger for an Asian-inspired variation that is particularly spectacular in rice bowls.
  • Extra Crispy Version: After the initial air fry, brush with a tiny additional amount of marinade and air fry for 2 more minutes — this double glazing produces an even more intensely flavored, slightly crispier result.

Nutritional Highlights (Per Serving)

CaloriesProteinCarbsFiberFat
~80 kcal2g12g2g3g

Storage

  • Best fresh: Carrot bacon is at its best immediately after cooking. The texture softens significantly as it cools and does not restore well during reheating.
  • Refrigerator: Store cooled carrot bacon in an airtight container for up to 3 days. Reheat in the air fryer at 375°F (190°C) for 3–4 minutes to partially restore crispiness — it will not be as good as fresh but still deeply flavorful.
  • Marinade only: The marinade keeps in the refrigerator for up to 2 weeks in a sealed jar, making it easy to marinate and cook a fresh batch quickly any morning.

Frequently Asked Questions

Can I make this in the oven instead of an air fryer?

Yes — arrange in a single layer on a lined baking sheet and bake at 400°F (200°C) for 15–20 minutes, flipping halfway, until caramelized and slightly crispy at the edges. The oven produces a slightly less crispy result than the air fryer but still delicious.

Where do I find liquid smoke?

Liquid smoke is available in most supermarkets in the condiments or barbecue section, typically in small bottles. A little goes a very long way — the ½ teaspoon in this recipe provides significant smokiness. Smoked paprika can be increased slightly as a partial substitute if unavailable, though the smoky character will be less pronounced.

Can I use other vegetables for bacon instead of carrot?

Yes — thin strips of beetroot, courgette, and eggplant all work with the same marinade, each producing a different texture. Carrot produces the most convincingly bacon-like result but all are delicious in their own right.


Tried this recipe? Leave a comment below and let us know how it turned out! Tag us on Instagram and Facebook — we love seeing your plant-powered creations. Looking for more addictive vegan snack and appetizer recipes? Browse all recipes on Easy Vegan Recipes — new recipes posted every single week!

3 Ingredient Vegan Oat Waffles — The Simplest Plant-Based Breakfast You Will Make All Week

3 ingredient vegan oat waffles

There are breakfast recipes that require a long list of ingredients and half the pantry. And then there are breakfast recipes like these 3 Ingredient Vegan Oat Waffles — the kind that come together from just oats, banana, and plant milk in a blender in under two minutes, cook in the waffle iron into golden, crispy-edged waffles with a soft, slightly chewy interior, and taste so genuinely satisfying and so naturally sweet from the banana that people assume something has been left off the ingredient list. This is that waffle. The one that proves extraordinary breakfast does not require extraordinary effort. The one that solves the problem of what to make on a morning when the pantry is nearly empty and time is nearly zero.

These waffles use rolled oats blended into a smooth, pourable batter with ripe banana and plant milk — no flour, no egg substitute, no leavening, no added sugar. The banana provides sweetness, binding, and moisture. The oats provide structure and the characteristic slightly chewy, hearty texture that makes these waffles so satisfying. The plant milk adjusts the consistency. Three ingredients, one blender, one waffle iron, and breakfast is ready.

What makes these waffles so outstanding is how complete they taste despite their simplicity — the natural sugars in the ripe banana caramelize against the hot waffle iron into a golden, slightly crispy exterior, while the oat interior stays tender and filling in a way that a standard flour waffle simply is not.

This recipe is 100% vegan, naturally gluten-free when made with certified gluten-free oats, ready in just 15 minutes, and absolutely wonderful topped with fresh berries, maple syrup, nut butter, or sliced banana for a breakfast that is simultaneously the simplest and one of the most satisfying in the entire collection.


Recipe Information

Prep TimeCook TimeTotal TimeServingsCalories
5 mins10 mins15 mins2~280 kcal

Ingredients

The 3 Ingredients

  • 1 cup (90g) rolled oats
  • 1 large ripe banana (the riper the better — brown-spotted bananas are ideal)
  • ¾ cup (180ml) unsweetened plant milk

Optional Add-ins That Keep the Spirit of Simplicity

  • ½ tsp cinnamon for warmth
  • 1 tsp vanilla extract for depth
  • 1 tbsp nut butter blended into the batter for richness
  • A pinch of salt to amplify all the other flavors

Topping Suggestions

  • Fresh berries and maple syrup — the classic
  • Sliced banana and peanut butter
  • Vegan yogurt and granola
  • Stewed apple and cinnamon
  • Vegan chocolate chips pressed into the batter before closing the iron

Instructions

  1. Blend the batter. Place the rolled oats, ripe banana, and plant milk in a blender. Blend on high for 60–90 seconds until completely smooth and pourable — no visible oat pieces should remain. The batter should be slightly thicker than pancake batter. If too thick add an extra tablespoon of plant milk; if too thin add a tablespoon of oats and blend again.
  2. Rest briefly. Let the batter sit for 2–3 minutes while the waffle iron heats up — the oats absorb additional moisture during this brief rest and the batter thickens slightly to the ideal consistency for crispy waffles.
  3. Cook the waffles. Preheat your waffle iron and grease lightly with a spray of neutral oil or a brush of melted vegan butter. Pour enough batter to fill your waffle iron — approximately ⅓ to ½ cup per waffle depending on the size of your iron. Close the lid and cook for 4–5 minutes until steam has mostly stopped escaping from the sides, indicating the waffles are set and most moisture has cooked out.
  4. Remove carefully. Open the iron slowly — oat waffles are slightly more delicate than flour-based waffles, particularly when very fresh from the iron. If the waffle sticks, give it another 60 seconds before trying again rather than forcing it open, which tears the surface.
  5. Serve immediately. Serve hot with your choice of toppings. These waffles are at their crispiest within 5 minutes of cooking.

Pro Tips

  • Use a very ripe banana with plenty of brown spots — an underripe banana does not provide enough natural sweetness or binding power and produces a paler, less flavorful waffle.
  • Do not open the waffle iron early — the steam escaping from the sides of the iron is water cooking out of the batter. Opening before the steam stops produces a wet, soft waffle that sticks to the iron.
  • Grease the iron between each waffle — oat-based batters with no added fat tend to stick more readily than butter-enriched batters.
  • Let the batter rest for 2–3 minutes after blending — this makes a meaningful difference to the final texture.

Why These Three Ingredients Work So Well Together

Each of the three ingredients in this recipe performs multiple functions simultaneously, which is why the recipe works despite its radical simplicity.

Rolled oats provide structure (the starch network that holds the waffle together), fiber (which creates the satisfying, sustaining quality of the finished waffle), and a subtle nutty flavor that makes the waffle taste genuinely interesting rather than blank. When blended smooth they behave similarly to flour, creating a pourable batter that sets into a solid, sliceable waffle in the heat of the iron.

Ripe banana provides sweetness (from its concentrated fructose), binding (from its natural pectin and starchy flesh), and moisture (from its high water content). It also contributes a subtle tropical aroma that is most noticeable in the first warm bites directly from the iron and disappears gracefully into the background under toppings.

Plant milk provides the liquid needed to achieve a pourable batter consistency from the dry oats — without it the blended oats and banana would produce a paste too thick to spread in the waffle iron rather than the fluid batter needed for even cooking.


Flavor Variations

  • Blueberry Oat Waffles: Fold whole blueberries into the batter just before cooking — do not blend them, as blending turns the batter grey. Press them into the batter in the iron for beautiful bursts of berry in every square.
  • Chocolate Oat Waffles: Add 2 tablespoons of cocoa powder to the blender with the other ingredients for a deeply chocolatey version that is particularly spectacular with peanut butter and maple syrup on top.
  • Pumpkin Spice Oat Waffles: Replace the banana with ½ cup of pumpkin puree and add cinnamon, ginger, and nutmeg for an autumn-inspired version.

Nutritional Highlights (Per Serving — 2 waffles)

CaloriesProteinCarbsFiberFat
~280 kcal8g52g6g4g

Storage

  • Best fresh: These waffles are crispiest within 5 minutes of cooking. Serve immediately whenever possible.
  • Refrigerator: Store cooled waffles in an airtight container for up to 3 days. Reheat in a toaster or air fryer for the best texture restoration — the toaster produces a crispier result than the microwave.
  • Freezer: Freeze cooled waffles in a single layer then transfer to a freezer bag for up to 2 months. Toast directly from frozen — they come out remarkably close to freshly made.
  • Batter: Do not store the batter — the oats continue to absorb moisture and the batter becomes too thick to use. Always make the batter fresh immediately before cooking.

Frequently Asked Questions

Can I make these without a waffle iron?

Yes — pour the batter into a hot, greased non-stick pan and cook as thick pancakes for 3–4 minutes per side. They will not have the characteristic waffle texture but taste identical and are equally delicious.

Can I use quick oats instead of rolled oats?

Yes — quick oats blend more easily and produce a slightly smoother batter. Rolled oats produce a heartier, more textured result. Either works well.

Why are my waffles sticking to the iron?

Sticking is caused by insufficient greasing, opening the iron too early before the waffles have set, or a waffle iron that has not been preheated fully. Grease thoroughly, preheat completely, and wait until steam has stopped escaping before opening.


Tried this recipe? Leave a comment below and let us know how it turned out! Tag us on Instagram and Facebook — we love seeing your plant-powered creations. Looking for more addictive vegan snack and appetizer recipes? Browse all recipes on Easy Vegan Recipes — new recipes posted every single week!
Vegan Caramel Eggnog Chia Pudding

vegan caramel eggnog chia pudding

There are breakfasts you make because something needs to happen before the day starts. And then there are breakfasts like this Vegan Caramel Eggnog Chia Pudding — the kind that sets overnight in the refrigerator into a thick, creamy, spiced pudding that tastes remarkably like classic eggnog, finished with a rich, buttery caramel swirl that makes every spoonful feel genuinely festive and indulgent. This is that breakfast. The one that makes a cold morning feel celebratory. The one that takes five minutes to prepare the night before and rewards you with something that tastes like dessert for breakfast.

This recipe uses chia seeds soaked in a spiced plant milk base flavored with nutmeg, cinnamon, and vanilla — the classic eggnog spice profile — sweetened naturally and swirled with a simple date caramel sauce. As the chia seeds soak overnight they absorb the liquid and swell into a thick, pudding-like texture, creating a breakfast that is both nutritious and genuinely reminiscent of the holiday classic.

What makes this pudding so outstanding is the spice blend — nutmeg in particular is the defining flavor of eggnog, and used generously here it produces a pudding that captures the essence of the holiday drink in a completely different, spoonable format.

This recipe is 100% vegan, naturally gluten-free, requires just 5 minutes of active preparation, and absolutely wonderful served chilled with an extra drizzle of caramel and a dusting of nutmeg on top.


Recipe Information

Prep TimeChill TimeTotal TimeServingsCalories
5 mins4 hours4 hrs 5 min4~260 kcal

Ingredients

For the Eggnog Chia Pudding

  • ½ cup (90g) chia seeds
  • 2 cups (480ml) plant milk (oat or coconut milk recommended)
  • 3 tbsp maple syrup
  • 1 tsp pure vanilla extract
  • ½ tsp ground nutmeg
  • ¼ tsp ground cinnamon
  • Pinch of ground cloves
  • Pinch of salt

For the Date Caramel Sauce

  • 10 medjool dates, pitted and soaked in hot water for 10 minutes
  • ¼ cup (60ml) full-fat coconut cream
  • 1 tbsp maple syrup
  • ½ tsp vanilla extract
  • ¼ tsp salt
  • 2–3 tbsp water, to thin

Optional Toppings

  • Extra ground nutmeg, dusted over
  • Toasted pecans, chopped
  • A dollop of vegan whipped coconut cream
  • Cinnamon stick for garnish

Instructions

  1. Make the chia pudding base. In a bowl or jar, whisk together the plant milk, maple syrup, vanilla extract, nutmeg, cinnamon, cloves, and salt until combined.
  2. Add the chia seeds. Add the chia seeds and whisk thoroughly to prevent clumping. Let sit for 5 minutes, then whisk again to break up any clumps that have formed.
  3. Chill. Cover and refrigerate for a minimum of 4 hours, ideally overnight, until thickened to a pudding-like consistency. Stir once after the first hour if possible to ensure even thickening.
  4. Make the date caramel. Drain the soaked dates and place in a blender with the coconut cream, maple syrup, vanilla extract, and salt. Blend until completely smooth, adding water a tablespoon at a time until the caramel reaches a thick, pourable consistency.
  5. Assemble and serve. Divide the chilled chia pudding between bowls or glasses. Swirl or drizzle the date caramel generously over each serving. Top with extra nutmeg, toasted pecans, or whipped coconut cream as desired.

Pro Tips

  • Whisk thoroughly when first combining the chia seeds with the liquid, and again after 5 minutes, to prevent clumping and ensure even thickening throughout.
  • Use full-fat coconut milk for the richest, most authentically eggnog-like result, though oat milk also works beautifully for a lighter version.
  • Do not skip the overnight chill if possible — a full 8 hours produces the thickest, most pudding-like texture.
  • Make a double batch of the date caramel, as it is excellent on virtually anything — oatmeal, pancakes, ice cream, or simply by the spoonful.

Why Nutmeg Defines the Eggnog Flavor

Nutmeg is the single most recognizable flavor component of traditional eggnog, and its warm, slightly sweet, aromatic character is what immediately signals “eggnog” to the palate even in the absence of dairy, eggs, or alcohol. Used generously alongside a smaller amount of cinnamon and a pinch of clove, nutmeg recreates the festive spice profile that makes eggnog so beloved during the holiday season, transferring that flavor experience seamlessly into this chia pudding format.


Flavor Variations

  • Boozy Eggnog Pudding: Add a tablespoon of rum or bourbon to the chia mixture for an adult version with a more complex, warming character.
  • Gingerbread Chia Pudding: Add ground ginger and extra cinnamon for a gingerbread-inspired version.
  • Chocolate Eggnog Pudding: Add 2 tablespoons of cocoa powder to the base for a chocolate eggnog variation.

Nutritional Highlights (Per Serving)

CaloriesProteinCarbsFiberFat
~260 kcal6g38g10g10g

Storage

  • Refrigerator: Store the chia pudding in an airtight container for up to 5 days. The caramel can be stored separately in a sealed jar for up to 2 weeks.
  • Meal prep: This pudding is ideal for meal prep — make a large batch at the start of the week and portion into individual jars for grab-and-go breakfasts.
  • Freezer: Chia pudding does not freeze well, as the texture becomes watery upon thawing. The date caramel freezes beautifully for up to 2 months.

Frequently Asked Questions

Can I make this pudding without coconut milk?

Yes — any plant milk works, though oat milk or coconut milk produce the richest, creamiest results most similar to traditional eggnog. Almond or soy milk also work well for a lighter version.

Why is my chia pudding too thin?

This is usually caused by insufficient chia seeds, insufficient chilling time, or not whisking thoroughly enough to prevent clumping. Ensure you whisk well immediately after adding the seeds and again after 5 minutes, and chill for the full recommended time.

Can I use a different sweetener instead of maple syrup?

Yes — agave syrup or date syrup both work as direct substitutes in the same quantity.


Tried this recipe? Leave a comment below and let us know how it turned out! Tag us on Instagram and Facebook — we love seeing your plant-powered creations. Looking for more festive vegan breakfast and holiday recipes? Browse all recipes on Easy Vegan Recipes — new recipes posted every single week!

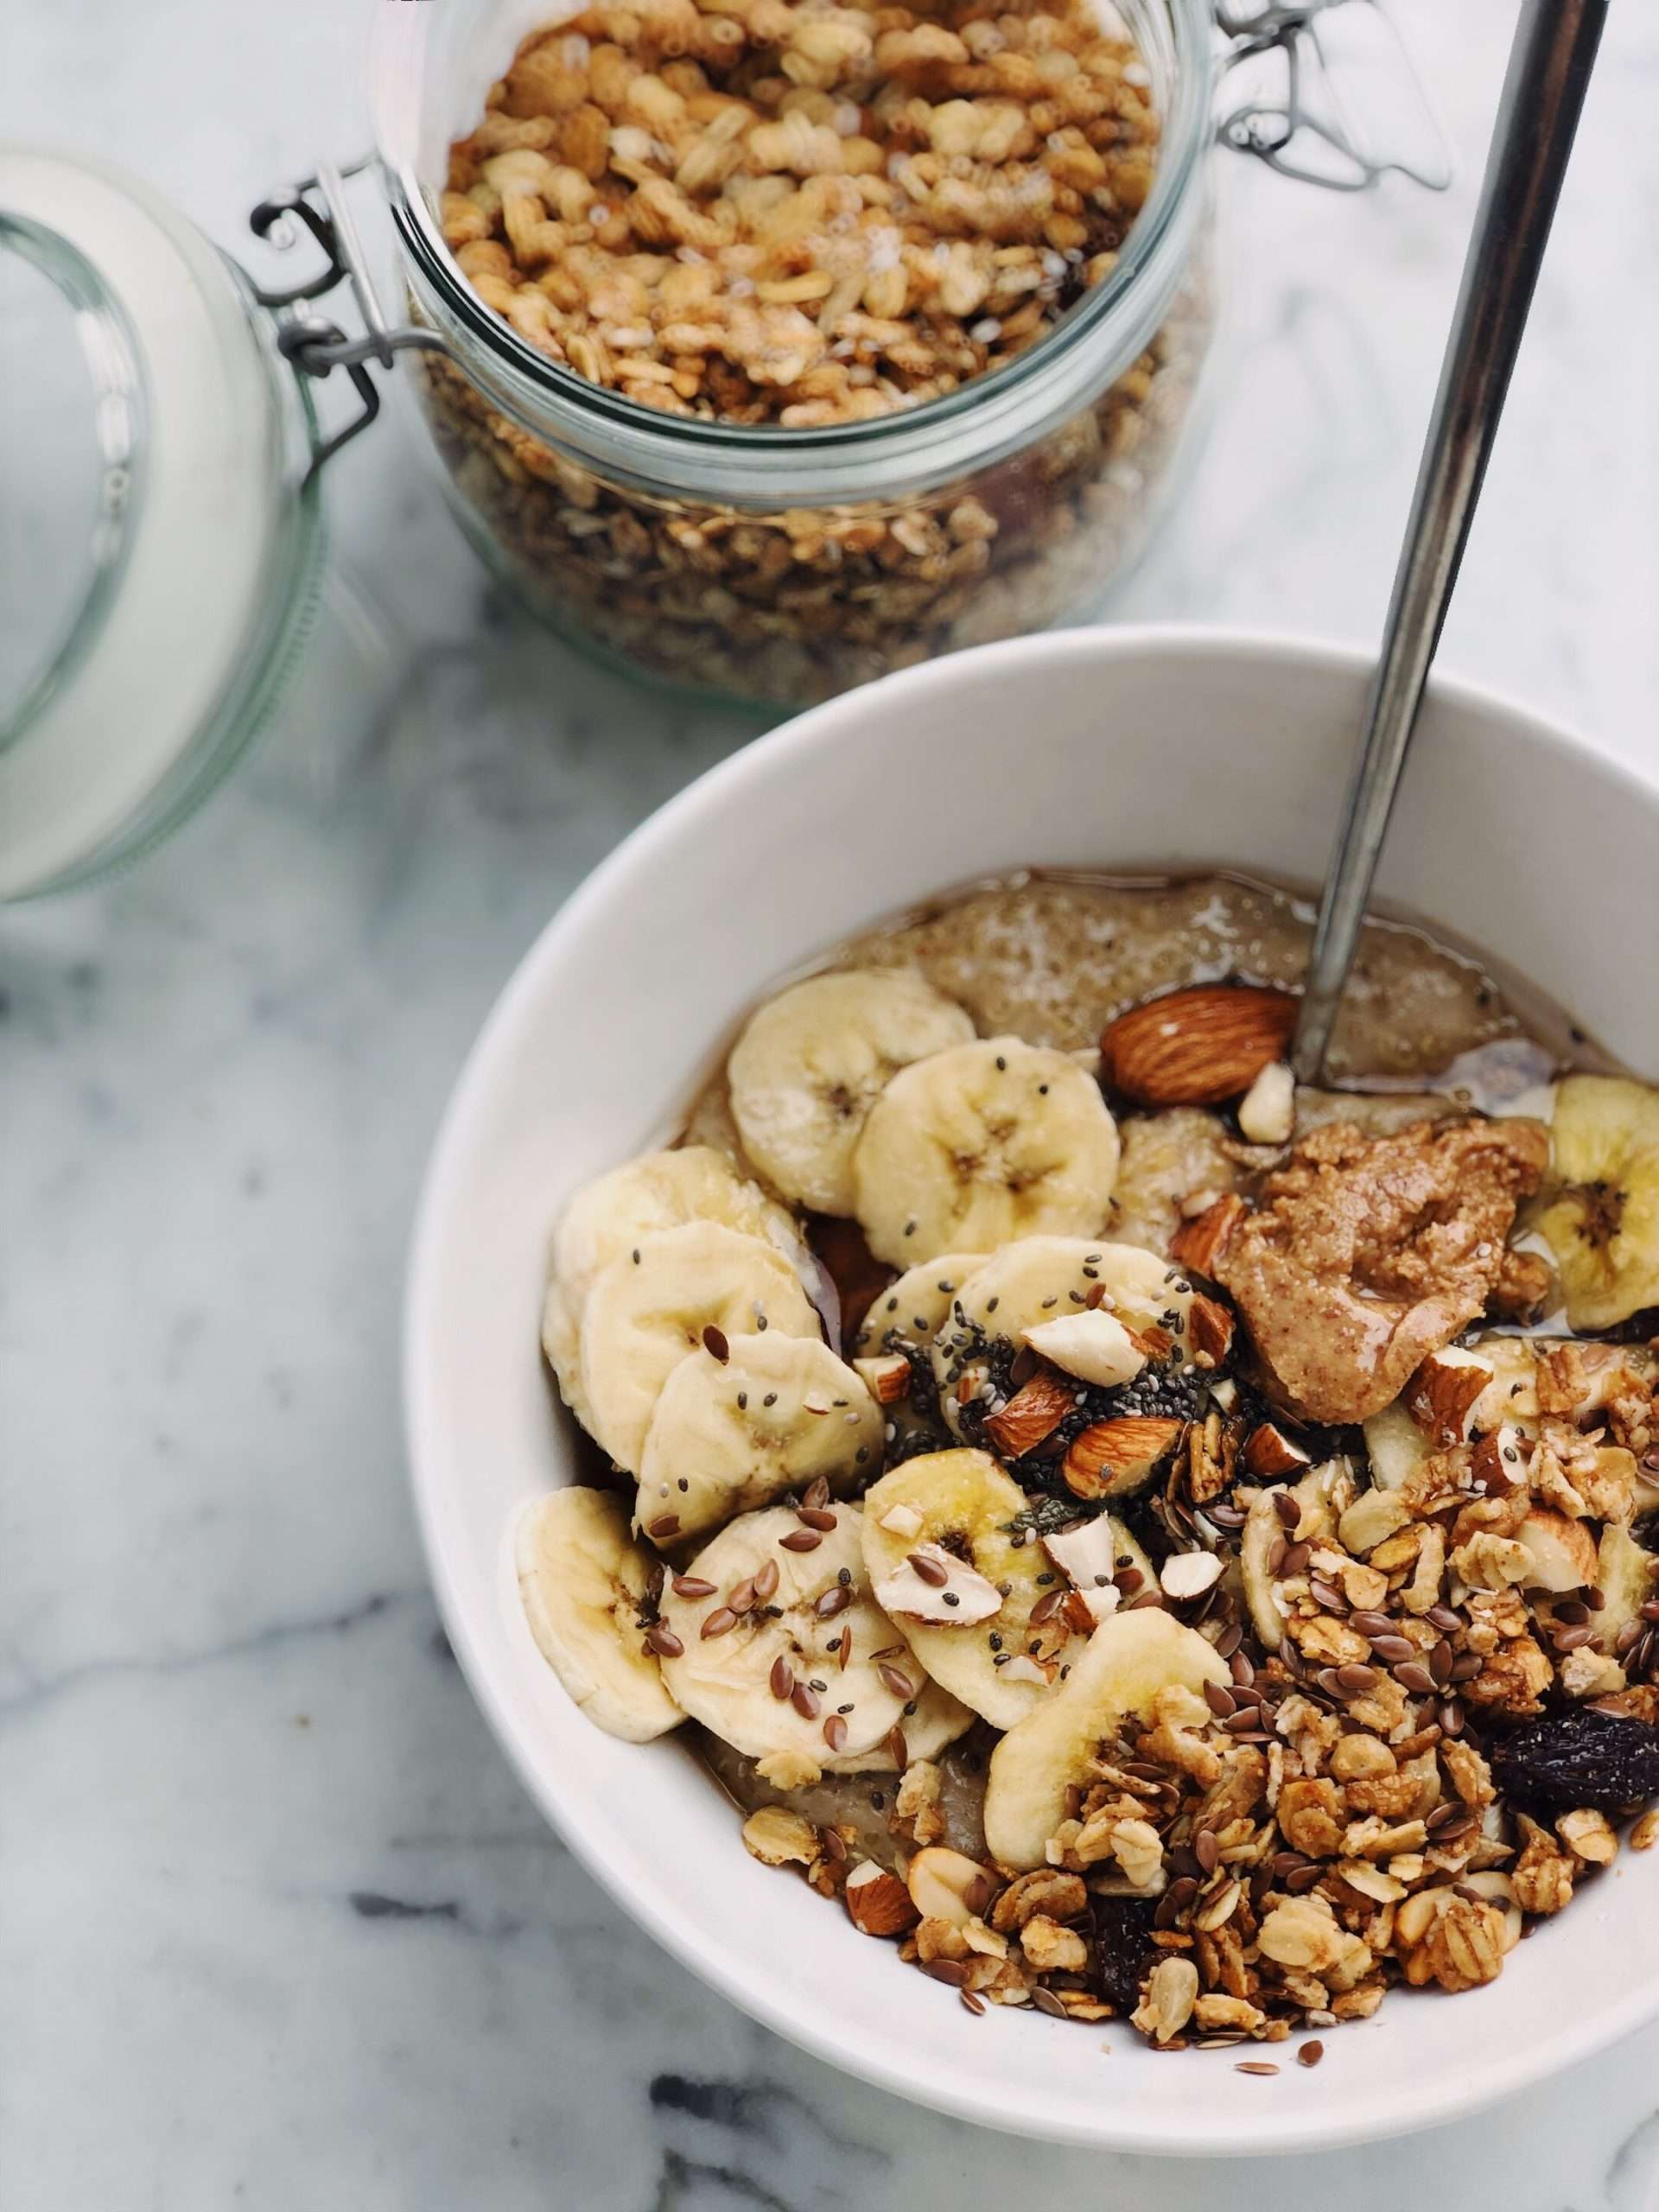
Macaroni baked with Granola

Pexels Daria Shevtsova 949069 Scaled
Pexels Daria Shevtsova 949069 768x1024

Method:

Cook a large cup of macaroni until tender in boiling milk and water. When done, drain and put a layer of the macaroni in the bottom of a pudding dish, and sprinkle over it a scant teaspoonful of granola. Add a second and third layer and sprinkle each with granola; then turn over the whole a custard sauce prepared by mixing together a pint of milk, the well beaten yolks of two eggs or one whole egg, and one-fourth of a teaspoonful of salt. Care should be taken to arrange the macaroni in layers loosely, so that the sauce will readily permeate the whole. Bake for a few minutes only, until the custard has well set, and serve.